Loading ...
Loading ...
Loading ...
22 23
Care & Cleaning
COLOR TOUCH SCREEN DISPLAY
Please keep the touch screen dry and clean to ensure that the machine functions properly.
REPLACING THE WATER FILTER
Assemble water
filter parts
Ensure parts are
connected
Install filter in
tank
Fill tank and wait
for 5min to soak
filter
Install water tankSet current month
1 6
Replace filter after
90 days or after
40L (10. US GAL)
!
22 3
54
The provided water filter helps prevent scale build-up in and on many of the inner functioning
components. Replacing the water filter after three months or 10.6 USgal / 40L will reduce the need
to descale the machine.
The limitation of 10.6 USgal / 40L is based on water hardness level 4. If you are in level 2 area,
you can increase this to 16 USgal / 60L.
NOTE
To purchase water filters visit Breville webpage.
CLEANING CYCLE
There will be a message prompt when a cleaning cycle is required. This is a back-flushing cycle
and is separate from descaling. Follow the instruction on the screen.
DESCALING
After regular use, hard water can cause mineral build up in and on many of the inner functioning
components, reducing the brewing flow, brewing temperature, power of the machine, and taste of
the espresso. Even if you used the provided water filter, we recommend you to descale if there is
scale build-up in the water tank.
Go to 'Settings' and select 'Descale cycle'. Follow the instructions on the screen.
WARNING
Do not immerse power cord, power plug or appliance in water or any other liquid. The water tank
should never be removed or completely emptied during descaling.
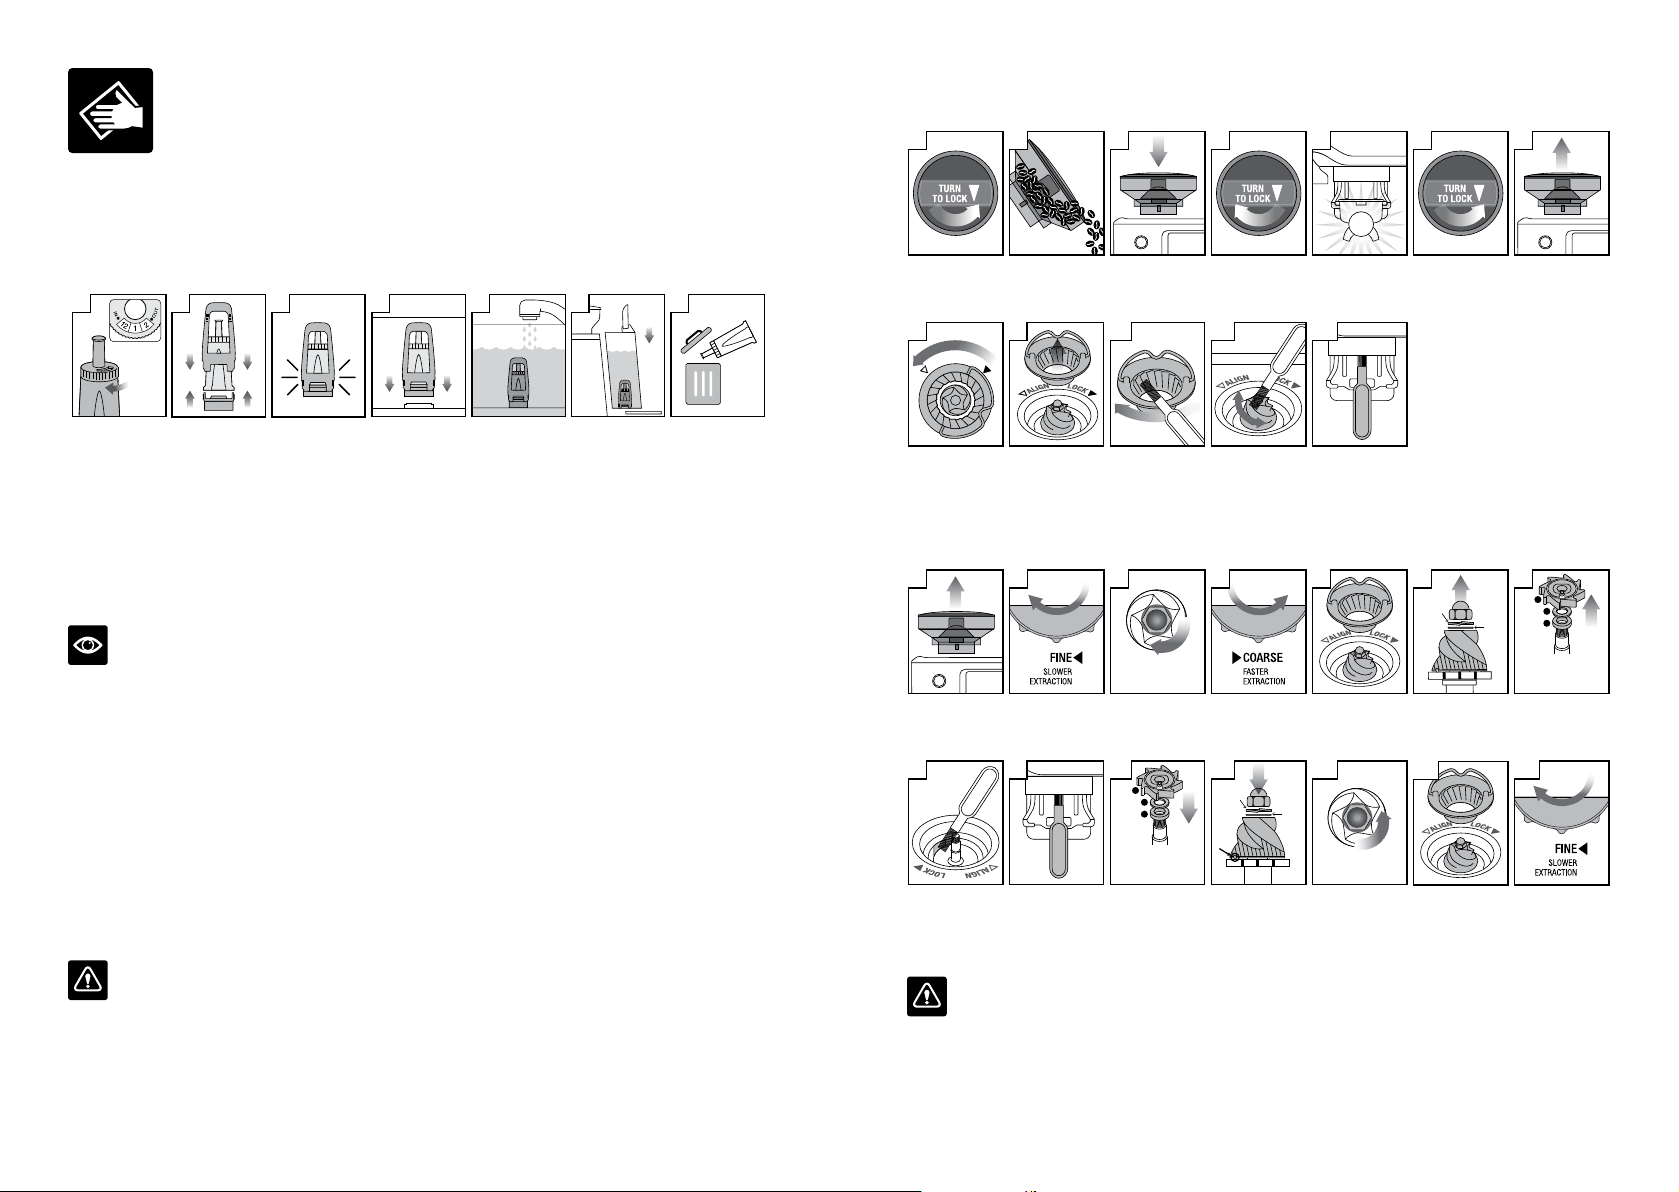
CLEANING THE CONICAL BURR GRINDER
This grinder cleaning cycle removes oil build-up on the burrs which can impede performance.
Unlock hopper Empty hopper Replace hopper Lock hopper Run grinder
empty
Unlock hopper Remove hopper
Remove top burrUnlock top burr Clean top burr
with brush
Clean lower
burr with brush
Clean chute
with brush
12
3 75
PUSH
2
11109988
L
O
C
K
A
L
I
G
N
41 6
ADVANCED CLEANING FOR THE CONICAL BURR GRINDER
This step is only required if there is a blockage between the grinding burrs and the grinder outlet.
Remove hopper Set 'GRIND SIZE'
to '1' (finest)
Use 10mm socket.
Rotate 'Clockwise'
to loosen the nut
only
Set 'GRIND SIZE'
to '30' (coarsest)
Unlock & remove
top burr
Remove nut, spring
& flat washer.
Carefully remove
lower burr
Remove grind fan
& washers
using long-nose
pliers
Insert & lock top
burr
Set 'GRIND SIZE'
to '15'. Replace &
lock hopper
Clean chute
with brush
Unblock the grinds
exit chute using the
brush or a pipe
cleaner
Insert washers &
grind fan using
long-nose pliers
Insert lower burr
(drive pin &
cavity to align).
Insert flat washer
& spring washer
Rotate 'Counter-
Clockwise' to
tighten nut
12
TIGHTEN NUT
5
13 14
1 3
LOOSEN NUT
6
SPRING
WASHER
FLAT
WASHER
7
1. GRIND FAN
2. METAL WASHER
3. FELT WASHER
3
2
1
88 99 10
1.
FELT WASHER
2. METAL WASHER
3.
GRIND FAN
1
2
3
11
SPRING
WASHER
FLAT
WASHER
42
TURN
TURN
TURN
WARNING
Care should be taken as the grinder burrs are extremely sharp.
Loading ...
Loading ...
Loading ...