Loading ...
Loading ...
Loading ...
24 25
OPERATING YOUR BREVILLE PRODUCT CARE, CLEANING & STORAGE
TIPS FOR SLOW COOKING
1. Ensure cookware is ovenproof and does
not exceed 13 pounds when empty.
2. Fill cookware a minimum of ½ and
maximum of ¾ full to avoid over or
under-cooking. To prevent spillover,
do not fill cookware more than ¾ full.
3. Always slow cook with the lid on to
prevent food from drying out. Cover
cookware with a layer of aluminum foil
before covering with lid to keep even
more moisture in.
4. Follow cooking settings and times
prescribed in traditional slow cooker
recipes. One hour on ‘HI’ is equivalent
to approximately one-and-a-half to two
hours on ‘LO’.
5. Cold food will take longer to cook than
food that has been pre-seared or heated
so adjust cooking times as appropriate.
Do not slow cook frozen foods.
USING THE WARMING TRAY
The top of the oven is very hot during and
after operation. As a result, storing items on
top of the oven is not recommended.
The only exception is the optional Breville
Bamboo Cutting Board and Serving Tray
that fits in the ribbed section on top of
the oven. Visit www.breville.com for
more information.
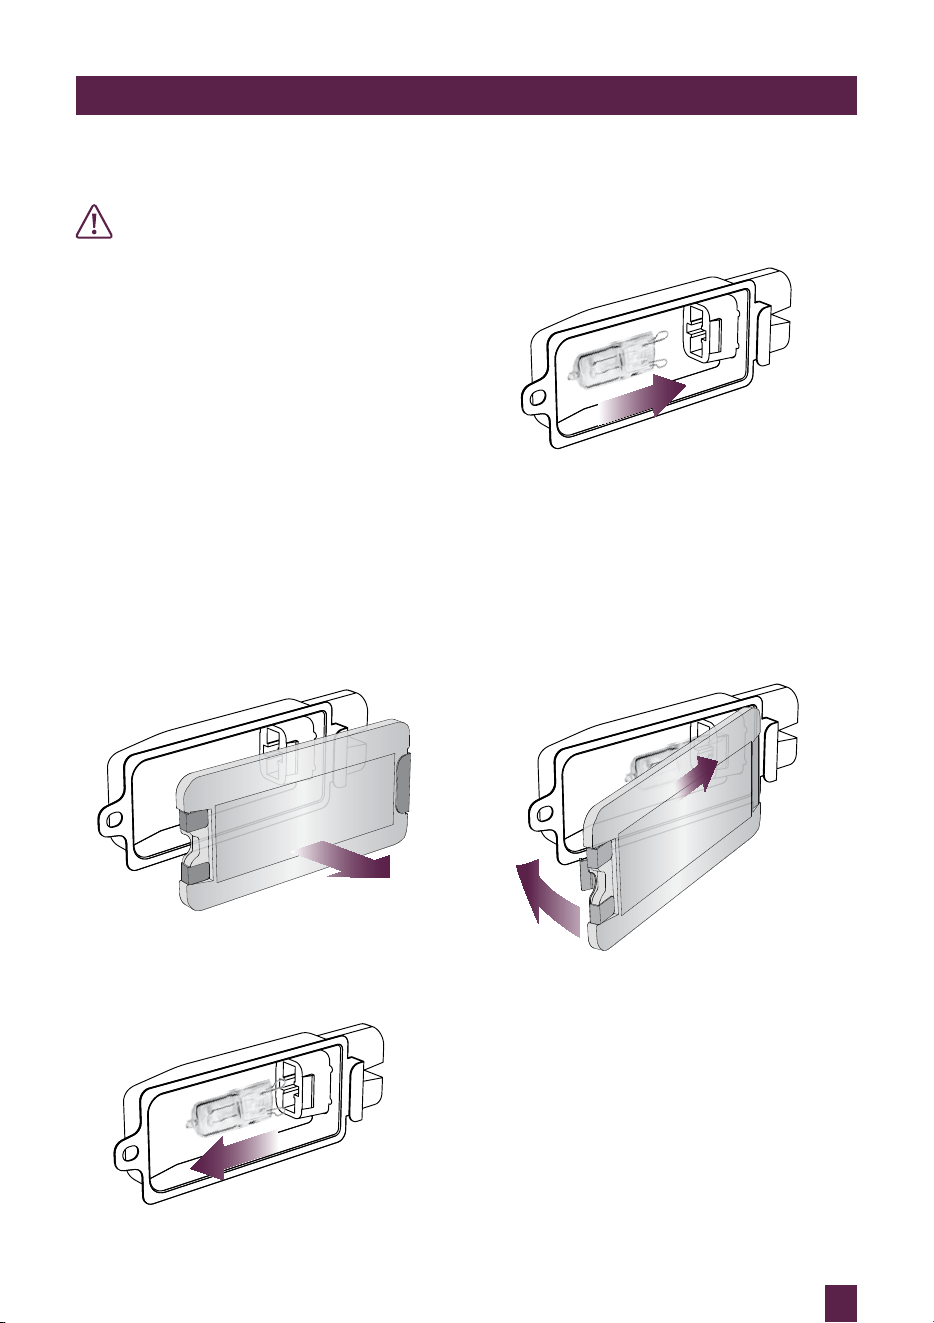
REPLACING THE OVEN LIGHT
WARNING
Always unplug oven and let cool before
replacing bulb. Only use a 25-Watt,
120V, G9 type oven bulb.
1. Remove the wire rack from the oven
before replacing the light.
2. The light is positioned on the left-
hand side of the oven cavity. Position
your fingers on the outside of the light
housing and gently pull the glass cover
away from the oven wall to remove it. If
you are unable to pull the cover off, slide
a spoon into the left side of the light
housing and gently lever the glass cover
off. Always hold the glass cover with the
other hand to prevent the cover from
falling and breaking.
3. Remove the used bulb by pulling it
directly out of its holder.
4. Use a soft cloth to insert the new bulb.
Do not directly touch the surface of the
bulb with your fingers as oil from your
skin can damage the bulb.
5. To reattach the glass cover, align the
metal hook with the left side of the light
housing. Slide the opposite end of the
glass cover into the metal bracket on
the right side of the housing, then push
the metal hook into the left side of the
housing until it snaps securely into
position.
CARE, CLEANING & STORAGE
Loading ...
Loading ...
Loading ...