Loading ...
Loading ...
Loading ...
22 23
OPERATING YOUR BREVILLE PRODUCT OPERATING YOUR BREVILLE PRODUCT
WARM FUNCTION
The WARM function maintains hot foods at
the recommended temperature to prevent
bacterial growth (160°F/70°C or above).
1. Insert the wire rack, with the spokes
facing upward, into the bottom rack
height position.
2. Place food, positioned on the included
baking pan, pizza pan or other
oven-proof dish, on the center of the wire
rack so air will flow around all sides of
the food.
3. Close the oven door.
4. Turn the FUNCTION dial until the
indicator on the LCD screen reaches
the WARM function. The top figure on
the LCD screen indicates the preset
temperature of ‘160°F’, while the bottom
figure indicates the preset time of ‘1:00
HRS’. The preset KEEP WARM symbol
will also be displayed.
5. The warming temperature and time
can be adjusted before or during the
warming cycle.
a) The temperature is displayed as the
top figure on the LCD screen. Turn
the TEMPERATURE dial to adjust the
temperature from 120°F/50°C to a
maximum of 450°F/230°C.
b) The time is displayed as the bottom
figure on the LCD screen. Turn the
TIME dial to adjust the time up to
2 hours.
6. Press the START/CANCEL button to
activate the WARM function. The button
backlight will illuminate red, the oven
alert will sound and the LCD screen will
illuminate orange.
7. The timer will be displayed and
automatically begin to count down.
The temperature and time can
be adjusted during the warming
cycle by turning the corresponding
TEMPERATURE and TIME dial. The
cycle can be stopped at any time by
pressing the START/CANCEL button.
8. At the end of the WARM cycle, the oven
alert will sound. The START/CANCEL
button backlight will go out and the
LCD screen will illuminate blue.
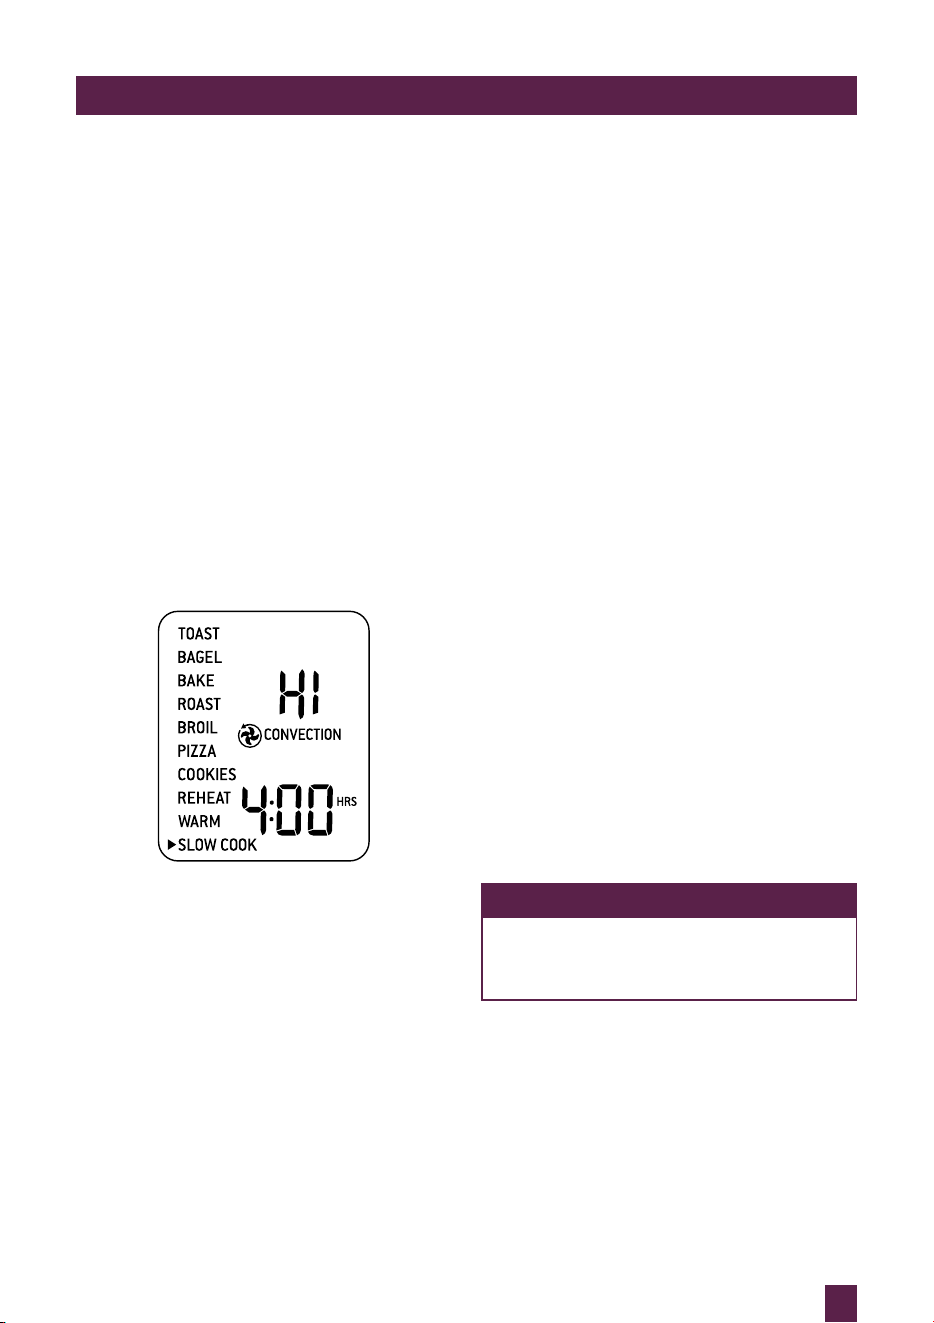
SLOW COOK FUNCTION
The SLOW COOK function has cooking
profiles designed for long cook times at
low temperatures.
1. Insert the wire rack, with the spokes
facing upward, into the bottom rack
height position.
2. Close the oven door.
3. Turn the FUNCTION dial until the
indicator on the LCD screen reaches
the SLOW COOK function. The top
figure on the LCD screen indicates the
preset SLOW COOK setting of ‘HI’,
while the bottom figure indicates the
preset time of ‘4:00HRS’. The preset
CONVECTION setting will also be
displayed.
4. The slow cook setting and time can be
adjusted:
a) The slow cook setting is displayed as
the top figure on the LCD screen. Turn
the TEMPERATURE dial to adjust
slow cooking to one of two preset
temperatures: ‘LO’ or ‘HI’.
b) The time is displayed as the bottom
figure on the LCD screen. Turn the
TIME dial to adjust the time between
4 and 10 hours for ‘LO’ and between
2 and 8 hours for ‘HI’.
5. Press the START/CANCEL button to
activate the SLOW COOK function.
The button backlight will illuminate
red, the oven alert will sound and the
LCD screen will illuminate orange. The
LCD screen will indicate a blinking
‘PREHEATING’.
6. Once the oven has reached the set
temperature, the temperature alert will
sound.
7. Place food, inside oven-proof cookware,
on the center of the wire rack so air will
flow around all sides of the food.
8. After the PREHEATING alert has
sounded, the timer will automatically
begin to count down. Time can be
adjusted during the slow cook cycle by
turning the corresponding TIME dial.
The cycle can be stopped at any time by
pressing the START/CANCEL button.
9. At the end of the SLOW COOK cycle,
the oven will automatically switch to
the WARM function. The LCD screen
will display ‘KEEP WARM’ and the
maximum keep warm time of ‘2:00 HRS’
will automatically count down. The
keep warm cycle can be stopped at
any time by pressing the START/
CANCEL button.
NOTE
Do not pull the wire rack further
than halfway out when inserting or
removing the cookware from the oven.
Loading ...
Loading ...
Loading ...