Loading ...
Loading ...
Loading ...
Care and Maintenance
50
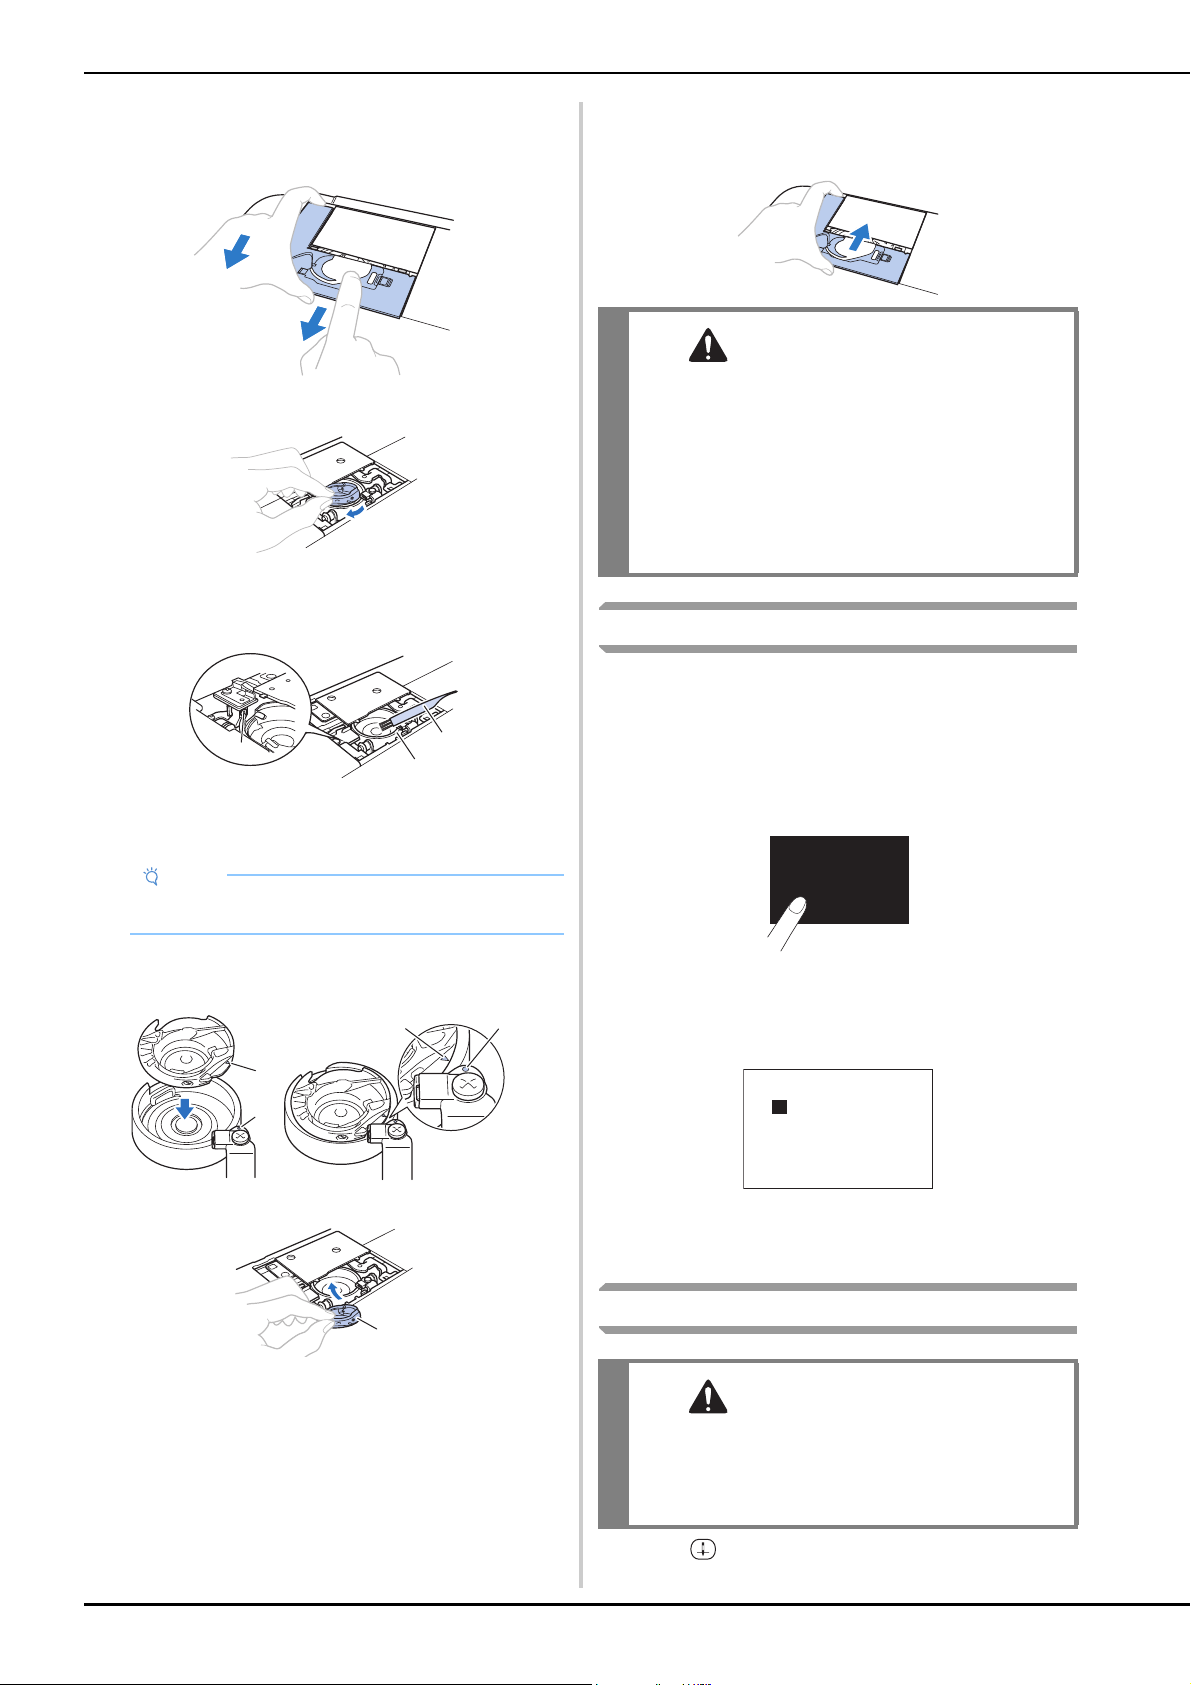
■ If there is no screw in the needle plate cover
1 Grasp both sides of the needle plate cover, and then
slide it toward you.
h
Grasp the bobbin case, and then pull it out.
i
Use the cleaning brush or a vacuum cleaner to remove
any lint and dust from the race and bobbin thread
sensor and the surrounding area.
1 Cleaning brush
2 Race
3 Bobbin thread sensor
j
Insert the bobbin case so that the
mark on the
bobbin case aligns with the
mark on the machine.
• Align the and
marks.
1 mark
2
mark
3 Bobbin case
• Make sure that the indicated points are aligned
before installing the bobbin case.
k
Insert the tabs on the needle plate cover into the
needle plate, and then slide the cover back on.
Reattach the bobbin cover.
Touch panel is malfunctioning
If the screen does not respond correctly when you touch a key
(the machine does not perform the operation or performs a
different operation), follow the steps below to make the
proper adjustments.
a
Holding your finger on the screen, turn the main
power switch to OFF and back to ON.
The touch panel adjustment screen is displayed.
b
Lightly touch the center of each +, in order from 1 to 5.
c
Turn the main power to OFF, then turn it back to ON.
Replacing the embroidery foot
a
Press (Needle position button) once or twice to
raise the needle.
Note
• Do not apply oil to the bobbin case.
a
b
c
a
b
ab
c
CAUTION
• Never use a bobbin case that is scratched or
has a burr on it. Otherwise the upper thread
may become tangled, the needle may break or
stitching performance may suffer. For a new
bobbin case, contact your nearest Brother
authorized service center.
• Be sure that the bobbin case is correctly
installed, otherwise the needle may break.
CAUTION
• Only use embroidery feet designed specifically
for this machine. Use of any other embroidery
foot may result in injuries or damage to the
machine.
+1
+4
+2
+5
+3
Loading ...
Loading ...
Loading ...