Loading ...
Loading ...
Loading ...
Embroidering
33
EMBROIDERY
2
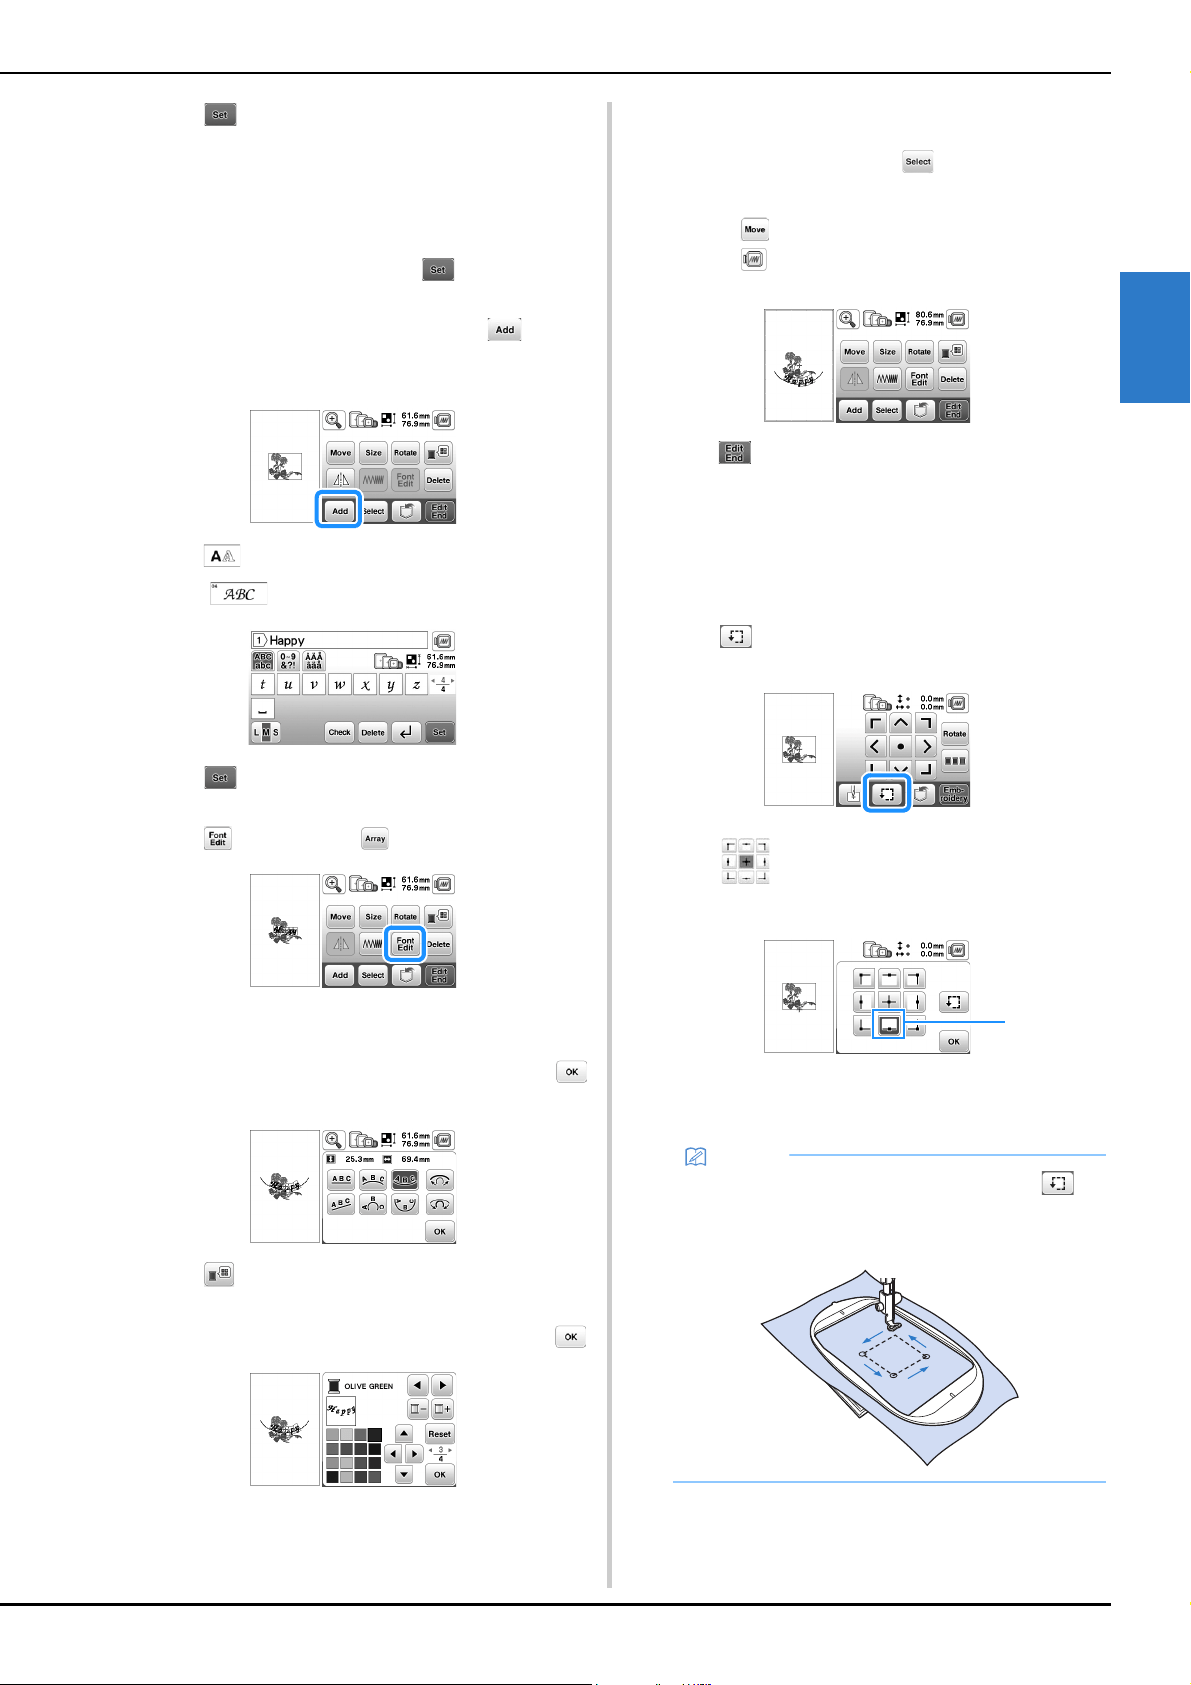
d
Press .
• For details on editing the pattern, refer to “Editing
Patterns (Pattern Editing Screen)” on page 42.
■ Combining patterns
a
Select the pattern and then press .
b
Edit the pattern if needed, and then press .
• For details on pattern editing, refer to “Pattern editing
screen” on page 42.
c
Press to enter the alphabet characters.
d
Select and enter “Happy”.
e
Press .
f
Press and then select .
• For details on character editing, refer to “Font editing
screen” on page 43.
g
Change the layout of the characters and then press
two times to return to the pattern editing screen.
h
Press to change the color.
i
Change the color of the characters and then press .
• For details on changing colors, refer to “Pattern
editing screen” on page 42.
j
Edit the pattern position.
• The pattern can be selected with your finger and then
moved by dragging it. Use to select patterns that
are overlapping and cannot be selected by touching
the screen.
• Press to decide the pattern position carefully.
• Press to check the preview of the combined
patterns.
k
Press .
■ Checking the pattern position
The embroidery frame moves and shows the pattern
position. Watch the frame closely to make sure the pattern
will be embroidered in the right place.
a
Press on the embroidery settings screen.
b
From , press the key for the position that you
want to check.
1 Selected position
The carriage will move to the selected position on
the pattern.
Memo
• To see the entire embroidering area, press .
The embroidery frame moves and shows the
embroidery area.
1
Loading ...
Loading ...
Loading ...