Loading ...
Loading ...
Loading ...
Embroidering
35
EMBROIDERY
2
h
Repeat the same steps for embroidering the remaining
colors.
When the last color is embroidered, a message
informing you the embroidering is finished will
appear on the display. Press , and the display
will return to the initial screen.
i
Cut the excess thread jumps within the color.
■ Changing the thread color display
You can display the name of the thread colors or
embroidery thread number.
a
Press and use or to display the following
settings screen.
b
Use or of the menu to select [Name of
Color] or [#123] (thread number).
• When [Name of Color] is selected, the name of the
thread colors is displayed.
• When [#123] is selected, the embroidery thread
number is displayed. Use or of the
menu to select the thread brand.
c
Press .
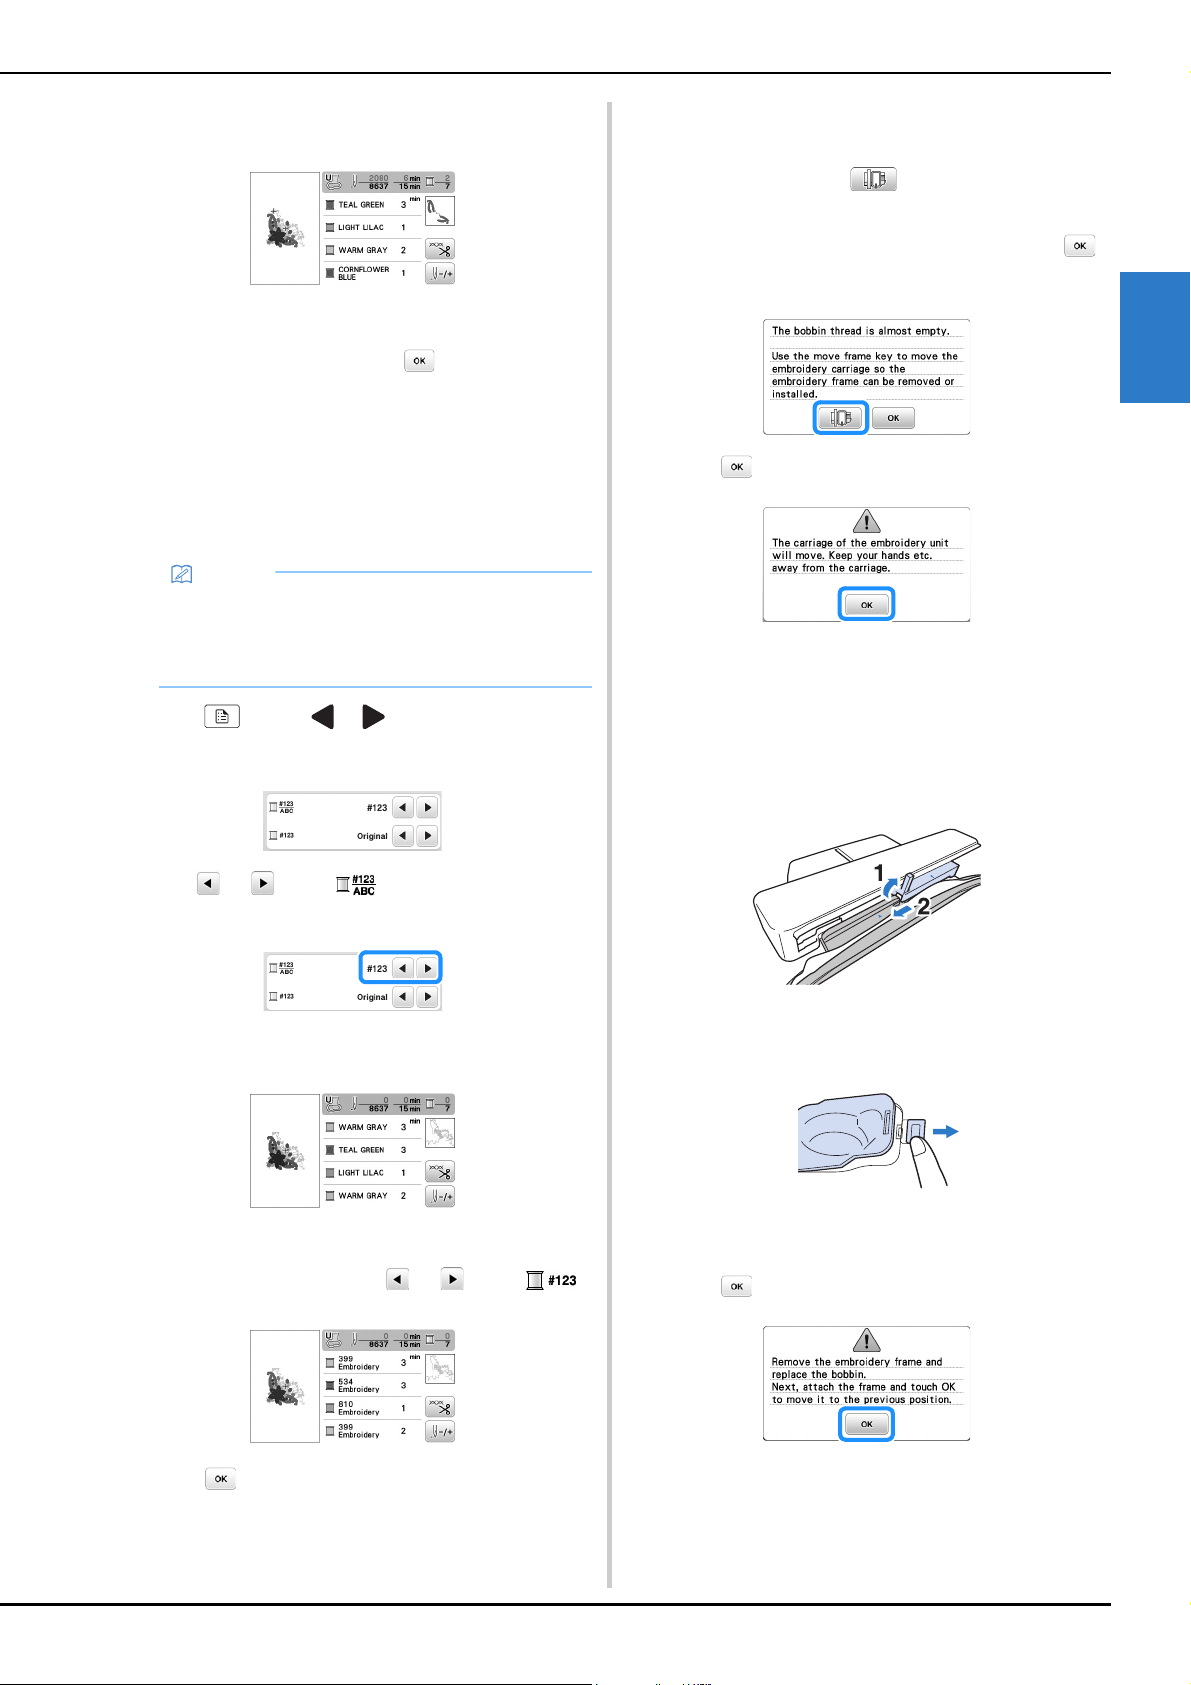
■ If the bobbin runs out of thread
When the bobbin begins to run out of thread during
embroidering, the machine will stop and the message
below will appear. Press and follow the directions
below to replace the bobbin. If very little embroidering
remains, you can embroider approximately 10 final
stitches without rethreading the machine by pressing .
The machine will stop after embroidering approximately
10 stitches.
a
Press .
After the thread is automatically cut, the carriage will
move.
b
Unlock the frame-securing lever and remove the
embroidery frame.
• Be careful not to apply strong force to the fabric at
this time. Otherwise, the fabric may loosen in the
frame.
c
Insert a wound bobbin into the machine. (Refer to
“Installing the bobbin” on page 19.)
d
Attach the embroidery frame.
e
Press .
Memo
• Colors on the screen may vary slightly from actual
spool colors.
• [Original], imported data remains the brand thread
created with the software, is set as a default.
Loading ...
Loading ...
Loading ...