Loading ...
Loading ...
Loading ...
Embroidering Preparation
29
EMBROIDERY
2
d
Gently stretch the fabric taut, and tighten the frame
adjustment screw to keep the fabric from loosening
after stretching.
• After stretching the fabric, make sure the fabric is
taut.
• Make sure the inside and outside frames are even
before you start embroidering.
e
Return the frame adjustment screw to its initial
position.
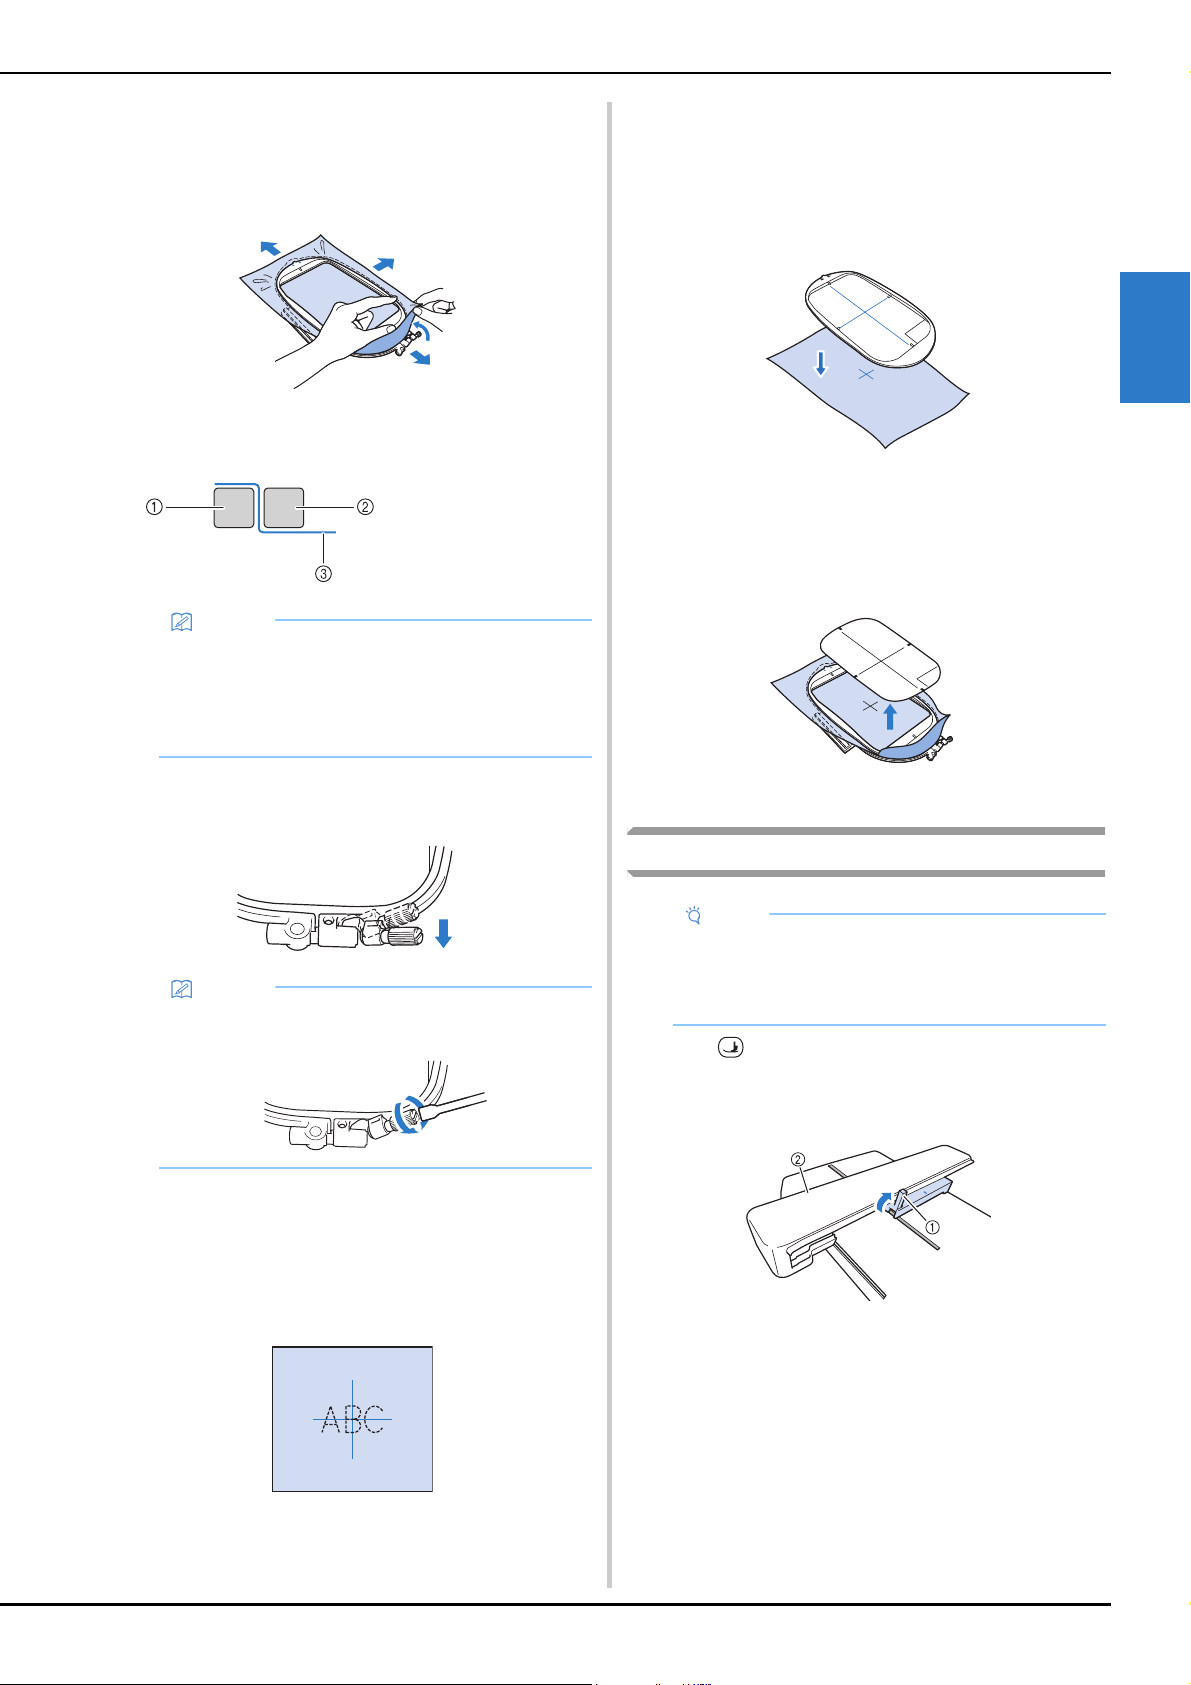
■ Using the embroidery sheet
When you want to embroider the pattern in a particular
place, use the embroidery sheet with the frame.
a
With a chalk pencil, mark the area of the fabric you
want to embroider.
b
Place the embroidery sheet on the inner frame.
c
Line the mark on the fabric up with the base line on the
embroidery sheet.
d
Place the inner frame with the fabric on the outer
frame and adjust the fabric if needed to align marks on
fabric with the embroidery sheet.
e
Remove the embroidery sheet.
Attaching the embroidery frame
a
Press (Presser foot lifter button) to raise the presser
foot.
b
Raise the frame-securing lever.
1 Frame-securing lever
2 Carriage
1 Outer frame
2 Inner frame
3 Fabric
Memo
• After stretching the fabric, lightly tapping it should
produce a drum-like sound.
• Stretch the fabric from all four corners and all four
edges. While stretching the fabric, tighten the
frame adjustment screw.
Memo
• You can use the included screwdriver when you
loosen or tighten the frame adjustment screw.
Note
• Wind and insert the bobbin before attaching the
embroidery frame making sure to use the
recommended bobbin thread. Check that there is
enough thread in the bobbin.
Loading ...
Loading ...
Loading ...