Loading ...
Loading ...
Loading ...
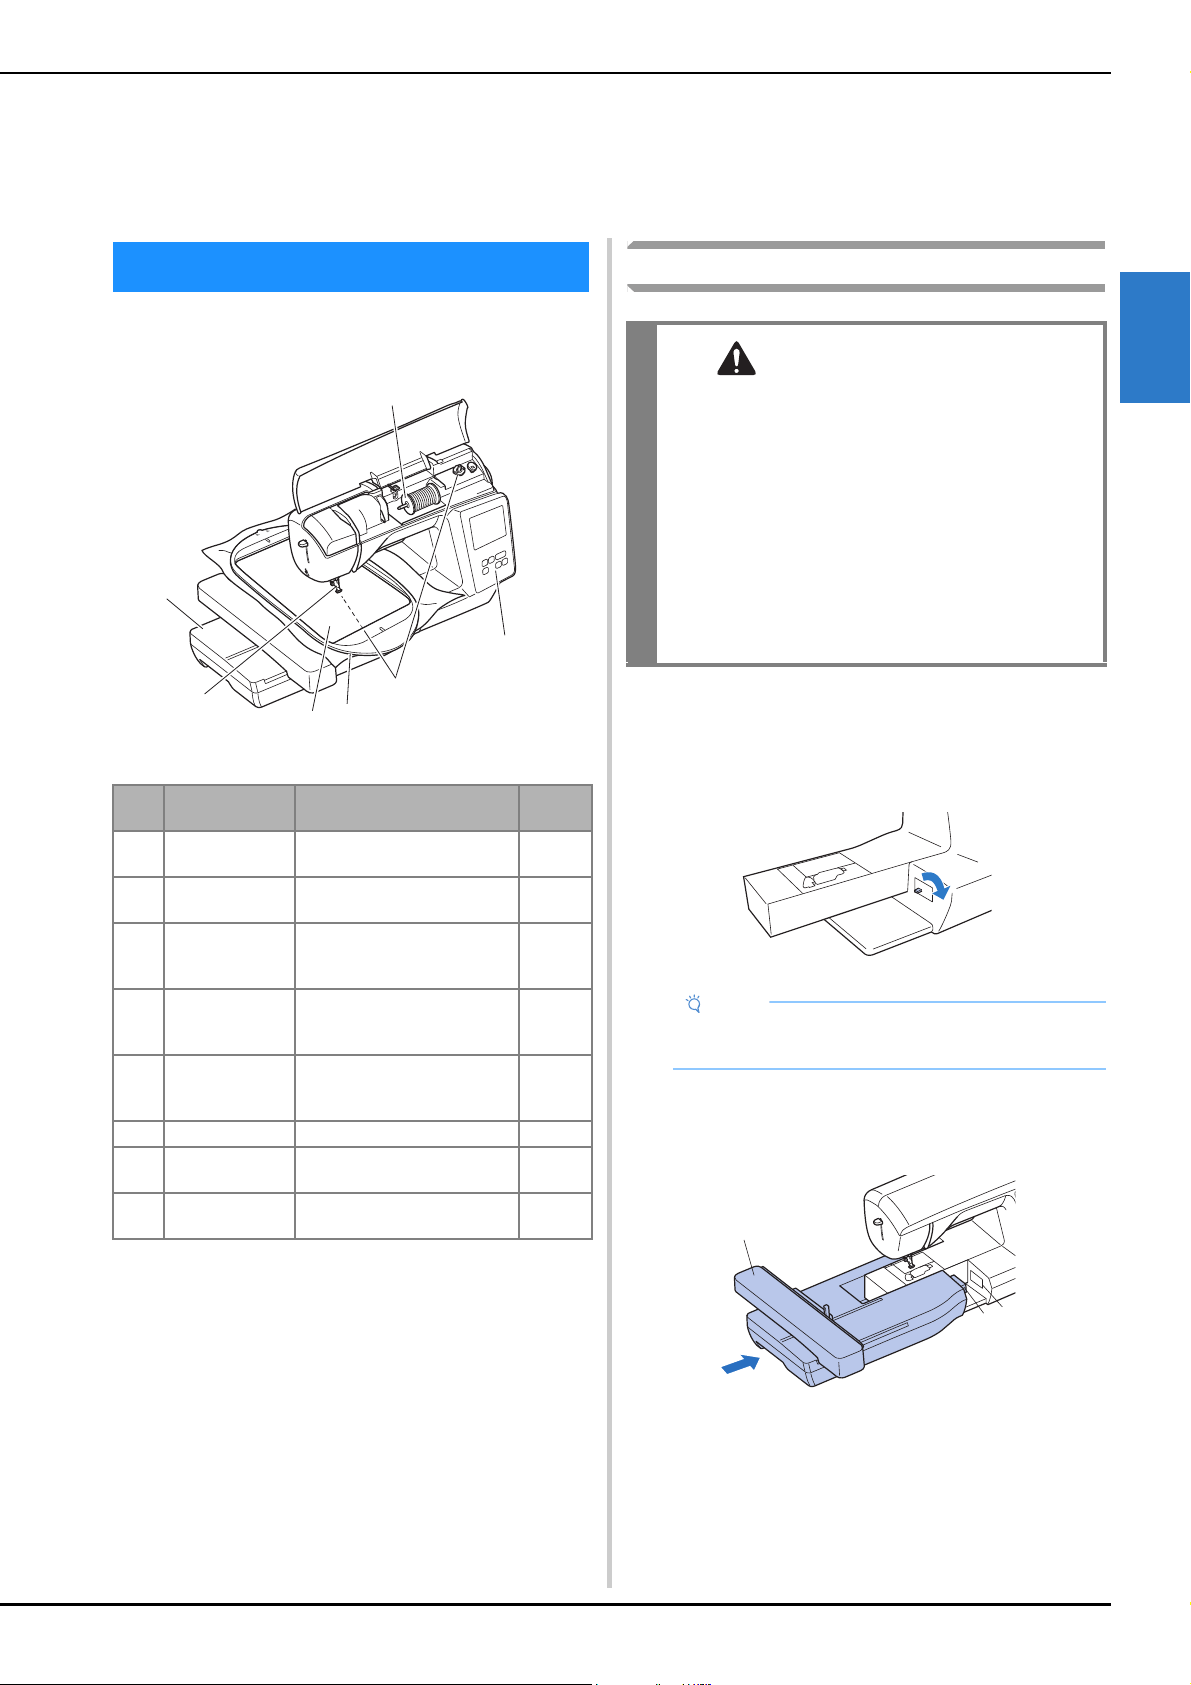
Embroidering Preparation
25
EMBROIDERY
2
Follow the steps below to prepare the machine for
embroidery.
Attaching the embroidery unit
a
Turn off the machine.
b
Slide the tab on the cover of the connection port in the
direction of the arrow to open the cover.
c
Insert the embroidery unit connection into the
connection port, and then lightly push in the
embroidery unit until it snaps into place.
1 Connection port
2 Embroidery unit connection
3 Carriage
Chapter 2
EMBROIDERY
Embroidering Preparation
Step
#
Aim Action Page
1 Checking the
needle
Use needle for embroidery. 23
2 Embroidery unit
attachment
Attach the embroidery unit. 25
3Bobbin thread
setup
For the bobbin thread, wind
embroidery bobbin thread and
set it in place.
16
4Fabric
preparation
Attach a stabilizer material to
the fabric, and hoop it in the
embroidery frame.
27
5Embroidery
frame
attachment
Attach the embroidery frame
to the embroidery unit.
29
6 Pattern selection Select an embroidery pattern. 31
7 Checking the
layout
Check and adjust the size and
position of the embroidery.
33
8Embroidery
thread setup
Set up embroidery thread
according to the pattern.
34
Step 2
Step 1
Step 4
Step 5
Step 3
Step 6, 7
Step 8
CAUTION
• Before attaching the embroidery unit, be sure
to turn off the machine. Otherwise, injuries
may occur if one of the operation buttons is
accidentally pressed and the machine starts
embroidering.
• Do not move the machine with the embroidery
unit in place. The embroidery unit may be
dropped and cause injury.
• Keep your hands and other objects away from
the embroidery carriage and frame when they
are moving. Otherwise injury may result.
Note
• Be sure to close the cover of the connection port
when the embroidery unit is not being used.
1
2
3
Loading ...
Loading ...
Loading ...