Loading ...
Loading ...
Loading ...
(continued)
CAUTION: BEFORE REPLACING
ANY LAMP,
DISCONNE~
ELECTRIC POWER TO RANGE
AT THE MAIN FUSE OR
CIRCUIT BREAKER PANEL.
LET LAMP (OR BULB) AND
LAMP COVER COOL
COMPLETELY.
WHEN CHANGING A
FLUORESCENT COOKTOP
LAMP, DO NOT TOUCH THE
METAL AT ENDS OF LAMP.
(on models so equipped)
One of the lamp-replacement
methods described below and at
right applies to your model.
Model with open lamp
shade—
lamp is visible without removing
the cover; cover does not need to be
raised or removed to change lamp.
a. Place fingers under lamp near
each end. Press up and roll bottom
of lamp away from you; lamp will
fall into palms of your hands; remove.
b. Check type and wattage of lamp
and replace with same kind. Hold
lamp near each end and insert
prongs into sockets. Gently roll
bottom of lamp toward front of
range until it stops.
Model with screws holding cover
a.
Remove screws; swing cover
toward you from rear.
b.
Place fingers on top of lamp and
roll toward front of range until it
stops. Remove.
c.
Check type and wattage of lamp
and replace with same kind. Hold
lamp near each end and insert
prongs into sockets. Gently roll
bottom of lamp toward front of
range until it stops.
d.
Close cover. Replace screws.
Model with bright lift-up cover
and snap-on shield
a. Lift up front of cover over lamp
to its open position.
b.
Pull straight out on plastic
shield over fluorescent lamp. (It is
a snap-fit. )
c. Place thumbs on bottom near
each end of lamp. Press and roll
bottom of lamp gently toward front
of range until it stops. Remove.
d.
Check type and wattage of lamp;
replace with same kind. Hold lamp
near each end and insert prongs into
sockets. Gently roll bottom of lamp
toward rear of range until it stops.
Model with woodgrain cover
hinged at back
a. Place fingers under ends of
cover. Lift forward then up so cover
is in open position.
b.
Remove bulb, check type and
wattage; replace with same kind.
Hold lamp near each end and insert
prongs into sockets. Gently roll
bottom of lamp toward rear of
range until it stops.
c. Swing down lamp cover so it
snaps into closed position.
Hi/Low model
a. Hold glass panel assembly and
remove the 3 screws from frame
that holds top of assembly in place.
b.
Hold assembly in both hands,
and remove. Remove lamps and
replace with bulbs of the same
wattage. Lift glass panel assembly
into place by first positioning
bottom edge of assembly over the
top of the back splasher panel;
replace screws in top of assembly
to hold it in place.
Hi/Low model
with swing-down glass cover
a.
Push buttons on sides of glass
cover. Allow glass to swing down.
b. Place fingers under each end of
lamp, rotate toward you until it
stops. Remove.
c. Check type and wattage of lamp;
replace with same kind. Hold lamp
near each end and insert prongs into
sockets. Gently roll bottom of lamp
toward rear of range until it stops.
d.
Snap glass cover in place.
(on models so equipped)
Self-Cleaning Oven
~!
‘
‘\
--
“
:.
●
-A
)
\.
/’
/
.-——
“-
-0
1
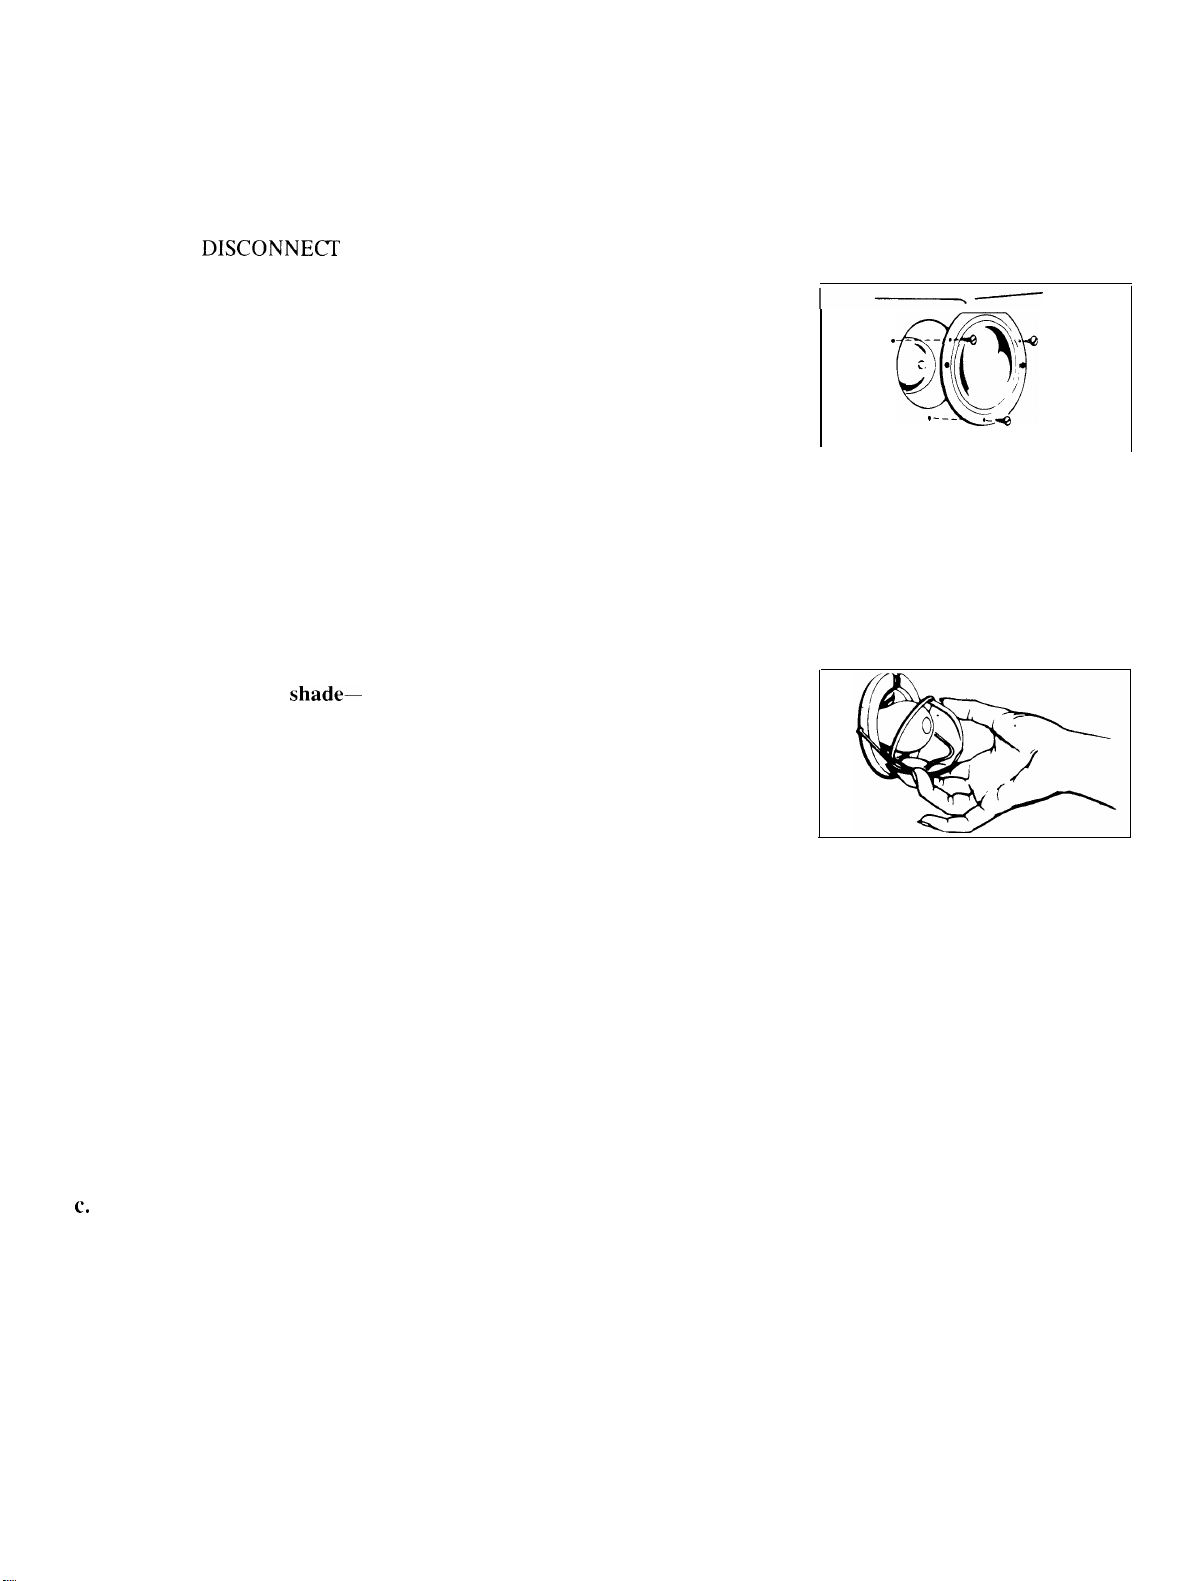
a.
Remove the three slotted screws
in lamp cover; see diagram. Remove
cover; replace lamp with 40-watt
appliance lamp.
b.
Replace lamp cover with three
screws.
Non Self-Cleaning Oven
The oven lamp (bulb) has a
removable glass cover which is
held in place with a bail-shaped
wire. Remove oven door, if desired
to reach cover easily.
a.
To remove, hold hand under
cover so it doesn’t fall when
released. With fingers of same
hand, firmly push down wire bail
until it clears cover. Lift off cover.
DO NOT REMOVE ANY
SCREWS TO REMOVE THIS
TYPE OF COVER.
b.
Replace lamp with 40-watt
home appliance bulb.
c. To replace cover,
place it into
groove of lamp receptacle. Lift
wire bail up to center of cover until
it snaps into place. When in place,
wire holds cover firmly, but be
certain wire bail is not below
depression in center of cover.
———
—-—
30
Loading ...
Loading ...
Loading ...