Loading ...
Loading ...
Loading ...
CP4 STAGE/CP40 STAGE Owner’s Manual 13
Component Names & Functions
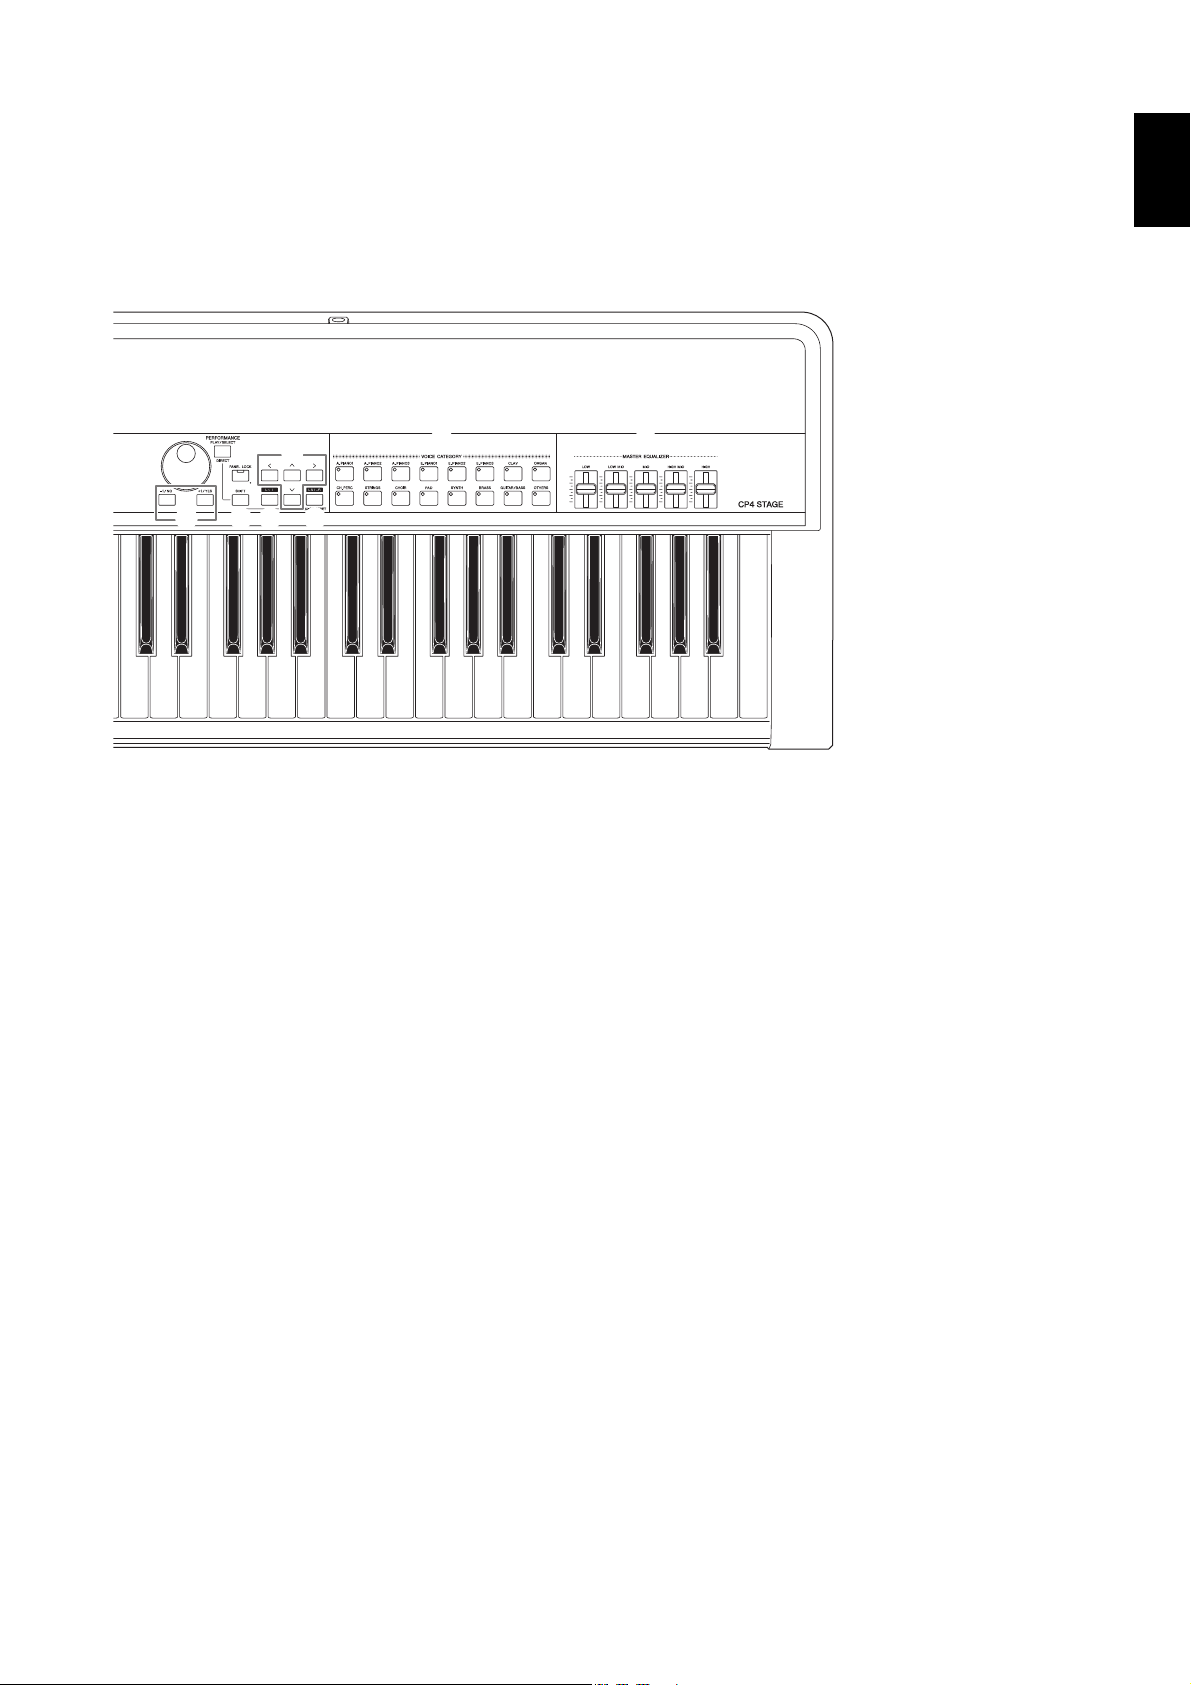
# [-] and [+] TRANSPOSE buttons (page 29)
Use these buttons to raise and lower the pitch of the
keyboard in steps of one semitone.
$ [FILE] button (page 39)
Use this button to open the File area in order to perform
file-related operations on the instrument itself or on the
connected USB flash-memory device.
% [UTILITY] button (page 41)
Use this button to open the Utility area in order to set
parameters that affect the instrument as a whole.
^ [EDIT] button (page 31)
Use this button to edit Performances (page 21) and also
to compare edited and unedited versions. (For details on
the Compare Performance function, see the Reference
Manual (pdf).)
& [STORE] button (pages 30 and 34)
Use this button to store Performances and Utility settings.
* LCD (Liquid Crystal Display) (page 19)
Using the LCD, you can confirm system messages,
parameter settings, and a range of other information
depending on the function currently being used.
( Data Dial (page 19)
Use this dial to change the value indicated by the on-
screen cursor.
A [-1/NO] and [+1/YES] buttons (page 19)
Use these buttons to increase or decrease the value
indicated by the on-screen cursor in single units.
B
[PERFORMANCE PLAY/SELECT] button
(page 30)
Use this button to open the screen for selecting
Performances.
C [PANEL LOCK] button (page 42)
Use this button to toggle the Panel Lock function on and
off. When on, control panel operations will be
deactivated.
D [SHIFT] button (page 48)
Use this button in combination with others to perform a
range of different operations.
E [EXIT] button (page 20)
The functions accessible using the stage piano’s screens
are arranged in a hierarchical structure. Press this button
to leave the current screen and move one step back
towards the top of the current area.
F [ENTER] button
Use this button to make menu selections and confirm
settings. It can also be used to execute a range of
functions.
G [u], [d], [l], and [r] (Cursor) buttons
(page 19)
Use these buttons to move the cursor on-screen in the
corresponding direction and to move between screen’s
panes.
H Voice Category buttons (page 22)
Use these buttons to select different Voice categories.
I MASTER EQUALIZER (EQ) sliders (page 29)
Use these sliders to adjust the gain in the corresponding
master-EQ frequency band.
C4 D4 E4 F4 G4 A4 B4 C5 D5 E5 F5 G5 A5 B5 C6 D6 E6 F6 G6 A6 B6 C7
C
B
E
H
A D F
G
I
(
Loading ...
Loading ...
Loading ...