Loading ...
Loading ...
Loading ...
12 CP4 STAGE/CP40 STAGE Owner’s Manual
Component Names & Functions
Component Names & Functions
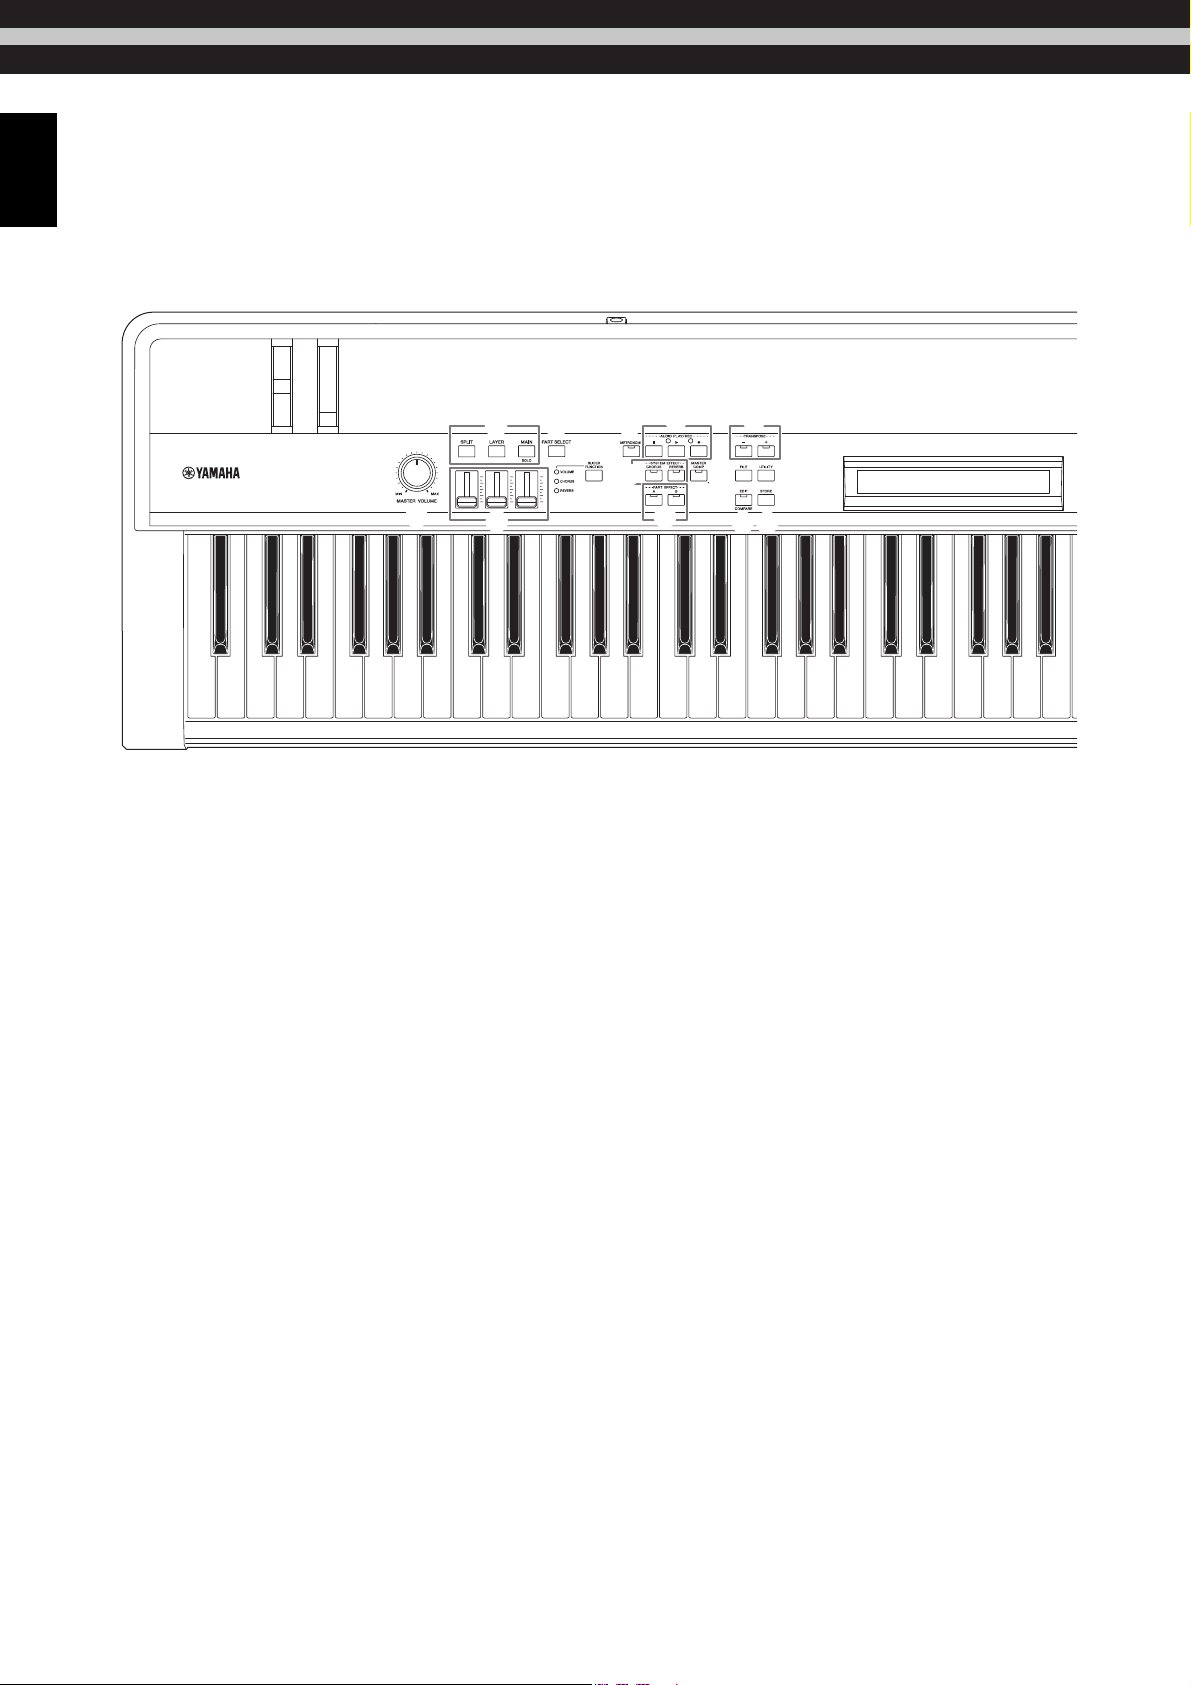
Control Panel
(Illustration shows the CP4 STAGE.)
1 Pitch bend wheel (page 28)
Use this controller to raise or lower the pitch of played
notes in a continuously variable manner.
2 Modulation wheel (page 28)
Use this controller to add varying degrees of vibrato and
other effects to played notes.
3 [MASTER VOLUME] dial (page 18)
Turn this dial to adjust the overall volume of the stage
piano.
4 Part buttons (page 23)
The following Part buttons control different Parts:
[MAIN] button
Press to activate the Solo function and turn off all Parts
other than the MAIN Part.
[LAYER] button
[SPLIT] button
On the CP4 STAGE, the [LAYER] and [SPLIT] buttons can
be used to toggle on and off the corresponding Parts; on
the CP40 STAGE, both of these buttons toggle on and off
the SPLIT/LAYER Part. On both the CP4 STAGE and
CP40 STAGE, the MAIN Part is always on and cannot be
turned off.
5
[PART SELECT] button (page 23)
Use this button to change the currently selected Part.
6 Part sliders (page 28)
Use these sliders to adjust three parameters (Volume,
Chorus, and Reverb) for each of the Parts.
7 [SLIDER FUNCTION] button (page 28)
Use this button to change the parameter currently
assigned to the Part sliders (
6). Each time you press this
button, the assigned parameter will change and the
indicator lights to its left will turn on and off to show the
current assignment.
8 [METRONOME] button (page 27)
Use this button to toggle the metronome on and off.
9 AUDIO PLAY/REC buttons (pages 35 and 36)
Use these buttons to control the playback and recording
of audio files.
[J] (Stop) button
This button is used to stop playback and recording of an
audio file.
[R] (Play) button
This button is used to start playback and recording of an
audio file. The indicator light above it will turn on during
playback and recording.
[I] (Record) button
This button is used to open the screen for recording an
audio file. The indicator light above it will turn on during
recording.
) [CHORUS] and [REVERB] SYSTEM EFFECT
buttons (page 34)
Use these buttons to toggle the instrument’s main chorus
and reverb effects on and off.
! [A] and [B] PART EFFECT buttons (page 34)
Use these buttons to toggle Insertion Effect A and
Insertion Effect B on and off.
@ [MASTER COMP] button (page 42)
Use this button to toggle the instrument’s master
compressor on and off.
6
A-1 B-1 C0 D0 E0 F0 G0 A0 B0 C1 D1 E1 F1 G1 A1 B1 C2 D2 E2 F2 G2 A2 B2 C3 D3 E3 F3 G3 A3 B3
1
2
3
4
5
7
8
9
)
!
@
#
^
&
%
$
*
Loading ...
Loading ...
Loading ...