Loading ...
Loading ...
Loading ...
27
En
Preparation
05
Caution
• A table or rack with adequate strength should always be used
to support the plasma display. Failure to do so could result in
personal injury and physical damage.
• When installing the plasma display, please take the necessary
safety measures to prevent it from falling or overturning in case
of emergencies, such as earthquakes, or of accidents.
• If you do not take these precautions, the plasma display could
fall down and cause injury.
• The screws, hooks, cords and other fittings that you use to
secure the plasma display to prevent it from overturning will
vary according to the composition and thickness of the surface
to which it will be attached.
• Select the appropriate screws, hooks, cords, and other fittings
after first inspecting the surface carefully to determine its
thickness and composition and after consulting a professional
installer if necessary.
Detaching the Pioneer stand
You can also install the display on a rack by detaching the stand.
The method for attaching/detaching the stand varies depending
on the product.
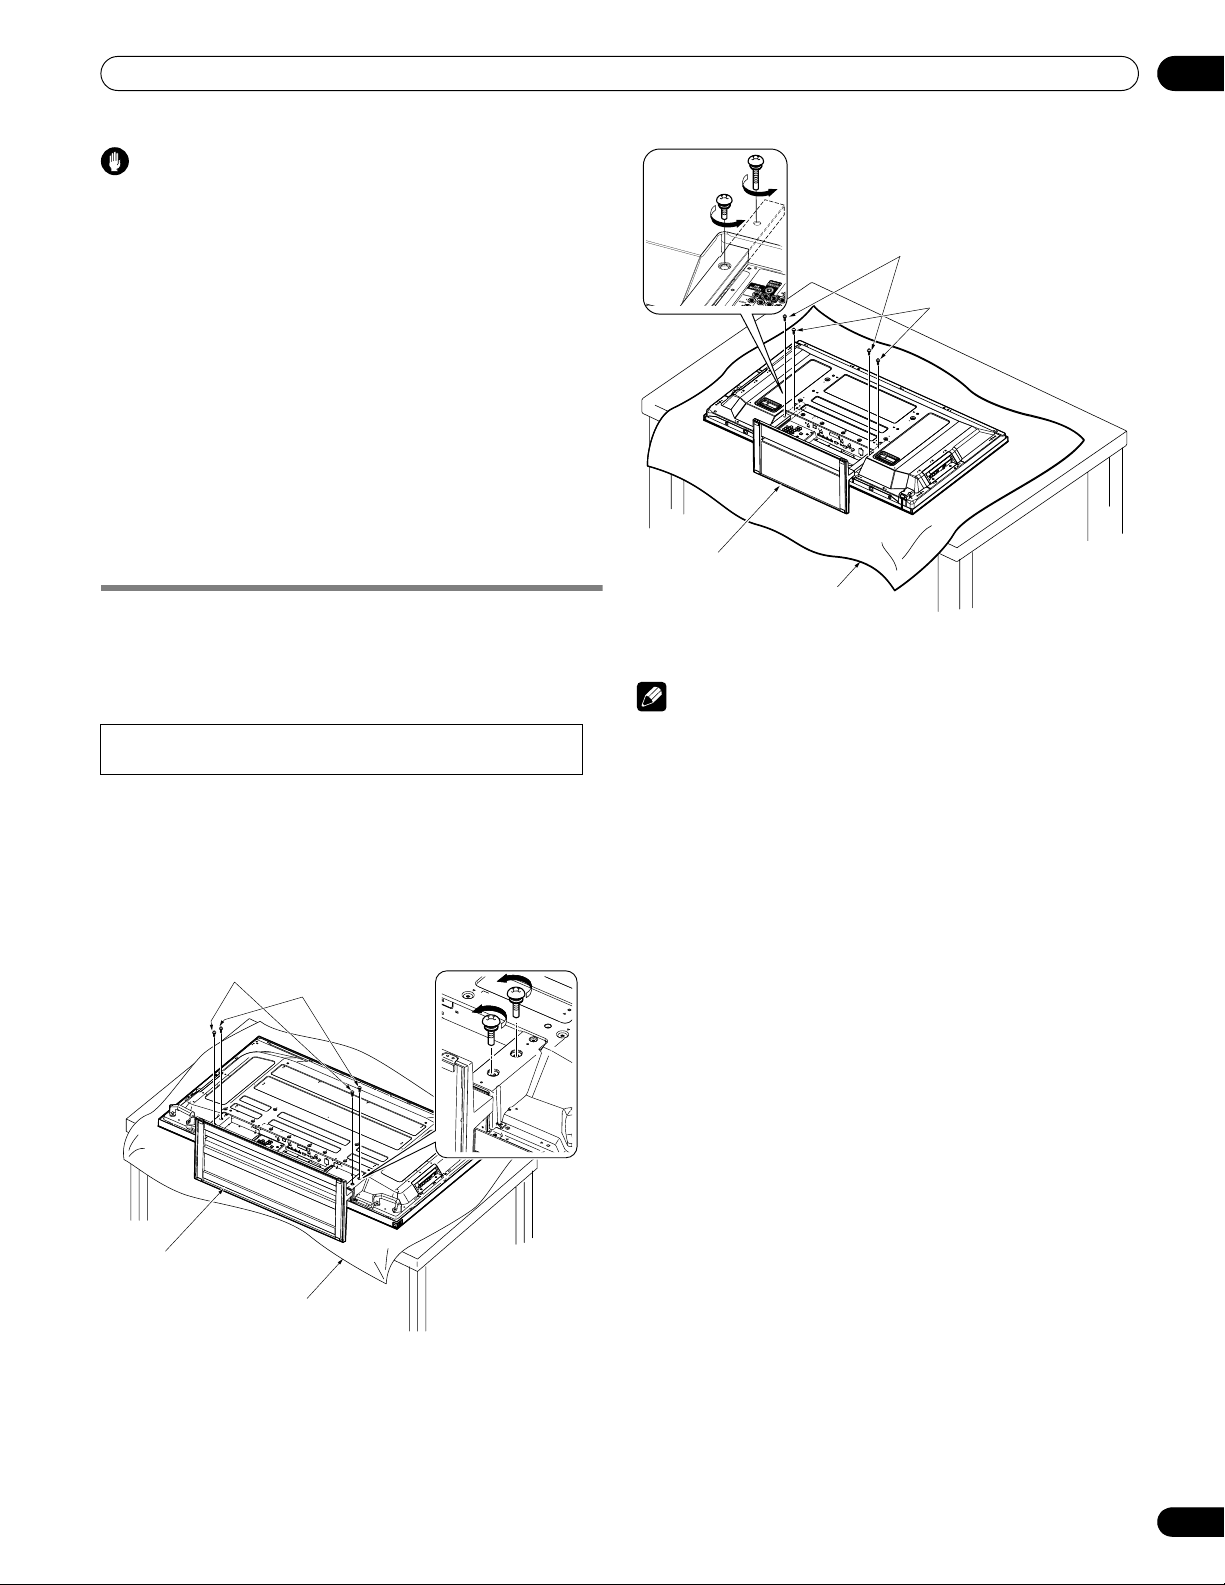
Detaching the stand
1 With the plasma display lying flat, loosen and remove
the two installation bolts (1) and (2) using a
screwdriver.
Installation bolts (1): M8 x 23 mm (black) for PRO-110FD
M6 x 20 mm (black) for PRO-150FD
Installation bolts (2): M8 x 40 mm (black) for PRO-110FD
M6 x 20 mm (black) for PRO-150FD
2 Remove the stand from the plasma display.
Note
• Make sure to keep the installation bolts (1) and (2) that have
been removed as they are re-used when attaching the stand to
the plasma display.
• Place a sheet or protective cover to protect the display from
scratches or damage.
• Work only with the plasma display lying flat on a table or similar
surface.
• When lying the plasma display down, be careful not to scratch
or damage it.
• If the speaker has been installed, it is recommended to detach
the speaker before removing the stand.
• Steps for detaching the stand are the same for PRO-150FD
and PRO-110FD.
Installation bolts (1)
(Step 1)
Installation bolts (2)
(Step 2)
Sheet
Table top stand
(PRO-150FD)
Installation bolts (1)
(Step 1)
Installation bolts (2)
(Step 2)
Table top stand
Sheet
(PRO-110FD)
PRO150FD.book Page 27 Tuesday, June 12, 2007 12:37 PM
Loading ...
Loading ...
Loading ...