
49-7000248 Rev. 0 02-24
Write the model and serial
numbers here:
Model # _________________
Serial # _________________
You can find them on a label inside
the oven.
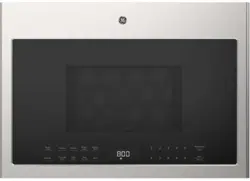
OWNER’S MANUAL
MICROWAVE OVEN
GVMB14S4
GE is a trademark of the General Electric Company. Manufactured under trademark license.
SAFETY INFORMATION ...........3
USING YOUR OVEN
Parts and Features .....................6
Control Panel .........................8
Power Levels .........................10
Time Features ........................10
Sensor Features ......................10
Microwave Terms .....................12
CARE AND CLEANING
Care and Cleaning ....................12
TROUBLESHOOTING ............. 14
CONSUMER SUPPORT
Limited Warranty .....................15
Consumer Support ....................16

2 49-7000248 Rev. 0
THANK YOU FOR MAKING GE APPLIANCES A PART OF YOUR HOME.
Whether you grew up with GE Appliances, or this is your first, we’re happy to have you in the family.
We take pride in the craftsmanship, innovation and design that goes into every GE Appliances product, and we think you
will too. Among other things, registration of your appliance ensures that we can deliver important product information and
warranty details when you need them.
Register your GE appliance now online. Helpful websites and phone numbers are available in the Consumer Support
section of this Owner’s Manual. You may also mail in the pre-printed registration card included in the packing material.

49-70000248 Rev. 0 3
SAFETY INFORMATION
IMPORTANT SAFETY INSTRUCTIONS
READ ALL INSTRUCTIONS BEFORE USING THE APPLIANCE
WARNING
To reduce the risk of burns, electric shock, fire, injury to persons, or exposure to
excessive microwave energy:
When using electrical appliances, basic safety precautions should be followed, including the following:
Ŷ Read all instructions before using this appliance.
Ŷ Read and follow the specific PRECAUTIONS TO
AVOID POSSIBLE EXPOSURE TO EXCESSIVE
MICROWAVE ENERGY section.
Ŷ Use this appliance only for its intended use as
described in this manual. Do not use corrosive
chemicals or vapors in this appliance. This microwave
oven is specifically designed to heat, dry or cook
food, and is not intended for laboratory or industrial
use.
Ŷ This appliance should be serviced only by qualified
service personnel. Contact nearest authorized service
facility for examination, repair, or adjustment.
INSTALLATION
Ŷ Install or locate this appliance only in accordance with
the provided installation instructions.
Ŷ This appliance must be grounded. Connect only to
a properly grounded outlet. See the GROUNDING
INSTRUCTIONS section.
Ŷ Do not operate this appliance if it has a damaged
power cord or plug, if it is not working properly, or if it
has been damaged or dropped.
Ŷ Keep power cord away from heated surfaces.
Ŷ Do not let cord hang over edge of table or counter.
Ŷ Do not immerse power cord or plug in water.
Ŷ Do not cover or block any opening on the appliance.
Ŷ Do not store this appliance outdoors. Do not use this
product near water - for example, in a wet basement,
near a swimming pool, or in a similar location.
Ŷ Do not mount over a sink.
TO REDUCE THE RISK OF FIRE IN THE CAVITY:
— Do not overcook food. Carefully attend appliance
when paper, plastic or other combustible materials
are placed inside the oven while cooking.
— Remove wire twist-ties and metal handles from
paper or plastic containers before placing them in
the oven.
— If materials inside the oven ignite, keep the oven
door closed, turn the oven off and disconnect the
power cord, or shut off power at the fuse or circuit
breaker panel.
— Do not store any materials in the oven when not in
use. Do not leave paper products, cooking utensils,
or food in the cavity when not in use. All racks
should be removed from oven when not in use.
— Do not operate the microwave feature without food
in the oven.
TO REDUCE THE RISK OF BURNS
Ŷ Be careful when opening containers of hot food. Use
pot holders and direct steam away from face and
hands.
Ŷ Vent, pierce, or slit containers, pouches or plastic
bags to prevent build-up of pressure.
Ŷ%HFDUHIXOZKHQWRXFKLQJWKHWXUQWDEOHGRRUUDFNVRU
walls of the oven which may become hot during use.
Do not touch heating elements.
Ŷ(QHUJL]HGFRRNWRSVXUIDFHDQGLQWHULRUFDYLW\OLJKWLQJ
will cause burns. Use caution when cleaning and
allow lamps to cool prior to replacement.
Ŷ HOT CONTENTS CAN CAUSE SEVERE BURNS.
DO NOT ALLOW CHILDREN TO USE THE
MICROWAVE. Use caution when removing hot items.
READ AND SAVE THESE INSTRUCTIONS

4 49-7000248 Rev. 0
SAFETY INFORMATION
READ AND SAVE THESE INSTRUCTIONS
IMPORTANT SAFETY INSTRUCTIONS
READ ALL INSTRUCTIONS BEFORE USING THE APPLIANCE
WARNING
OPERATING
Ŷ'RQRWRSHUDWHWKHPLFURZDYHZLWKRXWWKHWXUQWDEOHLQ
place. The turntable must be unrestricted so it
can turn.
Ŷ2YHUVL]HGIRRGRURYHUVL]HGPHWDOFRRNZDUHVKRXOG
not be used in a microwave/convection oven because
they increase the risk of electric shock and could
cause a fire.
Ŷ'RQRWXVHSDSHUSURGXFWVLQRYHQZKHQ
appliance is operated in any cooking mode except
microwave only.
Ŷ0DNHVXUHDOOFRRNZDUHXVHGLQ\RXUPLFURZDYHRYHQ
is suitable for microwaving. Most glass casseroles,
cooking dishes, measuring cups, custard cups,
pottery or china dinnerware which does not have
metallic trim or glaze with a metallic sheen can be
used in compliance with cookware manufacturers’
recommendations.
Ŷ'RQRWVWRUHDQ\WKLQJGLUHFWO\RQWRSRIWKHPLFURZDYH
surface when the microwave is in operation.
Ŷ6RPHSURGXFWVVXFKDVZKROHHJJVDQGVHDOHG
containers - for example, closed jars - are able to
explode and should not be heated in the
microwave oven.
Ŷ'RQRWRYHUFRRNSRWDWRHV7KH\FRXOGGHK\GUDWHDQG
catch fire.
Ŷ'RQRWFRYHUDPLFURZDYHUDFNRUDQ\SDUWRIWKH
oven with metal foil. This will cause overheating of
the microwave/convection oven.
Ŷ&RRNPHDWDQGSRXOWU\WKRURXJKO\²PHDWWRDWOHDVW
an INTERNAL temperature of 160°F and poultry to at
least an INTERNAL temperature of 180°F. Cooking
to these temperatures usually protects against
foodborne illness.
Ŷ7KLVRYHQLVQRWDSSURYHGRUWHVWHGIRUPDULQHXVH
CLEANING
Ŷ'LVFRQQHFWSRZHUEHIRUHFOHDQLQJ
Ŷ'LVFRQQHFWSRZHUEHIRUHUHSODFLQJFKDUFRDOILOWHUV
cavity lamps, or cooktop surface lamps
Ŷ.HHSWKHRYHQIUHHIURPJUHDVHEXLOGXS
Ŷ'RQRWFOHDQZLWKPHWDOVFRXULQJSDGV3LHFHVFDQ
burn off the pad and touch electrical parts involving
risk of electric shock.
Ŷ:KHQFOHDQLQJVXUIDFHVRIGRRUDQGRYHQWKDW
come together on closing the door, use only mild,
nonabrasive soaps, or detergents applied with a
clean sponge or soft cloth. Rinse well.
SUPER HEATED WATER
Ŷ/LTXLGVVXFKDVZDWHUFRIIHHRUWHDDUHDEOHWR
be overheated beyond the boiling point without
appearing to be boiling. Visible bubbling or boiling
when the container is removed from the microwave
oven is not always present. THIS COULD RESULT
IN VERY HOT LIQUIDS SUDDENLY BOILING
OVER WHEN THE CONTAINER IS DISTURBED
OR A SPOON OR OTHER UTENSIL IS INSERTED
INTO THE LIQUID.
Ŷ7RUHGXFHWKHULVNRILQMXU\WRSHUVRQV
- Do not overheat the liquid.
- Stir the liquid both before and halfway through
heating it.
- Do not use straight-sided containers with
narrow necks.
- After heating, allow the container to stand in the
microwave oven for a short time before removing
the container.
- Use extreme care when inserting a spoon or other
utensil into the container.
49-70000248 Rev. 0 5
READ AND SAVE THESE INSTRUCTIONS
IMPORTANT SAFETY INSTRUCTIONS
READ ALL INSTRUCTIONS BEFORE USING THE APPLIANCE
SAFETY INFORMATION
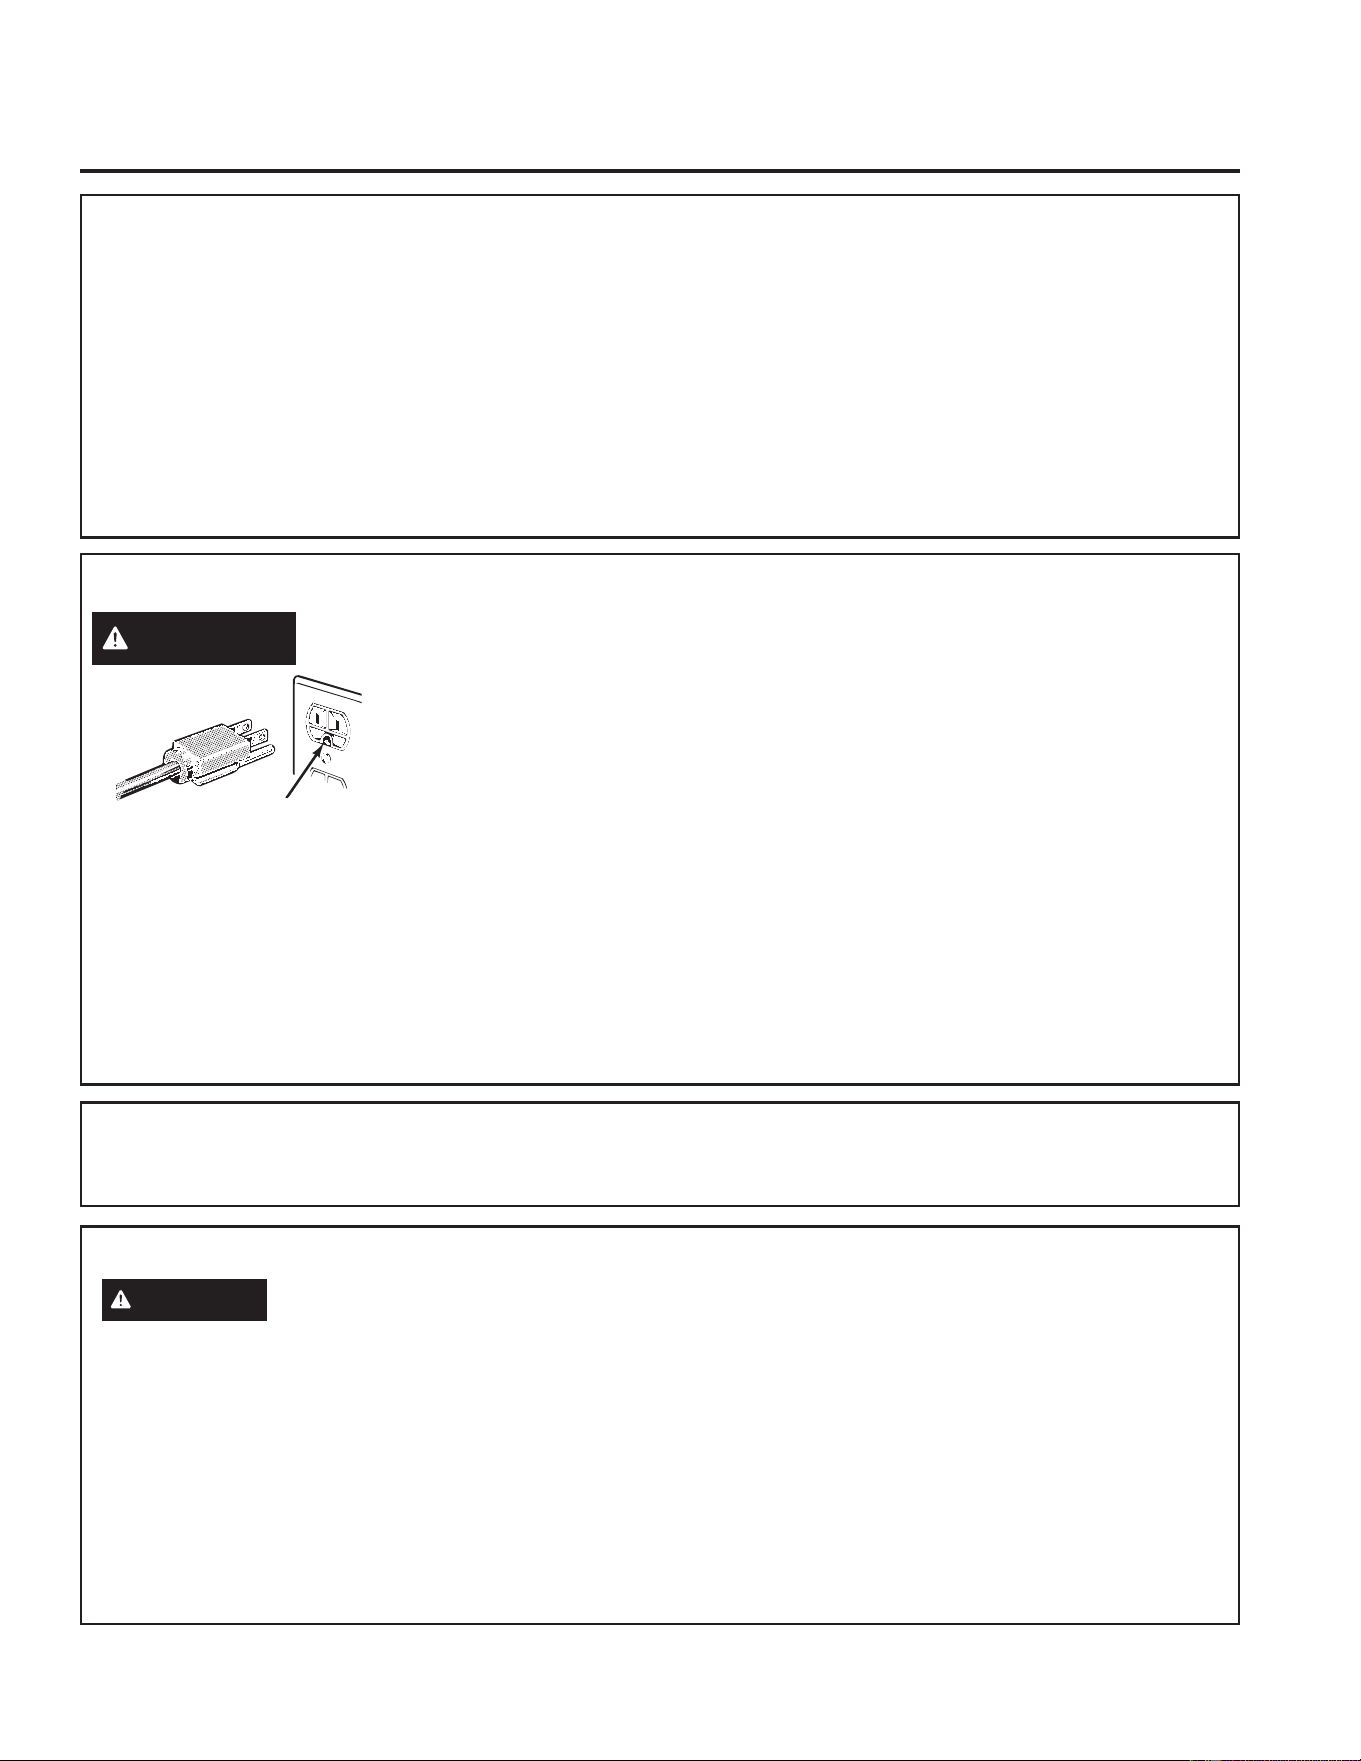
GROUNDING INSTRUCTIONS
WARNING
Improper use of the grounding plug can result in a risk of electric shock.
This appliance must be
grounded. In the event of
an electrical short circuit,
grounding reduces the
risk of electric shock by
providing an escape wire
for the electric current.
This appliance is equipped with a power cord having a
grounding wire with a grounding plug. The plug must
be plugged into an outlet that is properly installed and
grounded.
Consult a qualified electrician or service technician if
the GROUNDING INSTRUCTIONS are not completely
understood, or if doubt exists as to whether the
appliance is properly grounded.
If the outlet is a standard 2-prong wall outlet, it is
your personal responsibility and obligation to have it
replaced with a properly grounded 3-prong wall outlet.
Do not under any circumstances cut or remove the third
(ground) prong from the power cord.
A short power-supply cord is provided to reduce risks
resulting from becoming entangled or tripping over a
longer cord.
Do not use an extension cord. If the power cord is too
short, have a qualified electrician or service technician
install an outlet near the appliance.
For best operation, plug this appliance into its own
electrical outlet to prevent flickering of lights, blowing of
fuse or tripping of circuit breaker.
PRECAUTIONS TO AVOID POSSIBLE EXPOSURE
TO EXCESSIVE MICROWAVE ENERGY
(a) Do Not Attempt to operate this oven with the
door open since open-door operation can result
in harmful exposure to microwave energy. It is
important not to defeat or tamper with the safety
interlocks.
(b) Do Not Place any object between the oven front
face and the door or allow soil or cleaner residue to
accumulate on sealing surfaces.
(c) Do Not Operate the oven if it is damaged.
It is particularly important that the oven door close
properly and that there is no damage to the:
(1) door (bent),
(2) hinges and latches (broken or loosened),
(3) door seals and sealing surfaces.
(d) The Oven Should Not be adjusted or repaired by
anyone except properly qualified service personnel.
NOTICE: PACEMAKERS
Most pacemakers are shielded from interference from electronic products, including microwaves. However,
patients with pacemakers may wish to consult their physicians if they have concerns.
Ensure proper ground
exists before use.
VENT FAN
WARNING
The fan will operate automatically under certain conditions. Take care to prevent the starting
and spreading of accidental cooking fires while the vent fan is in use.
Ŷ&OHDQWKHXQGHUVLGHRIWKHPLFURZDYHRIWHQ'RQRW
allow grease to build up on the microwave or the fan
filters.
Ŷ,QWKHHYHQWRIDJUHDVHILUHRQWKHVXUIDFHXQLWV
below the microwave oven, smother a flaming pan
on the surface unit by covering the pan completely
with a lid, a cookie sheet or a flat tray.
Ŷ8VHFDUHZKHQFOHDQLQJWKHYHQWIDQILOWHUV
Corrosive cleaning agents, such as lye-based oven
cleaners, may damage the filters.
Ŷ:KHQSUHSDULQJIODPLQJIRRGVXQGHUWKHPLFURZDYH
turn the fan on.
Ŷ1HYHUOHDYHVXUIDFHXQLWVEHQHDWK\RXUPLFURZDYH
oven unattended. Boilovers cause smoking and
greasy spillovers that may ignite and spread if
the microwave vent fan is operating. To minimize
automatic fan operation, use adequate sized
cookware and use high heat on surface units only
when necessary.

6 49-7000248 Rev. 0
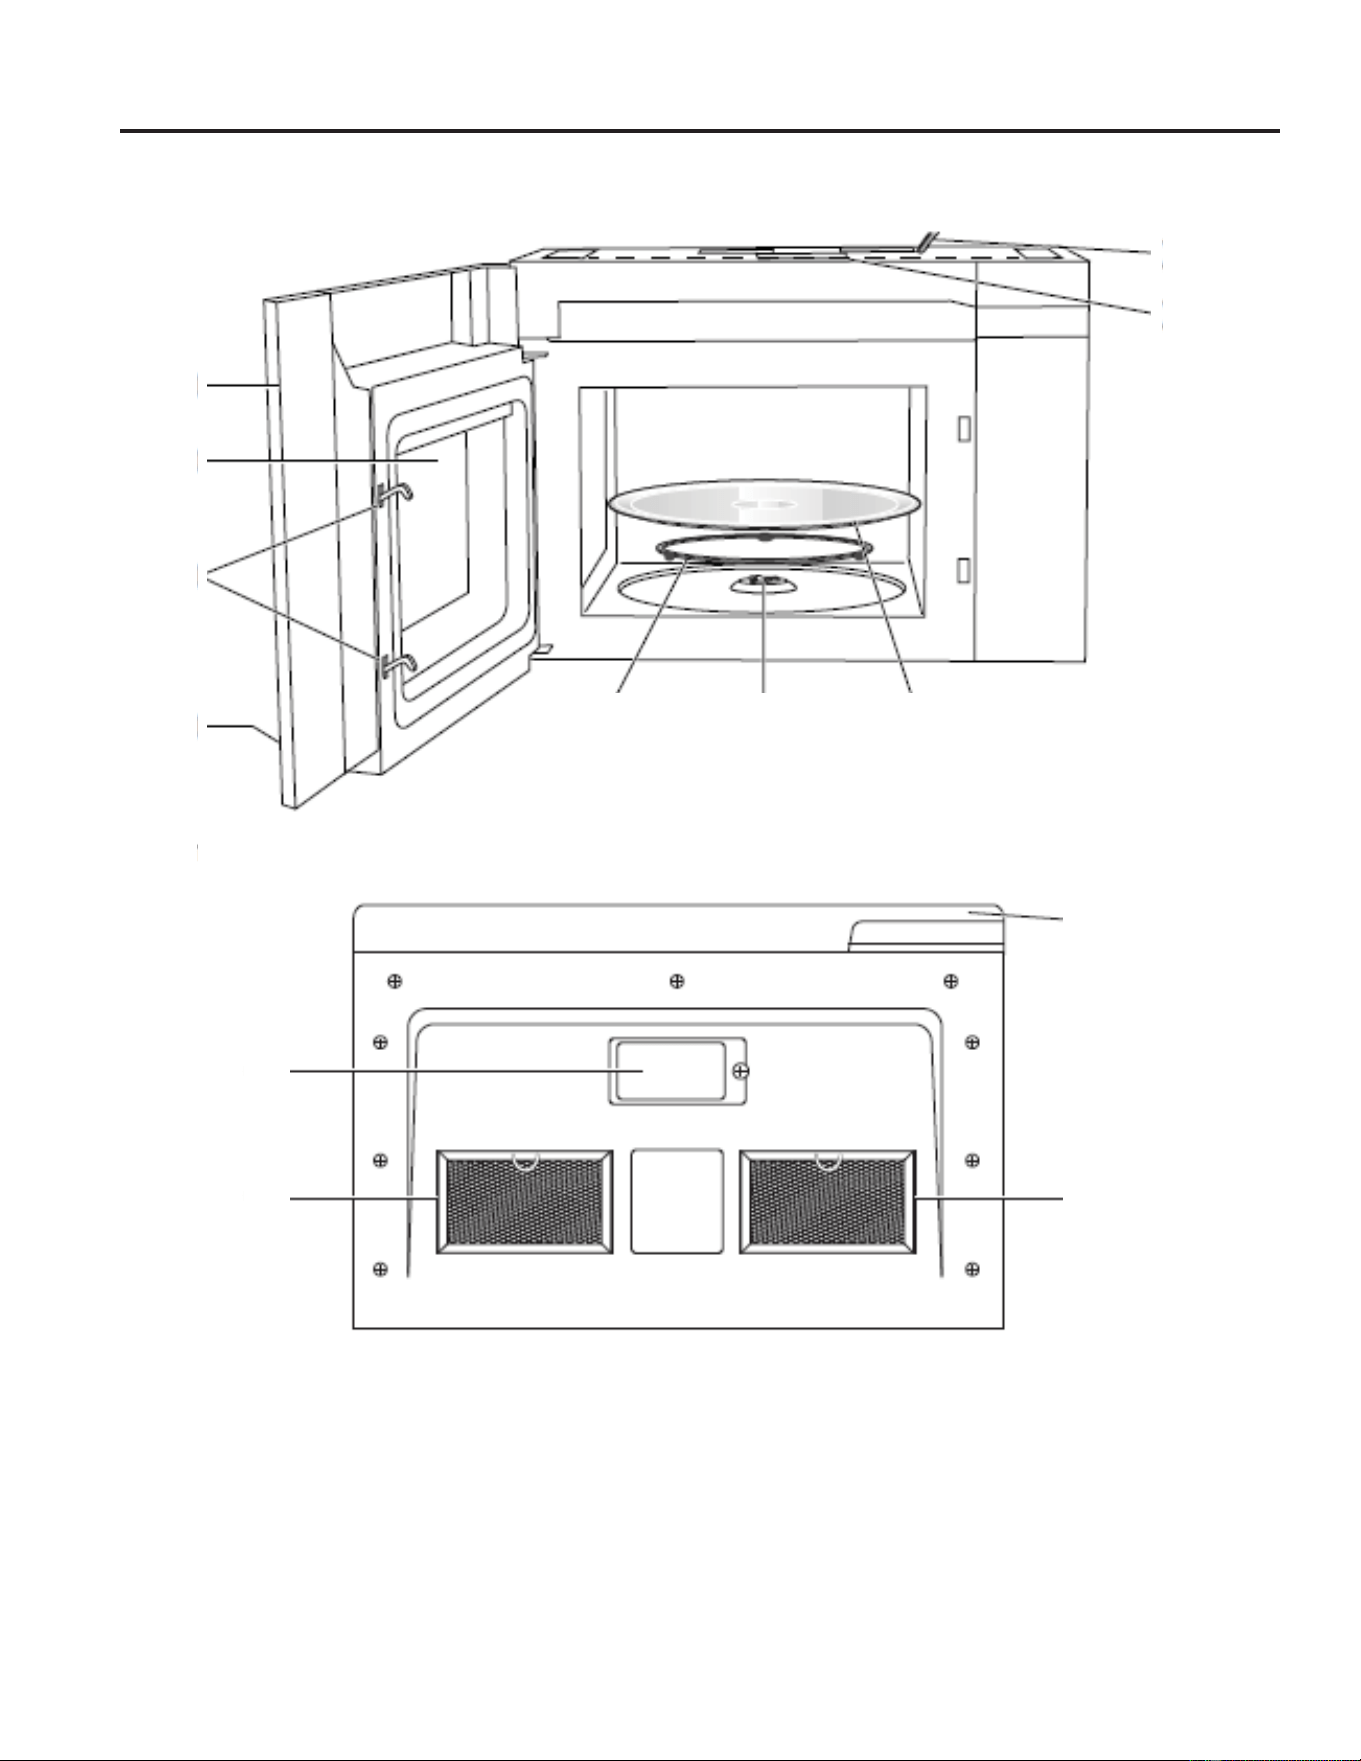
Parts and Features
Throughout this manual, features and appearance may vary from your model.
USING YOUR OVEN
A. Door
B. Window
C. Interlock System
D.&RQWURO3DQHO
E. Turntable Ring Assembly
F. Turntable Coupler
G. Glass Turntable
H. Top Grille
I.3RZHU&RUG
J. Surface Lights
K. Grease Filters
A
B
C
D
EFG
H
I
A
K
J
K
Front View
Bottom View
49-70000248 Rev. 0 7
USING YOUR OVEN
Parts and Features
Specifications
Model Number
GVMB14S4
Rated Voltage 120V~60Hz
5DWHG,QSXW3RZHU0LFURZDYH 1500 Watt
5DWHG2XWSXW3RZHU0LFURZDYH 1000 Watt
Oven Capacity 1.4 cu.ft
Turntable Diameter 13-1/2” (34.5 cm)
External Dimensions (W x D x H) 23-7/8 “ x 16-3/16 “ x 17” (60.6 cm x 41.1 cm x 43.2 cm)
Net Weight 57.3 lbs (26 kg)
LED Lighting Service Replacement only
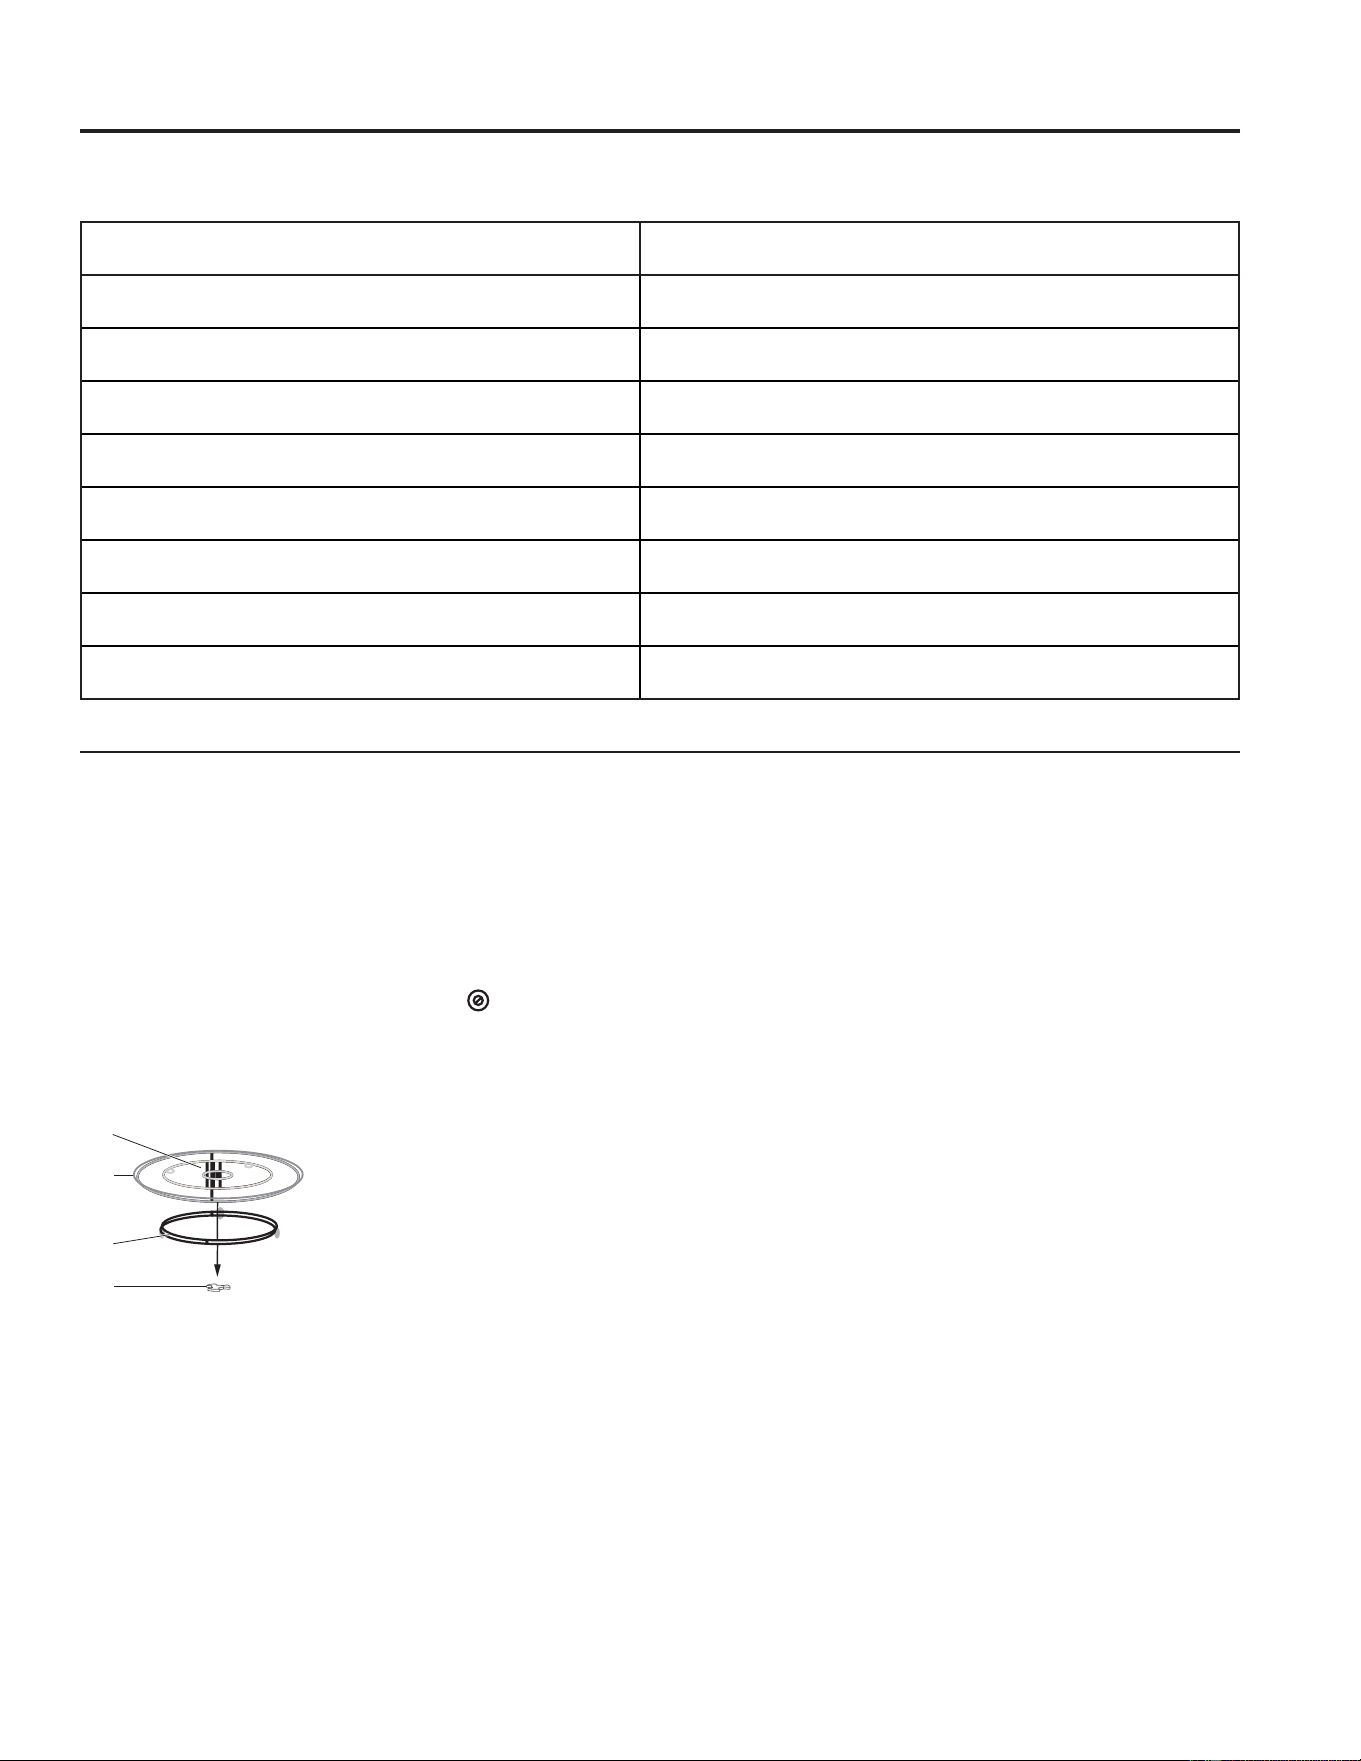
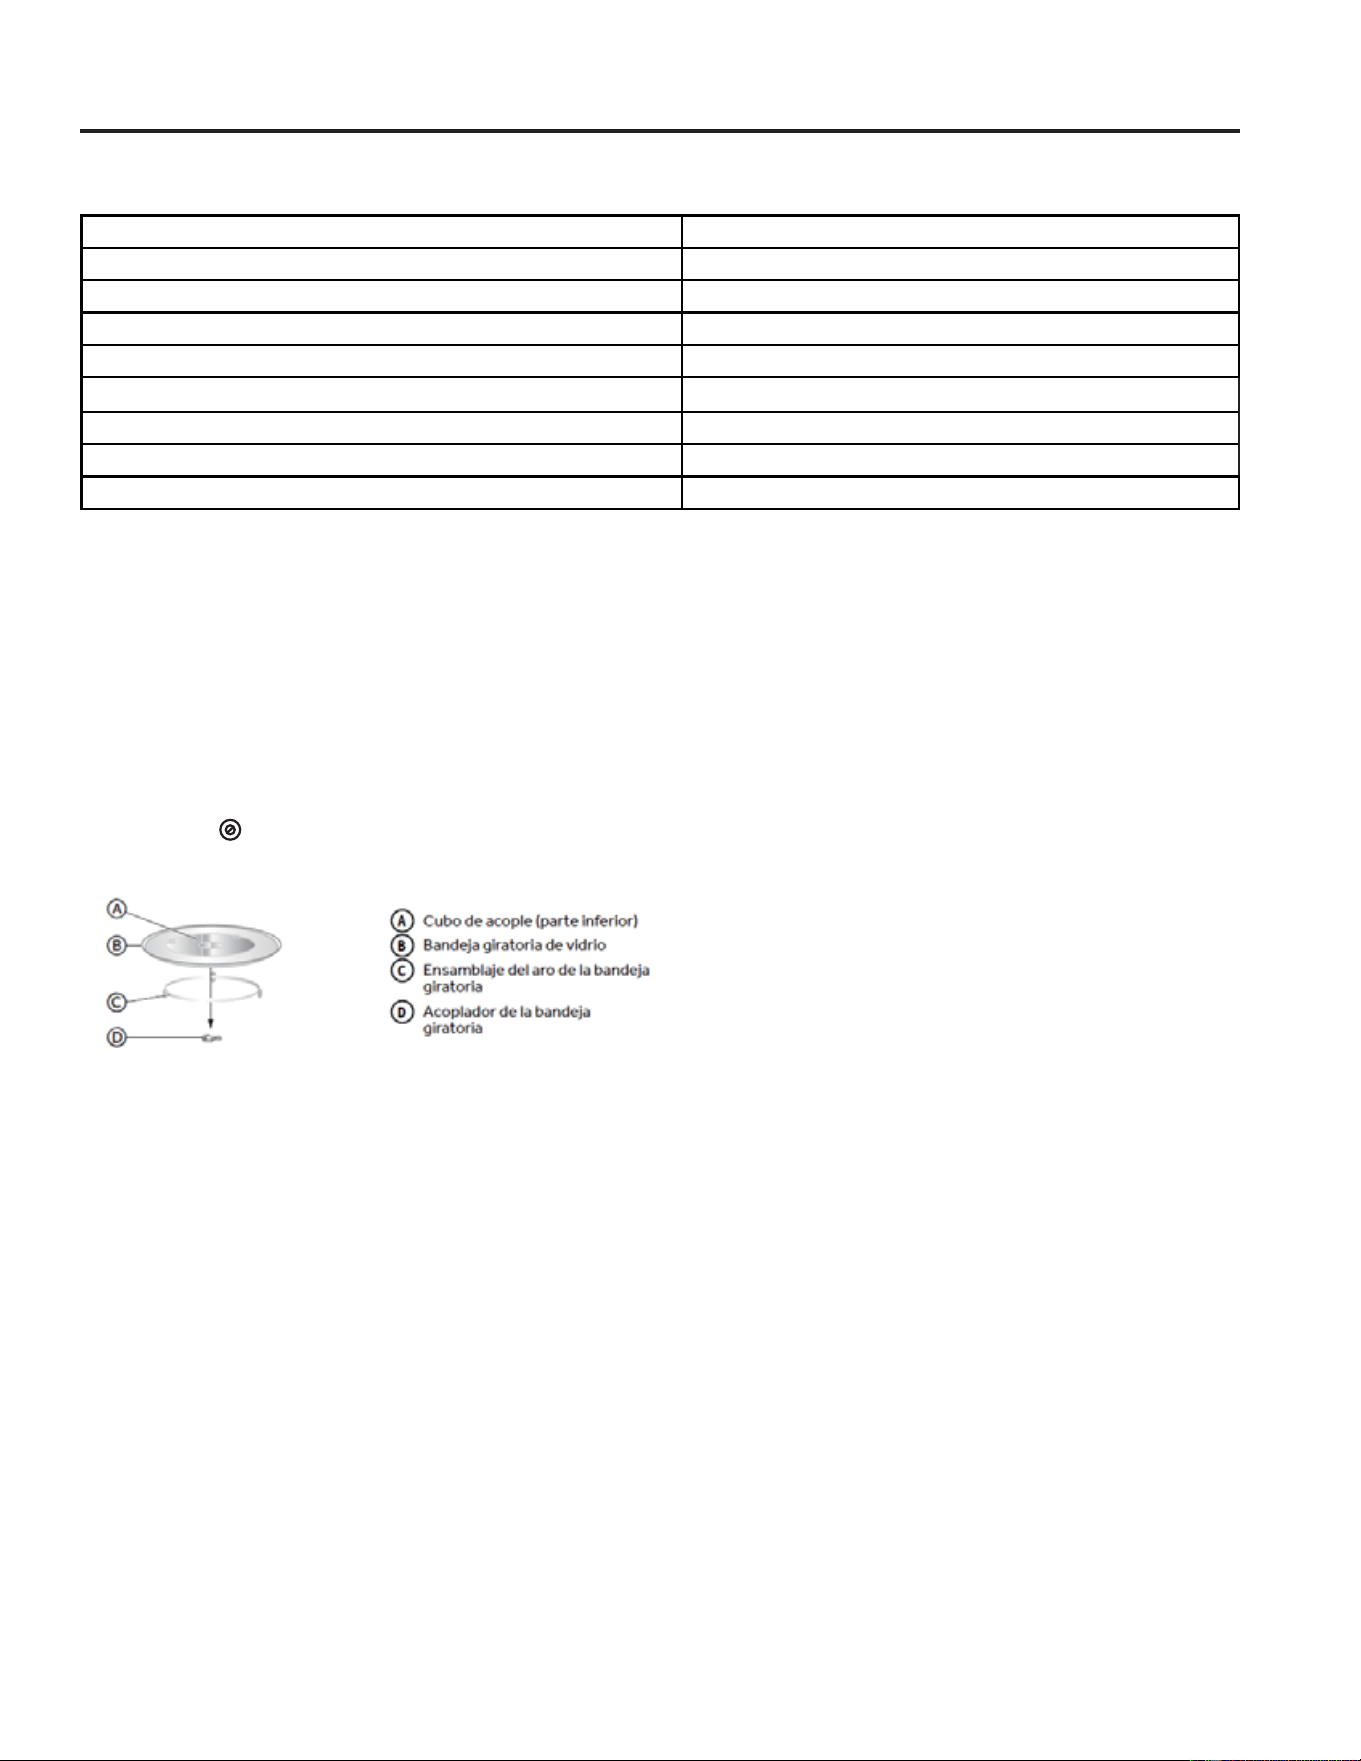
Turntable
• The turntable ring assembly and the glass turntable
must be used during cooking.
• If you are using large or oblong-shaped cookware
that would touch the walls of the microwave when the
turntable spins, you can turn o the turntable.
• 3UHVVTURNTABLE. “OFF” and the icon will
appear in the display.
• Assemble the turntable as shown
A
B
C
D
A: Hub (underside)
B: Glass Turntable
C : Turntable Ring Assembly
D : Turntable Coupler
NOTE:
• Do not place the glass turntable upside down.
• The glass tray should never be restricted.
3ODFHDOOIRRGDQGFRQWDLQHUVRIIRRGRQWKHJODVVWUD\
for cooking.
• If glass turntable or turntable ring assembly cracks or
breaks, contact the Customer Satisfaction Center at
1-877-337-3639 or the parts department at
encompassparts.com.

8 49-7000248 Rev. 0
Clock
Your model features a 12-hour clock.
SET TIME OF DAY
1. 3UHVVCLOCK to enter the Clock Setting mode. "12:00
35(66&/2&.(17(57,0(ZLOODSSHDULQWKH
display.
2. 3UHVVWKHQXPEHUSDGVWRHQWHUWKHFRUUHFWWLPHRI
day. For example, if the time is 10:12, press number
pads "1, 0, 1, 2" to enter the time.
3.3UHVVSTART to confirm the time.
KITCHEN TIMER
The microwave features a convenient timer for your
cooking needs.
1.3UHVVKITCHEN TIMER. “ENTER TIME” will appear in
the display.
2. 3UHVVWKHQXPEHUSDGVWRLQSXWWKHGHVLUHGFRRNLQJ
time.
NOTE: The maximum cooking time is 99 minutes and 99
seconds.
3.3UHVVSTART to begin counting down the time.
NOTE: When the set time has expired, "END" will appear
in the display and three long alert tones will sound.
4.3UHVVSTOP to exit the Kitchen Timer Function.
Control Panel
USING YOUR OVEN
A
I
B
J
C
K
D
L
EF G H
NM
A. Sensor Cook
B.3RSFRUQ
C. Reheat
D.3RZHU/HYHO
E. Kitchen Timer
F. Display
G.1XPEHU3DGV
H. Stop / Cancel / Lock
I. Defrost
J. Turntable On/Off
K. Light On/Off
L. Vent Hi-Lo-Off
M. Clock
N. Start / +30 Sec

49-70000248 Rev. 0 9
VENT FAN
The vent fan feature allows you to exhaust heat and
steam from the cooking surface below.
3UHVVVENT HI-LO-OFF to Turn On/Off the fan and to
regulate the fan speed.
NOTE:
• The fan speed cannot be adjusted if the control panel is
locked.
• When the control is pressed the first time, “High”
appears in the display.
+LJK6SHHG3UHVVRQFH
/RZ6SHHG3UHVVWZLFH
2))3UHVVWKUHHWLPHV
SURFACE LIGHTING
The surface light feature illuminates the cooking surface
below the microwave oven.
3UHVVLIGHT to toggle among High, Low and OFF.
CHILD LOCKOUT
The Child Lock feature allows you to lock the microwave
control panel for easy cleaning or to avoid unintentionally
changing the settings or turning on the microwave oven.
To Lock/Unlock the control panel:
3UHVVSTOP/CANCEL for 3 seconds. Two beeps
will sound to indicate the lock has been activated/
deactivated and "LOCKED" or "UNLOCK" will appear
in the display.
STATUS RECALL
The Status Recall feature allows you to check the Time
DQG3RZHUVHWWLQJVGXULQJPLFURZDYHFRRNLQJ
3UHVVPOWER LEVEL to display the set power level
3UHVVCLOCK to display the time.
Control Panel
USING YOUR OVEN
10 49-7000248 Rev. 0
TIMED COOKING
1.3UHVVWKHQXPEHUSDGVWRVHWWKHFRRNLQJWLPH
For example, to cook for 10 minutes, press “1,0,0,0”
in turn.
NOTE:
• The maximum cooking time is 99 minutes and
99 seconds.
• 100% power is the default. If you wish to cook at 100% power,
skip steps 2 and 3, and go directly to Step 4.
2.3UHVVPOWER LEVELWRDFWLYDWH3RZHUPRGH
3.
3UHVVWKHQXPEHUSDGVRUSUHVVPOWER LEVEL repeatedly
WRVHOHFWWKHGHVLUHGSRZHUOHYHO6HH³3RZHU/HYHOV´FKDUW
later in this section.
4.
3UHVVSTART to begin cooking. The time will count down.
NOTE: When cooking is finished, an alert tone sounds 3 times
and “End” appears in the display.
Variable power levels add flexibility to microwave cooking.
The power levels on the microwave oven can be compared
to the surface units on the range. Each power level gives you
microwave energy a certain percent of the time. Power level 7
is microwave energy 70% of the time. Power level 3 is energy
30% of the time. Most cooking will be done on High (power
level 10), which gives you 100% power. Power level 10 will
cook faster but food may need more frequent stirring, rotating,
or turning over. A lower setting will cook more evenly and needs
less stirring or rotating of the food. Some foods may have better
flavor, texture, or appearance, if one of the lower settings it
used. Use a lower power level when cooking foods that have
a tendency to boil over, such as scalloped potatoes and some
casseroles.
Rest periods (when the microwave energy cycles off) give
time for the food to "equalize" or transfer hea to the inside of
WKHIRRG$QH[DPSOHRIWKLVLVVKRZQZLWK3RZHUOHYHO²WKH
deforst cycle. If microwae energy did not cycle off, the outside
of the food would cook before the inside was defrosted.
Here are some examples of uses for various power levels:
Power Levels
Ten power levels are available.
Level 3RZHU Display Tips
10 100% 3/+, Fish, Bacon, Vegetables, Boiling Liquids
9 90% 3/ Gentle cooking of meat and poultry; baking
casseroles and reheating
8 80% 3/
7 70% 3/
6 60% 3/ Slow cooking and tenderizing for stews and
less tender cuts of meat
5 50% 3/
4 40% 3/
3 30% 3/ Defrosting; simmering; delicate sauces
2 20% 3/
1 10% 3/ Keeping food warm; softening butter
00%3/ -----------
CONVENIENCE COOKING
3UHVVSTART/+ 30 SEC to begin cooking at 100% microwave
power for 30 seconds.
3UHVVSTART/+ 30 SEC during microwave cooking, to
increase the cooking time in 30-second increments.
NOTE: The maximum cooking time is 99 minutes and 99
seconds.
3UHVVQXPEHUSDGVIURPWRWRVWDUWFRRNLQJZLWK
microwave power for 1 to 9 minutes.
NOTE: During Convenience cooking, the microwave power
level can be viewed, but not adjusted.
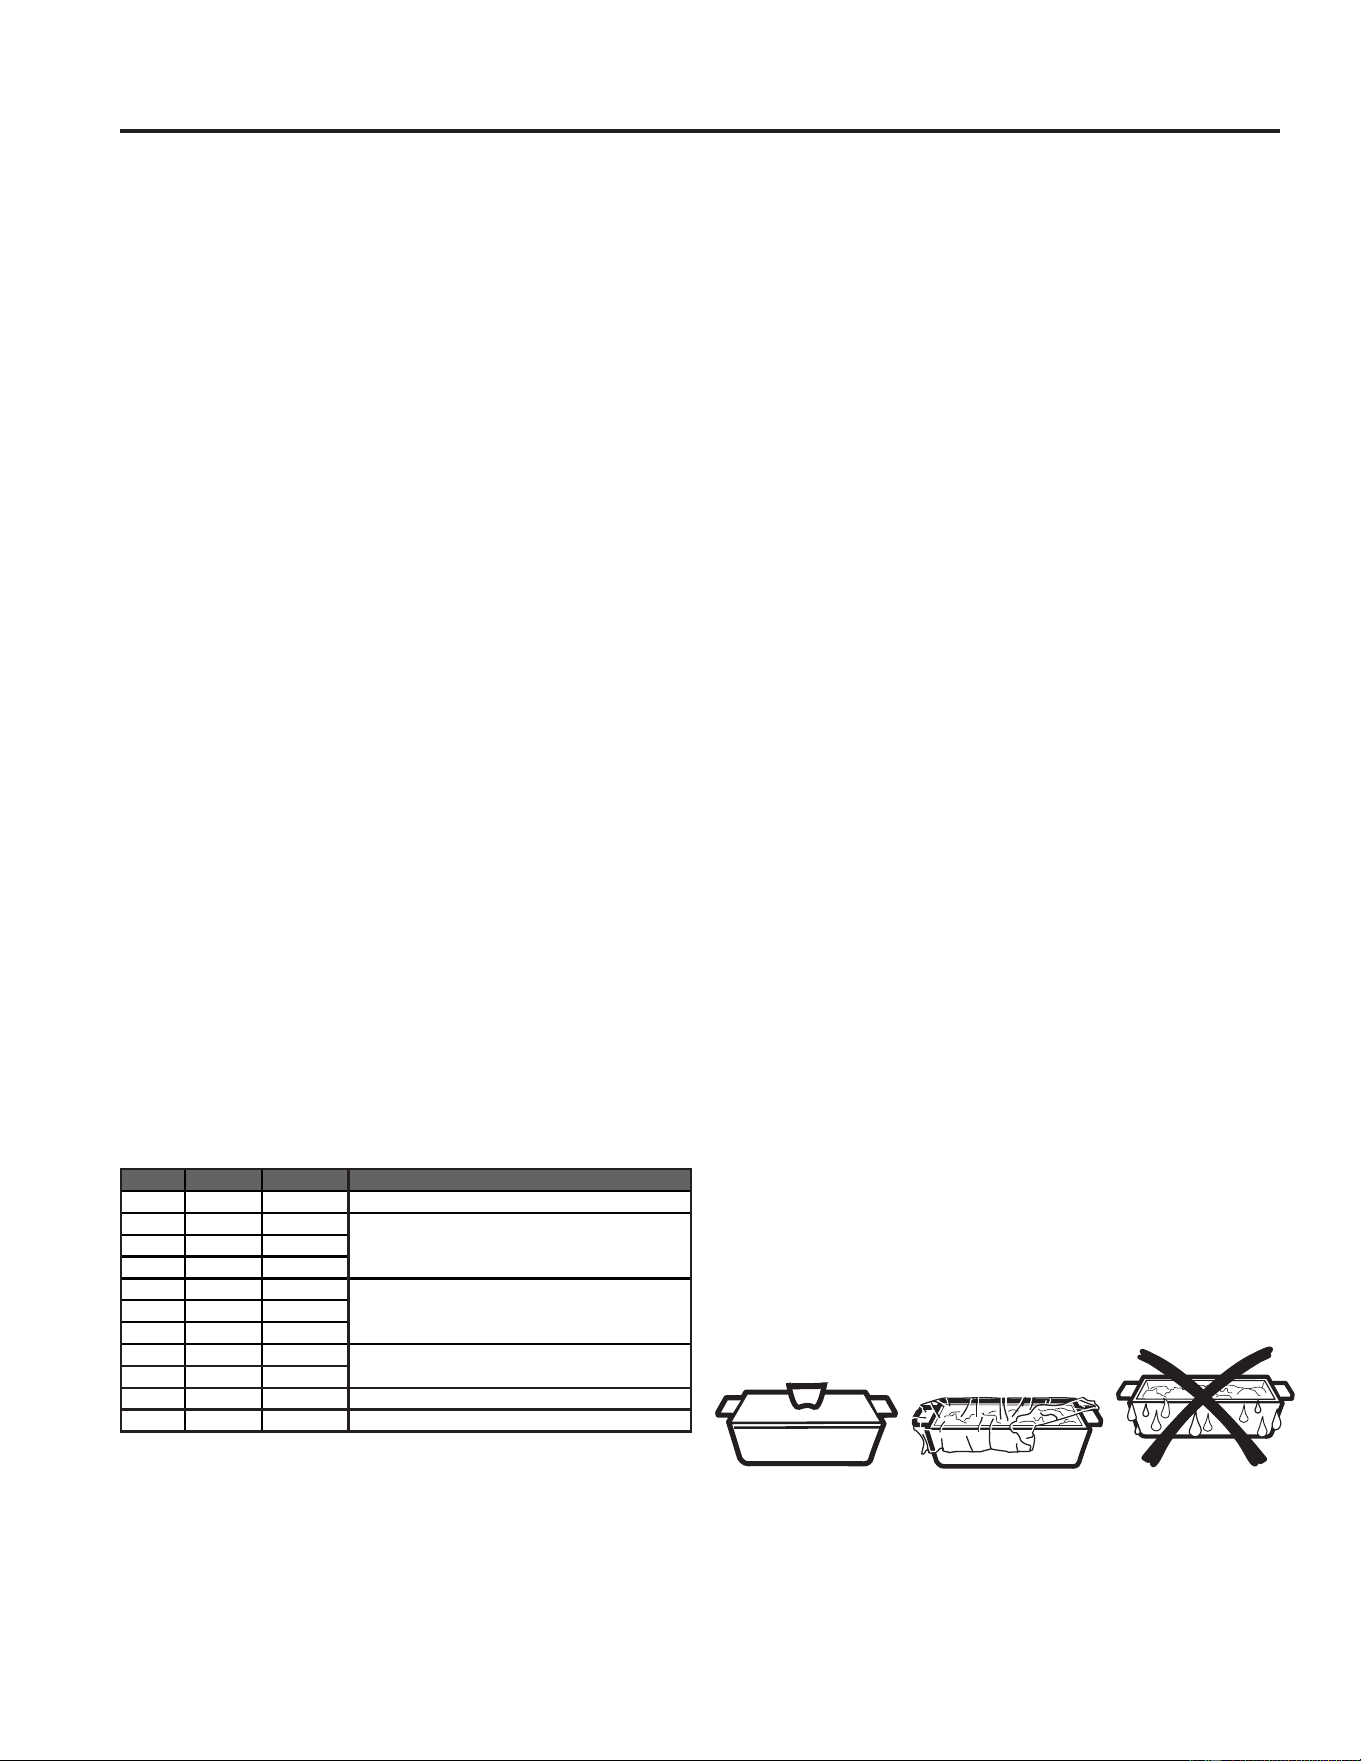
SENSOR COOK
The Sensor Cook control automatically sets the appropriate
cooking time calculated by sensing the moisture level of the
food or beverage being cooked.
The Sensor Cook control is programmed to cook the following
LWHPV3RWDWR)UHVK9HJJLHV)UR]HQ9HJJLHV)UR]HQ'LQQHU
White Rice, Frozen Breakfast, and Ground Meat.
For best results when using sensor cooking, use
microwave-safe containers and cover the containers with
vented lids or vented plastic wrap.
1.
3ODFHWKHFRYHUHGFRQWDLQHULQWKHPLFURZDYHRYHQ
2.3UHVVSENSOR COOKRQFH³3RWDWR´ZLOODSSHDURQWKH
display. Continue to press SENSOR COOK to toggle among
the choices unitl the desired item appear in the display.
3.3UHVVSTART to confirm and begin cooking.
4.
Once start is pressed, the sensing process begins. When the
sensing process is completed, alert tones will sound and the
calculated cook time will begin to count down.
NOTE: Do not open the door during the sensing process. If you
do, the Sensor Cook program will be cancelled.
5.
If the food is undercooked, use the Timed or Convenience
Cooking function to cook food to the desired degree.
Humidity Sensor
The Sensor Features detect the increasing humidity released
during cooking. The oven automatically adjusts the cooking
time to various types and amounts of food.
Do not use the Sensor Features twice in succession on the
same food portion—it may result in severely overcooked or
burnt food. If food is undercooked after the countdown, use
Time Cook for additional cooking time.
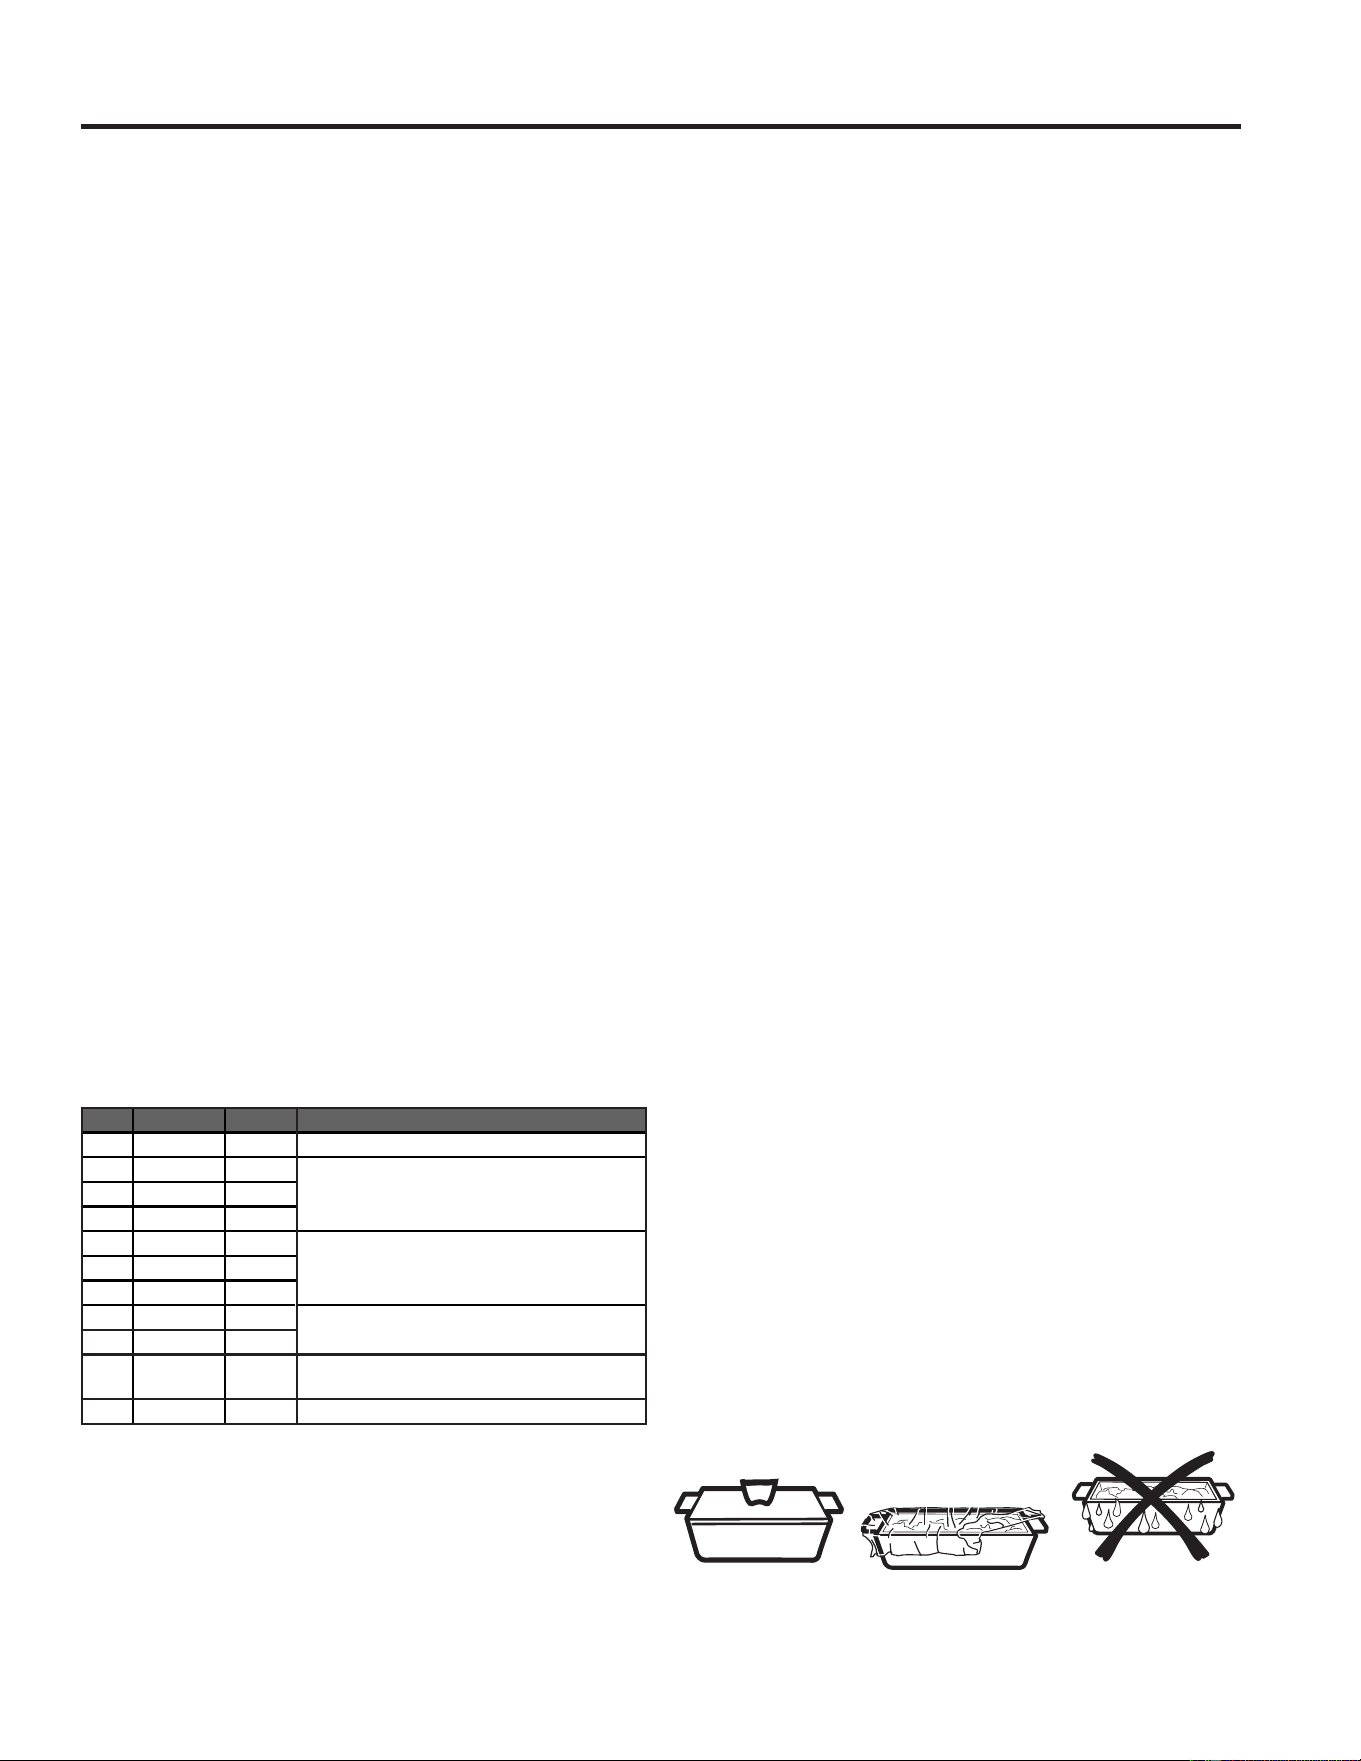
• The proper containers and covers are essential for best
sensor cooking.
• Always use microwave-safe containers and cover them with
lids or vented plastic wrap. Never use tight sealing plastic
containers—they can prevent steam from escaping and cause
food to overcook.
• Be sure the outside of the cooking containers and the inside
of the microwave oven are dry before placing food in the
oven. Beads of moisture turning into steam can mislead the
sensor.
Dry off dishes so they
don’t mislead the
sensor.
Vented
Covered
Microwave Oven Use
USING YOUR OVEN
49-70000248 Rev. 0 11
Sensor Cooking Programs
DEFROST
The Defrost function is programmed to automatically
defrost select items by weight. The Defrost control allows
\RXWRVHOHFWDPRQJWKHIROORZLQJLWHPV0HDW3RXOWU\
Fish, and Bread.
1.
3UHVVDEFROST once. "Meat" will appear on the display.
2.
Continue to press DEFROST to toggle among the
choices until the desired item appears on the display.
3.
3UHVVSTART to confirm your item selection. "Enter
Weight" will appear in the display.
4.
3UHVVWKHQXPEHUSDGVWRHQWHUWKHZHLJKWRIWKHLWHP
to be defrosted. For example, if the food weight is 1.2
lbs, press "1" and then "2" to enter the weight.
NOTE: The weight of the food item should be between
0.1 to 6.0 lbs. The maximum weight that will be accepted
is 6.0 lbs.
5.3UHVVSTART to begin defrosting.
Conversion Guide
If the weight of food is stated in pounds and ounces, the
ounces must be converted to tenths (.1) of a pound.
Ounces 3RXQGV
1-2 .1
3.2
4-5 .3
6-7 .4
8.5
9-10 .6
11 .7
12-13 .8
14-15 .9
Defrosting Tips
• Foods frozen in paper or plastic can be defrosted in
the package. Closed packages should be slit, pierced
RUYHQWHG$)7(5IRRGKDVSDUWLDOO\GHIURVWHG3ODVWLF
storage containers should be partially uncovered.
• Family-size, prepackaged frozen dinners can be
defrosted and microwaved. If the food is in a foil
container, transfer it to a microwave-safe dish.
• For more even defrosting of larger foods, such as
roasts, use Defrost Weight. Be sure large meats are
completely defrosted before cooking.
• Foods that spoil easily should not be allowed to sit
out for more than an hour after defrosting. Room
temperature promotes the growth of harmful bacteria.
• When defrosted, food should be cool but softened in all
areas. If still slightly icy, return to the microwave very
briefly, or let it stand for a few minutes.
REHEAT
The Reheat function is programmed to reheat the
IROORZLQJLWHPV%HYHUDJH'LQQHU3ODWH3L]]D6RXS
Sauce and Casserole.
The Reheat function sets the appropriate heating time
automatically. Depending on the item being reheated, the
heating time is calculated by either the amount of food
or beverage (Timed Cooking) or by sensing the moisture
level of the food or beverage (Sensor Cooking).
For best results when reheating items that use Sensor
Cooking, use microwave-safe containers and cover the
containers with vented lids or vented plastic wrap.
NOTE:
• Do not use tight-sealing covers that would keep the
steam from escaping, and cause the food to overcook.
• Make sure the outside of the microwave-safe container
and the inside of the oven are dry before placing the
container in the microwave oven. Any moisture will turn
into steam which can mislead the sensors.
1.
3ODFHWKHIRRGRUEHYHUDJHLWHPLQWKHPLFURZDYHRYHQ
2.3UHVVREHEAT once, “BEVERAGE” will appear on the
display. Continue to press
3.3UHVVSTART to confirm and begin reheating.
NOTE:
• If the heating time for your item is calculated by sensing
moisture, the Sensing process begins once Start is
pressed.
• Do not open the door during the Sensing process. If you
do, the Reheat program will be cancelled.
• When the Sensing process is completed, alert tones
will sound and the calculated reheat time will begin to
count down.
After removing food from the oven, stir, if possible, to
even out the temperature. If the food is not hot enough,
use Cook Time to reheat for more time. Reheated foods
may have wide variations in temperature. Some areas
may be extremely hot.
It is best to use Cook Time for these foods:
%UHDG3URGXFWV
• Foods that must be reheated covered.
• Foods that need to be stirred or rotated during
reheating.
• Foods calling for a dry look or crisp surface after
reheating.
Microwave Oven Use
USING YOUR OVEN
3URJUDP Item Quantity
1 %DNHG3RWDWR 1 - 4 potatoes
2 Fresh Vegetable 1 - 3 cups
3 Frozen Vegetable 1 - 3 cups
4 Frozen Dinner 10 - 20 oz.
5 White Rice 1 - 2 cups
6 Frozen Breakfast 8 - 12 oz.
7 Ground Meat 9 - 19 oz.
12 49-7000248 Rev. 0
Care and Cleaning
Optional Kits
Microwave Terms
CLEANING
IMPORTANT:
• Disconnect power before cleaning.
• Before cleaning, make sure all controls are off and the
microwave oven is cool. Always follow label instructions on
cleaning products.
• To avoid damage to the microwave oven caused by arcing
due to soil buildup, keep the oven cavity, top grille and the
area where the door touches the oven frame clean.
1.
Using a warm water and mild soap solution and a soft
cloth or sponge, clean the oven cavity, frame and oven
exterior.
2. Rinse with clean warm water and dry with a soft cloth.
NOTE: Do not use scouring powder or rough scouring
pads on the microwave. The glass turntable may be washed
and dried in the dishwasher. For stainless steel models, a
stainless steel cleaner may be used on the exterior.
Recirculating Charcoal Filter Kit
WB02X28929 – Charcoal Filter
Filter kits are used when the microwave oven cannot be
vented to the outside.
Reheat Programs
3URJUDP Item Quantity
1 Beverage 1 to 3 cups
2 'LQQHU3ODWH 1 plate
3 3L]]D 1 to 4 slices
4 Soup/Sauce 1 to 3 cup
5 Casserole/Lasagna 10.5 oz.
POPCORN
The popcorn control is programmed to pop microwave
popcorn based on the size of the bag.
1.3UHVVPOPCORN to toggle between the bag sizes.
3UHVVWLPH7RSRSDRXQFHEDJRISRSFRUQ
3UHVVWLPHV7RSRSDRXQFHEDJRISRSFRUQ
2.3UHVVSTART to confirm selection and begin cooking.
The popping time will appear on the display.
Term Definition
Arcing Arcing is the microwave term for sparks in the oven. Arcing is caused by:
• metal or foil touching the side of the oven.
• foil that is not molded to food (upturned edges act like antennas).
• metal such as twist ties, poultry pins, gold-rimmed dishes.
• recycled paper towels containing small metal pieces.
• plates or dishes with a metallic trim or glaze with a metallic sheen.
Covering Covers hold in moisture, allow for more even heating and reduce cooking time. Venting plastic wrap or covering with wax
paper allows excess steam to escape.
Shielding In a regular oven, you shield chicken breasts or baked foods to prevent over-browning. When microwaving, you use small
strips of foil to shield thin parts, such as the tips of wings and legs on poultry, which would cook before larger parts.
Standing Time When you cook with regular ovens, foods such as roasts or cakes are allowed to stand to finish cooking or to set. Standing
time is especially important in microwave cooking. NOTE: A microwaved cake is not placed on a cooling rack.
Venting After covering a dish with plastic wrap, you vent the plastic wrap by turning back one corner so excess steam can escape.
Microwave Oven Use
USING YOUR OVEN/CARE AND CLEANING
49-70000248 Rev. 0 13
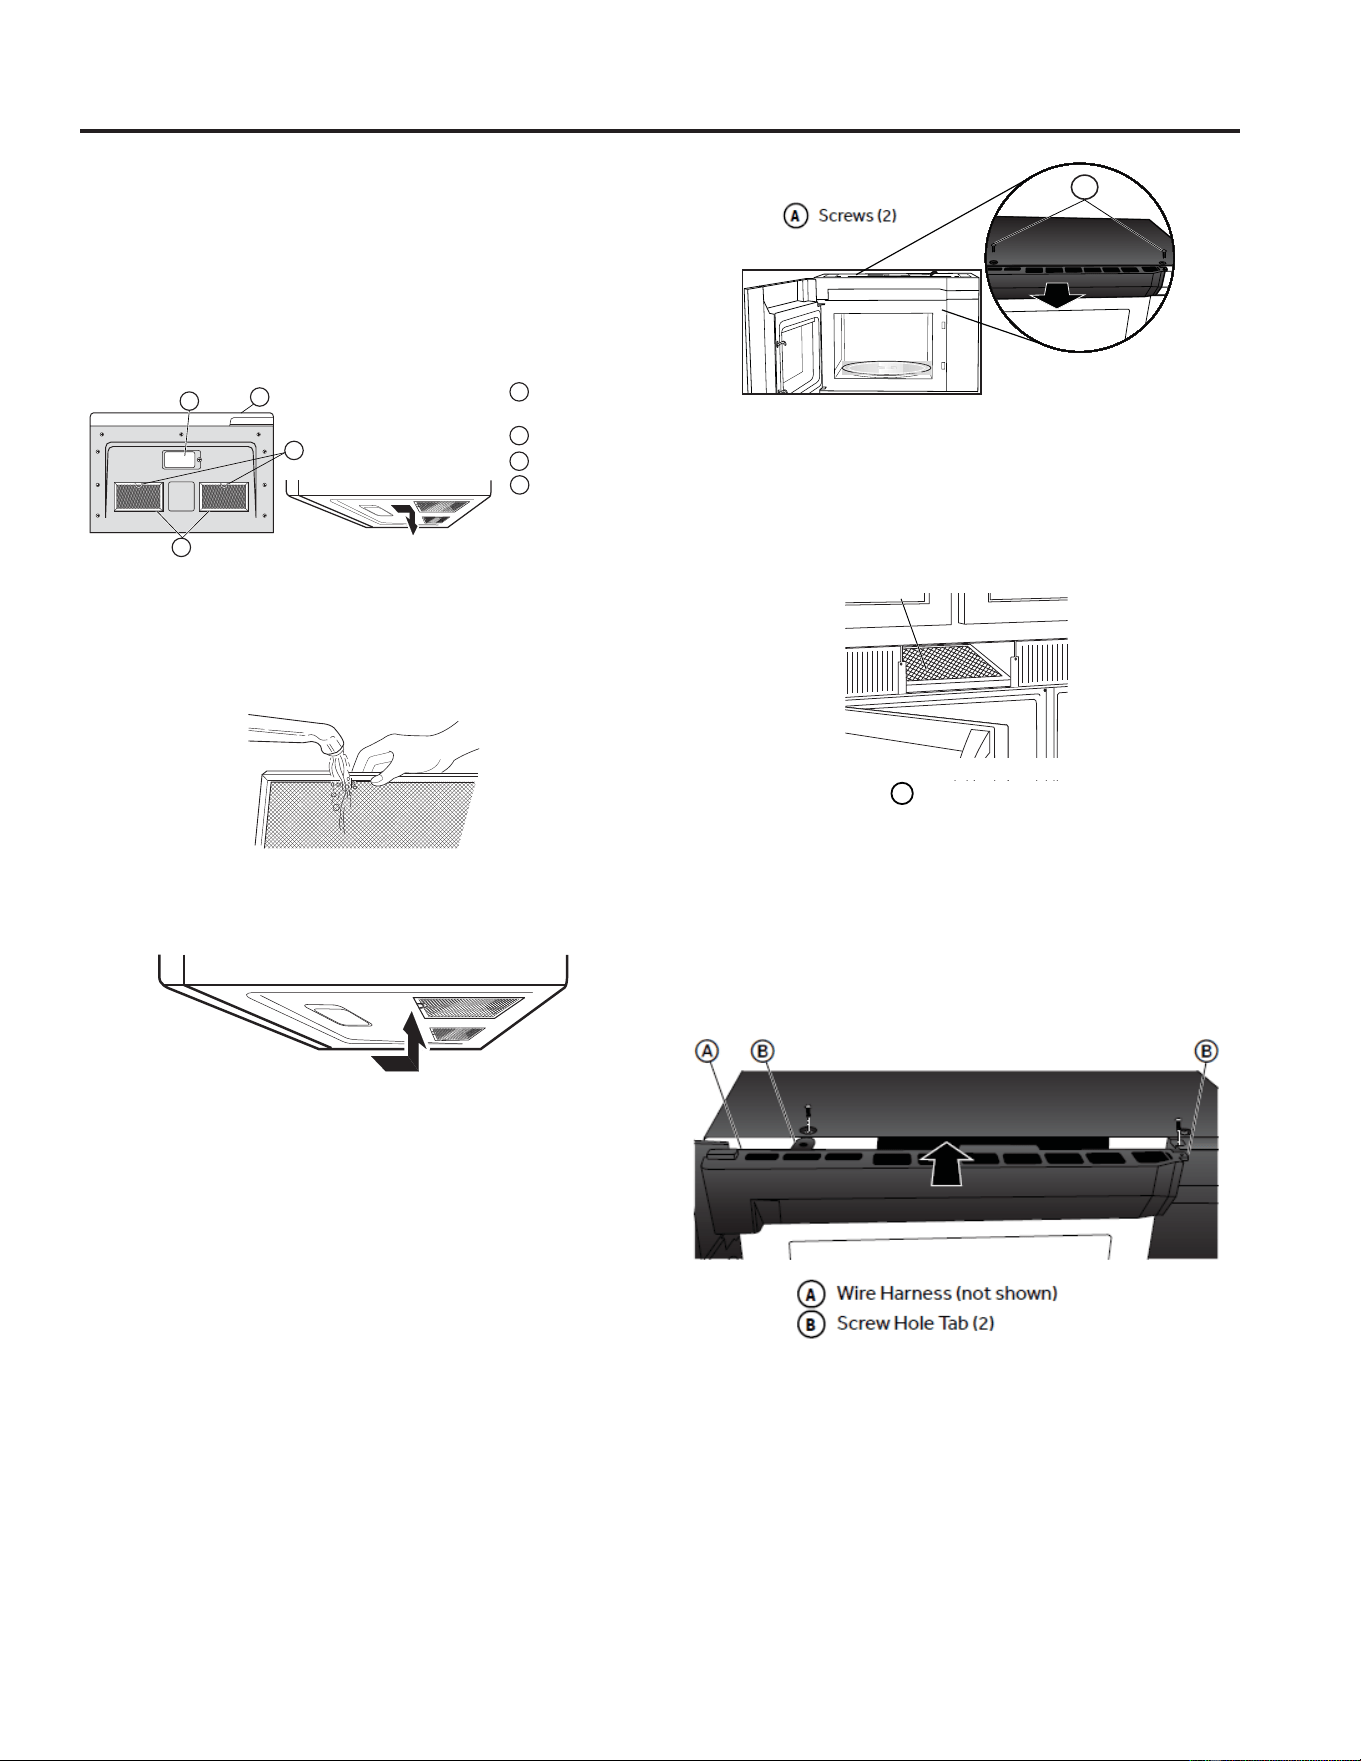
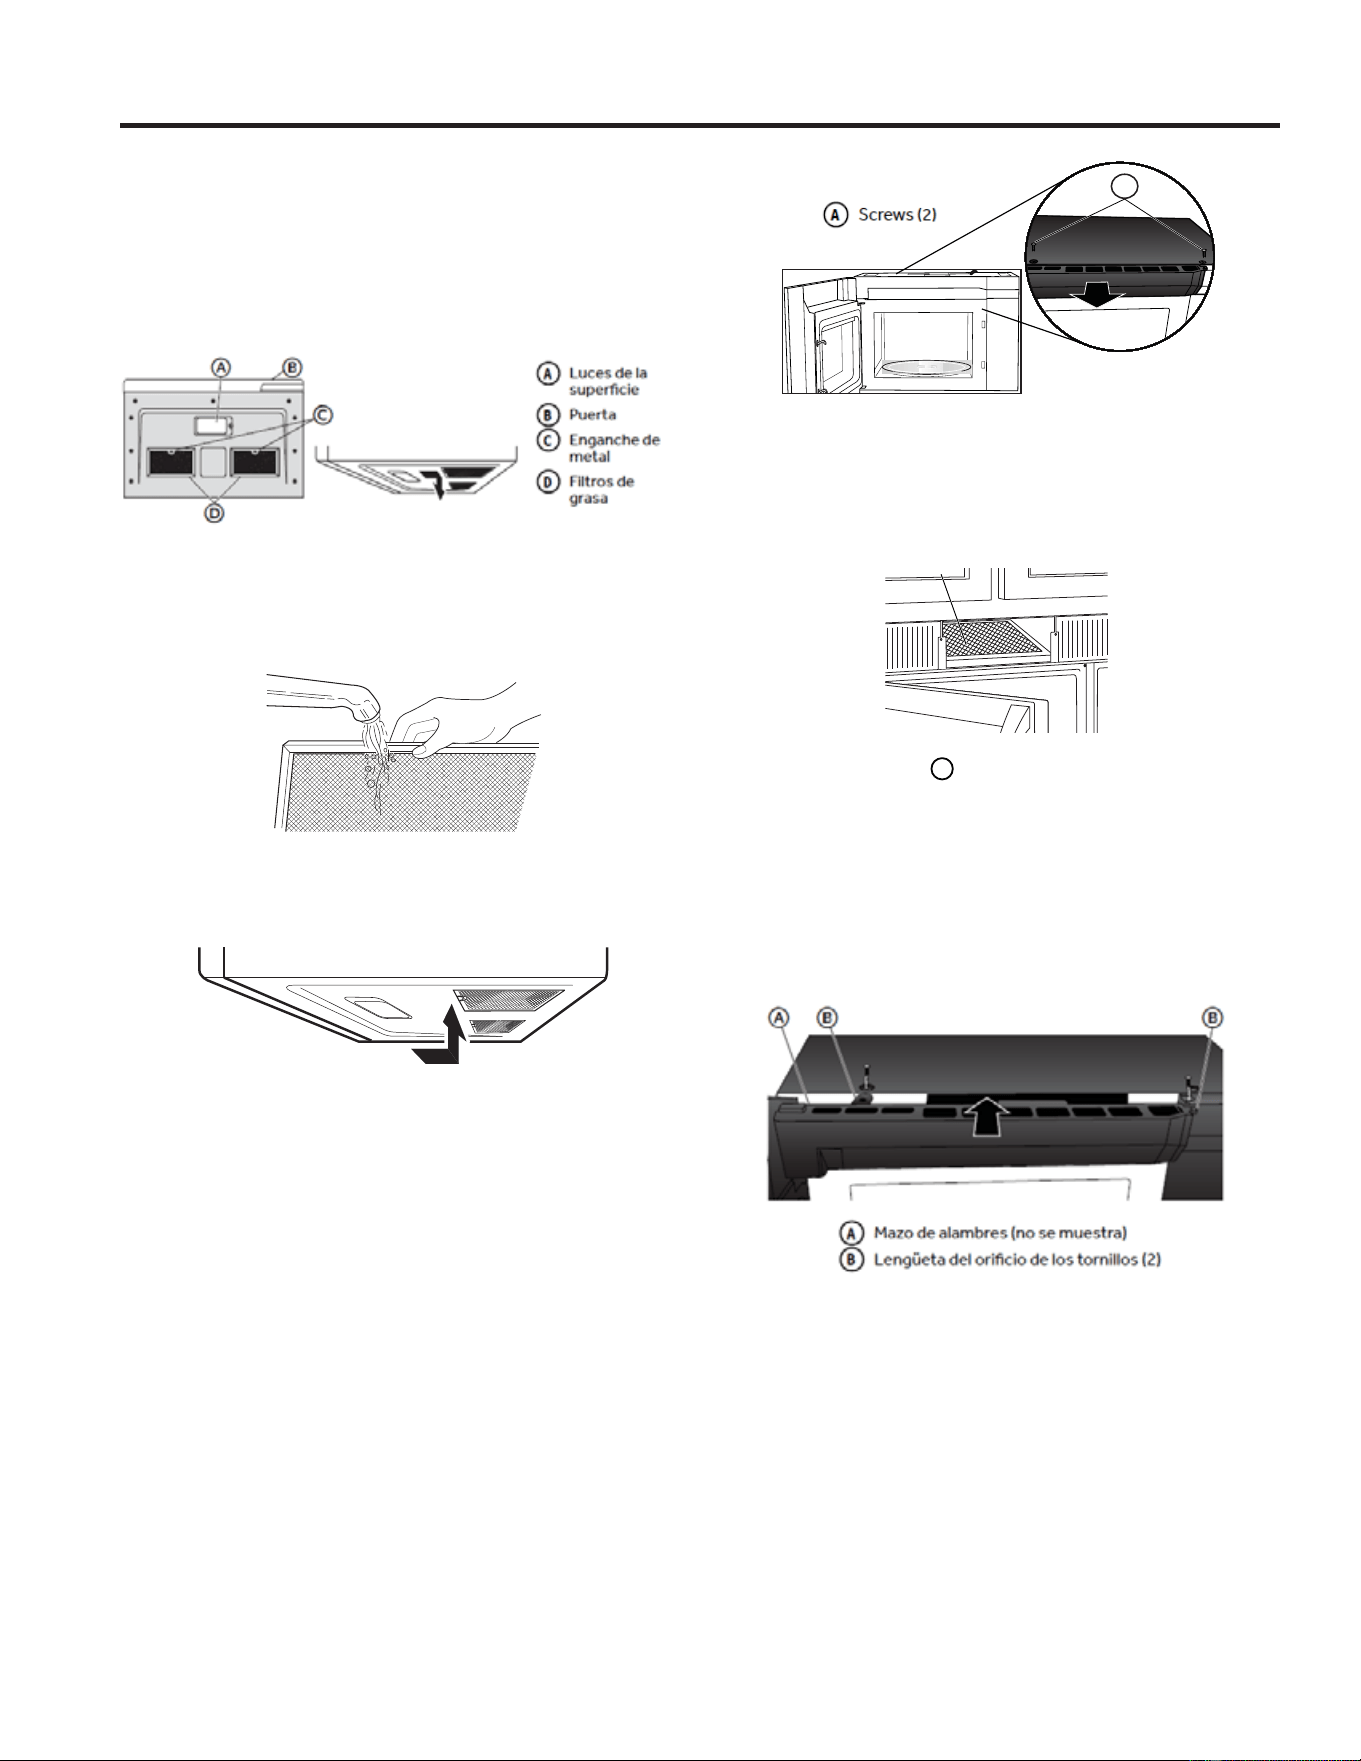
GREASE FILTER(S)
Grease filters are located on the underside of microwave
oven. The grease filters should be removed and cleaned
often; generally at least once every month.
1. Remove the grease filter. Grasp the metal ring, slide
the filter toward the back, and then gently pull the filter
downward. Repeat for the second filter.
Surface
Lights
Door
Metal Loop
Grease
Filters
A
A
B
B
C
C
D
D
2. Soak the grease filters in hot water with a mild
detergent added. Rinse well and shake to dry.
NOTE: Do not use ammonia or wash in a dishwasher.
The aluminum on the filter will corrode and darken.
3. Reinstall the grease filter by inserting the back edge of
the filter into the opening and gently pushing it up into
place. Repeat for the second filter.
CHARCOAL FILTER
IMPORTANT: A charcoal must be installed in the
microwave oven when it is used in a non-vented
(recirculating) installation. Your microwave oven comes
from the factory with the charcoal installed.
The charcoal cannot be cleaned, so it must be replaced
at least every 6 months or more often depending on use.
To order a replacement charcoal for your model, contact
the Customer Satisfaction Center. See “Back Cover” for
contact information.
1. Unplug or disconnect power.
2.8VLQJD3KLOOLSVVFUHZGULYHUUHPRYHVFUHZVIURPWKH
top grille.
3. Open the microwave door so you can grasp the top
grille, and then pull the grille straight out to remove.
A
4. Remove the used charcoal from the back of the grille,
and then discard the filter.
5. Align the holes in the new charcoal filter with the five
posts on the back of the grille, and gently press down
to attach.
A
Charcoal Filter
a
6. Align the top edge of the grille so that when the grille
is pushed into place the screw holes align with holes
in the microwave cabinet. Gentilly push grille until it
snaps into place and screw holes are aligned.
NOTE: Make sure that the wire harness, located near the
door hinge, is not pinched when you are replacing the top
grille.
7. Replace the two screws removed earlier, and tighten
the screws completely.
LIGHTS
IMPORTANT: Your microwave oven features LED interior
lighting as well as LED surface lighting. These lights
are designed to last for the life of your microwave oven.
However, if the lights stop illuminating, please contact a
technician for replacement or the Customer Satisfaction
Center for service. See the back cover for contact
information.
Care and Cleaning
CARE AND CLEANING
14 49-7000248 Rev. 0
Problem Possible Causes What to do
Oven will not start Microwave oven power cord is not plugged
into an electrical outlet.
3OXJLQWRDJURXQGHGSURQJRXWOHW
Door is open. Close the door and try again.
Wrong operation is set. Check instruction.
"KEYPAD SHORTED--- SERVICE
MAY BE NEEDED" appears on
display
A key has been activated for more than 60
VHFRQGV3UHVVStop/Cancel to clear the
display. This can happen if liquid is on the
control panel.
Dry the control panel thoroughly after
cleaning.
"FOOD" appears on display along
with beeping
Key press has been detected and the door
has not been opened within 5 minutes of
the last key press.
Open and close the door and reattempt
new cycle.
"LOCKED" appears on display The control has been locked. 3UHVVDQGKROGStop/Cancel for 3
seconds. Two beeps will sound and then
"UNLOCKED" will appear on display.
FEDERAL COMMUNICATIONS COMMISSION
(U.S.A.) RADIO FREQUENCY INTERFERENCE
STATEMENT
This equipment generates and uses ISM frequency
energy and if not installed and used properly, that is in
strict accordance with the manufacturer's instructions,
may cause interference to radio and television
reception. It has been type tested and found to comply
with limits for an ISM Equipment pursuant to part 18 of
FCC Rules, which are designed to provide reasonable
protection against such interference in residential
installation. However, there is no guarantee that
interference will not occur in a particular installation.
If this equipment does cause interference to radio
or television reception, which can be determined
by tuning the equipment off and on, the user is
encouraged to try to correct the interference by one or
more of the following:
• Reorient the receiving antenna of radio or television.
• Relocate the Microwave oven with respect to the
receiver.
• Move the microwave oven away from the receiver.
3OXJWKHPLFURZDYHRYHQLQWRDGLIIHUHQWRXWOHWVR
that the microwave oven and receiver are on different
branch circuits.
The manufacturer is not responsible for any radio of TV
interference caused by unauthorized modification to
this microwave oven. It is the responsibility of the user
to correct such interference.
Troubleshooting Tips...Before you call for service
TROUBLESHOOTING

49-70000248 Rev. 0 15
GEAppliances.com
All warranty service is provided by our Factory Service Centers, or an authorized service technician. To schedule
service online, visit us at GEAppliances.com/service or call 800.GE.CARES (800.432.2737) during normal business
hours.
What GE Appliances will not cover:
Ŷ6HUYLFHWULSVWR\RXUKRPHWRWHDFK\RXKRZWRXVHWKH
product.
Ŷ,PSURSHULQVWDOODWLRQGHOLYHU\RUPDLQWHQDQFH,I\RX
have an installation problem, contact your dealer or
installer. You are responsible for providing adequate
electrical, exhausting, and other connecting facilities.
Ŷ)DLOXUHRIWKHSURGXFWRUGDPDJHWRWKHSURGXFWLILWLV
abused, misused (for example, cavity arcing from wire
rack or metal/foil), or used for other than the intended
purpose or used commercially.
Ŷ5HSODFHPHQWRIKRXVHIXVHVRUUHVHWWLQJRIFLUFXLW
breakers.
Ŷ'DPDJHWRWKHSURGXFWFDXVHGE\DFFLGHQWILUHIORRGV
or acts of God.
Ŷ,QFLGHQWDORUFRQVHTXHQWLDOGDPDJHFDXVHGE\SRVVLEOH
defects with this appliance.
Ŷ'DPDJHFDXVHGDIWHUGHOLYHU\
Ŷ3URGXFWQRWDFFHVVLEOHWRSURYLGHUHTXLUHGVHUYLFH
Ŷ6HUYLFHWRUHSDLURUUHSODFHOLJKWEXOEVH[FHSWIRU/('
lamps.
Ŷ'DPDJHWRWKHILQLVKVXFKDVVXUIDFHUXVWWDUQLVKRU
small blemishes not reported within 48 hrs of delivery.
6WDSOH\RXUUHFHLSWKHUH3URRIRIWKHRULJLQDOSXUFKDVH
date is needed to obtain service under the warranty.
LIMITED WARRANTY
Microwave Oven Limited Warranty
EXCLUSION OF IMPLIED WARRANTIES
Your sole and exclusive remedy is product repair as provided in this Limited Warranty. Any implied warranties,
including the implied warranties of merchantability or fitness for a particular purpose, are limited to one year or
the shortest period allowed by law.
This limited warranty is extended to the original purchaser and any succeeding owner for products purchased for
home use within the USA. If the product is located in an area where service by a GE Appliances Authorized Servicer
is not available, you may be responsible for a trip charge or you may be required to bring the product to an Authorized
GE Appliances Service location for service. In Alaska, the limited warranty excludes the cost of shipping or service
calls to your home.
Some states do not allow the exclusion or limitation of incidental or consequential damages. This limited warranty
gives you specific legal rights, and you may also have other rights which vary from state to state. To know what your
legal rights are, consult your local or state consumer affairs office or your state’s Attorney General.
Warrantor: GE Appliances, a Haier company
Louisville KY,40225
For the period of GE Appliances will replace
One year
From the date
of the original
purchase
Any part of the oven which fails due to a defect in materials or workmanship. During this
limited one-year warranty, GE Appliances will also provide, free of charge, all labor and
related service costs to replace the defective part when the unit is serviced.

16 49-7000248 Rev. 0
Printed in China
Consumer Support
CONSUMER SUPPORT
GE Appliances Website
Have a question or need assistance with your appliance? Try the GE Appliances Website 24 hours a day, any day
of the year! You can also shop for more great GE Appliances products and take advantage of all our on-line support
services designed for your convenience. GEAppliances.com
Register Your Appliance
Register your new appliance on-line at your convenience! Timely product registration will allow for enhanced
communication and prompt service under the terms of your warranty, should the need arise. You may also mail in
the pre-printed registration card included in the packing material. GEAppliances.com/register
Schedule Service
Expert GE Appliances repair service is only one step away from your door. Get on-line and schedule your service at
your convenience any day of the year.
GEAppliances.com/service or call 800.GE.CARES (800.432.2737) during normal business hours.
Contact Us
If you are not satisfied with the service you receive from GE Appliances, contact us on our Website with all the
details including your phone number, or write to: General Manager,
*HQHUDO0DQDJHU&XVWRPHU5HODWLRQV_*($SSOLDQFHV$SSOLDQFH3DUN_/RXLVYLOOH.<
GEAppliances.com/contact
Parts and Accessories
Individuals qualified to service their own appliances can have parts or accessories sent directly to their homes
(VISA, MasterCard and Discover cards are accepted). Order on-line today 24 hours every day.
GEAppliances.com/parts or call 800.432.2737 during normal business hours.
Instructions contained in this manual cover procedures to be performed by any user. Other servicing
generally should be referred to qualified service personnel. Caution must be exercised, since improper
servicing may cause unsafe operation.

49-7000248 Rev. 0 02-24
GVMB14S4
MANUAL DEL
PROPIETARIO
Escriba los números de modelo y
de serie aquí:
Nº de Modelo _______________
Nº de Serie _________________
Los encontrará en una etiqueta
dentro del horno.
GE Appliances es una marca de General Electric Company. Fabricado bajo licencia de la marca.
HORNO MICROONDAS
INFORMACIÓN DE
SEGURIDAD ......................19
USO DEL HORNO
Piezas y Características ................22
Panel de Control ......................23
Nivel de Potencia .....................25
Funciones con Temporizador ...........25
Funciones del Sensor ..................25
Términos del Microondas ..............27
CUIDADO Y LIMPIEZA
Cuidado y Limpieza ...................27
SOLUCIÓN DE PROBLEMAS . . 29
SOPORTE AL CONSUMIDOR
Garantía Limitada .................... 30
Soporte al Consumidor ................31

18 49-7000248 Rev. 0
GRACIAS POR HACER QUE GE APPLIANCES SEA PARTE DE SU HOGAR.
Ya sea que haya crecido usando GE Appliances, o que ésta es su primera vez, nos complace
tenerlo en la familia.
Sentimos orgullo por el nivel de arte, innovación y diseño de cada uno de los electrodomésticos de GE Appliances, y
creemos que usted también. Entre otras cosas, el registro de su electrodoméstico asegura que podamos entregarle
información importante del producto y detalles de la garantía cuando los necesite.
Registre su electrodoméstico GE ahora a través de Internet. Sitios Web y números telefónicos útiles están disponibles
en la sección de Soporte para el Consumidor de este Manual del Propietario. También puede enviar una carta en la
tarjeta de inscripción preimpresa que se incluye con
el material embalado.

49-7000248 Rev. 0 19
INFORMACIÓN DE SEGURIDAD
INFORMACIÓN IMPORTANTE DE SEGURIDAD
LEA TODAS LAS INSTRUCCIONES ANTES DE USAR
ADVERTENCIA
Para reducir el riesgo de quemaduras, descargas eléctricas, incendio, lesiones o
exposición a energía de microondas excesiva:
Cuando utilice aparatos eléctricos, se deben seguir las precauciones de seguridad básicas, entre las que se
incluyen las siguientes:
Ŷ/HDWRGDVODVLQVWUXFFLRQHVDQWHVGHXWLOL]DUHVWH
aparato.
Ŷ/HD\VLJDODVHVSHFtILFDVHQODVHFFLyQGH
PRECAUCIONES PARA EVITAR LA POSIBLE
EXPOSICIÓN A ENERGÍA DE MICROONDAS
EXCESIVA.
Ŷ8WLOLFHHVWHDSDUDWRVRODPHQWHSDUDHOILQSUHYLVWR
como se describe en este manual. No utilice
químicos ni vapores corrosivos en este aparato. Este
horno está específicamente diseñado para calentar,
secar o cocinar alimentos y bebidas y no está
diseñado para usarse en n laboratorio ni para uso
industrial.
Ŷ(VWHHOHFWURGRPpVWLFRVyORGHEHUtDVHUUHSDUDGR
por personal técnico con calificación. En caso de
necesitar una evaluación, reparación o ajuste,
comuníquese con el servicio autorizado más cercano.
INSTALACIÓN
Ŷ,QVWDOHRXELTXHHVWHDSDUDWR~QLFDPHQWHGHDFXHUGR
a las instrucciones de instalación suministradas.
Ŷ(VWHDSDUDWRGHEHFRQWDUFRQXQDFRQH[LyQ
a tierra. Conecte sólo a un tomacorriente con
DGHFXDGDFRQH[LyQDWLHUUD9HUODVHFFLyQGH
INSTRUCCIONES DE CONEXIÓN A TIERRA.
Ŷ1RRSHUHHVWHHOHFWURGRPpVWLFRVLWLHQHXQFDEOH
de alimentación o enchufe dañado, si no funciona
correctamente o si se ha dañado o se ha caído.
Ŷ0DQWHQJDHOFDEOHDOHMDGRGHVXSHUILFLHVFDOLHQWHV
Ŷ1RSHUPLWDTXHHOFDEOHHOpFWULFRFXHOJXHVREUHHO
borde de la mesa o del mostrador de encimera.
Ŷ1RVXPHUMDHOFDEOHHOpFWULFRRHOHQFKXIHHQDJXD
Ŷ1RFXEUDQLEORTXHHQLQJXQDDSHUWXUDGHHVWH
aparato.
Ŷ1RDOPDFHQHHVWHDSDUDWRDODLUHOLEUH1RXWLOLFHHVWH
producto cerca del agua; por ejemplo, en un sótano
húmedo, cerca de una piscina, cerca de un lavabo o
lugares similares.
Ŷ1RPRQWHHVWHDSDUDWRVREUHHOIUHJDGHUR
PARA REDUCIR EL RIESGO DE INCENDIO DENTRO
DEL HORNO:
— 1RFRFLQHH[FHVLYDPHQWHORVDOLPHQWRV9LJLOH
cuidadosamente el aparato cuandose coloque papel,
plástico u otros materiales combustibles dentro del
microondas para facilitar la cocción.
— Quite las tiritas de seguridad (twist-ties) y asas
metálicas de los recipientes de papel o plástico
antes de colocarlos dentro del microondas.
— Si los materiales que se encuentran dentro del
horno prenden fuego, mantenga cerrada la puerta
del horno, apáguelo y desconecte el cable eléctrico,
o corte la energía desde el panel de fusibles o del
interruptor de circuitos.
— 1RJXDUGHQLQJ~QPDWHULDODH[FHSFLyQGHQXHVWURV
accesorios recomendados, en este horno cuando no
esté en uso No deje productos de papel, utensilios
de cocina ni comida en el horno cuando no esté en
uso. Todos los estantes deberán ser retirados del
horno cuando no se encuentren en uso.
— No opere el horno sin alimentos adentro.
A FIN DE REDUCIR RIESGOS DE QUEMADURAS:
Ŷ7HQJDFXLGDGRDODEULUHQYDVHVFRQFRPLGDFDOLHQWH
8VHPDQLMDV\DOHMHHOYDSRUGHOURVWUR\ODVPDQRV
Ŷ9HQWLOHSHUIRUHRFRUWHHQYDVHVEROVDVREROVDV
plásticas para evitar la acumulación de presión.
Ŷ7HQJDFXLGDGRDOWRFDUHOSODWRJLUDWRULRODSXHUWD
estantes o paredes del horno, los cuales se podrán
calentar durante el uso. No toque los elementos
calentadores.
Ŷ/DVXSHUILFLHGHFRFFLyQ\HOERPELOORGHODFDYLGDG
interior encendidos ocasionarán quemaduras. Tenga
cuidado al limpiar y espere hasta que los bombillos se
enfríen antes de su reemplazo.
Ŷ LOS CONTENIDOS CALIENTES PUEDEN
OCASIONAR QUEMADURAS GRAVES.
NO PERMITA QUE LOS NIÑOS USEN EL
MICROONDAS. Tenga cuidado al retirar ítems
calientes.

20 49-7000248 Rev. 0
INFORMACIÓN DE SEGURIDAD
INFORMACIÓN IMPORTANTE DE SEGURIDAD
LEA TODAS LAS INSTRUCCIONES ANTES DE USAR
ADVERTENCIA
USO
Ŷ No use el horno sin el plato giratorio en su posición. El
plato giratorio no deberá tener restricciones, de modo que
pueda girar.
Ŷ1RVHGHEHUiLQWURGXFLUFRPLGDQLXWHQVLOLRVPHWiOLFRVGH
WDPDxRH[FHVLYRHQXQKRUQRPLFURRQGDVSRUFRQYHFFLyQ
ya que incrementan el riesgo de descargas eléctricas y esto
podrá ocasionar un incendio.
Ŷ1RXVHSURGXFWRVGHSDSHOHQHOKRUQRFXDQGRHO
electrodoméstico sea usado en cualquier modo de cocción,
H[FHSWRHQODFRFFLyQFRQPLFURRQGDV
Ŷ$VHJ~UHVHGHTXHWRGRVORVXWHQVLOLRVXVDGRVHQHOKRUQR
microondas sean para uso en el mismo. Se pueden
usar la mayoría de las cazuelas de vidrio, platos de
cocción, tazas graduadas, tazas para postre, vajillas de
cerámica o cubiertos de porcelana que no poseen bordes
metálicos o vidriados con un brillo metálico, siguiendo las
recomendaciones del fabricante.
Ŷ1RDOPDFHQHQLQJ~QHOHPHQWRGLUHFWDPHQWHVREUHOD
superficie del horno de microondas cuando éste se
encuentre en funcionamiento.
Ŷ$OJXQRVSURGXFWRVWDOHVFRPRKXHYRVHQWHURV\
contenedores sellados (por ejemplo, frascos sellados) son
SURSHQVRVDH[SORWDU\QRGHEHQFDOHQWDUVHHQHVWHKRUQR
Tal uso del horno puede resultar en lesiones personales.
Ŷ No cocine demasiado las patatas. El deshidratado y
incendiarse.
Ŷ1RFXEUDHOHVWDQWHRFXDOTXLHUSDUWHGHOKRUQR
microondas con papel de aluminio. Esto ocasionará un
VREUHFDOHQWDPLHQWRGHOKRUQRPLFURRQGDVSRUFRQYHFFLyQ
Ŷ&RFLQHDIRQGRODFDUQHGHUHVRDYHODFDUQHGHUHVDSRU
los menos una temperatura INTERNA de 160° F y carne de
ave a por lo menos una temperatura INTERNA de 180° F.
Cocinar a estas temperaturas generalmente protege contra
enfermedades causadas por los alimentos.
Ŷ Este horno no fue aprobado ni evaluado para uso en la
marina.
LIMPIEZA
ŶDesconectar la corriente antes de limpiar.
Ŷ'HVFRQHFWHODFRUULHQWHDQWHVGHUHHPSOD]DUILOWURVGH
carbón, bombillos de cavidades o bombillos de la superficie
de cocción.
Ŷ Mantenga el horno libre de acumulación de grasa.
Ŷ1ROLPSLHFRQDOPRKDGLOODVPHWiOLFDVSDUDIUHJDU /DV
piezas podrán quemar la almohadilla y tener contacto
con partes eléctricas, involucrando riesgos de descargas
eléctricas.
Ŷ Al limpiar superficies de puerta y horno que se unen al
cerrar la puerta, use sólo jabones o detergentes suaves y
no abrasivos, aplicando los mismos con una esponja limpia
o tela suave. Enjuague bien.
AGUA SOBRECALENTADA
Ŷ/tTXLGRVWDOHVFRPRDJXDFDIpRWpVRQFDSDFHVGH
sobrecalentarse más allá del punto de ebullición sin parecer
que estén hirviendo. No siempre hay burbujeo o hervor
visible cuando se saca el recipiente del horno microondas.
(67238('(5(68/7$5(1/$(%8//,&,Ï1
5(3(17,1$'(/Ë48,'2608<&$/,(17(6&8$1'2
6(08(9((/5(&,3,(17(26(,16(57$81$
&8&+$5$8275287(16,/,2'(1752'(//Ë48,'2
Ŷ3DUDUHGXFLUHOULHVJRGHOHVLyQItVLFD
- No sobrecaliente el líquido.
- Revuelva el líquido antes y a la mitad del tiempo de
calentamiento.
- No utilice recipientes con costados rectos y cuellos
angostos.
- Después de calentar el recipiente, déjelo en el horno
microondas por un período corto de tiempo antes de
sacarlo.
7HQJDH[WUHPDSUHFDXFLyQFXDQGRLQWURGX]FDXQD
cuchara u otro utensilio en el recipiente.
LEA Y GUARDE ESTAS INSTRUCCIONES

49-7000248 Rev. 0 21
INFORMACIÓN IMPORTANTE DE SEGURIDAD
LEA TODAS LAS INSTRUCCIONES ANTES DE USAR
INFORMACIÓN DE SEGURIDAD
LEA Y GUARDE ESTAS INSTRUCCIONES
MARCAPASOS
/DPD\RUtDGHORVPDUFDSDVRVSRVHHQSURWHFFLyQFRQWUDLQWHUIHUHQFLDVGHSURGXFWRVHOpFWULFRVLQFOX\HQGRPLFURRQGDV6LQ
embargo, es aconsejable que los pacientes con marcapasos consulten a sus médicos ante cualquier duda.
INSTRUCCIONES DE CONEXIÓN A TIERRA
ADVERTENCIA
(OXVRLQDGHFXDGRGHOHQFKXIHGHFRQH[LyQDWLHUUDSXHGHSURYRFDUULHVJRVGHGHVFDUJDV
eléctricas.
Este electrodoméstico debe
estar conectado a tierra. Si
se produjera un cortocircuito,
la toma de tierra reduce el
riesgo de descarga eléctrica
al proveer un cable de escape
para la corriente eléctrica.
Este electrodoméstico está
equipado con un cable de
corriente que dispone de un hilo para toma de tierra con
un enchufe con toma de tierra. El enchufe debe estar
conectado a una toma de corriente que esté debidamente
instalada y con salida a tierra.
Consulte con un electricista cualificado o un técnico de
reparaciones si no entiende completamente las instrucciones
sobre la toma de tierra, o si tuviese alguna duda sobre si su
aparato está debidamente conectado a tierra.
Si la toma de corriente es un modelo estándar de dos
clavijas, es su responsabilidad personal y su obligación el
reemplazarla por una toma adecuada para tres clavijas con
FRQH[LyQDWLHUUD
%DMRQLQJXQDFLUFXQVWDQFLDGHEHFRUWDURTXLWDUODWHUFHUD
clavija (tierra) del cable de corriente.
Se brinda un cable de corriente corto a fin de reducir riesgos
que puedan resultar de enredos o tropiezos con un cable
más largo.
No recomendamos el uso de un cable de prolongación con
este electrodoméstico. Si el cable de corriente es demasiado
corto, haga que un electricista cualificado o un técnico
de reparaciones instalen una toma de corriente cerca del
HOHFWURGRPpVWLFR&RQVXOWHODVHFFLyQ$'9(57(1&,$²
&$%/(6'(352/21*$&,Ï1
Para un mejor funcionamiento, enchufe este
HOHFWURGRPpVWLFRHQXQDWRPDGHFRUULHQWHH[FOXVLYDSDUD
evitar parpadeos de luz, fusibles quemados o que salte el
diferencial.
PRECAUCIONES PARA EVITAR LA POSIBLE
EXPOSICIÓN A ENERGÍA DE MICROONDAS EXCESIVA
(a) No intente hacer funcionar el horno con
la compuerta abierta ya que ésto puede provocar
H[SRVLFLyQSHOLJURVDDODHQHUJtDGHPLFURRQGDV(V
importante no forzar ni dañar los seguros.
(b) No coloque ningún objeto entre la parte frontal del horno
y la compuerta, ni permita que se acumulen residuos de
producto limpiador o detergente, suciedad o polvo en las
superficies de sellado.
(c) No haga funcionar el horno si se encuentra dañado. Es
particularmente importante cerrar bien la compuerta
(1) la compuerta (doblada o curvada),
(2) las bisagras y pestillos (rotos o flojos),
(3) sellos de la compuerta y superficies de sellado.
(d) El horno no debe ser ajustado o reparado por ninguna
SHUVRQDH[FHSWRSRUSHUVRQDOGHPDQWHQLPLHQWR
calificado.
Asegúrese de contar con una
FRQH[LyQDWLHUUDDGHFXDGD
antes de usar.
EXTRACTOR
ADVERTENCIA
El ventilador funcionará de forma automática bajo ciertas condiciones. Asegúrese de evitar la
DFWLYDFLyQ\H[WHQVLyQDFFLGHQWDOGHOIXHJRGHFRFFLyQPLHQWUDVHOH[WUDFWRUHVWiHQXVR
Ŷ/LPSLHODFDUDLQIHULRUGHOKRUQRPLFURRQGDVGHIRUPD
frecuente. No permita que se acumule grasa en el horno
microondas o en los filtros del ventilador.
Ŷ(QFDVRGHTXHKD\DIXHJRSURGXFLGRSRUODJUDVDHQODV
unidades de la superficie debajo del horno microondas,
apague una olla llameante sobre la unidad de la superficie
cubriendo la olla completamente con una tapa, una asadera
de galletitas o una bandeja plana.
Ŷ/LPSLHFRQFXLGDGRORVILOWURVGHOH[WUDFWRU$JHQWHVGH
limpieza corrosivos, tales como los limpiadores de horno a
base de soda cáustica, podrán dañar los filtros.
Ŷ$OSUHSDUDUFRPLGDVOODPHDQWHVGHEDMRGHOKRUQR
microondas, encienda el ventilador.
Ŷ1XQFDSLHUGDGHYLVWDODVXQLGDGHVGHODVVXSHUILFLH
TXHVHHQFXHQWUDQGHEDMRGHVXKRUQRPLFURRQGDV/DV
ebulliciones producen humo y derrames de grasa que
pueden encender y esparcir el fuego si el ventilador
del horno microondas está en funcionamiento. A fin de
minimizar el funcionamiento del ventilador automático, use
utensilios de tamaño adecuado y use un nivel de calor alto
en las unidades de la superficie sólo cuando sea necesario.
22 49-7000248 Rev. 0
Piezas Y Características
USO DEL HORNO
Es posible que las funciones y apariencias varíen con relación a su modelo a lo largo del manual.
A. Puerta
B.9HQWDQD
C. Systema de bloqueo
D. Panel de control
E. Ensamblaje del aro de la bandeja giratoria
F. Acoplador de la bandeja giratoria
G.%DQGHMDJLUDWRULDGHYLGULR
H. Rejilla superior
I. Cable eléctrico
J./XFHVGHODVXSHUILFLH
K. Filtros de grasa
A
B
C
D
EFG
H
I
A
K
J
K
Vista desde el frente
Vista desde la parte inferior
49-7000248 Rev. 0 23
USO DEL HORNO
Piezas Y Características
Número de modelo GVMB14S4
9ROWDMHQRPLQDO 9a+]
3RWHQFLDQRPLQDOGHHQWUDGD+RUQRGHPLFURRQGDV 1500 vatios
3RWHQFLDQRPLQDOGHVDOLGD+RUQRGHPLFURRQGDV 1000 vatios
Capacidad del horno SLHVF~ELFRV/
Diámetro de la bandeja giratoria ´FP
'LPHQVLRQHVH[WHUQDV$QFKR[3URIXQGLGDG[$OWR ³[³[´FP[FP[FP
Peso neto 57.3 lbs (26 kg)
/XFHV/(' Solo servicio de reemplazo
Especificaciones
Bandeja Giratoria
Durante la cocción, se debe utilizar la bandeja giratoria de
vidrio y el ensamblaje del aro de la bandeja giratoria.
Si utiliza una cacerola grande o de forma ovalada que
pudiera tocar las paredes del horno de microondas cuando
gira la bandeja giratoria, usted la puede apagar.
• 3UHVLRQH78517$%/(%DQGHMDJLUDWRULD³2))´
(Apagar) y el
ícono aparecerá en la pantalla.
•Arme la bandeja giratoria tal como se muestra.
NOTA:
• No coloque la bandeja de vidrio hacia abajo.
/DEDQGHMDGHYLGULRQXQFDGHEHTXHGDUREVWUXLGD
• Coloque los alimentos y los recipientes de alimentos
sobre la bandeja de vidrio para cocinarlos.
• Si se quiebra o se rompe la bandeja giratoria de
vidrio o el ensamblaje del aro de la bandeja giratoria,
comuníquese con el Centro de atención al cliente al
1-877-337-3639 o visite el departamento de piezas en
encompassparts.com.

24 49-7000248 Rev. 0
CLOCK (RELOJ)
Su modelo tiene un reloj de 12 horas.
FIJAR LA HORA DEL DÍA
1.
Presione CLOCK para ingresar el modo para jar la
KRUD³35(66&/2&.(17(57,0(´,QJUHVH
la hora) aparecerá en la pantalla.
2.
Presione las teclas numéricas para ingresar la hora
correcta. Por ejemplo, si la hora es 10:12, presione las
WHFODVQXPpULFDV³´SDUDLQJUHVDUODKRUD
3. Presione START (Inicio) para conrmar la hora.
TEMPORIZADOR DE COCINA
El microondas tiene un temporizador conveniente para
sus necesidades de cocción.
1.
Presione KITCHEN TIMER (Temporizador de cocina).
³(17(57,0(´,QJUHVHODKRUDDSDUHFHUiHQOD
pantalla.
2.
Presione las teclas numéricas para ingresar el tiempo
de cocción deseado.
NOTA(OWLHPSRGHFRFFLyQPi[LPRHVGHPLQXWRV\
99 segundos.
3.
Presione START (Inicio) para comenzar la cuenta
regresiva del tiempo.
NOTA&XDQGRWHUPLQHHOWLHPSRMDGR³(1'´)LQ
aparecerá en la pantalla y sonarán tres tonos largos de
alerta.
4.
A Presione STOP (Detener) para salir de la función
.LWFKHQ7LPHU7HPSRUL]DGRUGHFRFLQD
CARACTERÍSTICAS
VENTILADOR
/DIXQFLyQ9HQW)DQ9HQWLODFLyQOHSHUPLWHTXLWDUHO
calor y el vapor de la supercie de cocción debajo.
• Presione VENT FAN HI/LOW/OFF9HQWLODGRU$OWR
%DMR$SDJDGRSDUDHQFHQGHUDSDJDUHOYHQWLODGRU\
regular su velocidad.
NOTA/DYHORFLGDGGHOYHQWLODGRUQRVHSXHGHDMXVWDUVL
el panel de control
está bloqueado.
• Cuando se presiona el control por primera vez,
DSDUHFH³+LJK´$OWRHQODSDQWDOOD
9HORFLGDGDOWDSUHVLRQHXQDYH]
9HORFLGDGEDMDSUHVLRQHGRVYHFHV
Apagar: presione tres veces
ILUMINACIÓN DE LA SUPERFICIE
/DOX]GHODVXSHUFLHLOXPLQDODVXSHUFLHGHFRFFLyQ
debajo del horno de microondas.
Presione LIGHT/X]SDUDDOWHUQDUHQWUH+LJK$OWR
/RZ%DMRDQG2$SDJDU
SEGURO PARA NIÑOS
/DIXQFLyQ&KLOG/RFN%ORTXHRSDUDQLxRVOHSHUPLWH
bloquear el panel de control del microondas para una
limpieza fácil o evitar cambiar accidentalmente los
ajustes o encender el horno de microondas.
3DUDEORTXHDUGHVEORTXHDUHOSDQHOGHFRQWURO
• Presione STOP/CANCEL'HWHQHU&DQFHODUGXUDQWH
3 segundos. Sonarán dos pitidos para indicar que
VHKDDFWLYDGRGHVDFWLYDGRHOEORTXHRGHVDFWLYDGR
\DSDUHFHUi³/2&.('´%ORTXHDGRR³81/2&.´
(Desbloquear) en la pantalla.
VER ESTADO
/DIXQFLyQ6WDWXV5HFDOO9HUHVWDGROHSHUPLWHYHULFDU
los ajustes de tiempo y potencia durante la cocción del
microondas.
• Presione POWER LEVEL (Nivel de potencia) para
visualizar el nivel de potencia jado.
• Presione CLOCK (Reloj) para visualizar la hora.
Panel De Control
A
I
B
J
C
K
D
L
EF G H
NM
A. Cocción por sensor
B. Palomitas de maíz
C. Recalentamiento
D. Nivel de potencia
E. Temporizador de cocina
F. Pantalla
G. Teclas numéricas
H.'HWHQHU&DQFHODU%ORTXHDU
I. Descongelado
J.(QFHQGLGR$SDJDGRGHODEDQGHMDJLUDWRULD
K.(QFHQGLGR$SDJDGRGHODOX]
L.9HQWLODFLyQDOWREDMRDSDJDU
M. Reloj
N.,QLFLR6HJ
USO DEL HORNO
49-7000248 Rev. 0 25
COCCIÓN PROGRAMADA
1. Presione los botones numéricos para configurar el tiempo de
cocción. Por ejemplo, para cocinar durante 10 minutos, presione
³´6XFHVLYDPHQWH
NOTA:
(OWLHPSRGHFRFFLyQPi[LPRHVGHPLQXWRV\VHJXQGRV
/DSRWHQFLDSRUGHIHFWRHVGHO6LGHVHDFRFLQDUDOGHOD
potencia, omita los pasos 2 y 3 y vaya directamente al paso 4.
2.
Presione POWER LEVEL (Nivel de potencia) para activar el modo
de potencia.
3.
Presione las teclas numéricas o presione POWER LEVEL varias
YHFHVSDUDVHOHFFLRQDUHOQLYHOGHSRWHQFLDGHVHDGR9HD³1LYHOHVGH
SRWHQFLD´TXHDSDUHFHPiVDGHODQWHHQHVWDVHFFLyQ
4.
Presione START/+30 Sec,QLFLR6HFSDUDFRPHQ]DUDFRFLQDU
Comenzará la cuenta regresiva.
NOTA: Cuando termine de cocinar, sonará un tono de alerta 3 veces.
/RVQLYHOHVGHSRWHQFLDYDULDEOHVVXPDQIOH[LELOLGDGDODFRFFLyQHQHO
PLFURRQGDV/RVQLYHOHVGHSRWHQFLDGHOKRUQRPLFURRQGDVVHSXHGHQ
comprar con las unidades de superficie de una cocina. Cada nivel
de potencia le brinda energía de microondas un cierto porcentaje del
tiempo. El Nivel de Potencia 7HVHQHUJtDGHPLFURRQGDVHO
del tiempo. El Nivel de Potencia 3HVHQHUJtDHOGHOWLHPSR/D
mayoría de las cocciones se harán en Nivel de Potencia 10, lo cual le
EULQGDHOGHSRWHQFLD
Power level 10 (Nivel de Potencia 10) hará la coccíon más rápido
pero será necesario revolver, rotar o dar vuelta la comida con mayor
IUHFXHQFLD8QDFRQILJXUDFLyQLQIHULRUKDUiODFRFFLyQPiVSDUHMD\VH
necesitará revolver y rotar menos la comida.
$OJXQDVFRPLGDVSRGUiQWHQHUPHMRUVDERUWH[WXUDRDVSHFWRVLVH
XVDXQDGHODVFRQILJXUDFLRQHVLQIHULRUHV8VHXQQLYHOGHSRWHQFLD
inferior al cocinar comidas con tendencia a hervir, tales como papas en
escalope.
/RVSHUtRGRGGHGHVFDQVRFXDQGRORVFLFORVGHHQHUJtDGHPLFURRQGDV
ILQDOL]DQEULQGDQWLHPSRSDUDTXHODFRPLGD8QHMHPSORGHHVWRVH
muestra con el nivel de potencia 3 - el ciclo de descongelamiento. Si
ODHQHUJtDGHOPLFURRQGDVQRILQDOL]yHOFLFORODSDUWHH[WHUQDGHOD
comida se cocinará antes de que el interior esté descongelado.
Estos son algunos ejemplos de aplicaciones para diferentes niveles de
potencia:
Niveles de potencia
+D\GLH]QLYHOHVGHSRWHQFLDGLVSRQLEOHV
Nivel Encendi-do Pantalla Consejos
10 3/+, Pescado, bacon, verduras, calentar líquidos
9 3/ Coccíon suave de carne y aves, sirve para
cocinar guisos y para recalentar
8 3/
7 3/
6 3/ Cocina lenta y tierna para estofados o guisos y
para partes menos tiernas de carne
5 3/
4 3/
3 3/ Para descongelar, cocer a "fuego" lento, para
salsas
2 3/
1 3/ Mantener la comida caliente, ablandar la
mantequilla.
0 3/ -----------
COCCIÓN RÁPIDA
3XHGHFRPHQ]DUDFRFLQDUFRQXQDSRWHQFLDGHOFRQVRORWRFDU
un único control. Para cocinar de manera práctica, use el control
START/+ 30 SEC (Inicio/+ 30 s) o ingrese el número tocando el
teclado numérico.
NOTA: Durante la cocción rápida, podrá ver el nivel de potencia del
microondas.
• Presione START/+ 30 SEC (+30 s)SDUDFRPHQ]DUDFRFLQDUDO
de potencia del horno de microondas durante 30 segundos.
• Presione START/+ 30 SEC (+30 s) durante la cocción del horno de
microondas para aumentar el tiempo de cocción en incrementos de 30
segundos.
NOTA(OWLHPSRGHFRFFLyQPi[LPRHVGHPLQXWRV\VHJXQGRV
• Presione los botones numéricos de 1 a 9 para comenzar a cocinar
FRQGHSRWHQFLDGHOKRUQRGHPLFURRQGDVGXUDQWHD
minutos.
COCCIÓN POR SENSOR
/DIXQFLyQ6HQVRU&RRN&RFFLyQSRUVHQVRUDMXVWDGHPDQHUD
automática, el tiempo de cocción adecuado que calcula al detectar el
nivel de humedad del alimento o bebida que se cocinará.
/DIXQFLyQ6HQVRU&RRNHVWiSURJUDPDGDSDUDFRFLQDUORVVLJXLHQWHV
alimentos: papas, verduras frescas, verduras congeladas, comida
congelada, arroz blanco, desayuno congelado y carne molida.
Para obtener mejores resultados al cocinar por sensor, utilice
recipientes aptos para microondas y cúbralos con tapas con ventilación
o envoltorios de plástico con ventilación.
NOTA: No emplee cubiertas herméticas, ya que evitan que el vapor
escape y
hacen que la comida se cocine demasiado.
1. Coloque el recipiente cubierto en el horno de microondas.
NOTA$VHJ~UHVHGHTXHODSDUWHH[WHUQDGHOUHFLSLHQWHDSWRSDUD
microondas y la parte interna del horno estén secas antes de colocar
HOUHFLSLHQWHGHQWURGHOKRUQRGHPLFURRQGDV/DKXPHGDGVH
transformará en vapor lo cual puede confundir a los sensores.
2. Presione SENSOR COOKXQDYH]\DSDUHFHUiODSDODEUD³3RWDWR´
(Papa) en la pantalla. Continúe presionando SENSOR COOK para
alternar entre las opciones hasta que el alimento deseado aparezca
en la pantalla.
3. Presione START para conrmar la selección y comenzar a cocinar.
4. Después de presionar Start (Inicio), comenzará el proceso de
detección. Cuando naliza el proceso de detección, sonarán los
tonos de alerta y comenzará la cuenta regresiva del tiempo de
cocción calculado.
NOTA: No abra la puerta durante el proceso de detección. Si lo hace,
cancelará el programa Sensor Cook.
5.
8WLOLFHODIXQFLyQFRFFLyQSURJUDPDGDRUiSLGDSDUDFRPSOHWDUOD
cocción del alimento hasta llegar al punto de cocción deseado
en caso de que el alimento no esté totalmente cocido una vez
transcurrido el tiempo de Sensor Cook.
Sensor de Humedad
/DIXQFLyQ6HQVRU)HDWXUHVGHWHFWDHODXPHQWRGHODKXPHGDGOLEHUDGD
durante la cocción. El horno ajusta de forma automática el tiempo de
cocción a diferentes tipos y cantidades de comida.
No use Sensor Features dos veces seguidas en la misma porción de
comida; esto podrá hacer que la comida se sobrecaliente de forma
H[FHVLYDRTXHVHTXHPH6LODFRPLGDQRVHFRFLQDOXHJRGHODFXHQWD
regresiva, use Time Cook para adicionar tiempo.
• Es esencial contar con envases y cobertores para una mejor cocción
con sensor.
• Siempre use envases para uso seguro en el horno microondas y
cubra los mismos con tapas o envoltorios de plástico ventilados.
Nunca use envases de plástico sellados – pueden impedir la salida de
vapor y hacer que la comida se sobrecaliente.
$VHJ~UHVHGHTXHODSDUWHH[WHULRUGHORVHQYDVHVGHFRFFLyQ\HO
interior del horno microondas estén secos antes de colocar comida en
HOKRUQR/DVJRWDVGHKXPHGDGTXHVHFRQYLHUWHQHQYDSRUSXHGHQ
alterar el funcionamiento del sensor.
Seque los platos de
modo que no alteren el
funcionamiento del sensor.
9HQWLODGR
Cubierto
Uso Del Horno De Microondas
USO DEL HORNO
26 49-7000248 Rev. 0
Programas de cocción por sensor
DESCONGELAR
/DIXQFLyQ'HIURVW'HVFRQJHODUHVWiSURJUDPDGDSDUD
descongelar de forma automática ítems específicos por peso.
El control de la función Defrost le permite realizar una selección
entre los siguientes ítems: Carne, Ave, Pescado, y Pan.
1.
Presione DEFROST una vez. Carne aparecerá en la
pantalla.
2.
/XHJRSUHVLRQHDEFROST para alternar entre las opciones
hasta que el ítem deseado aparezca en la pantalla.
3.
Presione START (Iniciar) para confirmar la selección de
su ítem. "Enter Weight" (Ingresar Peso) aparecerá en la
pantalla.
4.
Presione las teclas numéricas para ingresar el peso del ítem
que será descongelado. Por ejemplo: si la comida pesa 1.2
libras, presione "1" y luego "2" para ingresar el peso.
NOTA: El peso del ítem de comida deberá ser de entre 0.1 y
OLEUDV(OSHVRPi[LPRDFHSWDGRVHUiGHOLEUDV
5. Presione START para iniciar la descongelación.
Guía de Converión
6LHOSHVRGHODFRPLGDVHH[SUHVDHOOLEUDV\RQ]DVODVRQ]DVVH
deberán convertir a décimas (.1) de una libra.
Onzas /LEUDV
1-2 .1
3.2
4-5 .3
6-7 .4
8.5
9-10 .6
11 .7
12-13 .8
14-15 .9
Consejos para la Desongelación
/DVFRPLGDVFRQJHODGHVHQSDSHORSOiVWLFRVHSRGUiQ
GHVFRQJHODUHQHOSDTXHWH/RVSDTXHWHVFHUUDGRVVH
GHEHUiQFRUWDUSHUIRUDURYHQWLODU/8(*2GHTXHODFRPLGD
VHKD\DGHVFRQJHODGRSDUFLDOPHQWH/RVHQYDVHVGHSOiVWLFR
se deberán descubrir en forma parcial.
/DVFRPLGDVGHWDPDxRIDPLOLDUSUHHPSDTXHWDGDVVHSRGUiQ
descongelar y cocinar en el horno microondas. Si la comida
se encuentra en el envase de papel de aluminio, traslade le
misma a un plato para uso seguro en el horno microondas.
• Para una descongelación más pareja de comidas
más grandes, tales como asado, use Weight Defrost
(Descongelacíon por Peso). Asegúrese de que las carnes
queden totalmente descongeladas antes de consinar.
/DVFRPLGDVTXHVHHFKDQDSHUGHUFRQIDFLOLGDGQRVH
deberán dejar reposar por más de una hora luego de
ODGHVRQJHODFLyQ/DWHPSHUDWXUDDPELHQWDHVWLPXODHO
desarrollo de bacterias nocivas.
8QDYH]GHVFRQJHODGDODFRPLGDGHEHUtDHVWDUIUtDSHUR
ablandada en todas las áreas. Si aún está un poco congelada,
vuelva a colocarla en el horno microondas muy brevemente, o
deje reposar la misma por unos pocos minutos.
REHEAT (RECALENTAR)
/DIXQFLyQ5HKHDWHVWiSURJUDPDGDSDUDUHFDOHQWDUORV
VLJXLHQWHVDOLPHQWRVEHELGDVSODWRSULQFLSDOSL]]DVRSDVDOVD
y guiso.
/DIXQFLyQ5HKHDWDMXVWDDXWRPiWLFDPHQWHHOWLHPSRGH
calentamiento de manera adecuada. De acuerdo con el
alimento que se recalentará, el tiempo de calentamiento se
calcula según la cantidad de alimento o bebida (Cocción
programada) o la detección del nivel de humedad del alimento
o bebida (Cocción por sensor).
Para obtener mejores resultados al recalentar alimentos
usando la Cocción por sensor, utilice recipientes aptos para
microondas y cúbralos con tapas con ventilación o envoltorios
de plástico con ventilación.
NOTA: No emplee cubiertas herméticas, ya que evitan que el
vapor escape y hacen que la comida se cocine demasiado.
$VHJ~UHVHGHTXHODSDUWHH[WHUQDGHOUHFLSLHQWHDSWRSDUD
microondas y la parte interna del horno estén secas antes
GHFRORFDUHOUHFLSLHQWHGHQWURGHOKRUQRGHPLFURRQGDV/D
humedad se transformará en vapor lo cual puede confundir a
los sensores.
1.
Coloque los alimentos o bebidas en el horno de microondas.
2. Presione REHEAT una vez, aparecerá la palabra
³%(9(5$*(´HQODSDQWDOOD&RQWLQ~HSUHVLRQDQGRREHEAT
para alternar entre las opciones hasta que el alimento
deseado aparezca en la pantalla.
Presione START para conrmar la selección y comenzar a
recalentar.
NOTA: Si el tiempo de calentamiento de su alimento se calcula
a través de la detección de humedad, el proceso de detección
comienza una vez que presiona START.
• No abra la puerta durante el proceso de detección. Si lo hace,
cancelará el programa REHEAT.
• Cuando naliza el proceso de detección, sonarán los tonos
de alerta y aparecerá la cuenta regresiva del tiempo de
recalentamiento calculado.
/XHJRGHUHWLUDUODFRPLGDGHOKRUQRUHYXHOYDVLHVSRVLEOH
para emparejar la temperatura. Si la comida no se calentó lo
suficiente, no vuelva a usar el botón REHEAT8VHCOOK
TIMESDUDUHFOHQWDUGXUDQWHPiVWLHPSR/DVFRPLGDV
reclentadas podrán tener amplias variaciones de temperatura.
$OJXQDVSDUWHVGHODFRPLGDSRGUiQHVWDUH[WUHPDGDPHQWH
calientes.
Es mejor usar COOK TIME para estas comidas:
• Productos con pan
• Comidas que se deben recalentar sin estar cubiertas
• Comidas que se deben revolver o girar
• Comidas que deben tener un aspecto seco o una superficie
crocante luego de recalentar.
Uso Del Horno De Microondas
Articulo Cantidad
Pomme de terre au four 1 à 4 pommes de terre
/pJXPHVIUDLV 1 à 3 tasses (140 à 420 g)
/pJXPHVVXUJHOpV 1 à 3 tasses (140 à 420 g)
Repas surgelé 10 à 20 oz (283 à 567 g)
Riz blanc 1 à 2 tasses (185 à 370 g)
Petit-déjeuner surgelé 8 à 12 oz (227 à 340 g)
9LDQGHKDFKpH 9 à 19 oz (255 à 539 g)
USO DEL HORNO
49-7000248 Rev. 0 27
LIMPIEZA
IMPORTANTE:
• Desconectar la corriente antes de limpiar
• Antes de limpiar, asegúrese de que todos los controles estén
apagados y que el horno de microondas esté frío. Siempre
siga las instrucciones de la etiqueta en los productos de
limpieza.
• Para evitar daños al horno de microondas causados por la
formación de arcos debido a la acumulación de suciedad,
mantenga limpia la cavidad del horno, la rejilla superior y el
área donde la puerta toca el marco del horno.
1.
Con una solución de agua tibia y jabón suave y un paño
VXDYHRXQDHVSRQMDOLPSLHODFDYLGDGHOPDUFR\HOH[WHULRU
del horno.
2.
Enjuague con agua tibia limpia y seque con un paño suave.
NOTA: No use polvo para fregar ni estropajos en el
microondas. El plato giratorio de vidrio se puede lavar y secar
HQHOODYDYDMLOODV3DUDORVPRGHORVGHDFHURLQR[LGDEOHVH
SXHGHXVDUXQOLPSLDGRUGHDFHURLQR[LGDEOHHQHOH[WHULRU
Cuidado y Limpieza
Programas para Recalentar
Artículo Cocción programada o
por sensor
Cantidad
%HELGDV Programada 1 a 3 tazas
Plato principal Por sensor 1 plato
Pizza Por sensor 1 a 4 pociones
6RSD6DOVD Programada 1 a 3 taza
*XLVR/DVDxD Programada 10,5 oz (298 g)
PALOMITAS DE MAÍZ
El control Popcorn (Palomitas de maíz) está programado
para preparar palomitas de maíz en el microondas según el
tamaño de la bolsa.
1.
Presione POPCORN (Palomitas de maíz) para alternar entre
los tamaños de bolsas.
• Presione 1 vez: para preparar una bolsa de 3.2 onzas (94 g)
de palomitas de maíz.
• Presione 3 veces: para preparar una bolsa de 1.75 onzas (50
g) de palomitas de maíz.
2. Presione START (Inicio) para conrmar la selección y
comenzar a cocinar. El tiempo de preparación aparecerá en
la pantalla.
Términos Del Microondas
Término Definición
Arco
Eléctrico
El arco eléctrico es lo que, en la terminología de los microondas, describe las chispas en el horno. El arco
eléctrico se produce cuando:
• el estante de metal se ha instalado de forma incorrecta y está tocando las paredes del microondas.
• hay un metal o papel de aluminio tocando el lateral del horno.
• hay papel de aluminio no está envolviendo bien la comida (hay bordes doblados hacia arriba que actúan como
antenas).
• hay algún metal, como cintas de cierre con metal, pinchos de pollo, o platos con decoración de oro.
• hay papel toalla reciclado que contiene paqueñas piezas de metal.
• el suporte del aro del plato giratorio está instalado incorrectamente.
Cubierto /DVFXELHUWDVPDQWLHQDQODKXPHGDGGHQWURSHUPLWLHQGRXQFDOHQWDPLHQWRPiVSDUHMR\UHGXFLHQGRHOWLHPSRGH
cocción. Cuando se agujerea el envoltorio de plástico o se cubre con papel de cera permite la salida del vapor.
Resguardar En un horno convencional, se tapan o resguardan las perchugas de pollo o las comidas horneadas para que no
se doren demasiado. Al usar el microondas, use pequeñas cintas de papel de aluminio para cubrir partes finas,
como las puntas de las alas en las aves, que podrían cocinarse antes que las partes mayores.
Tiempo de
reposo
Cuando cocina en hornos regulares, las comidas como los asados o pasteles se dejan reposar para que acaben
de cocinarse o se asienten. El tiempo de reposo es especialmente importante al cocinar con microondas. Tenga
en cuenta que un pastel cocido en horno microondas no se coloca en un estante de enfriamiento.
Abrir
respiraderos
8QDYH]TXHKD\DFXELHUWRXQSODWRFRQILOPSOiVWLFRGHEHUiDEULUXQRUILFLRGHVSOHJDQGRXQDHVTXLQDSDUDTXH
pueda escapar el vapor.
Uso Del Horno De Microondas
USO DEL HORNO/CUIDADO Y LIMPIEZA
Kits Opcionales
Kit de filtro de carbón recirculante
WB02X28929 – Filtro de carbón
/RVNLWVGHILOWURVHXWLOL]DQFXDQGRHOKRUQRPLFURRQGDVQRSXHGHYHQWLODUVHDOH[WHULRU
28 49-7000248 Rev. 0
FILTRO(S) PARA GRASA
/RVILOWURVSDUDJUDVDVHHQFXHQWUDQHQODSDUWHGHDEDMRGHO
KRUQRGHPLFURRQGDV/RVILOWURVSDUDJUDVDGHEHQTXLWDUVH\
limpiarse a menudo; en general, por lo menos una vez al mes.
1.
Retire el filtro para grasa. Tome el aro de metal, deslice el
filtro hacia atrás y luego empuje suavemente el filtro hacia
abajo. Repita el procedimiento con el segundo filtro.
2. Remoje los filtros para grasa en agua caliente con
detergente neutro. Enjuáguelos bien y sacúdalos para
secarlos.
NOTA: No utilice amoníaco ni los lave en la lavavajillas. El
aluminio del filtro se corroerá y oscurecerá.
3.9XHOYDDFRORFDUHOILOWURSDUDJUDVD,QVHUWHHOERUGH
posterior del filtro en la abertura y luego empuje suavemente
el filtro para colocarlo en su lugar. Repita el procedimiento
con el segundo filtro.
FILTRO DE CARBÓN
IMPORTANTE: Debe colocar un filtro de carbón en el horno
de microondas si\ lo utiliza en una instalación sin salida de
ventilación (recirculación). El horno de microondas viene de
fábrica con un filtro de carbón instalado.
No es posible limpiar el filtro de carbón, lo debe cambiar al
menos cada 6 meses o con mayor frecuencia según el uso.
Para solicitar un filtro de carbón de repuesto para su modelo,
FRPXQtTXHVHFRQHO&HQWURGH$WHQFLyQDO&OLHQWH9HDHOGRUVR
de la tapa para obtener la información de contacto.
1. Desenchufe o desconecte el suministro de energía.
2.
Quite los tornillos de la rejilla superior con un destornillador
Phillips.
3.
Abra la puerta del horno de microondas para tomar la rejilla
superior y luego jalela rejilla en forma recta hacia afuera para
quitarla.
A
4. Quite el filtro de carbón usado de la parte posterior de la
parrilla y deseche el filtro.
5.
Alinee los orificios en el nuevo filtro de carbón con las cinco
sujeciones en la parte posterior de la parrilla y presione con
cuidado para sujetar.
A
Charcoal Filter
a
6. Alinee el borde superior de la rejilla para que cuando la
empuja en su lugar, los orificios de los tornillos se alineen
con los orificios del gabinete del microondas. Empuje
suavemente la rejilla hasta que encaje en su lugar y los
orificios de los tornillos estén alineados.
NOTA: Asegúrese de no apretar el mazo de alambres, ubicado
cerca de la bisagra de la puerta, cuando reemplaza la rejilla
superior.
7.9XHOYDDFRORFDUORVGRVWRUQLOORVTXHTXLWyDQWHV\DM~VWHORV
por completo.
LUCES
IMPORTANTE6XKRUQRGHPLFURRQGDVWLHQHOXFHV/('
HQHOLQWHULRU\OXFHV/('VREUHODVXSHUILFLH(VWDVOXFHVVH
diseñaron para durar toda la vida útil del horno de microondas.
Sin embargo, si las luces dejan de funcionar, llame a un técnico
calificado para su reemplazo o llame al Centro de Atención al
&OLHQWHSDUDUHSDUDUODV9HDHOGRUVRGHODWDSDSDUDREWHQHUOD
información de contacto.
Cuidado y Limpieza
CUIDADO Y LIMPIEZA
49-7000248 Rev. 0 29
COMISIÓN DE COMUNICACIONES FEDERALES (EE.
UU.) DECLARACIÓN DE INTERFERENCIA DE RADIO
FRECUENCIA
Este equipo genera y usa energía de frecuencia ISM
y si no es instalado y usado de forma adecuada, en
cumplimiento estricto con las instrucciones del fabricante,
se podrán ocasionar interferencias en la recepción de
radio y televisión. Se realizó una evaluación por tipo y se
encontró en cumplimiento con los límites de un equipo ISM,
de acuerdo con la parte 18 de las Reglas FCC, que fueron
diseñadas para brindar una protección razonable contra
dichas interferencias en una instalación residencial. Sin
embargo, no se garantiza que no se presenten interferencias
en una instalación en particular. Si el equipo provoca
interferencias en la recepción de radio o televisión, lo que
se puede determinar encendiendo y apagando el equipo,
se aconseja al usuario que intente corregir la interferencia a
través de una o más de las siguientes medidas:
• Reoriente la antena receptora de radio o televisión.
• Reubique el horno microondas con respecto al receptor.
• Coloque el horno microondas alejado del receptor.
• Enchufe el horno microondas en un tomacorriente
diferente, de modo que el horno microondas y el receptor
estén en diferentes circuitos de empalmes.
El fabricante no es responsable de cualquier interferencia de
UDGLRR79RFDVLRQDGDSRUXQDPRGLILFDFLyQQRDXWRUL]DGD
sobre este horno microondas. Es responsabilidad del
usuario corregir dicha interferencia.
PROBLEMA POSIBLES (S) CAUSA (S) SOLUCIÓN
El horno no se pone en marcha El cable de suministro de energía
del horno no está enchufado en un
tomacorriente.
Conecte a un contacto de pared de
FRQH[LyQDWLHUUDGHWHUPLQDOHV
/DSXHUWDHVWiDELHUWD Cierre la puerta y vuelva a intentarlo.
+DILMDGRXQDRSFLyQLQFRUUHFWD Revise las instrucciones.
.(<3$'6+257('6(59,&(
0$<%(1(('('DSDUHFHHQOD
pantalla
Se ha activado una tecla durante más
GHVHJXQGRV6HOHFFLRQH6WRS
Cancel para borrar la pantalla. Esto
puede suceder si hay líquido en el
panel de control.
Seque bien el panel de control
después de limpiarlo.
"FOOD" aparece en la pantalla
junto con el pitido
Se ha detectado una pulsación de
tecla y la puerto no se ha abierto en
los 5 minutos posteriores a la última
pulsación de tecla.
Abre y cierra la puerta y vuelve a
intentar un nuevo ciclo.
/2&.('DSDUHFHHQODV
pantalla
El control ha sido bloqueado. Presione y Mantenga Stop/Cancel
durante 3 segundos. Sonarán dos
SLWRGRV\OXHJR81/2&.('
aparecerá en la pantalla.
Solución De Problemas… Antes de llamar al servicio técnico.
SOLUCIÓN DE PROBLEMAS

30 49-7000248 Rev. 0
GEAppliances.com
Todo el servicio de garantía es provisto por nuestros Centros de Servicio de Fabricación, o un técnico autorizado de Servicio.
Para programar una visita del servicio técnico a través de Internet, visítenos en GEappliances.com/service. o comuníquese al
800.432.2737 durante el horario de atención comercial.
Lo que GE Appliances no cubrirá:
Ŷ9LDMHVGHOWpFQLFRGHOVHUYLFLRDVXKRJDUSDUDHQVHxDUOH
sobre cómo usar el producto.
Ŷ,QVWDODFLyQHQWUHJDRPDQWHQLPLHQWRLQDGHFXDGRV6L
tiene un problema con la instalación, comuníquese con su
YHQGHGRURLQVWDODGRU8VWHGHVUHVSRQVDEOHGHEULQGDU
LQVWDODFLRQHVDGHFXDGDVGHFRQH[LyQHOpFWULFDHVFDSHX
RWUDVLQVWDODFLRQHVGHFRQH[LyQ
Ŷ)DOODGHOSURGXFWRRGDxRVREUHHOSURGXFWRVLVHSURGXFH
un abuso, uso inadecuado (por ejemplo: arco eléctrico en
XQDFDYLGDGGHODUHMLOODRPHWDOSDSHOGHDOXPLQLRRXVR
diferente para el cual fue diseñado o uso comercial.
Ŷ5HHPSOD]RGHIXVLEOHVGHODFDVDRUHLQLFLRGHGLV\XQWRUHV
Ŷ'DxRVRFDVLRQDGRVVREUHHOSURGXFWRSRUDFFLGHQWH
incendio, inundaciones o catástrofes naturales.
Ŷ'DxRVFRQVHFXHQWHVRLQFLGHQWDOHVFDXVDGRVSRUSRVLEOHV
defectos sobre este producto.
Ŷ'DxRFDXVDGRGHVSXpVGHODHQWUHJD
Ŷ3URGXFWRQRDFFHVLEOHSDUDEULQGDUHOVHUYLFLRUHTXHULGR
Ŷ6ROLFLWHHOVHUYLFLRWpFQLFRSDUDUHSDUDURUHHPSOD]DUODV
OiPSDUDVH[FHSWRODVOiPSDUDV/('
Ŷ'DxRVVREUHHODFDEDGRWDOHVFRPRy[LGRVREUHOD
superficie, deslustres o manchas pequeñas no informadas
dentro de las 48 horas luego de la entrega.
Abroche su recibo aquí. Para acceder al servicio técnico de acuerdo con la
garantía deberá contar con la prueba de la fecha original de compra.
GARANTÍA LIMITADA
Garantía Limitada de Horno Microondas GE Appliances
EXCLUSIÓN DE GARANTÍAS IMPLÍCITAS
6X~QLFD\H[FOXVLYDDOWHUQDWLYDHVODUHSDUDFLyQGHOSURGXFWRFRPRVHLQGLFDHQOD*DUDQWtD/LPLWDGD/DVJDUDQWtDV
implícitas, incluyendo garantías implícitas de comerciabilidad o conveniencia sobre un propósito particular, se limitan a un
año o al período más corto permitido por la ley.
(VWDJDUDQWtDOLPLWDGDVHH[WLHQGHDOFRPSUDGRURULJLQDO\DFXDOTXLHUGXHxRVXEVLJXLHQWHGHSURGXFWRVFRPSUDGRVSDUDXVR
KRJDUHxRGHQWURGH((886LHOSURGXFWRHVWiHQXQiUHDGRQGHQRVHHQFXHQWUDGLVSRQLEOHXQ3URYHHGRU$XWRUL]DGRGHO6HUYLFLR
Técnico de GE Appliances, usted será responsable por el costo de un viaje o se podrá requerir que traiga el producto a una
XELFDFLyQGHO6HUYLFLR7pFQLFRGH*($SSOLDQFHVDXWRUL]DGRSDUDUHFLELUHOVHUYLFLR(Q$ODVNDODJDUDQWtDOLPLWDGDH[FOX\HHOFRVWR
de envío o llamadas del servicio a su hogar.
$OJXQRVHVWDGRVQRSHUPLWHQODH[FOXVLyQROLPLWDFLyQGHGDxRVIRUWXLWRVRFRQVHFXHQWHV(VWDJDUDQWtDOLPLWDGDOHGDGHUHFKRV
legales específicos y es posible que tenga otros derechos legales que varían entre un estado y otro. Para conocer cuáles son sus
derechos legales, consulte a la oficina de asuntos del consumidor local o estatal o al Fiscal de su estado.
Garante: GE Appliances, a+DLHUCompany
/RXLVYLOOH.<
Por el período de GE Appliances Reemplazará:
Un año
Desde la fecha de
compra original
Cualquier parte del horno que falle debido a un defecto en los materiales o mano de obra. Durante
esta garantía limitada de un año, GE Appliances también proveerá, sin costo, todo el trabajo y los
costos del servicio relacionado con el reemplazo de la parte que presente defectos.

49-7000248 Rev. 0 31
Impreso en China
Soporte para el Consumidor
SOPORTE PARA EL CONSUMIDOR
Sitio Web de GE Appliances
¿Desea realizar una consulta o necesita ayuda con su electrodoméstico? ¡Intente a través del Sitio Web de GE
$SSOLDQFHVODVKRUDVGHOGtDFXDOTXLHUGtDGHODxR8VWHGWDPELpQSXHGHFRPSUDUPiVHOHFWURGRPpVWLFRV
maravillosos de GE Appliances y aprovechar todos nuestros servicios de soporte a través de Internet, diseñados
SDUDVXFRQYHQLHQFLD(Q((88GEAppliances.com
Registre su Electrodoméstico
£5HJLVWUHVXHOHFWURGRPpVWLFRQXHYRDWUDYpVGH,QWHUQHWVHJ~QVXFRQYHQLHQFLD8QUHJLVWURSXQWXDOGHVXSURGXFWR
permitirá una mejor comunicación y un servicio más puntual de acuerdo con los términos de su garantía, en caso de
surgir la necesidad. También puede enviar una carta en la tarjeta de inscripción preimpresa que se incluye con el
PDWHULDOHPEDODGR(Q((88GEAppliances.com/register
Servicio Programado
(OVHUYLFLRGHUHSDUDFLyQGHH[SHUWRVGH*($SSOLDQFHVHVWiDVyORXQSDVRGHVXSXHUWD&RQpFWHVHDWUDYpVGH,QWHUQHW\SURJUDPH
VXVHUYLFLRDVXFRQYHQLHQFLDFXDOTXLHUGtDGHODxR(Q((88GEappliances.com/service o comuníquese al 800.432.2737
durante el horario de atención comercial.
Piezas y Accesorios
Aquellos individuos calificados para realizar el servicio técnico de sus propios electrodomésticos podrán solicitar el
HQYtRGHSLH]DVRDFFHVRULRVGLUHFWDPHQWHDVXVKRJDUHVVHDFHSWDQODVWDUMHWDV9,6$0DVWHU&DUG\'LVFRYHU
2UGHQHKR\DWUDYpVGH,QWHUQHWGXUDQWHODVKRUDVWRGRVORVGtDV(Q((88GEApplianceparts.com o de
forma telefónica al 800.432.2737 durante el horario de atención comercial.
Contáctenos
Si no se encuentra satisfecho con el servicio que recibió de GE Appliances, comuníquese con nosotros a través de
nuestro sitio Web con todos los detalles, incluyendo su número telefónico, o escriba a:
(Q((88*HQHUDO0DQDJHU&XVWRPHU5HODWLRQV_*($SSOLDQFHV$SSOLDQFH3DUN_/RXLVYLOOH.<
GEAppliances.com/contact

32 49-7000248 Rev. 0
Printed in China
IMPORTANTE
No regrese este producto a la tienda
Si tiene un problema con este producto, por favor comuníquese al 1-877-
337-3639 para solicitar el nombre y número telefónico del centro de
servicio al cliente autorizado más cercano.
NECESITA UNA PRUEBA DE COMPRA FECHADA, NÚMERO DE MODELO
Y DE SERIE PARA EL SERVICIO DE LA GARANTÍA
IMPORTANT
Do Not Return This Product To The Store
If you have a problem with this product, please call 1-877-337-3639 for the
name and telephone number of the nearest authorized service center.
DATED PROOF OF PURCHASE REQUIRED FOR WARRANTY SERVICE
