
MICROWAVE OVEN
PVM9215
PNM9216
OWNER’S
MANUAL
Write the model and serial numbers
here:
Model # _____________________
Serial # _____________________
You can find them on a label when
the door is open.
49-7000090 Rev. 1 06-24
GE is a trademark of the General Electric Company. Manufactured under trademark license.
SAFETY INSTRUCTIONS . . 3
USING THE MICROWAVE
..7
Features ..........................7
Controls
..........................8
Time And Auto Features
........... 9
Sensor Features
..................13
Other Features
...................16
Microwave Terms
.................19
CARE AND CLEANING
Inside ........................... 20
Stainless Steel ................... 20
Outside
.........................20
Replacing the LED Lamp
..........21
Vent Filters
..................... 22
Charcoal Filters ....................22
TROUBLESHOOTING TIPS 23
CONSUMER SUPPORT
Limited
Warranty ................
24
Optional Kits
.................... 25
Consumer Support
............... 28

2 49-7000090 Rev. 1
THANK YOU FOR MAKING GE APPLIANCES A PART OF YOUR HOME
Whether you grew up with GE Appliances, or this is your first, we’re happy to have you in the family.
We take pride in the craftsmanship, innovation and design that goes into every GE Appliances
product, and we think you will too. Among other things, registration of your appliance ensures that we
can deliver important product information and warranty details when you need them.
Register your GE appliance now online. Helpful websites and phone numbers are available in the
Consumer Support section of this Owner’s Manual.

49-7000090 Rev. 1 3
READ AND SAVE THESE INSTRUCTIONS
IMPORTANT SAFETY INFORMATION
READ ALL INSTRUCTIONS BEFORE USING THE APPLIANCE
SAFETY INFORMATION
WARNING
To reduce the risk of burns, electric shock, fire, injury to persons, or exposure to
excessive microwave energy:
When using electrical appliances, basic safety precautions should be followed, including the following:
Ŷ 5HDGDOOLQVWUXFWLRQVEHIRUHXVLQJWKLVDSSOLDQFH
Ŷ 5HDGDQGIROORZWKHVSHFLILFSUHFDXWLRQVLQWKH
PRECAUTIONS TO AVOID POSSIBLE EXPOSURE
TO EXCESSIVE MICROWAVE ENERGY section on
page 6.
Ŷ 8VHWKLVDSSOLDQFHRQO\IRULWVLQWHQGHGXVHDV
described in this manual. Do not use corrosive
chemicals or vapors in this appliance. This oven is
specifically designed to heat, dry or cook food, and is
not intended for laboratory or industrial use.
Ŷ 7KLVPLFURZDYHPXVWRQO\EHVHUYLFHGE\TXDOLILHG
service personnel. Contact nearest authorized
service facility for examination, repair or adjustment.
INSTALLATION
Ŷ ,QVWDOORUORFDWHWKLVDSSOLDQFHRQO\LQDFFRUGDQFH
with the provided installation instructions.
Ŷ This appliance must be grounded. Connect only
to properly grounded outlet. See “GROUNDING
INSTRUCTIONS” found on page 5.
Ŷ 7KLVPLFURZDYHRYHQLV(7/OLVWHGIRULQVWDOODWLRQ
over both gas and electric ranges.
Ŷ 7KLVXQLWLVVXLWDEOHIRUXVHDERYHJDVRUHOHFWULF
FRRNLQJHTXLSPHQW´RUOHVVZLGH
Ŷ Do not operate this appliance if it has a damaged
power cord or plug, if it is not working properly, or if it
has been damaged or dropped.
Ŷ .HHSFRUGDZD\IURPKHDWHGVXUIDFHV
Ŷ Do not let cord hang over the edge of the table or
counter
Ŷ 'RQRWLPPHUVHFRUGRUSOXJLQZDWHU
Ŷ 'RQRWFRYHURUEORFNDQ\RSHQLQJVRQWKH
appliance.
Ŷ 'RQRWVWRUHWKLVDSSOLDQFHRXWGRRUV'RQRWXVHWKLV
product near water—for example, in a wet basement,
near a swimming pool, near a sink or in similar
locations.
Ŷ 'RQRWPRXQWWKLVDSSOLDQFHRYHUDVLQN
TO REDUCE THE RISK OF FIRE IN THE CAVITY:
Ŷ Do not overcook food. Carefully attend appliance
when paper, plastic or other combustible materials
are placed inside the oven
to facilitate cooking.
Ŷ 5HPRYHZLUHWZLVWWLHVDQGPHWDOKDQGOHVIURP
paper or plastic containers before placing them in
the oven.
Ŷ 'RQRWVWRUHDQ\PDWHULDOV, other than our
recommended accessories, in this oven when not in
use. Do not leave paper products, cooking utensils
or food in the cavity when not in use. Microwave
rack should be removed from oven when not in use.
Ŷ ,IPDWHULDOVLQVLGHWKHRYHQLJQLWHNHHSWKHRYHQ
door closed, turn the oven off and disconnect the
power cord or shut off power at the fuse or circuit
breaker panel.
Ŷ 'RQRWRSHUDWHWKHPLFURZDYHIHDWXUHZLWKRXWIRRGLQ
the oven.
TO REDUCE THE RISK OF BURNS:
Ŷ %HFDUHIXOZKHQRSHQLQJFRQWDLQHUVRIKRWIRRG8VH
pot holders and direct steam away from face and
hands.
Ŷ 9HQWSLHUFHRUVOLWFRQWDLQHUVSRXFKHVRUSODVWLF
EDJVWRSUHYHQWEXLOGXSRISUHVVXUH
Ŷ %HFDUHIXOZKHQWRXFKLQJWKHWXUQWDEOHGRRUUDFNV
or walls of the oven which may become hot during
use.
Ŷ HOT CONTENTS CAN CAUSE SEVERE BURNS.
DO NOT ALLOW CHILDREN TO USE THE
MICROWAVE. Use caution when removing hot items.

4 49-7000090 Rev. 1
SAFETY INFORMATION
READ AND SAVE THESE INSTRUCTIONS
IMPORTANT SAFETY INFORMATION
READ ALL INSTRUCTIONS BEFORE USING THE APPLIANCE
WARNING
Continued
OPERATING
Ŷ 'RQRWRSHUDWHWKHRYHQZLWKRXWWKHWXUQWDEOHLQ
place. The turntable must be unrestricted so it can
turn.
Ŷ 0DNHVXUHDOOFRRNZDUHXVHGLQ\RXUPLFURZDYH
oven is suitable for microwaving. Most glass
casseroles, cooking dishes, measuring cups, custard
cups, pottery, or china dinnerware, which does not
have metallic trim or glaze with a metallic sheen can
be used in compliance with cookware manufacturers’
recommendations.
Ŷ 'RQRWVWRUHDQ\WKLQJGLUHFWO\RQWRSRIWKH
microwave surface when the microwave is in
operation.
Ŷ 6RPHSURGXFWVVXFKDVZKROHHJJVDQGVHDOHG
FRQWDLQHUVIRUH[DPSOHFORVHGMDUVDUHDEOHWR
explode and should not be heated in the microwave
oven.
Ŷ 'RQRWRYHUFRRNSRWDWRHV7KH\FRXOGGHK\GUDWHDQG
catch fire.
Ŷ 'RQRWFRYHUDQ\RWKHUSDUWRIWKHRYHQZLWKPHWDO
foil. This will cause overheating of the oven.
Ŷ &RRNPHDWDQGSRXOWU\WKRURXJKO\²PHDWWRDWOHDVW
an INTERNAL temperature of 160°F and poultry to at
least an INTERNAL temperature of 180°F. Cooking
to these temperatures usually protects against
foodborne illness.
Ŷ 7KLVRYHQLVQRWDSSURYHGRUWHVWHGIRUPDULQHXVH
CLEANING
Ŷ .HHSWKHRYHQIUHHIURPJUHDVHEXLOGXS
Ŷ 'RQRWFOHDQZLWKPHWDOVFRXULQJSDGV3LHFHVFDQ
burn off the pad and touch electrical parts involving
risk of electric shock.
Ŷ :KHQFOHDQLQJVXUIDFHVRIGRRUDQGRYHQWKDW
come together on closing the door, use only mild,
nonabrasive soaps, or detergents applied with a
clean sponge or soft cloth. Rinse well.
SUPER HEATED WATER
Ŷ /LTXLGVVXFKDVZDWHUFRIIHHRUWHDDUHDEOHWR
be overheated beyond the boiling point without
appearing to be boiling. Visible bubbling or boiling
when the container is removed from the microwave
oven is not always present. THIS COULD RESULT
IN VERY HOT LIQUIDS SUDDENLY BOILING
OVER WHEN THE CONTAINER IS DISTURBED
OR A SPOON OR OTHER UTENSIL IS INSERTED
INTO THE LIQUID.
Ŷ 7RUHGXFHWKHULVNRILQMXU\WRSHUVRQV
'RQRWRYHUKHDWWKHOLTXLG
6WLUWKHOLTXLGERWKEHIRUHDQGKDOIZD\WKURXJK
heating it.
'RQRWXVHVWUDLJKWVLGHGFRQWDLQHUVZLWKQDUURZ
necks.
$IWHUKHDWLQJDOORZWKHFRQWDLQHUWRVWDQGLQWKH
microwave oven for a short time before removing
the container.
8VHH[WUHPHFDUHZKHQLQVHUWLQJDVSRRQRURWKHU
utensil into the container.
49-7000090 Rev. 1 5
READ AND SAVE THESE INSTRUCTIONS
IMPORTANT SAFETY INFORMATION
READ ALL INSTRUCTIONS BEFORE USING THE APPLIANCE
SAFETY INFORMATION
VENT FAN
The fan will operate automatically under certain conditions.
Take care to prevent the starting and spreading of accidental
cooking fires while the vent fan is in use.
Ŷ Clean the underside of the microwave often. Do not
allow grease to build up on the microwave or the fan
filters.
Ŷ In the event of a grease fire on the surface units
below the microwave oven, smother a flaming pan
on the surface unit by covering the pan completely
with a lid, a cookie sheet or a flat tray.
Ŷ Use care when cleaning the vent fan filters.
&RUURVLYHFOHDQLQJDJHQWVVXFKDVO\HEDVHGRYHQ
cleaners, may damage the filters.
Ŷ When preparing flaming foods under the microwave,
turn the fan on.
Ŷ Never leave surface units beneath your microwave
oven unattended at high heat settings. Boilovers
cause smoking and greasy spillovers that may ignite
and spread if the microwave vent fan is operating.
7RPLQLPL]HDXWRPDWLFIDQRSHUDWLRQXVHDGHTXDWH
sized cookware and use high heat on surface units
only when necessary.
PACEMAKERS
Most pacemakers are shielded from interference from electronic products, including microwaves. However,
patients with pacemakers may wish to consult their physicians if they have concerns.
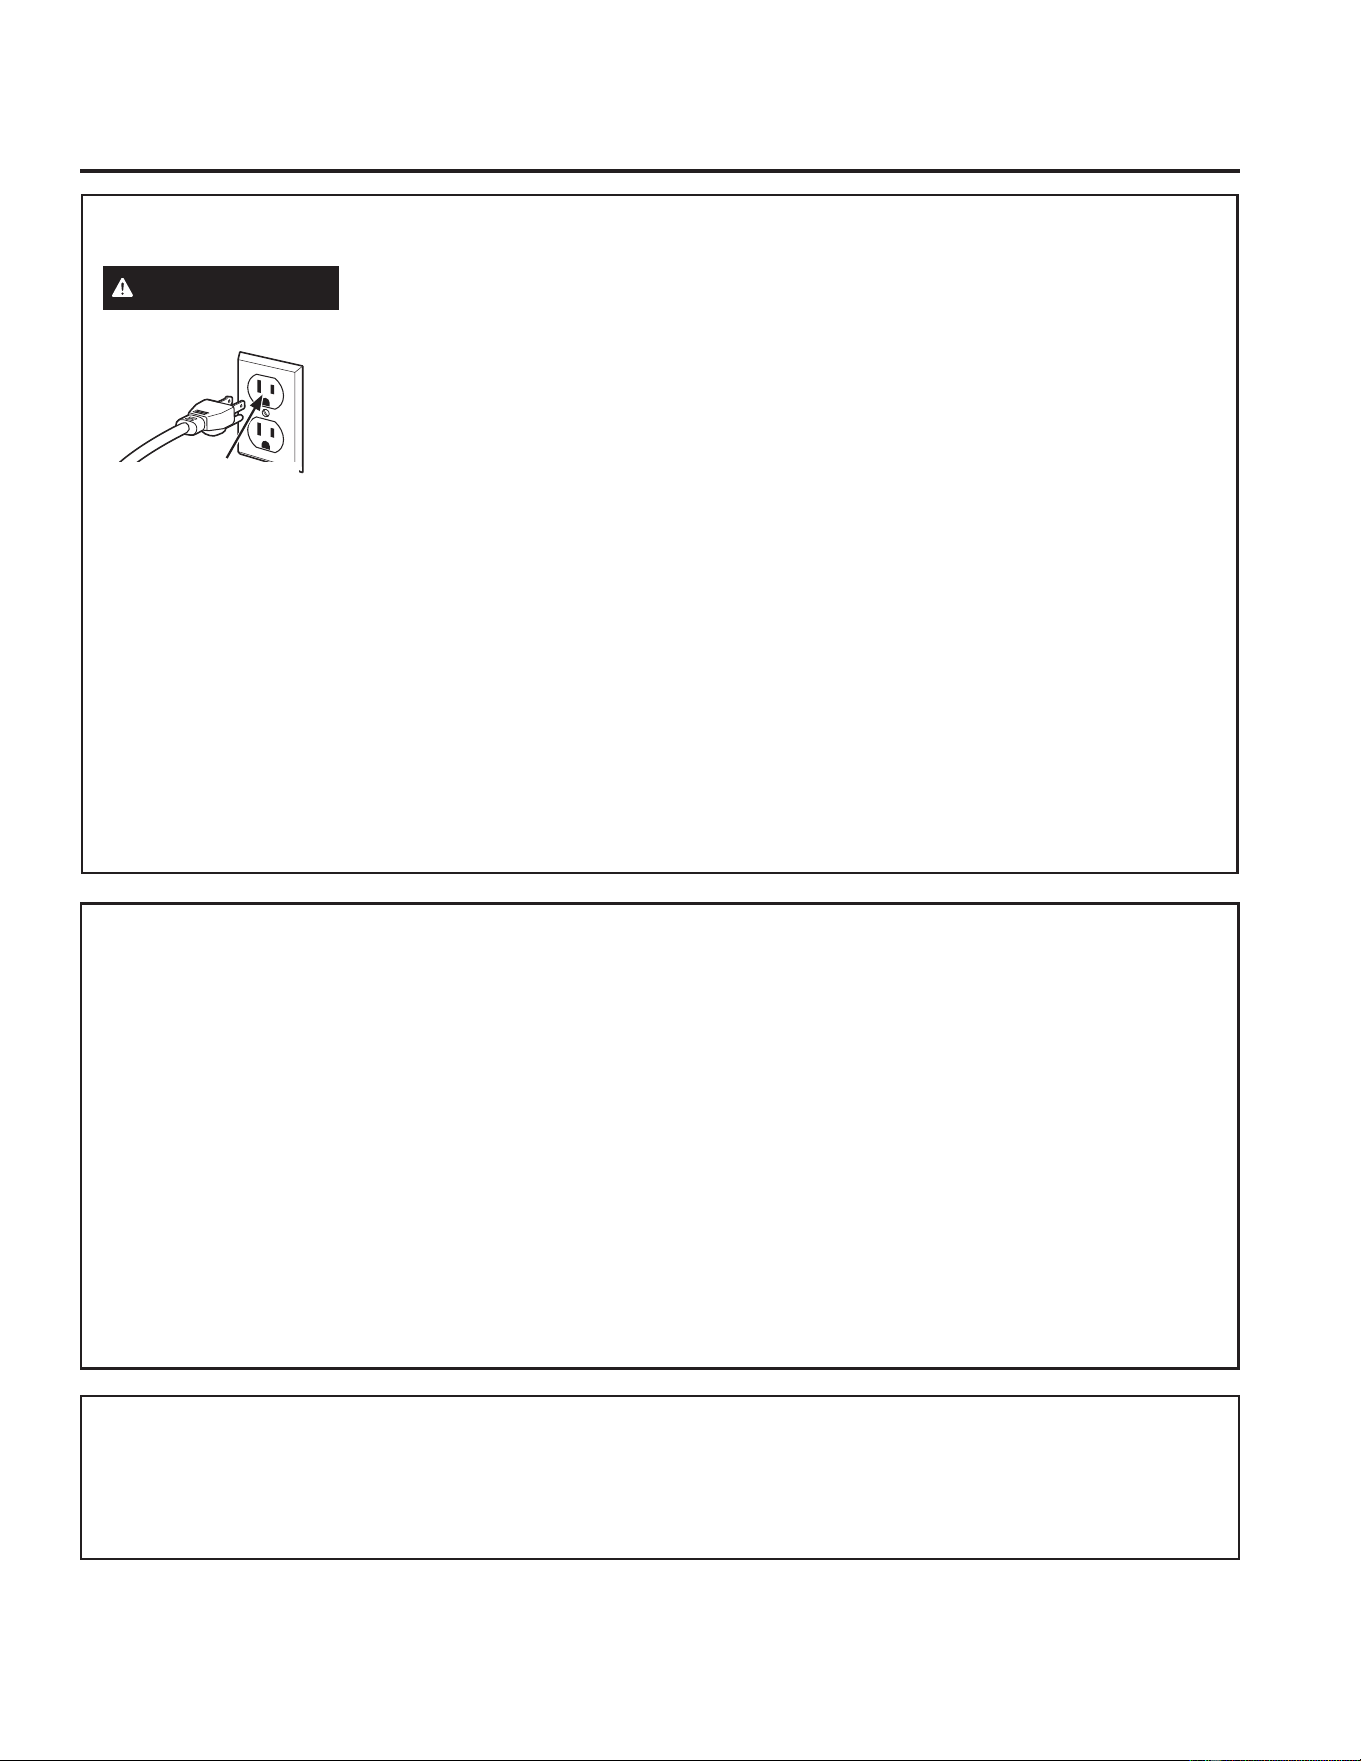
GROUNDING INSTRUCTIONS
WARNING
Improper use of the grounding plug can result in a risk of electric shock.
This appliance must be
grounded. In the event of an
electrical short circuit, grounding
reduces the risk of electric shock
by providing an escape wire for
the electric current.
7KLVDSSOLDQFHLVHTXLSSHGZLWKDSRZHUFRUGKDYLQJD
grounding wire with a grounding plug. The plug must
be plugged into an outlet that is properly installed and
grounded.
&RQVXOWDTXDOLILHGHOHFWULFLDQRUVHUYLFHWHFKQLFLDQLI
the GROUNDING INSTRUCTIONS are not completely
understood, or if doubt exists as to whether the
appliance is properly grounded.
,IWKHRXWOHWLVDVWDQGDUGSURQJZDOORXWOHWLWLV
your personal responsibility and obligation to have it
UHSODFHGZLWKDSURSHUO\JURXQGHGSURQJZDOORXWOHW
Do not under any circumstances cut or remove the
third (ground) prong from the power cord.
Do not use an extension cord. If the power cord is too
VKRUWKDYHDTXDOLILHGHOHFWULFLDQRUVHUYLFHWHFKQLFLDQ
install an outlet near the appliance.
For best operation, plug this appliance into its own
electrical outlet to prevent flickering of lights, blowing
of fuse or tripping of circuit breaker.
Ensure Proper ground
exists before use.

6 49-7000090 Rev. 1
SAFETY INFORMATION
IMPORTANT SAFETY INFORMATION
READ ALL INSTRUCTIONS BEFORE USING THE APPLIANCE
PRECAUTIONS TO AVOID POSSIBLE EXPOSURE
TO EXCESSIVE MICROWAVE ENERGY
(a) Do Not Attempt to operate this oven with the
GRRURSHQVLQFHRSHQGRRURSHUDWLRQFDQUHVXOW
in harmful exposure to microwave energy. It is
important not to defeat or tamper with the safety
interlocks.
(b) Do Not Place any object between the oven front
face and the door or allow soil or cleaner residue to
accumulate on sealing surfaces.
(c) Do Not Operate the oven if it is damaged.
It is particularly important that the oven door close
properly and that there is no damage to the:
(1) door (bent),
(2) hinges and latches (broken or loosened),
(3) door seals and sealing surfaces.
(d) The Oven Should Not be adjusted or repaired by
DQ\RQHH[FHSWSURSHUO\TXDOLILHGVHUYLFHSHUVRQQHO
49-7000090 Rev. 1 7
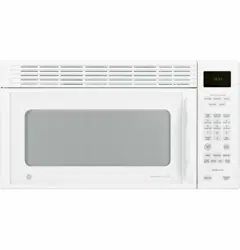
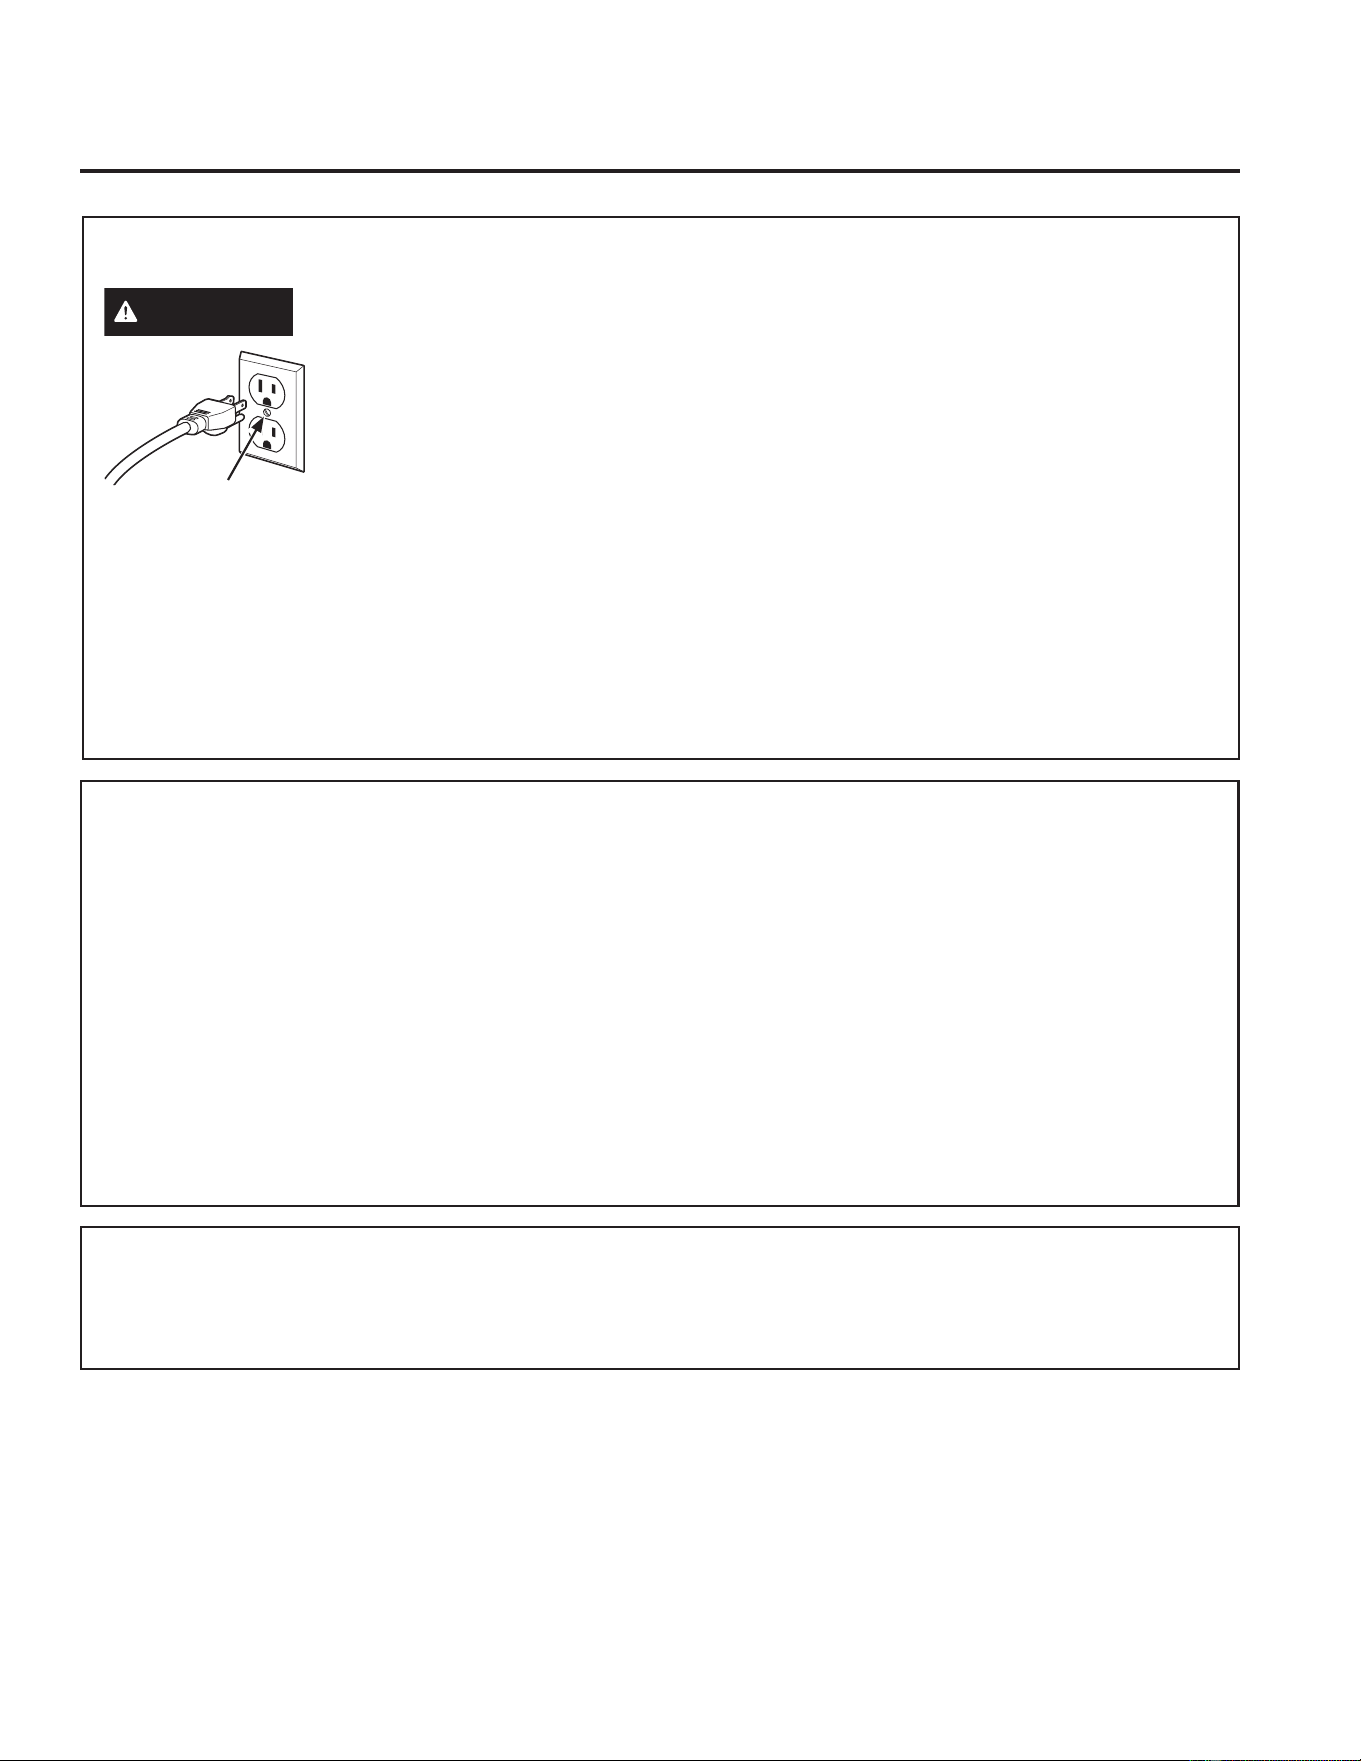
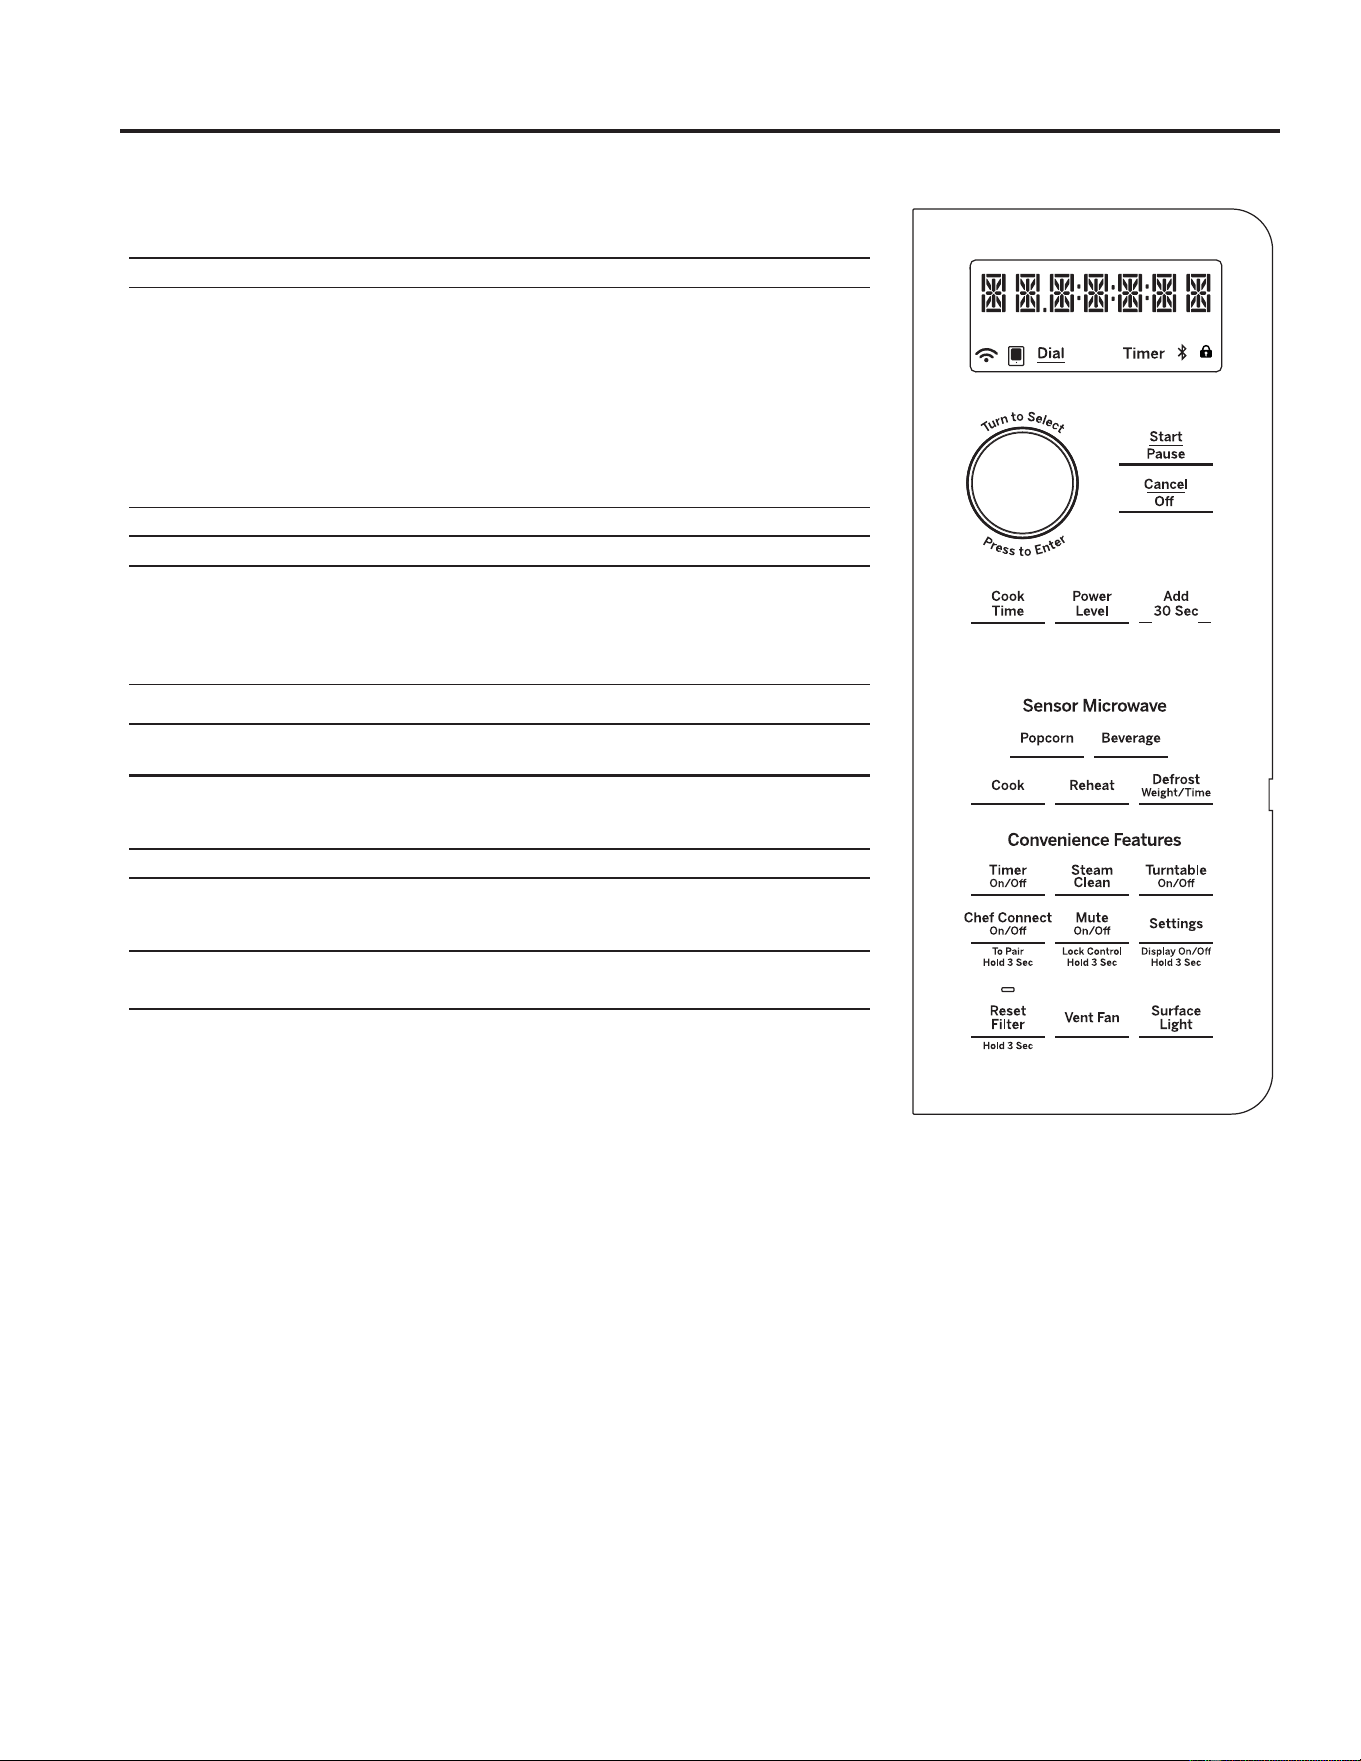
Throughout this manual, features and appearance may vary from your model.
Features
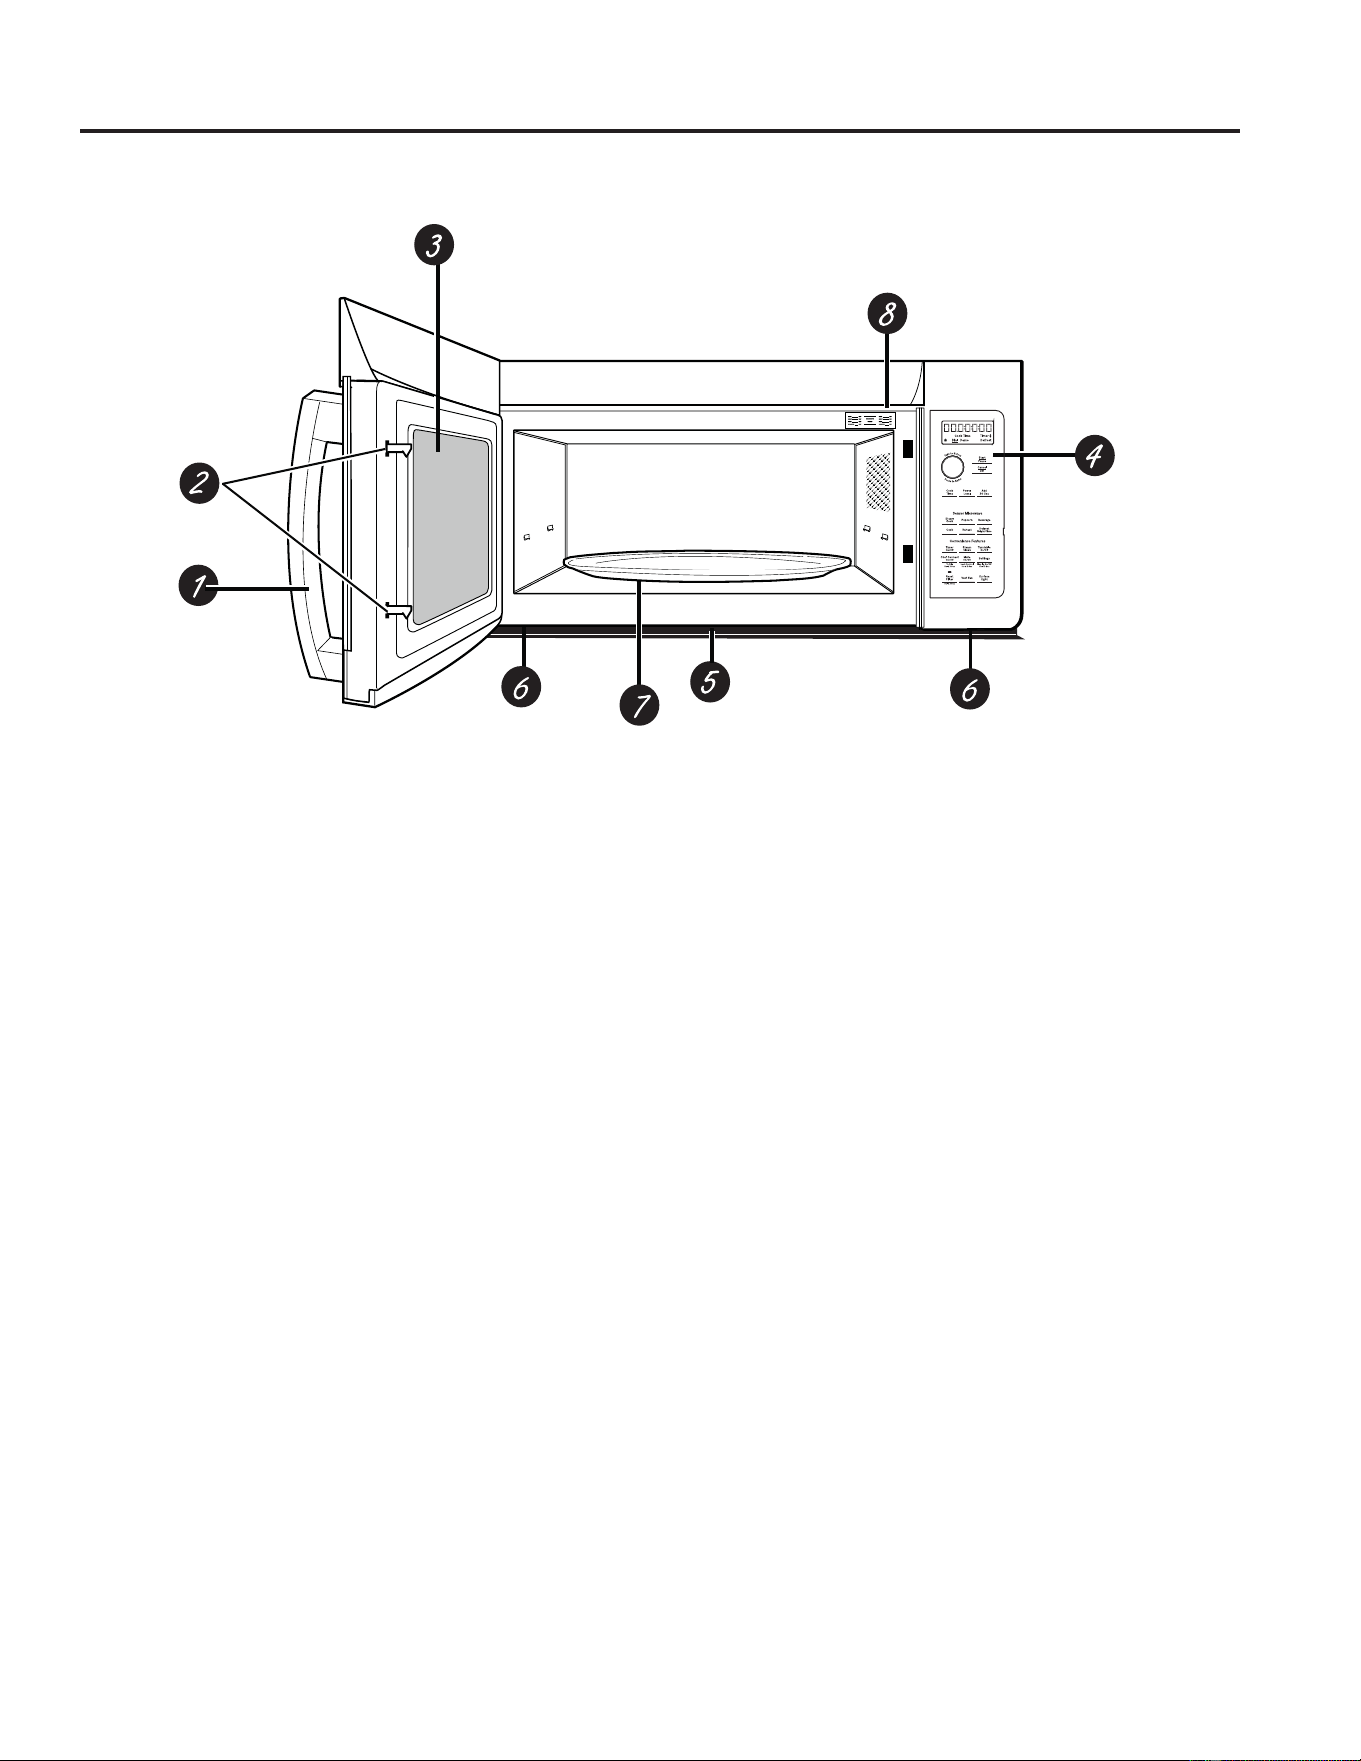
USING YOUR OVEN: Features
1 Door Handle. Pull to open the door. The door must
be securely latched for the microwave to operate.
2 Door Latches.
3 Window with Metal Shield. Screen allows cooking
to be viewed while keeping microwaves confined
in the oven.
4 Control Panel and Selector Dial.
5 Cooktop Light.
6 Grease Filter .
7 Removable Turntable. Turntable and support must be
in place when using the oven. The turntable may be
removed for cleaning.
8 Rating Plate.
NOTE: Oven vent(s) and oven light are located on the
inside walls of the microwave oven.
8 49-7000090 Rev. 1
Controls
USING YOUR OVEN: Controls
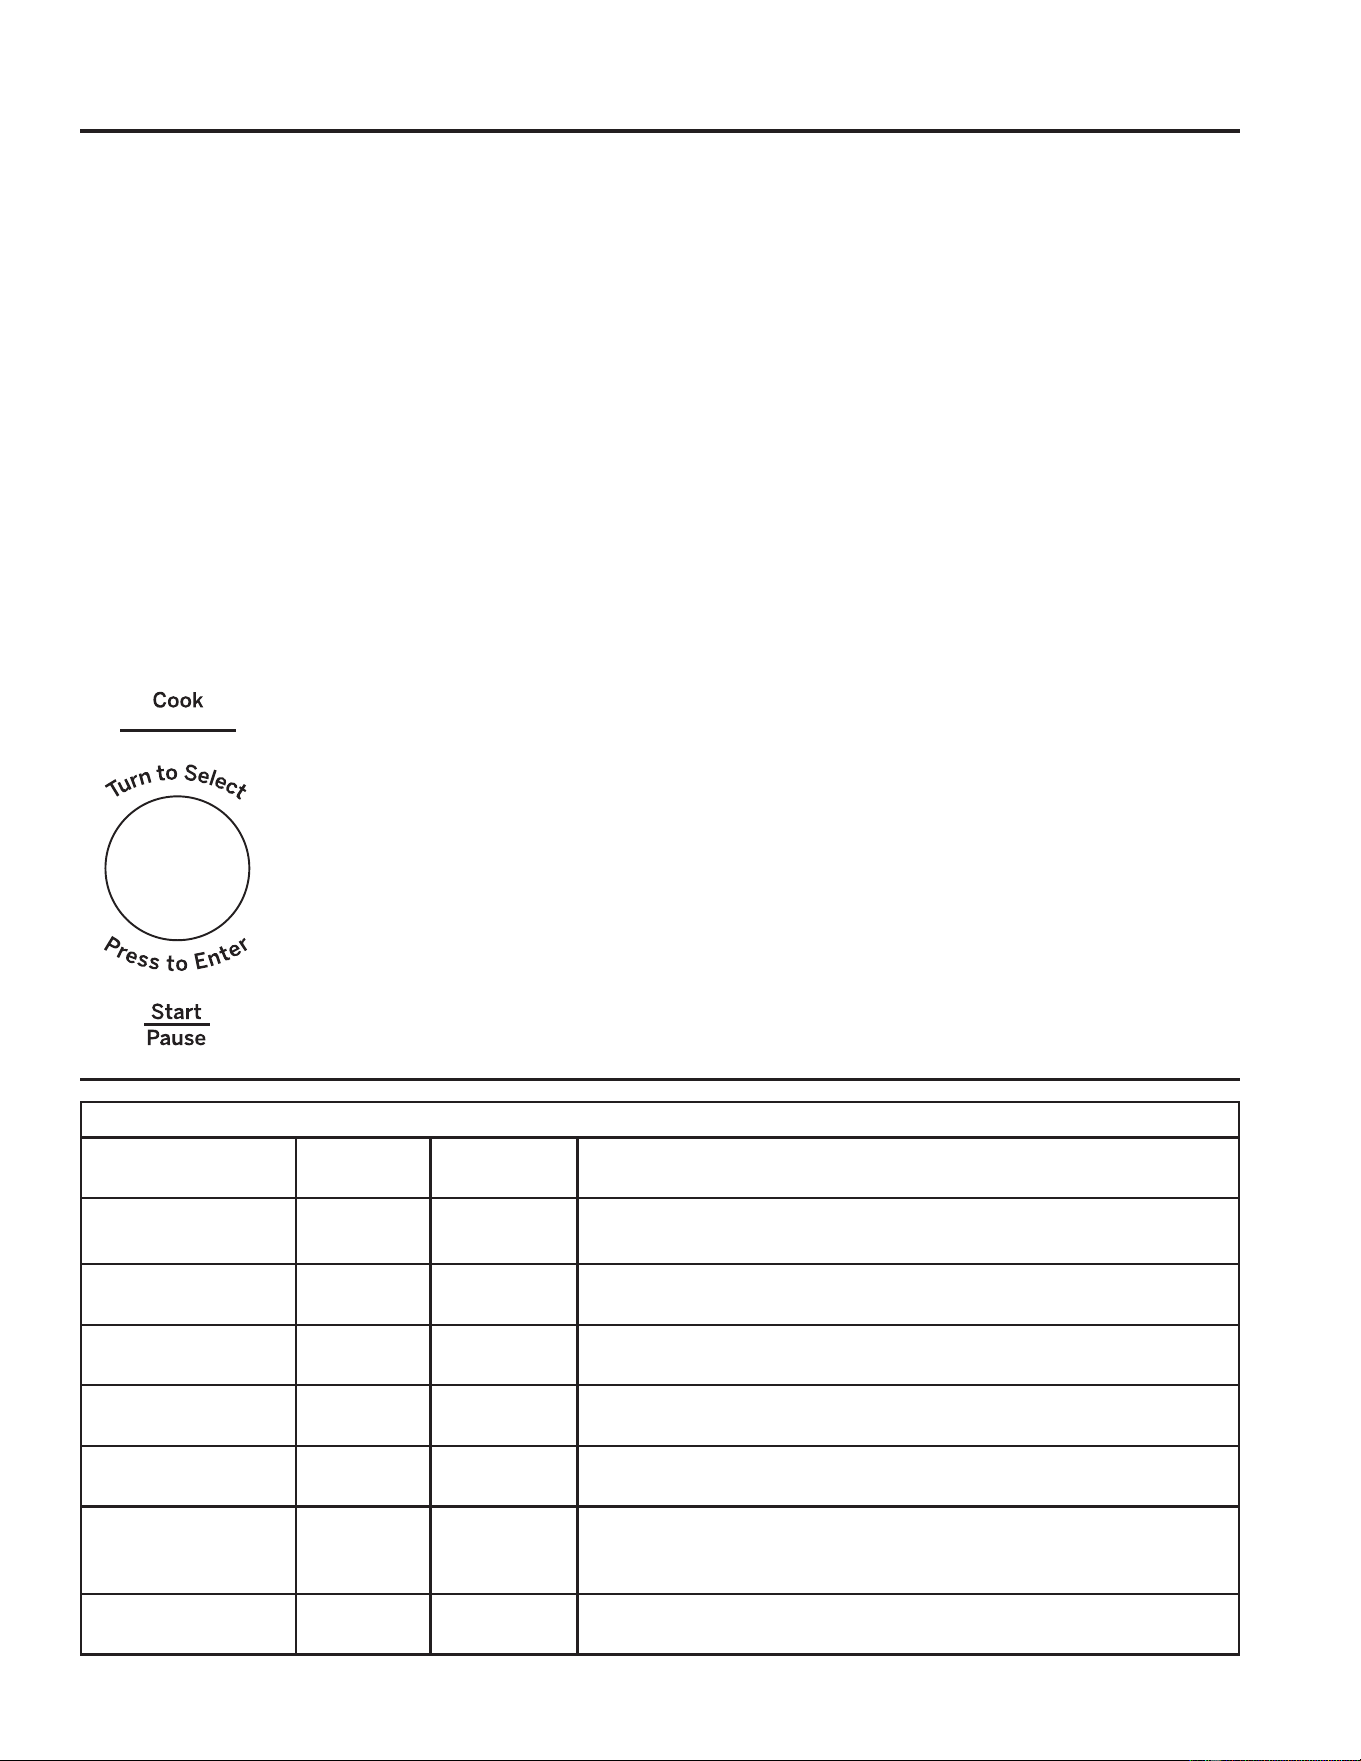
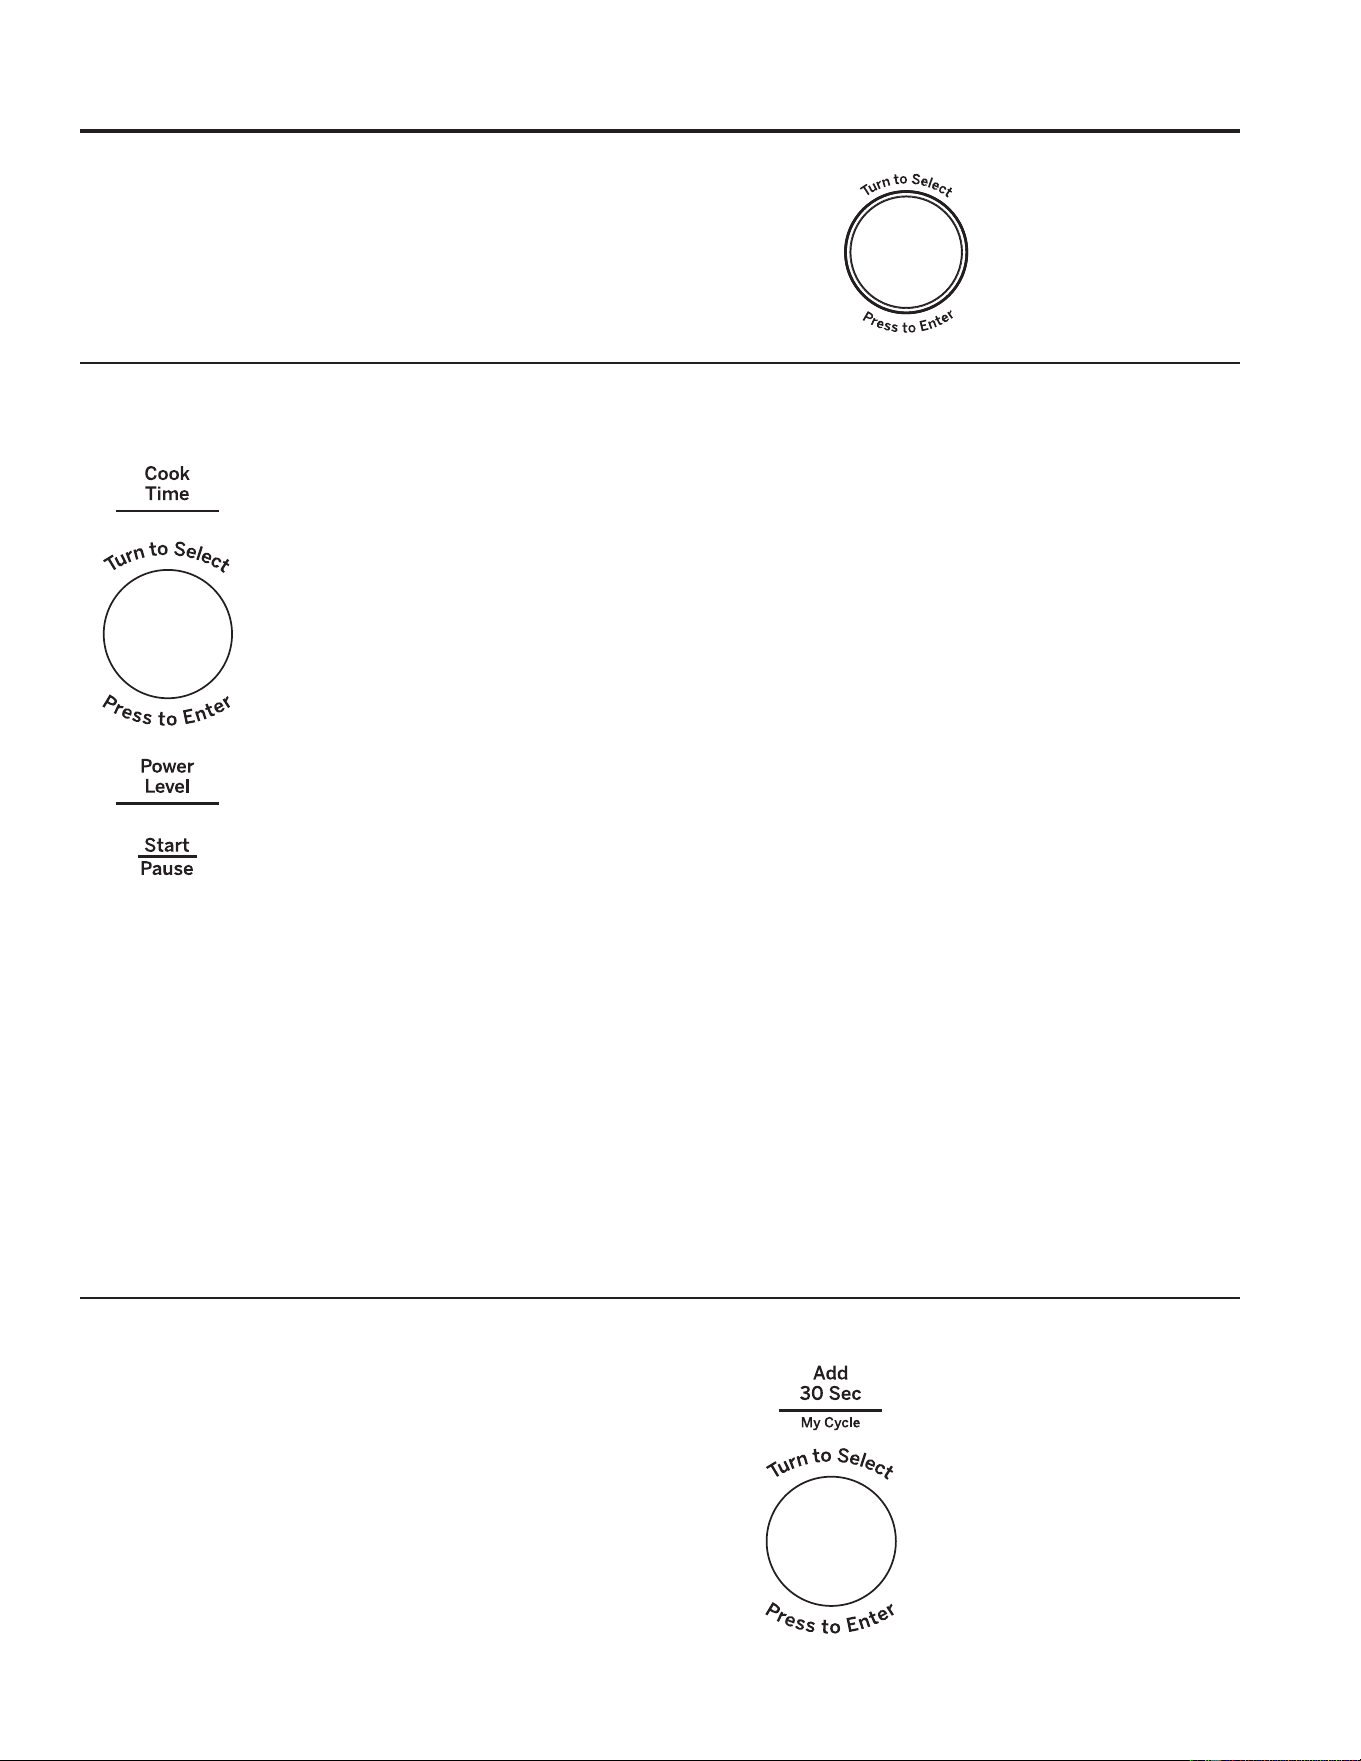
Microwave Cooking Time and Auto Features
Press Turn and push dial to enter
Cook Time Amount of cooking time
Press once (Cook Time I) to
microwave any time between
15 seconds and 99 minutes.
Press twice (Cook Time II) to
add a 2nd microwave
cooking stage.
Power Level Power level 1–10
Add 30 sec. Starts immediately!
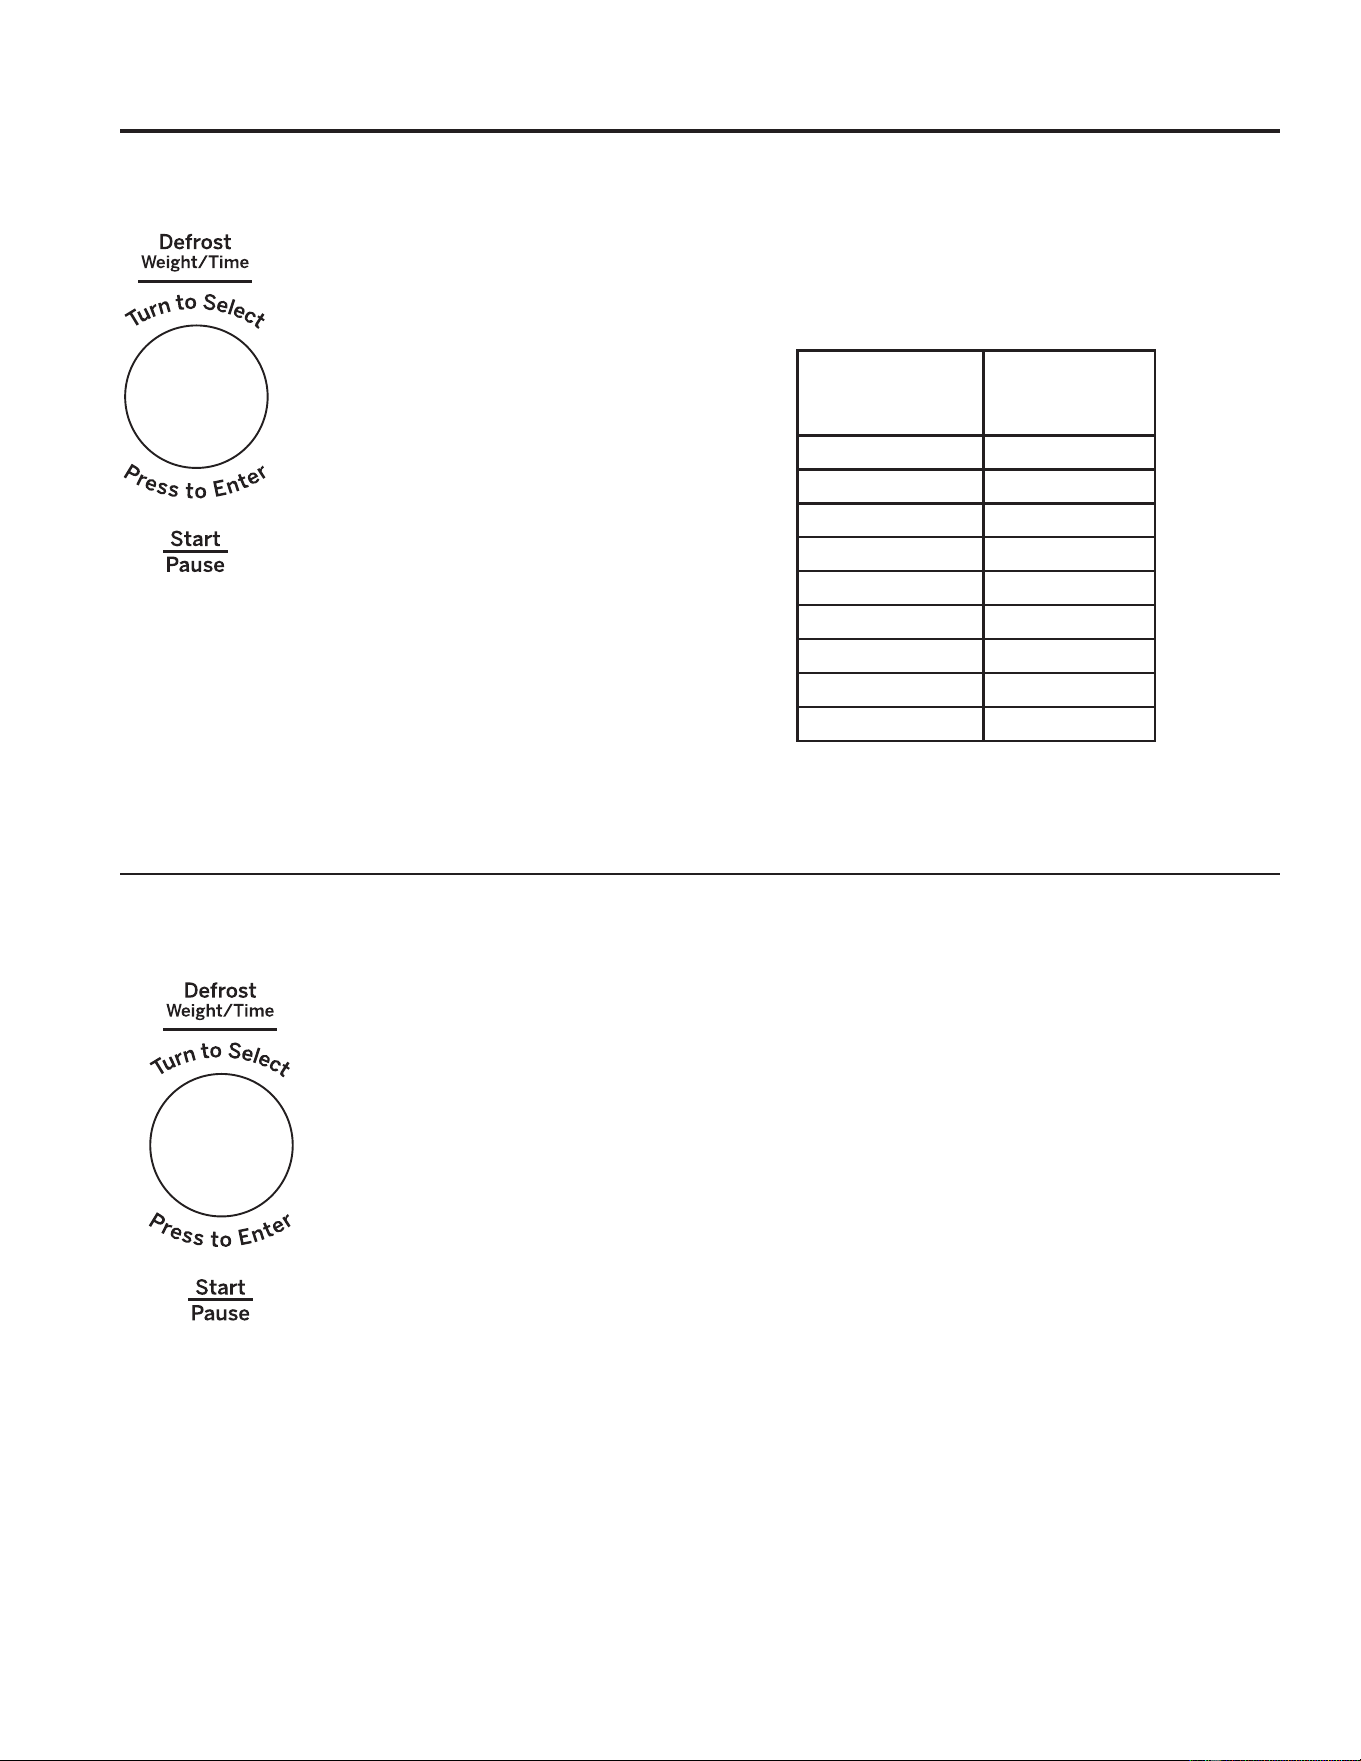
Defrost Weight/Time
Press once (Weight Defrost) Food weight up to one pound
Press twice (Timed Defrost) Amount of defrosting time
Sensor Features
Press Turn and push
dial to enter Option
Popcorn Starts immediately! more/less time
Beverage Starts immediately!
Cook Food Type more/less time
Reheat Food Type more/less time
My Cycle
Mute
49-7000090 Rev. 1 9
USING YOUR OVEN: Time and Auto Microwave Features
Using the Dial
You can make selections on the oven by turning the dial
and pressing it to enter the selection.
Pressing the dial can also be used in place of the Start/
PauseEXWWRQIRUTXLFNHUSURJUDPPLQJRIWKHRYHQ
Cook Time
Cook Time I
Allows you to microwave for any time between
15 seconds and 99 minutes.
Power level 10 (High) is automatically set, but
you may change it for more flexibility.
1. Press the Cook Time button.
2. Turn the dial to set the cook time and press
the dial to enter.
3. Change power level if you don’t want full
power. (Press Power Level. Turn the dial to
select. Press the dial to enter.)
4. Press the dial or the Start/Pause button to
start cooking.
You may open the door during Cook Time to
check the food. Close the door and press the
dial or Start/Pause to resume cooking.
NOTE: You may change the cook time at any
time during cooking by turning the dial. You
may also change the power level by pressing
the Power Level button.
Cook Time II
Lets you change power levels automatically
during cooking. Here’s how to do it:
1. Press the Cook Time button.
2. Turn the dial to set the first cook time and
press the dial to enter.
3. Change the power level if you don’t want full
power. (Press Power Level. Turn the dial to
select. Press the dial to enter.)
4. Press the Cook Time button again.
5. Turn the dial to set the second cook time and
press the dial to enter.
6. Change the power level if you don’t want full
power. (Press Power Level. Turn the dial to
select. Press the dial to enter.)
7. Press the dial or the Start/Pause button to
start cooking.
At the end of Cook Time I, Cook Time II
counts down.
NOTE: You may change the cook time at any
time during cooking by turning the dial. You
may also change the power level by pressing
the Power Level button.
Add 30 Sec
7KLVLVDTXLFNZD\WRVHWDQGVWDUWFRRNLQJLQVHFRQG
blocks each time the Add 30 Second button is pressed.
The cook time may be changed by turning the dial at any
time during cooking.
The power level will automatically be set at 10 and the
oven will start immediately.
The power level can be changed as time is counting
down. Press the Power Level button, turn the dial and
press to enter.
Time and Auto Microwave Features
10 49-7000090 Rev. 1
Time and Auto Microwave Features
Weight Defrost
Weight Defrost automatically sets the
defrosting times and power levels to
give even defrosting results for meats,
poultry and fish weighing up to one
pound.
Ŷ5HPRYHPHDWIURPSDFNDJHDQG
SODFHRQPLFURZDYHVDIHGLVK
1. Press the Defrost button once.
2. Turn the dial to the food weight,
using the Conversion Guide at right.
For example, dial .5 for .5 pounds (8
oz.) Press the dial to enter.
3. Press the Start/Pause button to start defrosting.
4. Turn the food over if the oven signals TURN FOOD
OVER.
Ŷ5HPRYHGHIURVWHGPHDWRUVKLHOGZDUPDUHDVZLWK
small pieces of foil.
Ŷ$IWHUGHIURVWLQJPRVWPHDWVQHHGWRVWDQGPLQXWHV
to complete defrosting.
Conversion Guide
If the weight of food is stated in pounds and ounces, the
ounces must be converted to tenths (.1) of a pound.
Use Time Defrost to defrost for a selected
length of time.
1. Press the Defrost button twice.
2. Turn the dial to select the time you want.
Press the dial to enter.
3. Press the Start/Pause button to start
defrosting.
4. Turn the food over if the oven signals
TURN FOOD OVER.
You may change the defrost time at any time
during defrosting by turning the dial.
Power level is automatically set at 3, but
can be changed. You can defrost small
LWHPVTXLFNO\E\UDLVLQJWKHSRZHUOHYHODIWHU
entering the time. Power Level 7 cuts the
total defrosting time in about half; Power
Level 10 cuts the total time to approximately
+RZHYHUIRRGZLOOQHHGPRUHIUHTXHQW
attention than usual.
A dull thumping noise may be heard during
defrosting. This is normal when oven is not
operating at High power.
Defrosting Tips
Ŷ)RRGVIUR]HQLQSDSHURUSODVWLFFDQEH
defrosted in the package. Closed packages
should be slit, pierced or vented AFTER
food has partially defrosted. Plastic storage
containers should be partially uncovered.
Ŷ)DPLO\VL]HSUHSDFNDJHGIUR]HQGLQQHUV
can be defrosted and microwaved. If the
food is in a foil container, transfer it to a
PLFURZDYHVDIHGLVK
Ŷ)RRGVWKDWVSRLOHDVLO\VKRXOGQRWEH
allowed to sit out for more than one
hour after defrosting. Room temperature
promotes the growth of harmful bacteria.
Ŷ:KHQGHIURVWHGIRRGVKRXOGEHFRROEXW
softened in all areas. If still slightly icy,
return to the microwave very briefly, or let it
stand a few minutes.
Weight of Food
in Ounces
Enter Food
Weight (tenths
of a pound)
1–2 .1
3.2
4–5 .3
6–7 .4
8.5
9–10 .6
11 .7
12–13 .8
14–15 .9
Time Defrost
USING YOUR OVEN: Time and Auto Microwave Features

49-7000090 Rev. 1 11
USING YOUR OVEN: Time and Auto Microwave Features
Time and Auto Microwave Features
Defrosting Guide
Food Time Comments
Breads, Cakes
Bread, buns or rolls (1
piece)
1/4 min.
Sweet rolls (approx. 12 oz.) 2 to 4 min. Rearrange after half of time.
Fish and Seafood
Fillets, frozen (1 lb.) 6 to 9 min.
Fruit
Plastic pouch—1 or 2 1 to 5 min.
R]SDFNDJH
Meat
Bacon (1 lb.) 2 to 5 min.
Place unopened package in oven. Let stand 5 minutes after defrosting.
Franks (1 lb.) 2 to 5 min. Place unopened package in oven. Microwave just until franks can be
separated. Let stand 5 minutes, if necessary, to complete defrosting.
Ground meat (1 lb.) 4 to 6 min. Turn meat over after first half of time.
Roast: beef, lamb, veal,
pork
9 to 13 min. per lb. Use power level 10.
Steaks, chops and cutlets 4 to 8 min. per lb. Place unwrapped meat in cooking dish. Turn over after first half of time
and shield warm areas with foil. After second half of time, separate pieces
with table knife. Let stand to complete defrosting.
Poultry
&KLFNHQEURLOHUIU\HUFXWXS
(2
1
/2 to 3 lbs.)
14 to 20 min. Place wrapped chicken in dish. Unwrap and turn over after first half of
time. After second half of time, separate pieces and place in cooking dish.
Microwave 2 to 4 minutes more, if necessary. Let stand a few minutes to
finish defrosting.
Chicken, whole (2
1
/2 to 3
lbs.)
20 to 25 min. Place wrapped chicken in dish. After first half of time, unwrap and turn
chicken over. Shield warm areas with foil. To complete defrosting, run cool
water in cavity until giblets can be removed.
Cornish hen 7 to 13 min. per lb.
3ODFHXQZUDSSHGKHQLQRYHQEUHDVWVLGHXS7XUQRYHUDIWHUILUVWKDOIRI
time. Run cool water in cavity until giblets can be removed.
Turkey breast (4 to 6 lbs.) 3 to 8 min. per lb.
3ODFHXQZUDSSHGEUHDVWLQPLFURZDYHVDIHGLVKEUHDVWVLGHGRZQ$IWHU
ILUVWKDOIRIWLPHWXUQEUHDVWVLGHXSDQGVKLHOGZDUPDUHDVZLWKIRLO
Defrost for second half of time. Let stand 1 to 2 hours in refrigerator to
complete defrosting.
12 49-7000090 Rev. 1
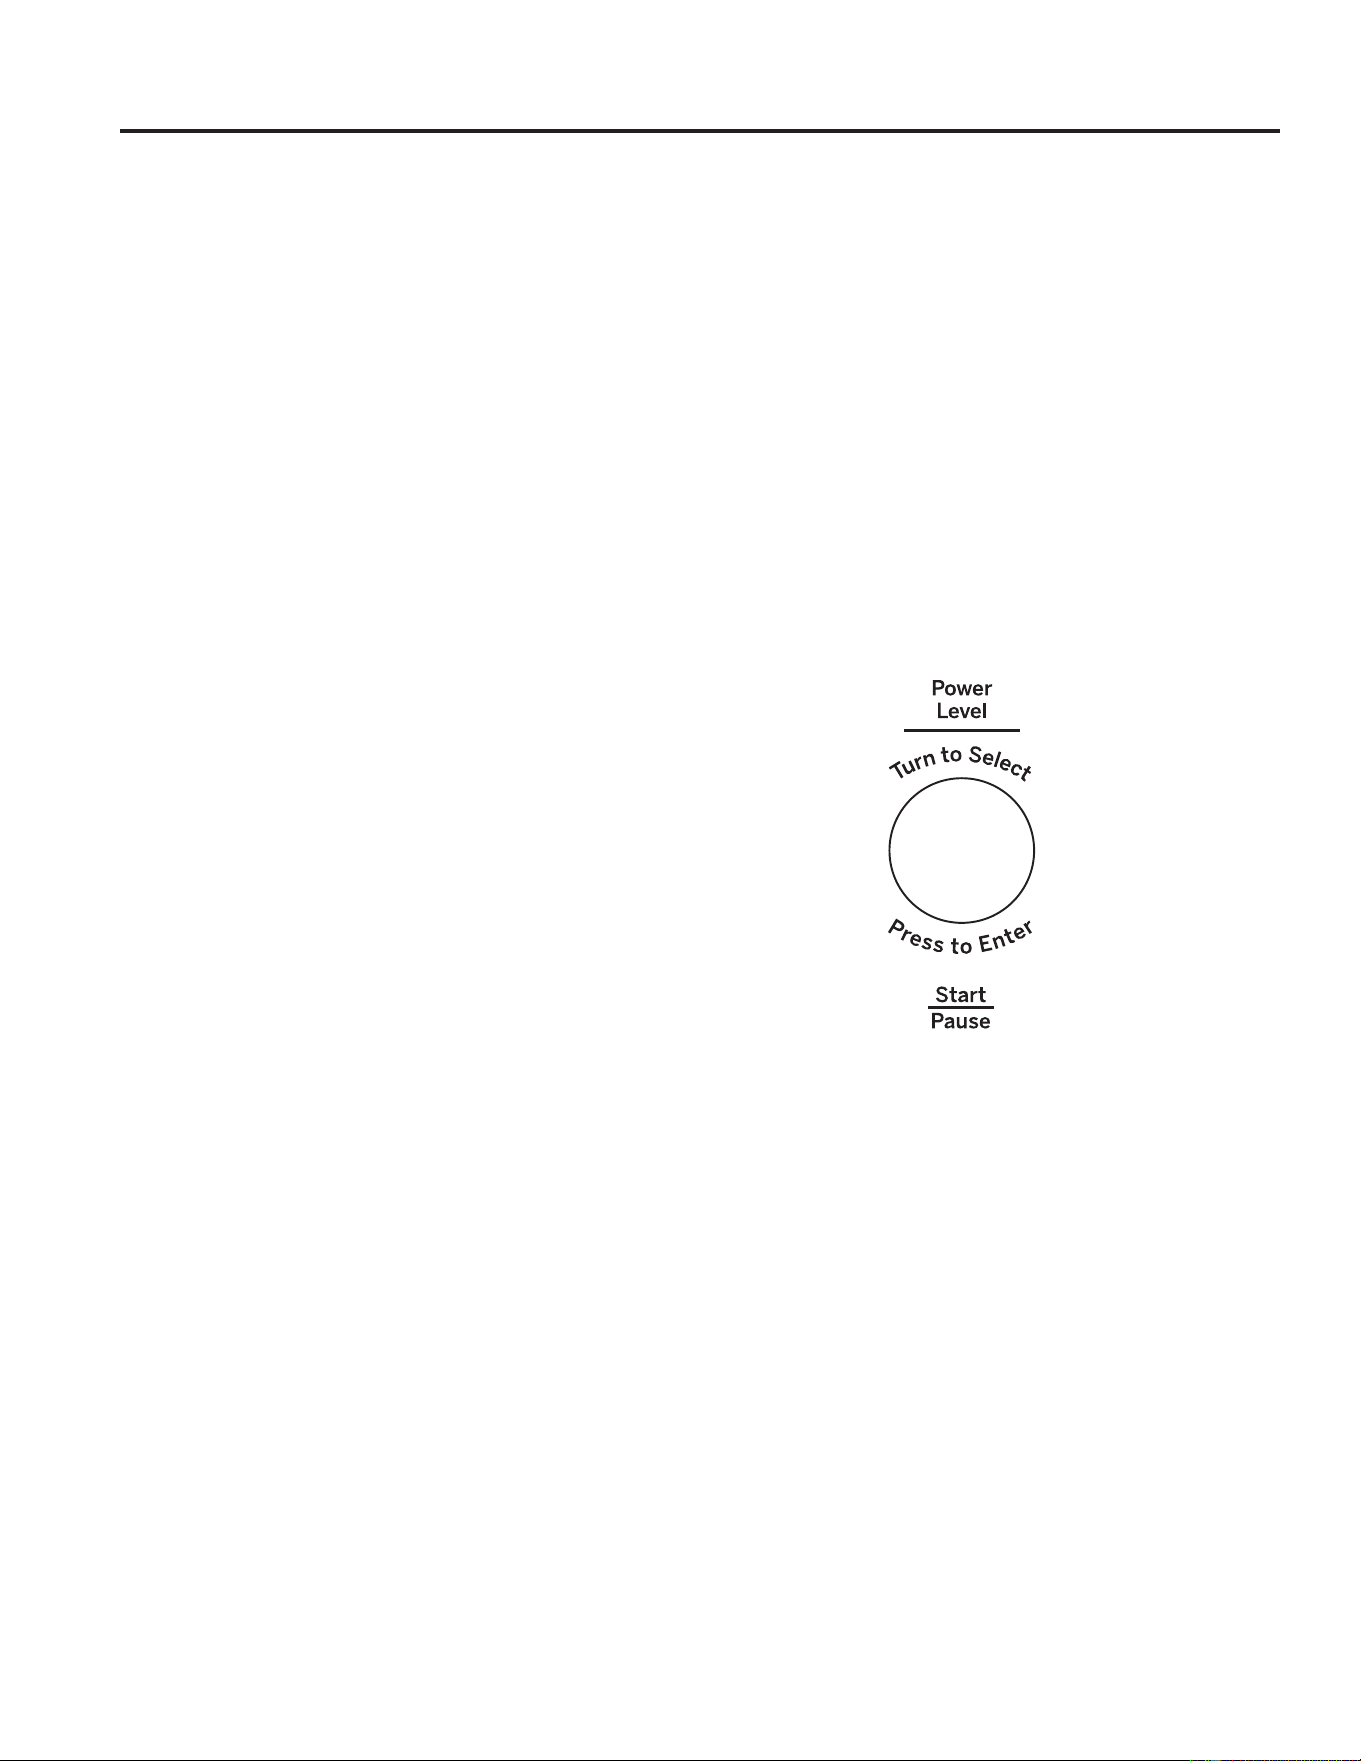
Time and Auto Microwave Features
1. First, follow directions for Cook Time or Time
Defrost.
2. Press the Power Level button.
3. Turn the dial clockwise to increase and
counterclockwise to decrease the power level. Press
the dial to enter.
4. Press the Start/Pause button to start cooking.
Variable power levels add flexibility to microwave
cooking. The power levels on the microwave oven can
be compared to the surface units on a range. Each
power level gives you microwave energy a certain
percent of the time. Power Level 7 is microwave energy
70% of the time. Power Level 3 is energy 30% of the
time. Most cooking will be done on High (Power Level
10) which gives you 100% power. Power Level 10 will
FRRNIDVWHUEXWIRRGPD\QHHGPRUHIUHTXHQWVWLUULQJ
rotating or turning over.
A lower setting will cook more evenly and need less
stirring or rotating of the food. Some foods may have
better flavor, texture or appearance if one of the lower
settings is used. Use a lower power level when cooking
foods that have a tendency to boil over, such as
scalloped potatoes.
Rest periods (when the microwave energy cycles off)
JLYHWLPHIRUWKHIRRGWR³HTXDOL]H´RUWUDQVIHUKHDWWR
the inside of the food. An example of this is shown with
Power Level 3WKHGHIURVWF\FOH,IPLFURZDYHHQHUJ\
did not cycle off, the outside of the food would cook
before the inside was defrosted.
Here are some examples of uses for various power
levels:
High 10: )LVKEDFRQYHJHWDEOHVKHDWLQJOLTXLGV
Med-High 7: Gentle cooking of meat and poultry;
baking casseroles and reheating.
Medium 5: Slow cooking and tenderizing for stews and
less tender cuts of meat.
Low 2 or 3: Defrosting; simmering; delicate sauces.
Warm 1: .HHSLQJIRRGZDUPVRIWHQLQJEXWWHU
Power Level
The power level may be entered or changed immediately after entering the time for Cook Time or Time Defrost.
The power level may also be changed during time countdown.
USING YOUR OVEN: Sensor Microwave Features
49-7000090 Rev. 1 13
USING YOUR OVEN: Time and Auto Microwave Features
Sensor Microwave Features
Humidity Sensor
What happens when using the Sensor Features:
The Sensor Features detect the increasing humidity
released during cooking. The oven automatically adjusts
the cooking time to various types and amounts of food.
Do not use the Sensor Features twice in succession
on the same food portion—it may result in severely
overcooked or burnt food. If food is undercooked after the
countdown, use Cook Time for additional cooking time.
NOTE: Sensor features will not operate when the oven
is hot. If one of the sensor cooking buttons is pressed
when the temperature inside the oven is greater than
)³29(1722+27)256(1625&22.,1*
USING ALTERNATE METHOD” will be displayed. The
oven will automatically change to cook by time (follow the
directions in the display) or once the oven is cool enough,
the sensor features will function normally.
Ŷ7KHSURSHUFRQWDLQHUVDQG
covers are essential for best
sensor cooking.
Ŷ$OZD\VXVHPLFURZDYH
safe containers and cover
them with lids or vented
plastic wrap. Never use tight
sealing plastic containers
WKH\FDQSUHYHQWVWHDP
from escaping and cause
food to overcook.
Ŷ%HVXUHWKHRXWVLGHRIWKH
cooking containers and the
inside of the microwave
oven are dry before placing
food in the oven. Beads of
moisture turning into steam
can mislead the sensor.
Dry off dishes so they don’t
mislead the sensor.
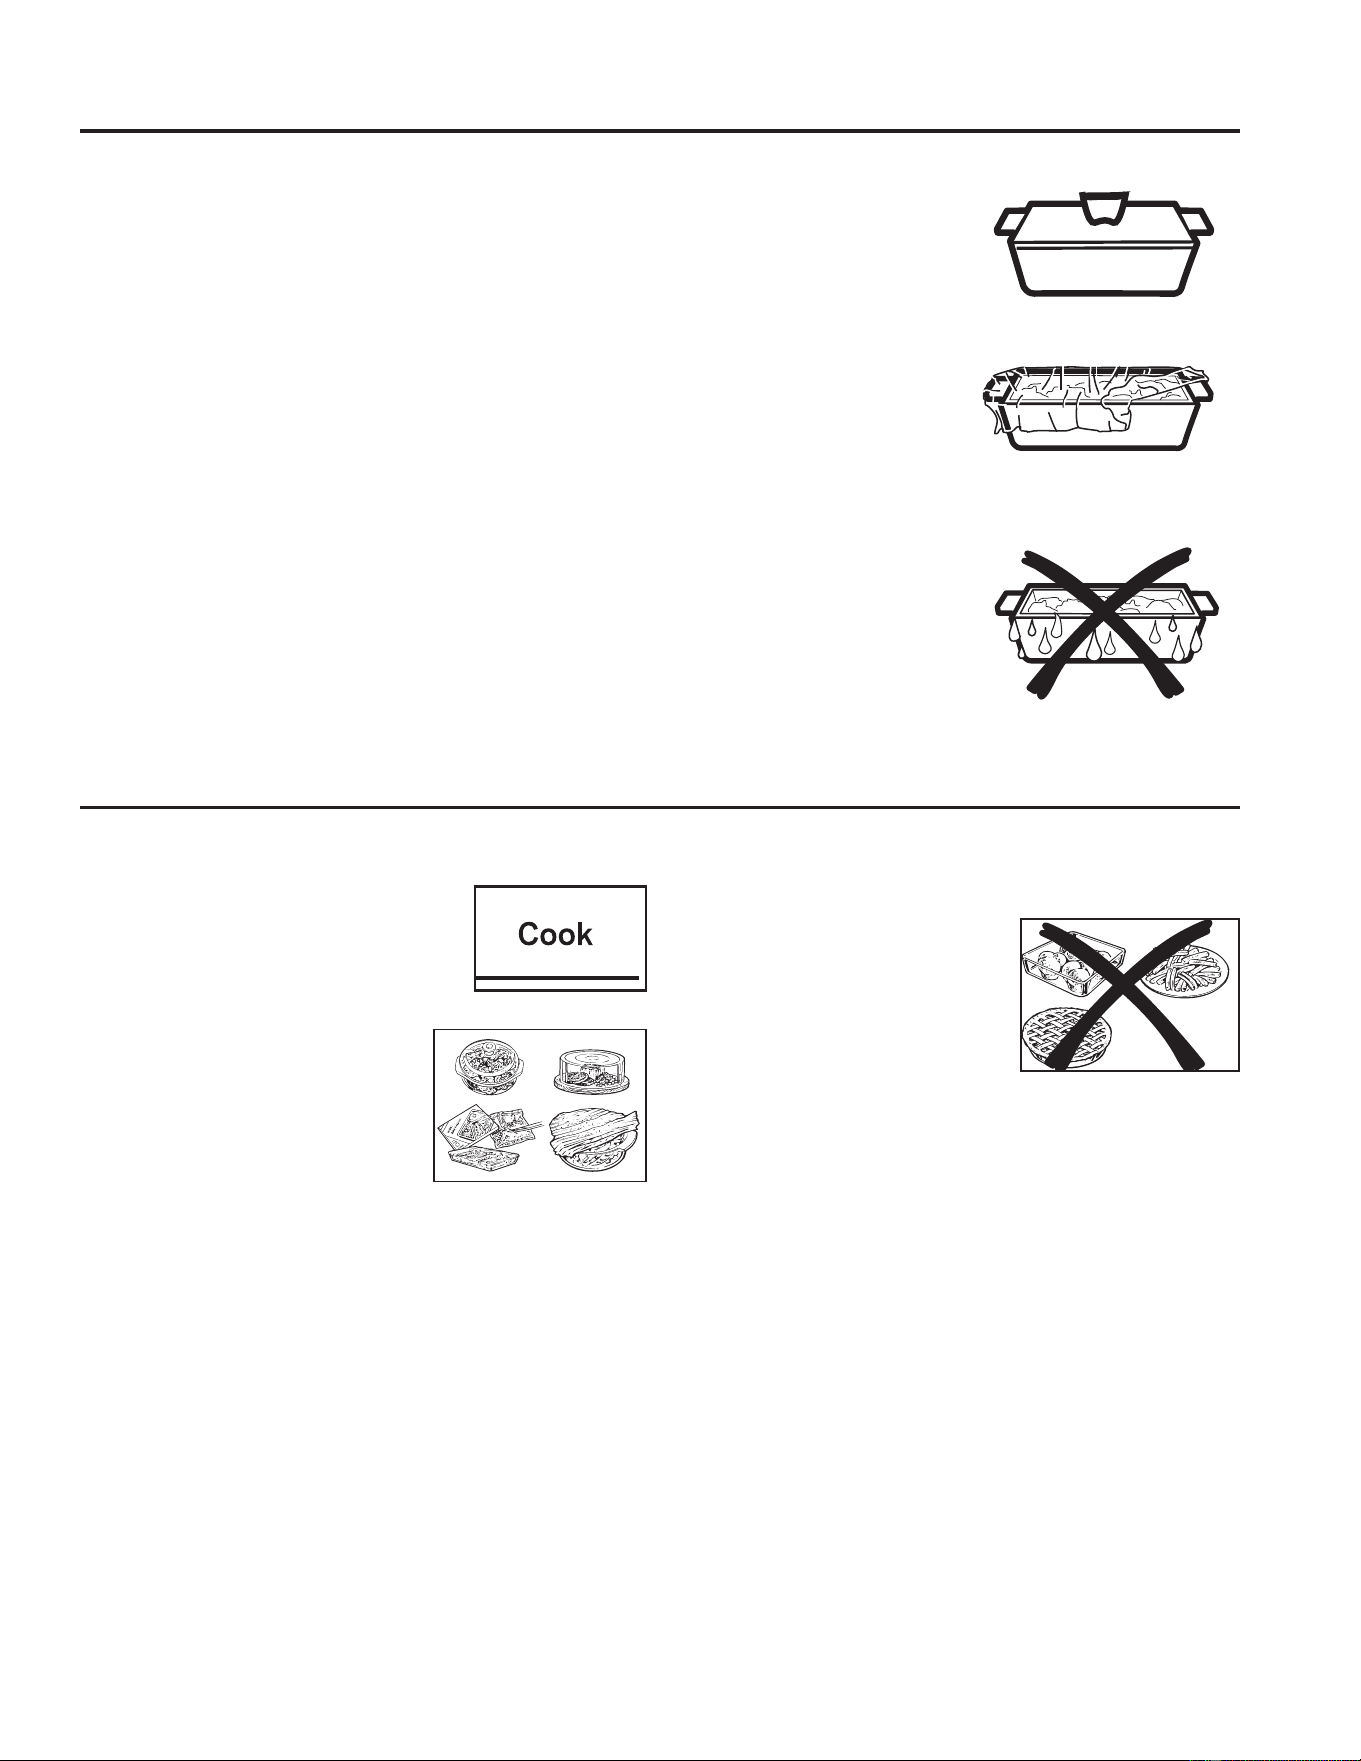
Vented
Covered
Cook
Because most cooking containers
must be covered during Cook, this
feature is best with foods that you
want to steam or retain moisture.
Recommended Foods
A wide variety of foods including
meats, fish and vegetables can be
cooked using this feature.
Foods not recommended
Foods that must be cooked
XQFRYHUHGIRRGVWKDWUHTXLUH
constant attention, foods that
UHTXLUHDGGLWLRQRILQJUHGLHQWV
during cooking and foods calling
for a dry look or crisp surface after
cooking should not be cooked
using this feature. It is best to Cook Time them.

14 49-7000090 Rev. 1
Popcorn
To use the Popcorn feature:
1. Follow package instructions, using Cook Time if the
package is less than 2.0 ounces or larger than 3.5
ounces. Place the package of popcorn in the center of
the turntable.
2. Press the Popcorn button. The oven starts
immediately.
If you open the door while POPCORN SENSOR is
displayed, an error message will appear. Close the door,
press &DQFHO2ႇ and begin again.
If food is undercooked after the countdown, use Cook
Time for additional cooking time.
How to Adjust the Automatic Popcorn Setting to
Provide a Shorter or Longer Cook Time
If you find that the brand of popcorn you use underpops
or overpops consistently, you can add or subtract 20–30
seconds to the automatic popping time.
To subtract or add time for sensor cook, turn the dial
when the time appears.
Sensor Microwave Features
Use only with prepackaged microwave
popcorn weighing 2.0 to 3.5 ounces.
NOTE: Do not use this feature twice
in succession on the same food
portion—it may result in severely
overcooked or burnt food.
Reheat
The Reheat feature reheats servings of previously
cooked foods or a plate of leftovers.
3ODFHWKHFXSRIOLTXLGRUFRYHUHGIRRGLQWKHRYHQ
Press Reheat and choose food type.
2. The oven signals when steam is sensed and the time
remaining begins counting down.
Do not open the oven door until time is counting down.
If the door is opened, close it and press Start/Pause
immediately.
After removing food from the oven, stir, if possible, to
even out the temperature. Reheated foods may have
wide variations in temperature. Some areas of food may
be extremely hot.
If food is not hot enough after the countdown use Cook
Time for additional reheating time.
Some Foods Not Recommended for Use With Reheat
It is best to use Cook Time for these foods:
Ŷ Bread products.
Ŷ Foods that must be reheated uncovered.
Ŷ Foods that need to be stirred or rotated.
Ŷ Foods calling for a dry look or crisp surface after
reheating.
To substract or add time for sensor cook, turn the dial
when the time is shown.
Beverage
The Beverage feature heats beverages from 6 to 12
ounces.
Press the Beverage button. Then oven start
immediately.
Drinks heated with the Beverage feature may be very
hot. Remove the container with care.
NOTE: Do not use this feature twice in
succession on the same food portion—it may
result in severely overcooked or burnt food.
Selection Food to Reheat
1 Plate
2 Soup
3 Veggies
4Pasta
USING YOUR OVEN: Sensor Microwave Features
49-7000090 Rev. 1 15
USING YOUR OVEN: Sensor Microwave Features
Sensor Microwave Features
Cook
1. Place covered food in the oven and close the door.
Press the Cook button. ENTER FOOD TYPE appears
in the display.
2. Turn the dial to the desired food type. Press to enter.
See the Sensor Food Type Guide below for specific
foods and instructions.
The oven starts immediately.
NOTE: If the door was open while the control was being
set, close the door and press the Start/Pause button to
begin cooking.
If food is undercooked after the countdown, use Cook
Time for additional cooking time.
Do not open the oven door before the countdown time
is displayed—steam escaping from the oven can affect
cooking performance. If the door is opened, close the
door and press Start/Pause immediately.
If ground meat was selected, the oven may signal you
to drain and stir the meat. Open the door, drain the meat
and close the door. Press the Start/Pause button if
necessary to resume cooking.
Cooking Tips
Ŷ:KHQRYHQVLJQDOVDQGFRXQWGRZQWLPHLVGLVSOD\HG
the door may be opened for stirring, turning or rotating
food. To resume cooking, close the door and press
Start/Pause.
Ŷ0DWFKWKHDPRXQWRIIRRGWRWKHVL]HRIFRQWDLQHU)LOO
containers at least 1/2 full.
Ŷ%HVXUHRXWVLGHRIFRQWDLQHUDQGLQVLGHRIRYHQDUHGU\
Ŷ$IWHUFRPSOHWLRQRI&RRNF\FOHLIIRRGQHHGVDGGLWLRQDO
cooking, return food to oven and use Cook Time to
finish cooking.
To substract or add time for sensor cook, turn the dial
when the time is shown.
NOTE: Do not use this feature
twice in succession on the same
food portion—it may result in
severely overcooked or burnt
food.
Sensor Food Type Guide
Food Type Servings Serving
Size
Comments
Chicken %RQH,Q
Boneless
2 to 8 pieces 8VHREORQJVTXDUHRUURXQGGLVK&RYHUZLWKYHQWHGSODVWLF
wrap.
Fish — 4 to 16 oz. 8VHREORQJVTXDUHRUURXQGGLVK&RYHUZLWKYHQWHGSODVWLF
wrap.
Ground Meat (Beef,
Pork, Turkey)
— 8 to 32 oz. Use round casserole dish. Crumble meat into dish. Cover with
vented plastic wrap.
Potatoes — 8 to 32 oz. Pierce skin with fork. Arrange in a star pattern in center of
turntable.
Vegetables Fresh 4 to 16 oz. 8VHPLFURZDYHVDIHFDVVHUROHRUERZO$GGWDEOHVSRRQVZDWHU
for each serving. Cover with lid or vented plastic wrap.
Vegetables Frozen 4 to 16 oz. 8VHPLFURZDYHVDIHFDVVHUROHRUERZO)ROORZSDFNDJH
instructions for adding water. Cover with lid or vented plastic
wrap.
Vegetables Canned 4 to 16 oz. 8VHPLFURZDYHVDIHFDVVHUROHRUERZO&RYHUZLWKOLGRUYHQWHG
plastic wrap.
16 49-7000090 Rev. 1
Mute On/Off
You can control sound using Mute On/Off button.
Control Lock-Out
You may lock the control panel to prevent the oven from
being accidentally started during cleaning or being used by
children.
To lock or unlock the controls, press and hold 3 seconds.
When the control panel is locked, CONTROL LOCKED will
be displayed briefly anytime a button or dial is pressed.
Other Features
Cooking Complete Reminder
To remind you that you have food in the oven, the oven
will display FOOD IS READY and beep once a minute
until you either open the oven door or press the Cancel/
Off button.
Start/Pause
In addition to starting many functions, Start/Pause allows
you to stop cooking without opening the door or clearing the
display.
Cancel/Off
Press the Cancel/Off button to stop and cancel cooking at
any time.
Timer On/Off
The Timer operates as a minute timer and can be used
at any time, even when the oven is operating.
1. Press the Timer button.
2. Turn the dial to select the minutes. Press the dial to
enter.
3. Turn the dial to select the seconds. Press the dial to
enter
4. Press the dial or Timer to start.
To cancel, press the Timer button.
When time is up, the oven will signal. To turn off the
timer signal, press Timer.
NOTE: The TIMER indicator will be lit while the timer is
operating.
Turntable
For best cooking results, leave the turntable on. It can be
turned off for large dishes.
1. Press the Turntable On/Off button to stop or start
rotating the turntable.
Sometimes the turntable can become too
hot to touch.
Be careful touching the turntable during
and after cooking.
Steam Clean
1. Press the Steam Clean button.
2. Put steam bowl with 1/4 cup of water.
3. Press the dial or Start/Pause to start.
Once the cycle is terminated, wipe oven
cavity with paper towel or cloth.
USING YOUR OVEN: Other Features
49-7000090 Rev. 1 17
USING YOUR OVEN: Other Features
Other Features
Chef Connect
Use the Chef Connect feature
for connecting your microwave to
a
GE
Appliances range to sync
your vent fan, cooktop surface
lights and clock via Bluetooth
technology.
1. You must have a Chef Connect enabled range. To
pair your microwave for the first time, initiate the
Chef Connect process on the
GE
Appliances range.
Refer to the range owner’s manual for instructions
2. On the microwave, hold Chef Connect button for 3
seconds. The Bluetooth icon on the display will
start flashing as the microwave starts to search and
pair with your
GE
Appliances range. The icon will
remain ON after pairing successfully.
If a
GE
Appliances range is not found within 2
minutes during search mode the microwave will stop
searching and the Bluetooth icon will turn OFF.
On initial setup, the setup protocol will start.
If the Chef Connect feature is enabled the default
settings are as follows:
'LVSOD\FORFNV\QF21
$XWRVXUIDFHOLJKW21+,*+VHWWLQJ
$XWRYHQWIDQ2))
$XWRRIIPLQXWHV
3. Turn the dial to select Surface Light Sync On/
Off. Press the dial to confirm. If on, it allows the
microwave surface lights to turn on at HIGH level
automatically when the paired range’s cooktop
burner turns ON. If OFF, the microwave surface
lights will not automatically turn on when a cooktop
burner turns on.
4. Turn the dial to select Vent Fan Sync ON/OFF.
Press the dial to confirm. If ON, it allows the
microwave vent fan to turn on at LOW speed
automatically when the paired range’s cooktop
burner turns on. If OFF, the vent fan will not turn ON
automatically when a cooktop burner is turned on.
Pairing is now complete, the Chef Connect feature
is now on.
NOTE: If there is no sync option selected during set
up, 5 minutes after icon turns ON, the units will
UHWXUQWRVWDQGE\PRGHDQGXVHWKHGHIDXOWVHWWLQJV
After completing the setting per above steps, your
microwaves vent fan and surface light could be set
to turn on automatically when the cooktop burner is
turned on. The cooktop and range clock display will
be synced to display the same time. The vent fan
and cooktop light will be set to automatically turn off
15 minutes after the cooktop burner is turned OFF.
If desired, the light, fan, and auto off settings can
now be changed using option in Settings.
Press Chef Connect once to temporarily turn OFF
communication between the microwave and range.
Press again to turn communication back ON. The
icon will illuminate when ON.
In the case of an unintended disconnect such as lost
power to the microwave or range the connection will
remain after power resumed. For very short power
interruptions, the power may need to be reset in
order to reconnect
NOTE: To unpair the microwave from the range,
press and hold the Chef Connect button on the
microwave for 3 seconds. The Bluetooth icon will
start to flash. Press cancel or wait 2 minutes for the
flashing to stop. You may need to unpair when the
GE
Appliances range is replaced or serviced.
18 49-7000090 Rev. 1
USING YOUR OVEN: Other Features
Set Clock
1. Press the Settings button and turn
the dial to select Clock Set. Press
the dial to enter..
2. Turn the dial to set hours. Press the
dial to enter.
3. Turn the dial to set minutes. Press
the dial to enter.
4. Turn the dial to set AM/PM. Press
the dial to enter.
Clock Mode
Clock Mode can be set for 12 hours and 24 hours.
NOTE: Default is 12 hours
1. Press the Settings button and turn the dial to select
Clock Mode. Press the dial to enter.
2. Turn the dial to set 12 hours or 24 hours Clock
Mode. Press enter to activate.
Display Speed
Display Speed can be adjusted for Slow, Normal, or
Fast
NOTE: Default is normal.
1. Press the Settings button and turn the dial to select
Display Speed. Press the dial to enter.
2. Turn the dial to set Display Speed (Slow, Normal,
Fast). Press enter to activate.
Sound Level
Sound Level can be adjusted for Mute, Low, Normal
or Loud.
NOTE: Default is normal.
1. Press the Settings button and turn the dial to select
Sound Level. Press the dial to enter.
2. Turn the dial to set Sound Level (Mute, Low, Normal,
or Loud). Press enter to activate.
Surface Light Sync
1. Press the Settings button and turn the dial to select
Surface Light Sync. Press the dial to enter.
2. Turn the dial to select Sync Mode (Off, Low, High).
3. Press the dial to activate.
Vent Fan Sync
1. Press the Settings button and turn the dial to select
Vent Fan Sync. Press the dial to enter.
2. Turn the dial to select Vent Fan Sync Mode (Off,
Low, Medium, High or Boost).
3. Press the dial to activate.
Sync Auto Off
1. Press the Settings button and turn the dial to select
Sync Auto Off Press the dial to enter.
2. Turn the dial to select Sync Auto Off (up to 15
minutes and manual). Press enter to activate.
My Cycle
The Add 30 Sec button can be adjusted to the My Cycle
feature.
1. Press Setting button and turn the dial to select
MyCycle.Press the dial to enter.
2. Turn the dial to select time (from 5 Sec to 60 Sec) and
press the dial to complete the setting.
Filter Replace Reminder
The charcoal/grease filter should be
replaced when it is noticeably dirty /
GLVFRORUHGXVXDOO\DIWHUPRQWKV
depending on hood usage) or filter
replacement LED is on.
When the Filter Replace LED turned
on, replace filter and press Reset Filter and hold for 3
seconds to rest.
Surface Light
Press Surface Light once for bright
light, twice for the night light or a third
time to turn the light off.
Surface light will turn on automatically
when the cooktop burner is turned on with Chef
Connection.
Vent Fan
The vent fan removes steam and other
vapors from surface cooking.
Press Vent Fan once for boost fan
speed, twice for hugh fan speed, three
times for medium fan spped, forth for
low fan speed, or fifth to turn the fan off.
NOTE: The FAN indicator will be lit while the fan is
operating.
Vent fan will turn on automatically when the cooktop
burner is turned on with Chef Connection.
Automatic Fan
An automatic fan feature protects the microwave from
too much heat rising from the cooktop below it. It
automatically turns on if it senses too much heat.
If you have turned the fan on you may find that you
cannot turn it off. The fan will automatically turn off when
the internal parts are cool. It may stay on for 30 minutes
or more after the cooktop and microwave controls are
turned off.
Other Features
49-7000090 Rev. 1 19
Microwave Terms
Term Definition
Arcing Arcing is the microwave term for sparks in the oven. Arcing is caused by:
Ŷmetal or foil touching the side of the oven.
Ŷfoil that is not molded to food (upturned edges act like antennas).
ŶPHWDOVXFKDVWZLVWWLHVSRXOWU\SLQVJROGULPPHGGLVKHV
Ŷrecycled paper towels containing small metal pieces.
Ŷplates or dishes with a metallic trim or glaze with a metallic sheen.
Covering Covers hold in moisture, allow for more even heating and reduce cooking time. Venting plastic wrap or
covering with wax paper allows excess steam to escape.
Shielding ,QDUHJXODURYHQ\RXVKLHOGFKLFNHQEUHDVWVRUEDNHGIRRGVWRSUHYHQWRYHUEURZQLQJ:KHQ
microwaving, you use small strips of foil to shield thin parts, such as the tips of wings and legs on
poultry, which would cook before larger parts.
Standing Time When you cook with regular ovens, foods such as roasts or cakes are allowed to stand to finish
cooking or to set. Standing time is especially important in microwave cooking. Note that a microwaved
cake is not placed on a cooling rack.
Venting After covering a dish with plastic wrap, you vent the plastic wrap by turning back one corner so excess
steam can escape.
MICROWAVE TERMS
20 49-7000090 Rev. 1
Care and Cleaning
Helpful Hints
An occasional thorough wiping with a solution of baking soda
and water keeps the inside fresh.
Be certain the oven control is turned off before cleaning
any part of this oven.
How to Clean the Inside
Walls, Floor, Inside Window, Metal and Plastic Parts
on the Door
Some spatters can be removed with a paper towel;
RWKHUVPD\UHTXLUHDGDPSFORWK5HPRYHJUHDV\
spatters with a sudsy cloth, then rinse with a damp cloth.
Do not use abrasive cleaners or sharp utensils on oven
walls.
Never use a commercial oven
cleaner on any part of your
microwave.
Removable Turntable and Turntable Support
To prevent breakage, do not
place the turntable into water
just after cooking. Wash it
carefully in warm, sudsy water
or in the dishwasher. The
turntable and support can be
broken if dropped. Remember, do not operate the oven
in the microwave mode without the turntable and support
seated and in place.
How to Clean the Outside
We recommend against using cleaners with ammonia
or alcohol, as they can damage the appearance of
the microwave oven. If you choose to use a common
household cleaner, first apply the cleaner directly to a
clean cloth, then wipe the soiled area.
Case
Clean the outside of the microwave with a sudsy cloth. Rinse
and then dry. Wipe the window clean with a damp cloth.
Control Panel
Wipe with a damp cloth. Dry thoroughly. Do not use cleaning
sprays, large amounts of soap and water, abrasives or sharp
objects on the panel—they can damage it. Some paper towels
can also scratch the control panel.
Door Panel
Before cleaning the front door panel, make sure you know what
type of panel you have. Refer to the eighth digit of the model
number. “S” is stainless steel, “L” is CleanSteel and “B”, “W” or
“C” are plastic colors.
Stainless Steel (on some models)
The stainless steel panel can be cleaned with Stainless Steel
Magic or a similar product using a clean, soft cloth. Apply
stainless cleaner carefully to avoid the surrounding plastic
parts. Do not use appliance wax, polish, bleach or products
containing chlorine on Stainless Steel finishes.
Plastic Color Panels
Use a clean, soft, lightly dampened cloth, then dry thoroughly.
Door Seal
It’s important to keep the area clean where the door seals
DJDLQVWWKHPLFURZDYH8VHRQO\PLOGQRQDEUDVLYHGHWHUJHQWV
applied with a clean sponge or soft cloth. Rinse well.
Bottom
Clean off the grease and dust on the bottom often. Use a
solution of warm water and detergent.
CARE AND CLEANING
T
u
r
n
t
o
S
e
l
e
c
t
P
r
e
s
s
t
o
E
n
t
e
r
Reheat
Timer
On/Off
Defrost
Weight/Time
Start
Pause
Cancel
Off
Lock Controls
Hold 3 Sec
Cook
Time
Set
Clock
Options Help
Surface
Light
Vent Fan
Warm
Power
Level
Auto
Cook
Combination
Fast Bake
Convection
Roast
Turntable
Convection
Bake
49-7000090 Rev. 1 21
Replacing the LED Lamp
Cooktop Light/Nite Light
Replace with LED lamp. See back cover for ordering
online at GEAppliances.com.
1. To replace the cooktop light/nite light, first disconnect
the power at the main fuse or circuit breaker panel,
or pull the plug.
2. Remove the screw from the side of the light
compartment cover and lower the cover until it stops.
3. Be sure the LED lamp is cool before removing.
Remove a screw and connector from LED lamp.
4. Connect LED lamp and secure using the screw. Raise
the light cover and replace the screw. Connect
electrical power to the oven.
Remove screw.
REPLACING THE LIGHT BULB
22 49-7000090 Rev. 1
Reusable Vent Filters
The metal filters trap grease released by foods on the cooktop.
They also prevent flames from foods on the cooktop from
damaging the inside of the oven.
For this reason, the filters must always be in place when the
hood is used. The vent filters should be cleaned once a month,
or as needed.
Removing and Cleaning the Filters
To remove, slide them to the rear using the tabs. Pull down
and out.
To clean the vent filters, soak them and then swish around
in hot water and detergent. Don’t use ammonia or ammonia
products because they will darken the metal. Light brushing
can be used to remove embedded dirt.
Rinse, shake and let dry before replacing.
To replace, slide the filters into the frame slots on the back of
each opening. Press up and to the front to lock into place.
Vent Fan
The vent fan has two metal reusable vent filters.
Models that recirculate air back into the room also use a
charcoal filter.
Exhaust Feature
T
u
r
n
t
o
S
e
l
e
c
t
P
r
e
s
s
t
o
E
n
t
e
r
Reheat
Timer
On/Off
Defrost
Weight/Time
Start
Pause
Cancel
Off
Lock Controls
Hold 3 Sec
Cook
Time
Set
Clock
Options Help
Surface
Light
Vent Fan
Popcorn
Beverage
Microwave
Express
Warm
Power
Level
Auto
Cook
Combination
Fast Bake
Convection
Roast
Turntable
Convection
Bake
Reusable vent filters
(on all models).
Charcoal filter
T
u
r
n
t
o
S
e
l
e
c
t
P
r
e
s
s
t
o
E
n
t
e
r
Reheat
Timer
On/Off
Defrost
Weight/Time
Start
Pause
Cancel
Off
Lock Controls
Hold 3 Sec
Cook
Time
Set
Clock
Options Help
Surface
Light
Vent Fan
Popcorn
B
everage
Microwave
Express
Warm
Power
Level
Auto
Cook
Combination
Fast Bake
Convection
Roast
Turntable
Convection
Bake
Charcoal Filter
The charcoal filter cannot be cleaned. It must be
replaced. See back cover for ordering online at
GEAppliances.com
If the model is not vented to the outside, the air will be
recirculated through a disposable charcoal filter that
helps remove smoke and odors.
The charcoal filter should be replaced when it is
noticeably dirty or discolored (usually after 6 to 12
months, depending on usage). See Optional Kits page
25, for more information.
CHARCOAL FILTER REPLACEMENT
1. Unplug the microwave oven.
2. Remove the vent grille mounting screws.
3. Tip the grille forward, then lift out to remove.
4. Remove the charcoal filter.
5. Slide a new charcoal filter into place.
6. Slide the bottom of the vent grille into place.
Push the top until is snaps into place.
Replace the mounting screws
7. Plug in the microwave oven.
EXHAUST FEATURE
49-7000090 Rev. 1 23
Problem Possible Cause What To Do
Oven will not start A fuse in your home may be blown or the
circuit breaker tripped.
Replace fuse or reset circuit breaker.
Power surge. Unplug the microwave oven, then plug it back in.
Plug not fully inserted into wall outlet.
0DNHVXUHWKHSURQJSOXJRQWKHRYHQLVIXOO\LQVHUWHG
into wall outlet.
Door not securely closed. Open the door and close securely.
Floor of the oven is warm even
when the oven has not been used
Heat from the cooktop light may make the
floor get warm.
This is normal.
"CONTROL LOCK IS ON"
appears on display
The control has been locked. Press and hold Mute On/Off for about 3 seconds to unlock
the control.
You hear an unusual low-tone
beep
You have tried to change the power level
when it is not allowed.
Many of the oven’s features are preset and cannot be
changed.
“SENSOR ERROR” appears on
display
When using a Sensor feature, the door was
opened before steam could
be detected
Do not open door until steam is sensed and time is shown
counting down on display
Steam not detected in maximum amount of
time
Use TIME COOK to heat for more time
Food amount too large for
Sensor Reheat
Sensor Reheat is for single servings of
recommended foods
Use TIME COOK for large amounts of food
Troubleshooting Tips... Before you call for service
Save time and money! Review the charts on the following pages first and you may not need to call for service.
Things That Are Normal With Your Microwave Oven
Ŷ Steam or vapor escaping from around the door.
Ŷ Light reflection around door or outer case.
Ŷ
Dimming oven light and change in the blower sound at
power levels other than high.
Ŷ
Dull thumping sound while oven is operating.
TROUBLESHOOTING
FEDERAL COMMUNICATIONS COMMISSION RADIO FREQUENCY
INTERFERENCE STATEMENT (U.S.A. ONLY)
7KLVHTXLSPHQWJHQHUDWHVDQGXVHV,60IUHTXHQF\HQHUJ\
and if not installed and used properly, that is in strict
accordance with the manufacturer’s instructions, may
cause interference to radio and television reception. It has
been type tested and found to comply with limits for ISM
(TXLSPHQWSXUVXDQWWRSDUWRI)&&5XOHVZKLFKDUH
designed to part 18 of FCC Rules, which are designed to
provide residential installation.
However, there is no guarantee that interference will not
RFFXULQDSDUWLFXODULQVWDOODWLRQ,IWKLVHTXLSPHQWGRHV
cause interference to radio or television reception, which
FDQEHGHWHUPLQHGE\WXUQLQJWKHHTXLSPHQWRIIDQGRQWKH
user is encouraged to try to correct the interference by one
or more of the following:
Ŷ5HRULHQWWKHUHFHLYLQJDQWHQQDRIWKHUDGLRRUWHOHYLVLRQ
Ŷ5HORFDWHWKH0LFURZDYH2YHQZLWKUHVSHFWWRWKH
receiver.
Ŷ0RYHWKHPLFURZDYHRYHQDZD\IURPWKHUHFHLYHU
Ŷ3OXJWKHPLFURZDYHRYHQLQWRDGLIIHUHQWRXWOHWVRWKDWWKH
microwave oven and the receiver are on different branch
codes.
The manufacturer is not responsible for any radio of TV
interference caused by unauthorized modification to this
microwave oven. It is the responsibility of the user to correct
such interference.
7KLVHTXLSPHQWKDVEHHQWHVWHGDQGIRXQGWRFRPSO\ZLWK
the limits for a Class B digital device, pursuant to part 15
of the FCC Rules. These limits are designed to provide
reasonable protection against harmful interference in a
UHVLGHQWLDOLQVWDOODWLRQ7KLVHTXLSPHQWJHQHUDWHVXVHV
DQGFDQUDGLDWHUDGLRIUHTXHQF\HQHUJ\DQGLIQRWLQVWDOOHG
and used in accordance with the instructions, may cause
harmful interference to radio communications. However,
there is no guarantee that interference will not occur in a
SDUWLFXODULQVWDOODWLRQ,IWKLVHTXLSPHQWGRHVFDXVHKDUPIXO
interference to radio or television reception, which can be
GHWHUPLQHGE\WXUQLQJWKHHTXLSPHQWRIIDQGRQWKHXVHULV
encouraged to try to correct the interference by one or more
of the following measures:
Ŷ5HRULHQWRUUHORFDWHWKHUHFHLYLQJDQWHQQD
Ŷ,QFUHDVHWKHVHSDUDWLRQEHWZHHQWKHHTXLSPHQWDQG
receiver.
Ŷ&RQQHFWWKHHTXLSPHQWLQWRDQRXWOHWRQDFLUFXLW
different from that to which the receiver is connected.
Ŷ&RQVXOWWKHGHDOHURUDQH[SHULHQFHGUDGLR79
technician for help.
7RVDWLVI\)&&5)H[SRVXUHUHTXLUHPHQWVDVHSDUDWLRQ
distance of 20 cm or more should be maintained between
the antenna of this device and persons during device
operation.
To ensure compliance, operations at closer than this
distance is not recommended.
WARNING
Any changes or modifications to this unit
not expressly approved by the party
responsible for compliance could void the user’s authority
WRRSHUDWHWKHHTXLSPHQW

24 49-7000090 Rev. 1
Staple your receipt here. Proof of the original purchase
date is needed to obtain service under the warranty.
GEAppliances.com
All warranty service is provided by our Factory Service Centers, or an authorized service technician. To schedule
service online, visit us at GEAppliances.com/service.
What GE Appliances will not cover:
Ŷ 6HUYLFHWULSVWR\RXUKRPHWRWHDFK\RXKRZWRXVH
the product.
Ŷ ,PSURSHULQVWDOODWLRQGHOLYHU\RUPDLQWHQDQFH,I\RX
have an installation problem, contact your dealer or
LQVWDOOHU<RXDUHUHVSRQVLEOHIRUSURYLGLQJDGHTXDWH
electrical, exhausting, and other connecting facilities.
Ŷ )DLOXUHRIWKHSURGXFWRUGDPDJHWRWKHSURGXFWLILWLV
abused, misused (for example, cavity arcing from wire
rack or metal/foil), or used for other than the intended
purpose or used commercially.
Ŷ 5HSODFHPHQWRIKRXVHIXVHVRUUHVHWWLQJRIFLUFXLW
breakers.
Ŷ 'DPDJHWRWKHSURGXFWFDXVHGE\DFFLGHQWILUH
floods or acts of God.
Ŷ ,QFLGHQWDORUFRQVHTXHQWLDOGDPDJHFDXVHGE\
possible defects with this appliance.
Ŷ 'DPDJHFDXVHGDIWHUGHOLYHU\
Ŷ 3URGXFWQRWDFFHVVLEOHWRSURYLGHUHTXLUHGVHUYLFH
Ŷ 6HUYLFHWRUHSDLURUUHSODFHOLJKWEXOEVH[FHSWIRU/('
lamps.
Ŷ 'DPDJHWRWKHILQLVKVXFKDVVXUIDFHUXVWWDUQLVKRU
small blemishes not reported within 48 hrs of delivery.
LIMITED WARRANTY
Microwave Oven Limited Warranty
EXCLUSION OF IMPLIED WARRANTIES
Your sole and exclusive remedy is product repair as provided in this Limited Warranty. Any implied warranties,
including the implied warranties of merchantability or fitness for a particular purpose, are limited to one year or
the shortest period allowed by law.
This limited warranty is extended to the original purchaser and any succeeding owner for products purchased for home
use within the USA. If the product is located in an area where service by a GE Appliances Authorized Servicer is not
DYDLODEOH\RXPD\EHUHVSRQVLEOHIRUDWULSFKDUJHRU\RXPD\EHUHTXLUHGWREULQJWKHSURGXFWWRDQ$XWKRUL]HG*(
Appliances Service location for service. In Alaska, the limited warranty excludes the cost of shipping or service calls to
your home.
6RPHVWDWHVGRQRWDOORZWKHH[FOXVLRQRUOLPLWDWLRQRILQFLGHQWDORUFRQVHTXHQWLDOGDPDJHV7KLVOLPLWHGZDUUDQW\
gives you specific legal rights, and you may also have other rights which vary from state to state. To know what your
legal rights are, consult your local or state consumer affairs office or your state’s Attorney General.
Warrantor: GE Appliances, a Haier company
/RXLVYLOOH.<
For the period of GE Appliances will replace
One year
From the date
of the original
purchase
Any part of the oven which fails due to a defect in materials or workmanship. During this
limited one-year warranty, GE Appliances will also provide, free of charge, all labor and
related service costs to replace the defective part when the unit is serviced.
49-7000090 Rev. 1 25
Optional Accessories
Filler Panel Kit
JX36BSS - Stainless
When replacing a 36" range hood, filler panel kits fill in the
DGGLWLRQDOZLGWKWRSURYLGHDFXVWRPEXLOWLQDSSHDUDQFH
)RULQVWDOODWLRQEHWZHHQFDELQHWVRQO\QRWIRUHQGRIFDELQHW
installation. Each kit contains two 3" wide filler panels.
Recirculating Charcoal Filter Kit
Filter kits are used when the microwave oven cannot be vented
to the outside.
15” Cabinet Installation Kit
For use when installing with 15” depth cabinets.
Available at extra cost from your
GE
Appliances supplier, See
back cover for ordering online at geappliances.com.
Available at extra cost from your
GE
Appliances supplier.
)LOWHU3DQHO.LWV
OPTIONAL ACCESSORIES

26 49-7000090 Rev. 1
NOTES
Notes

49-7000090 Rev. 1 27
Notes
NOTES

28 49-7000090 Rev. 1
Consumer Support
CONSUMER SUPPORT
GE Appliances Website
+DYHDTXHVWLRQRUQHHGDVVLVWDQFHZLWK\RXUDSSOLDQFH"7U\WKHGE Appliances Website 24 hours a day, any day of the year!
You can also shop for more great GE
$SSOLDQFHVSURGXFWVDQGWDNHDGYDQWDJHRIDOORXURQOLQHVXSSRUWVHUYLFHVGHVLJQHGIRU
your convenience. GEAppliances.com
Register Your Appliance
5HJLVWHU\RXUQHZDSSOLDQFHRQOLQHDW\RXUFRQYHQLHQFH7LPHO\SURGXFWUHJLVWUDWLRQZLOODOORZIRUHQKDQFHGFRPPXQLFDWLRQDQG
SURPSWVHUYLFHXQGHUWKHWHUPVRI\RXUZDUUDQW\VKRXOGWKHQHHGDULVH<RXPD\DOVRPDLOLQWKHSUHSULQWHGUHJLVWUDWLRQFDUG
included in the packing material. GEAppliances.com/register
Schedule Service
Expert GE$SSOLDQFHVUHSDLUVHUYLFHLVRQO\RQHVWHSDZD\IURP\RXUGRRU*HWRQOLQHDQGVFKHGXOH\RXUVHUYLFHDW\RXU
convenience any day of the year. GEAppliances.com/service
Extended Warranties
Purchase a GE Appliances extended warranty and learn about special discounts that are available while your warranty is still in
HIIHFW<RXFDQSXUFKDVHLWRQOLQHDQ\WLPHGE Appliances Services will still be there after your warranty expires.GEAppliances.
com/extended-warranty
Remote Connectivity
For assistance with wireless network connectivity (for models with remote enable), visit our website at GEAppliances.com/
connect
Parts and Accessories
,QGLYLGXDOVTXDOLILHGWRVHUYLFHWKHLURZQDSSOLDQFHVFDQKDYHSDUWVRUDFFHVVRULHVVHQWGLUHFWO\WRWKHLUKRPHV
9,6$0DVWHU&DUGDQG'LVFRYHUFDUGVDUHDFFHSWHG2UGHURQOLQHWRGD\KRXUVHYHU\GD\
GEAppliances.com/parts
Instructions contained in this manual cover procedures to be performed by any user. Other servicing generally should
be referred to qualified service personnel. Caution must be exercised, since improper servicing may cause unsafe
operation.
Contact Us
If you are not satisfied with the service you receive from GE Appliances, contact us on our Website with all the details including
your phone number, or write to: General Manager,

MANUAL DEL USUARIO
PVM9215
PNM9216
HORNO MICROONDAS
49-7000090 Rev. 1 06-24
Escriba el modelo y los números de serie a
continuación:
Modelo No: ____________________________
Serial No: ______________________________
Los encontrará en una etiqueta ubicada detrás
de la perilla del quemador izquierdo o en la parte
inferior de la superficie de cocción.
INFORMACIÓN IMPORTANTE
DE SEGURIDAD
............3
FUNCIONES DEL HORNO
...7
Funciones ...........................7
Controles
............................8
Funciones de microondas por tiempo y
automático
..........................9
Características de microondas
por sensor
..........................13
Otras funciones
.....................16
Terminología de microondas
.........19
MANTENIMIENTO Y LIMPIEZA
interior ..............................20
Acero inoxidable ................20
Exterior
........................20
Reemplazo de la lámpara
..........21
Filtros de extractor reutilizables
... 22
Filtros de carbón vegeta ..............22
CONSEJOS PARA LA
SOLUCIÓN
DE PROBLEMAS
......... 23
SOPORTE PARA EL
CONSUMIDOR
Garantía Limitada ..................
24
Accesorios Opcionales
..............25
Soporte para el Consumidor
........ 26

2 49-7000090 Rev. 1
GRACIAS POR HACER QUE GE APPLIANCES SEA PARTE DE SU HOGAR.
Ya sea que haya crecido usando GE Appliances, o que ésta es su primera vez, nos complace
tenerlo en la familia.
Sentimos orgullo por el nivel de arte, innovación y diseño de cada uno de los electrodomésticos de
GE Appliances, y creemos que usted también. Entre otras cosas, el registro de su electrodoméstico
asegura que podamos entregarle información importante del producto y detalles de la garantía
cuando los necesite.
Registre su electrodoméstico GE ahora a través de Internet. Sitios Web y números telefónicos útiles
están disponibles en la sección de Soporte para el Consumidor de este Manual del Propietario.
También puede enviar una carta en la tarjeta de inscripción preimpresa que se incluye con
el material embalado.

49-7000090 Rev. 1 3
INFORMACIÓN DE SEGURIDAD
LEA Y GUARDE ESTAS INSTRUCCIONES
INFORMACIÓN IMPORTANTE DE SEGURIDAD
LEA TODAS LAS INSTRUCCIONES ANTES DE USAR
ADVERTENCIA
Para reducir el riesgo de quemaduras, descargas eléctricas, incendio, lesiones o
exposición a energía de microondas excesiva:
Cuando utilice aparatos eléctricos, se deben seguir las precauciones de seguridad básicas, entre las que se incluyen las
siguientes:
Ŷ /HDWRGDVODVLQVWUXFFLRQHVDQWHVGHXWLOL]DUHVWHDSDUDWR
Ŷ /HD\VLJDODVSUHFDXFLRQHVHVSHFtILFDVGHVFULWDVHQOD
sección PRECAUCIONES PARA EVITAR LA POSIBLE
EXPOSICIÓN A ENERGÍA DE MICROONDAS EXCESIVA
de la página 6.
Ŷ 8WLOLFHHVWHDSDUDWRVRODPHQWHSDUDHOILQSUHYLVWR
como se describe en este manual. No utilice químicos
ni vapores corrosivos en este aparato. Este horno está
específicamente diseñado para calentar, secar o cocinar
alimentos y bebidas y no está diseñado para usarse en n
laboratorio ni para uso industrial.
Ŷ (VWHHOHFWURGRPpVWLFRVyORGHEHUtDVHUUHSDUDGRSRU
personal técnico con calificación. En caso de necesitar
una evaluación, reparación o ajuste, comuníquese con el
servicio autorizado más cercano.
INSTALACIÓN
Ŷ ,QVWDOHRXELTXHHVWHDSDUDWR~QLFDPHQWHGHDFXHUGRDODV
instrucciones de instalación suministradas.
Ŷ Este aparato debe contar con una conexión a tierra.
Conecte sólo a un tomacorriente con adecuada conexión a
tierra. Ver la sección Instrucciones de conexión a tierra de
la página 5.
Ŷ Este horno microondas figura en la lista de ETL para su
posible instalación tanto en estufas a gas como eléctricas.
Ŷ Esta unidad fue diseñada para use sobre equipamientos
de cocción a gas o eléctricos, de un ancho de 36” o
menos.
Ŷ 1RXWLOLFHHVWHDSDUDWRVLWLHQHHOFDEOHHOpFWULFRRHO
enchufe dañados, si no funciona bien o si ha sufrido una
avería o una caída.
Ŷ 0DQWHQJDHOFDEOHDOHMDGRGHVXSHUILFLHVFDOLHQWHV
Ŷ 1RSHUPLWDTXHHOFDEOHHOpFWULFRFXHOJXHVREUHHOERUGH
de la mesa o del mostrador de encimera.
Ŷ 1RVXPHUMDHOFDEOHHOpFWULFRRHOHQFKXIHHQDJXD
Ŷ 1RFXEUDQLEORTXHHQLQJXQDDSHUWXUDGHHVWHDSDUDWR
Ŷ 1RDOPDFHQHHVWHDSDUDWRDODLUHOLEUH1RXWLOLFHHVWH
producto cerca del agua; por ejemplo, en un sótano
húmedo, cerca de una piscina, cerca de un lavabo o
lugares similares.
Ŷ 1RPRQWHHVWHDSDUDWRVREUHHOIUHJDGHUR
PARA REDUCIR EL RIESGO DE INCENDIO DENTRO DEL
HORNO:
Ŷ 1RFRFLQHH[FHVLYDPHQWHORVDOLPHQWRV9LJLOH
cuidadosamente el aparato cuandose coloque papel,
plástico u otros materiales combustibles dentro del
microondas para facilitar la cocción.
Ŷ 4XLWHODVWLULWDVGHVHJXULGDGWZLVWWLHV\DVDVPHWiOLFDV
de los recipientes de papel o plástico antes de colocarlos
dentro del microondas.
Ŷ 1RJXDUGHQLQJ~QPDWHULDODH[FHSFLyQGHQXHVWURV
accesorios recomendados, en este horno cuando no esté
en uso No deje productos de papel, utensilios de cocina
ni comida en el horno cuando no esté en uso. El estante
del microondas se deberá retirar del horno cuando no se
encuentre en uso.
Ŷ 6LORVPDWHULDOHVTXHVHHQFXHQWUDQGHQWURGHOKRUQR
prenden fuego, mantenga cerrada la puerta del horno,
apáguelo y desconecte el cable eléctrico, o corte la
energía desde el panel de fusibles o del interruptor de
circuitos.
Ŷ No opere el horno sin alimentos adentro.
A FIN DE REDUCIR RIESGOS DE QUEMADURAS:
Ŷ 7HQJDFXLGDGRDODEULUHQYDVHVFRQFRPLGDFDOLHQWH8VH
manijas y aleje el vapor del rostro y las manos.
Ŷ 9HQWLOHSHUIRUHRFRUWHHQYDVHVEROVDVREROVDV
plásticas para evitar la acumulación de presión.
Ŷ 7HQJDFXLGDGRDOWRFDUHOSODWRJLUDWRULRODSXHUWD
estantes o paredes del horno, los cuales se podrán
calentar durante el uso.
Ŷ /26&217(1,'26&$/,(17(638('(1
2&$6,21$548(0$'85$6*5$9(612
3(50,7$48(/261,f2687,/,&(1(/
MICROONDAS. Tenga cuidado al retirar ítems
calientes.

4 49-7000090 Rev. 1
LEA Y GUARDE ESTAS INSTRUCCIONES
INFORMACIÓN DE SEGURIDAD
INFORMACIÓN IMPORTANTE DE SEGURIDAD
LEA TODAS LAS INSTRUCCIONES ANTES DE USAR
ADVERTENCIA
USO
Ŷ1RXVHHOKRUQRVLQHOSODWRJLUDWRULRHQVXSRVLFLyQ
El plato giratorio no deberá tener restricciones, de
modo que pueda girar.
Ŷ$VHJ~UHVHGHTXHWRGRVORVXWHQVLOLRVXVDGRVHQ
el horno microondas sean para uso en el mismo.
Podrán ser usadas la mayoría de las cacerolas de
vidrio, platos de cocción, tazas graduadas, tazas
para postre, vajillas de cerámica o juegos de platos
de porcelana que no posean bordes metálicos o
vidriados con un brillo metálico, en cumplimiento con
las recomendaciones del fabricante de utensilios.
Ŷ1RJXDUGHQDGDGLUHFWDPHQWHVREUHODVXSHUILFLHGHO
horno microondas cuando el mismo se encuentre
funcionando.
Ŷ$OJXQRVSURGXFWRVWDOHVFRPRKXHYRVHQWHURV\
envases sellados – por ejemplo: tarros de vidrio
cerrados – pueden explotar y por esto no se deben
calentar en el horno microondas.
Ŷ1RFDOLHQWHODVSDSDVHQH[FHVR/DVPLVPDVVH
podrán deshidratar e incendiarse.
Ŷ1RFXEUDQLQJXQDRWUDSDUWHGHOKRUQRFRQSDSHOGH
aluminio. Esto ocasionará un sobrecalentamiento del
horno.
Ŷ&RFLQHFDUQHV\FDUQHVGHDYHHQIRUPDFRPSOHWD±
la carne por lo menos a una temperatura INTERIOR
de 160°F y la carne de ave por lo menos a una
temperatura INTERIOR de 180°F. Normalmente la
cocción a estas temperaturas brinda una protección
contra las enfermedades transmitidas por la comida.
Ŷ(VWHKRUQRQRIXHDSUREDGRQLHYDOXDGRSDUDXVRHQ
la marino.
LIMPIEZA
Ŷ0DQWHQJDHOKRUQROLEUHGHDFXPXODFLyQGHJUDVD
Ŷ1ROLPSLHFRQDOPRKDGLOODVPHWiOLFDVSDUDIUHJDU/DV
piezas podrán quemar la almohadilla y tener contacto
con partes eléctricas y producir riesgos de descargas
eléctricas.
Ŷ$OOLPSLDUVXSHUILFLHVGHSXHUWD\KRUQRTXHVHXQHQ
al cerrar la puerta, use sólo jabones o detergentes
suaves y no abrasivos, aplicando los mismos con
una esponja limpia o tela suave. Enjuague bien.
AGUA EXTREMADAMENTE CALIENTE
Ŷ/RVOtTXLGRVWDOHVFRPRHODJXDFDIpRWpVHSRGUiQ
sobrecalentar más allá de su punto de hervor sin
que parezca que esto está sucediendo. No siempre
se observan burbujas o hervor cuando el envase
es retirado del horno microondas. ESTO PODRÁ
35292&$548(/26/Ë48,'2608<&$/,(17(6
DE PRONTO HIERVAN CUANDO SE MUEVA EL
ENVASE O CUANDO SE INSERTE UNA CUCHARA
8275287(16,/,2(1(//Ë48,'2
Ŷ3DUDUHGXFLUHOULHVJRGHOHVLRQHVSHUVRQDOHV
- No sobrecaliente el líquido.
- Revuelva el líquido tanto antes como a la mitad del
tiempo mientras lo calienta.
- No use envases con lados rectos y cuellos angostos.
- Después de calentar, deje reposar el envase en el
horno microondas durante un período corto antes de
retirar el mismo.
- Tenga extremo cuidado al insertar una cuchara u otro
utensilio en el envase.
49-7000090 Rev. 1 5
INFORMACIÓN IMPORTANTE DE SEGURIDAD
LEA TODAS LAS INSTRUCCIONES ANTES DE USAR
INFORMACIÓN DE SEGURIDAD
LEA Y GUARDE ESTAS INSTRUCCIONES
VENTILADOR CON EXTRACTOR
El ventilador funcionará de forma automática bajo ciertas
condiciones. Asegúrese de evitar la activación y extensión
accidental del fuego de cocción mientras el ventilador esté
en uso.
Ŷ /LPSLHODFDUDLQIHULRUGHOKRUQRPLFURRQGDVHQIRUPD
frecuente. No permita que se acumule grasa en el horno
microondas ni en los filtros del ventilador.
Ŷ (QFDVRGHTXHKD\DIXHJRSURGXFLGRSRUODJUDVDHQODV
unidades de la superficie debajo del horno microondas,
apague una olla llameante sobre la unidad de la
superficie cubriendo la olla completamente con una tapa,
una asadera de galletitas o una bandeja plana.
Ŷ Limpie con cuidado los filtros del ventilador. Agentes de
limpieza corrosivos, tales como los limpiadores de horno
a base de soda cáustica, podrán dañar los filtros.
Ŷ Al preparar comidas llameantes debajo del horno
microondas, encienda el ventilador.
Ŷ Nunca deje de prestar atención a las unidades de
la superficie debajo de su horno microondas en
las configuraciones altas de calor. Las ebulliciones
producen humo y derrames de grasa que pueden
encender y esparcir el fuego si el ventilador del horno
microondas está en funcionamiento. A fin de minimizar el
funcionamiento del ventilador automático, use utensilios
de tamaño adecuado y use un nivel de calor alto en las
unidades de la superficie sólo cuando sea necesario.
MARCAPASOS
La mayoría de los marcapasos poseen protección contra interferencias de productos eléctricos, incluyendo
microondas. Sin embargo, es aconsejable que los pacientes con marcapasos consulten a sus médicos ante
cualquier duda.
INSTRUCCIONES DE CONEXIÓN A TIERRA
ADVERTENCIA
El uso inadecuado del enchufe de conexión a tierra puede provocar riesgos de
descargas eléctricas.
Este electrodoméstico deberá
estar conectado a tierra. En caso
de que se produzca un
cortocircuito, la conexión a tierra
reduce el riesgo de descarga
eléctrica, brindando un cable de
salida de la corriente eléctrica.
Este electrodoméstico está equipado con un cable de
corriente que posee un cable de conexión a tierra con
un enchufe a tierra. El enchufe se deberá conectar
en un tomacorriente instalado y conectado a tierra de
forma adecuada.
Consulte a un electricista calificado o al personal del
servicio técnico en caso de que las INSTRUCCIONES
DE CONEXIÓN A TIERRA no se entiendan
completamente o si tiene dudas sobre si el
electrodoméstico está conectado a tierra de forma
apropiada.
En caso de contar con un tomacorriente de pared
estándar de 2 cables, es su responsabilidad y
obligación reemplazarlo por un tomacorriente de pared
de 3 cables correctamente conectado a tierra.
Bajo ninguna circunstancia corte o elimine el tercer
FDEOHWLHUUDGHOFDEOHGHFRUULHQWH
No use un prolongador. Si el cable de corriente
es demasiado corto, solicítele a un electricista o a
personal del servicio técnico calificado la instalación
de un tomacorriente cerca del electrodoméstico.
Para un mejor funcionamiento, conecte este
electrodoméstico en su tomacorriente eléctrico a fin de
evitar parpadeos de las luces, explosión del fusible o
desactivación del disyuntor.
Asegúrese de contar
con una conexión a
tierra adecuada antes
de usar.

6 49-7000090 Rev. 1
LEA Y GUARDE ESTAS INSTRUCCIONES
INFORMACIÓN IMPORTANTE DE SEGURIDAD
LEA TODAS LAS INSTRUCCIONES ANTES DE USAR
INFORMACIÓN DE SEGURIDAD
PRECAUCIONES PARA EVITAR LA POSIBLE
EXPOSICIÓN A ENERGÍA DE MICROONDAS EXCESIVA
(a) No intente hacer funcionar el horno con
la compuerta abierta ya que ésto puede provocar
exposición peligrosa a la energía de microondas. Es
importante no forzar ni dañar los seguros.
(b) No coloque ningún objeto entre la parte frontal del horno
y la compuerta, ni permita que se acumulen residuos de
producto limpiador o detergente, suciedad o polvo en las
superficies de sellado.
(c) No haga funcionar el horno si se encuentra dañado. Es
particularmente importante cerrar bien la compuerta
ODFRPSXHUWDGREODGDRFXUYDGD
ODVELVDJUDV\SHVWLOORVURWRVRIORMRV
VHOORVGHODFRPSXHUWD\VXSHUILFLHVGHVHOODGR
(d) El horno no debe ser ajustado o reparado por ninguna
persona, excepto por personal de mantenimiento
calificado.
49-7000090 Rev. 1 7
Funciones
FUNCIONES DEL HORNO: Funciones
Es posible que las funciones y apariencias varíen con relación a su modelo a lo largo del manual.
1 Manija de la Puerta Empuje para abrir la puerta. La
puerta deberá estar asegurada con la traba para que
las microondas se activen.
2 Pestillos de la Puerta.
3 Ventana con Protector Metálico Pantalla permite
que la cocción pueda ser observada mientras se
mantienen las microondas dentro del horno.
4 Panel de Control y Dial del Selector
5 Luz de la Placa de Cocción
6 Filtro de Grasa
7 Plato Giratorio Extraíble El plato giratorio y el
soporte deben estar en la ubicación correcta al usar
el horno. El plato giratorio se podrá retirar para la
limpieza.
8 Placa de Calificación
NOTA: /DYHQWLODFLyQHVGHOKRUQR\ODOX]GHOKRUQR
están ubicadas en las paredes interiores del horno
microondas.
8 49-7000090 Rev. 1
Controles
USO DEL HORNO: Controles
Funciones de tiempo de cocción por microondas y
automáticas
Presione Gire y apriete el dial para aceptar
Cook Time (cocción por tiempo) Cantidad de tiempo de cocción
Pulse una vez Cook Time I
7LHPSRGHFRFFLyQ,
para utilizar la función
microondas en un intervalo de tiempo
de entre 15 segundos y 99 minutos.
3XOVHGRVYHFHV&RRN7LPH,,7LHPSR
GHFRFFLyQ,,SDUDDJUHJXHXQVHJXQGR
microondas etapa de cocina
Nivel de POTENCIA
Nivel de potencia 1–10
Añadir 30 seg. ¡Empieza inmediatamente!
Descongelar por Peso/Tiempo
Presione una vez Peso de la comida de hasta una libra.
'HVFRQJHODUSRU3HVR
Presione dos veces Cantidad de tiempo de descongelación
'HVFRQJHODUSRU7LHPSR
Funciones de sensor
Presione Gire y apriete el dial
para aceptar Opción
CPopcorn (rosetas o palomitas ¡Empieza
de maíz)
inmediatamente! más/menos
tiempo
Beverage (bebida) ¡ Empieza inmediatamente!
Cook (cocinar) Tipo de alimentos
más/menos
tiempo
Reheat (recalentar) Tipo de alimentos más/menos
tiempo
My Cycle
Mute
49-7000090 Rev. 1 9
Funciones de microondas por tiempo y automático
USO DEL HORNO: Funciones de microondas por tiempo y automático
Cómo usar el dial
Podrá hacer selecciones en el horno girando el dial y
presionando para ingresar la selección.
Usted también puede presionar el dial en vez de botón Start/
Pause para una programación más rápida del horno.
Cook Time (cocción por tiempo)
Cook Time I (cocción por tiempo I)
Le permite usar el microondas por un período de
entre 15 segundos y 99 minutos.
El Nivel de potencia 10 (alto) (power level 10
[High]) se selecciona de forma automática pero
puede cambiarlo para mayor flexibilidad.
1. Presione el botón Cook Time (cocción por
tiempo).
2. Gire el dial para ajustar el tiempo de cocción y
presione el dial para seleccionar
3. Cambie el nivel de potencia si no quiere que
FRFLQHDWRGDSRWHQFLD3UHVLRQH3RZHU/HYHO
Gire el dial para buscar. Presione el dial para
VHOHFFLRQDU
4. Presione el dial o el botón Start/Pause para
empezar a cocinar.
Cuando use Cook Time puede abrir la puerta para
revisar la comida. Cierre la puerta y presione el dial
o Start/Pause para seguir cocinando.
NOTA: El tiempo de cocción puede cambiarse
en cualquier momento mientras se cocina
girando el dial. Usted puede también cambiar
el nivel de energía presionando el botón de
energía Power Level.
Cook Time II (cocción por tiempo II)
Le permite cambiar los niveles de potencia de forma
automática mientras cocina. Se hace de la siguiente
forma:
3UHVLRQHHOERWyQ&RRN7LPHFRFFLyQSRU
WLHPSR
2. Gire el dial para ajustar el primer tiempo de
cocción y presione el dial para seleccionar.
3. Cambie el nivel de potencia si no quiere que
FRFLQHDWRGDSRWHQFLD3UHVLRQH3RZHU/HYHO
Gire el dial para seleccionar. Presione el dial para
VHOHFFLRQDU
3UHVLRQHHOERWyQ&RRN7LPHFRFFLyQSRUWLHPSR
de nuevo.
5. Gire el dial para ajustar el segundo tiempo de
cocción y presione el dial para seleccionar.
6. Cambie el nivel de potencia si no quiere que
FRFLQHDWRGDSRWHQFLD3UHVLRQH3RZHU/HYHO
Gire el dial para seleccionar. Presione el dial para
VHOHFFLRQDU
7. Presione el el dial o el botón Start/Pause para
empezar a cocinar.
Cuando acaba Cook Time I, Cook Time II empieza
a funcionar.
NOTA: El tiempo de cocción puede cambiarse en
cualquier momento mientras se cocina girandoel
dial. Usted puede también cambiar el nivel de
energía presionando el botón de energía Power
Level.
Add 30 Sec (Agregar 30 Segundos)
Esta es la forma rápida de ajustar y empezar a cocinar en
bloques de 30 segundos cada vez que se aprieta el botón.
Botón para Agregar 30 Segundos. El tiempo de cocción puede
cambiarse en cualquier momento mientras se cocina girando
el dial.
El nivel de potencia estará automáticamente seleccionado a 10
y el horno empezará inmediatamente.
El nivel de potencia puede cambiarse mientras el tiempo se
va agotando. Presione el botón Power gire el dial y presiónelo
para seleccionar.
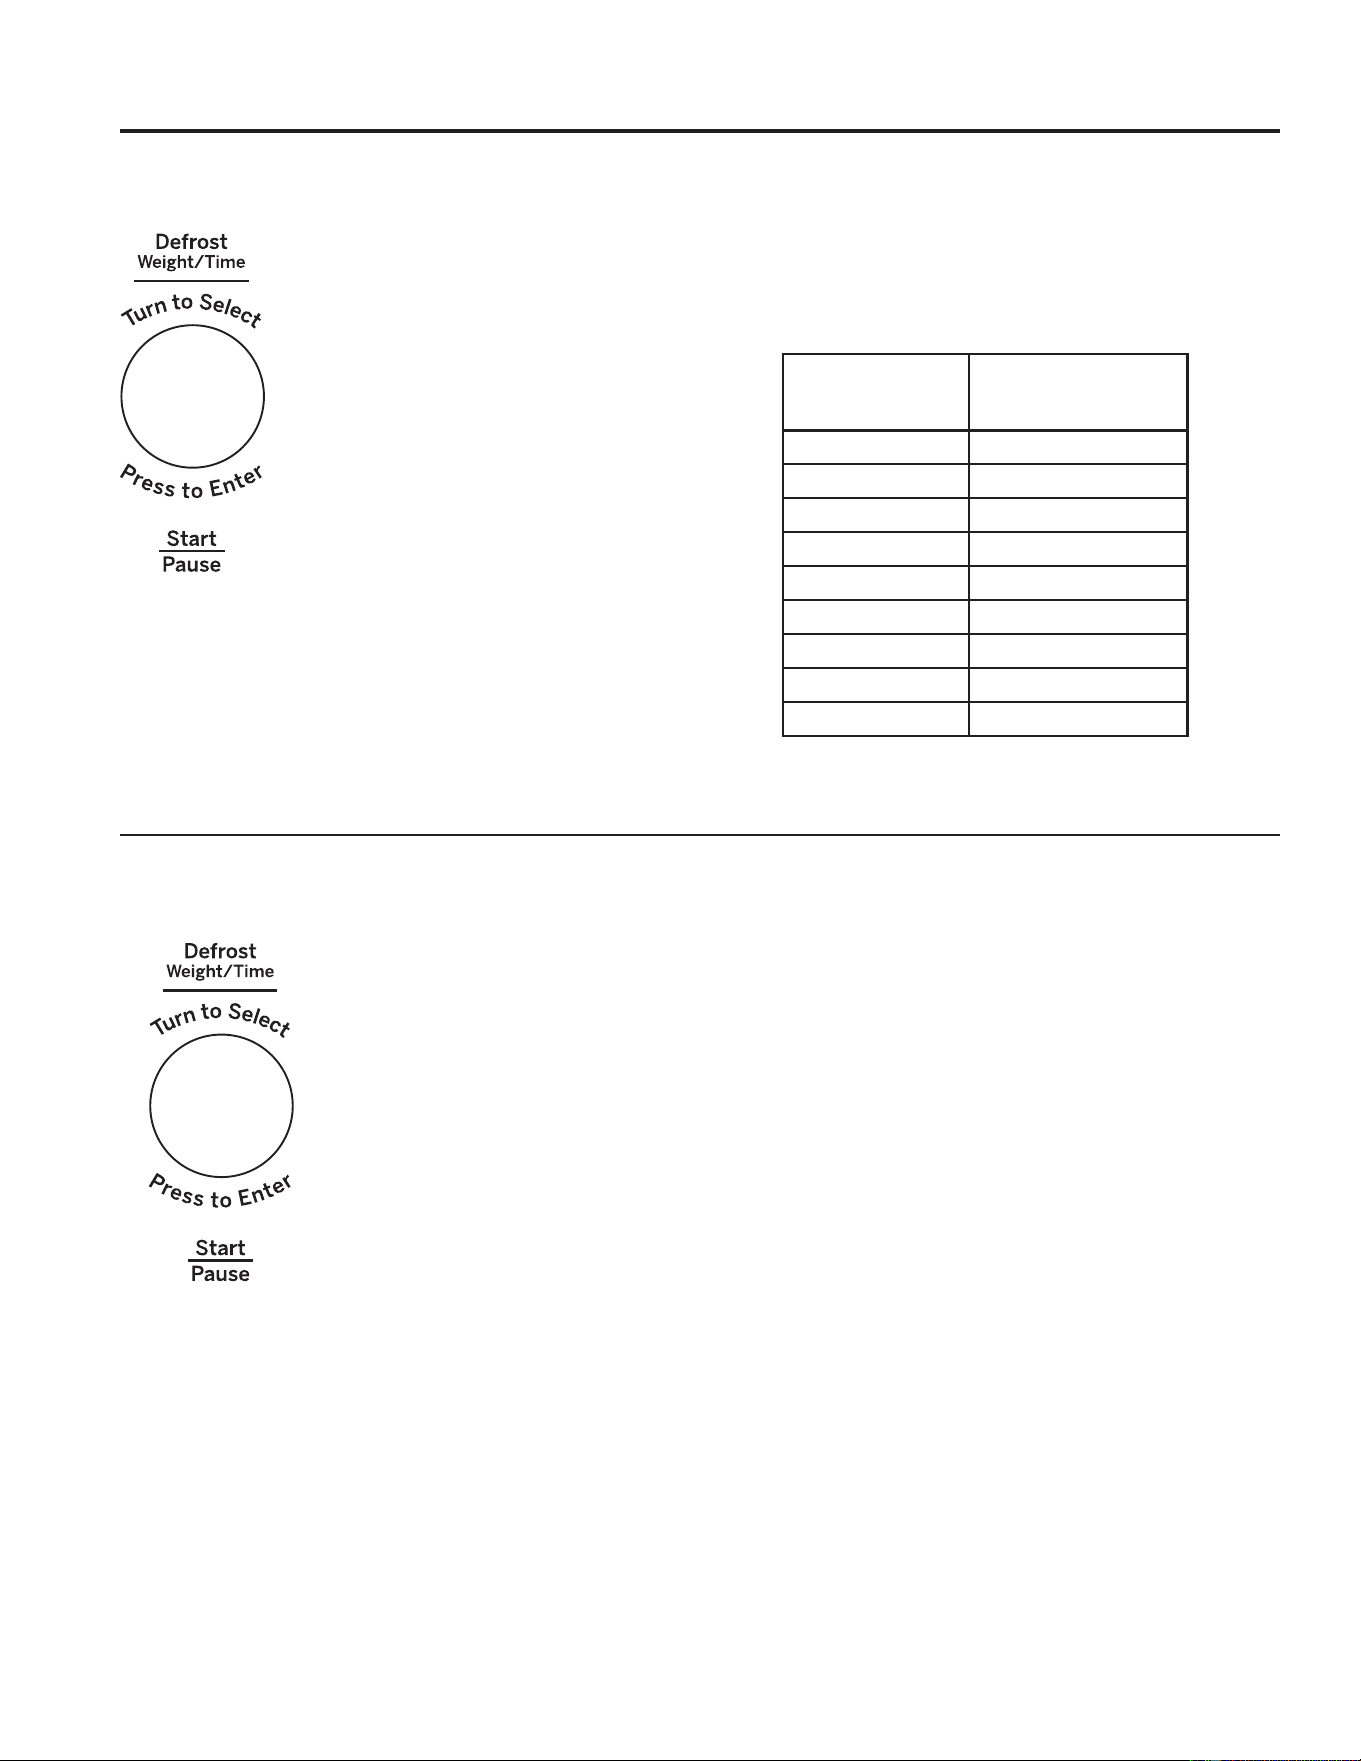
10 49-7000090 Rev. 1
Funciones de microondas por tiempo y automático
Weight Defrost (Descongelación por Peso)
Weight Defrost ajusta de forma automática
los tiempos de descongelación y los niveles
de potencia para producir resultados de
descongelación parejos para carnes, aves y
pescado que pesen hasta una libra.
Ŷ6DTXHODFDUQHGHOSDTXHWH\FROyTXHODHQ
un plato apto para microondas.
1. Presione el botón DEFROST
'HVFRQJHODUXQDYH]
2. Gire el dial hasta alcanzar el peso de la
comida usando la Tabla de Conversión a
la derecha. Por ejemplo, ponga el dial a .5
SDUDOLEUDVRQ]DV3UHVLRQHHOGLDO
para seleccionar.
3. Presione el botón Start/Pause para empezar a descongelar.
4. De la vuelta a la comida si aparece el mensaje TURN FOOD
OVER.
Ŷ5HWLUHODFDUGHGHVFRQJHODGDRFXEUDODViUHDVFDOLHQWHVFRQ
pequeños recortes de papel de aluminio.
Ŷ8QDYH]GHVFRQJHODGDVODPD\RUtDGHFDUQHVQHFHVLWDQ
minutos en reposo para que acaben de descongelarse.
Tabla de conversión
Si el peso de la comida se calcula en libras y onzas, las
RQ]DVGHEHUiQFRQYHUWLUVHDGpFLPDVGHOLEUD
Use Time Defrost (Descongelación por Tiempo)
para descongelar durante un período de tiempo
seleccionado.
1. Presione el botón DEFROST (Descongelar) dos
veces.
2. Gire el dial para seleccionar el tiempo que
desee. Presione el dial para ingresar.
3. Presione el botón Start/Pause para empezar a
descongelar.
4. De la vuelta a la comida si aparece el mensaje
TURN FOOD OVER.
Puede cambiar el tiempo de descongelación en
cualquier momento durante la misma girando el
dial.
El nivel de potencia se configura de forma
automática en 3, pero se puede cambiar. Puede
descongelar productos pequeños de forma
rápida, incrementando el nivel de potencia luego
GHLQJUHVDUHOWLHPSR3RZHUOHYHO1LYHOGH
SRWHQFLDUHGXFHHOWLHPSRGHGHVFRQJHODFLyQ
WRWDODSUR[LPDGDPHQWHDODPLWDGSRZHUOHYHO
QLYHOGHSRWHQFLDUHGXFHHOWLHPSRWRWDO
a aproximadamente 1/3. Sin embargo, será
necesario prestar mayor atención a la comida que
lo usual.
Es posible que se escuchen ruidos de golpes
secos durante la descongelación. Esto es normal
cuando el horno no está funcionando en el nivel de
SRWHQFLD+LJK$OWR
Consejos para la Descongelación
Ŷ/DVFRPLGDVFRQJHODGDVHQSDSHORSOiVWLFRVH
podrán descongelar en el paquete. Los paquetes
cerrados se deberán cortar, perforar o ventilar
LUEGO de que la comida se haya descongelado
parcialmente. Los envases de plástico se
deberán descubrir en forma parcial.
Ŷ/DVFRPLGDVGHWDPDxRIDPLOLDU
preempaquetadas se podrán descongelar y
cocinar en el horno microondas. Si la comida se
encuentra en el envase de papel de aluminio,
traslade la misma a un plato para uso seguro en
el horno microondas.
Ŷ/DVFRPLGDVTXHVHHFKDQDSHUGHUFRQIDFLOLGDG
no se deberán dejar reposar por más de una
hora luego de la descongelación. La temperatura
ambiente estimula el desarrollo de bacterias
nocivas.
Ŷ8QDYH]GHVFRQJHODGDODFRPLGDGHEHUtDHVWDU
fría pero ablandada en todas las áreas. Si aún
está un poco congelada, vuelva a colocarla en
el horno microondas muy brevemente, o deje
reposar la misma por unos pocos minutos.
Peso de la
comida en onzas
Introduzca el peso de
la comida (décimas
de libra)
1–2 .1
3.2
4–5 .3
6–7 .4
8.5
9–10 .6
11 .7
12–13 .8
14–15 .9
Time Defrost (Descongelación por Tiempo)
USO DEL HORNO: Funciones de microondas por tiempo y automático

49-7000090 Rev. 1 11
USO DEL HORNO: Funciones de microondas por tiempo y automático
Funciones de microondas por tiempo y automático
Guía de Descongelación
Comida Tiempo Comentarios
Panes, Tortas
Panes, buñuelos o
SDQHFLOORVWUR]R
1/4 min.
3DVWHOLWRVR]DSUR[ 2 a 4 min. Reordene luego de la mitad del tiempo.
Pescado y Mariscos
/RPRVFRQJHODGRVOE 6 a 9 min.
Fruta
Bolsa de plástico—1 o 2 1 a 5 min.
SDTXHWHGHR]
Carne
7RFLQROE 2 a 5 min.
Coloque el paquete cerrado en el horno. Deje reposar por 5 minutos luego
de la descongelación.
Salchichas Tipo Frankfurt
OE
2 a 5 min. Coloque el paquete cerrado en el horno. Cocine en el horno microondas
hasta que las salchichas tipo Frankfort se puedan separar. Deje reposar
por 5 minutos, de ser necesario, para completar la descongelación.
&DUQHSLFDGDOE 4 a 6 min. Dé vuelta luego de la primera mitad de tiempo.
Asar: Bife, cordero, ternera,
cerdo
9 a 13 min. par lb. Use el nivel de potencia 10.
Bistecs, chuletas de cerdo y
cordero
4 a 8 min. par lb. Coloque la carne aún envuelta en el plato de cocción. Dé vuelta vuelta
luego de la primera mitad de tiempo y cubra las áreas calientes con papel
de aluminio. Luego de la segunda mitad de tiempo, separe los trozos con
un cuchillo de mesa. Espere hasta que se complete la descongelación.
Ave
Pollo, parilla-freidora, corte
óDOLEUDV
14 a 20 min. Coloque el pollo envuelto en el plato. Desenvuelva y dé vuelta luego de
la primera mitad de tiempo. Luego de la segunda mitad de tiempo, separe
los trozos y coloque los mismos en un plato de cocción. Cocine en el
horno microondas entre 2 y 4 minutos más, si es necesario. Deje reposar
por unos pocos minutos para finalizar la descongelación.
3ROORHQWHURóDOEV 20 a 25 min. Coloque el pollo envuelto en el plato. Luego de la primera mitad de
tiempo, desenvuelva y dé vuelta el pollo. Cubra las partes calientes con
papel de aluminio. Para completar la descongelación, deje correr agua
fría en la cavidad hasta que se puedan retirar los menudos.
Gallina de cornualle 7 a 13 min. par lb. Coloque la gallina sin desenvolver en el horno con la pechuga hacia
arriba. Dé vuelta luego de la primera mitad de tiempo. Deje correr agua
por la cavidad hasta que se puedan quitar los menudos.
3HFKXJDGHSDYRD
OLEUDV
3 a 8 min. par lb. Coloque la pechuga sin desenvolver en el plato para uso seguro en horno
microondas con la pechuga hacia abajo. Luego de la primera mitad de
tiempo, dé vuelta la pechuga hacia arriba y cubra las partes calientes
con papel de aluminio. Descongele durante la segunda mitad del tiempo.
Deje reposar entre 1 y 2 horas en el refrigerador para completar la
descongelación.

12 49-7000090 Rev. 1
USO DEL HORNO: Funciones de microondas por tiempo y automático
1. Primero, siga las instrucciones para el tiempo de cocción
(Cook Time) o el tiempo de descongelación (Time Defrost).
2. Presione el botón Power Level.
3. Gire el dial, en el sentido de las agujas del reloj, para
aumentar y en el sentido contrario para disminuir la
potencia. Presione el dial para seleccionar.
4. Presione el botón Start/Pause para empezar a cocinar.
Los niveles de potencia variables añaden flexibilidad a la
cocina con microondas. Los niveles de potencia del horno
microondas pueden compararse con las unidades de la
HQFLPHUDIRJRQHVHQXQDFRFLQD&DGDQLYHOGHSRWHQFLD
le proporciona energía microondas durante cierto porcentaje
del tiempo. Nivel de potencia 7SRZHUOHYHO7HVHQHUJtD
microondas al 70% del tiempo. Nivel de potencia 3SRZHU
level 3HVHQHUJtDDOGHOWLHPSR1RUPDOPHQWHVH
FRFLQDUiHQ$OWRQLYHOGHSRWHQFLD10+LJKSRZHUOHYHO10
TXHSURSRUFLRQDXQDSRWHQFLDGHO3RZHUOHYHO10 le
permitirá cocinar más rápido, pero la comida, posiblemente,
necesitará que la agite, gire o dé la vuelta más a menudo.
Un nivel inferior cocinará la comida de forma más pareja y
no necesitará que la agite, gire o dé la vuelta tanto. Algunas
comidas pueden tener mejor sabor, textura o aspecto si se usa
un nivel inferior. Use un nivel de potencia inferior cuando esté
cocinando comidas que tengan tendencia a hervir, como las
papas gratinadas.
/RVSHUtRGRVGHGHVFDQVRFXDQGRVHDFDEDHOFLFORGHOD
HQHUJtDPLFURRQGDVOHGDQWLHPSRDODFRPLGDD³LJXDODUVH´R
transferir el calor a su interior. Se muestra un ejemplo de esto
FRQHOFLFORGHGHVFRQJHODFLyQSRZHUOHYHO6LODHQHUJtD
microondas no funcionara en ciclos, la parte externa de la
comida se cocinaría antes de que el interior se descongelara.
Estos son algunos ejemplos de aplicaciones para diferentes
niveles de potencia:
Alta 10: Pescado, bacon, verduras, calentar líquidos.
Media alta 7: Cocción suave de carne y aves, sirve para
cocinar guisos y para recalentar.
Media 5: Cocina lenta y tierna para estofados o guisos y para
partes menos tiernas de carne.
Baja 2 o 3:3DUDGHVFRQJHODUFRFHUD³IXHJR´OHQWRSDUD
salsas delicadas.
Algo caliente 1: Mantener la comida caliente, ablandar la
mantequilla.
Power Level
El nivel de potencia puede introducirse o cambiarse de forma inmediata tras introducir el tiempo de cocción (Cook Time) o el tiempo
de descongelación (Time Defrost). El nivel de potencia también puede cambiarse durante la cuenta atrás.
Funciones de microondas por tiempo y automático
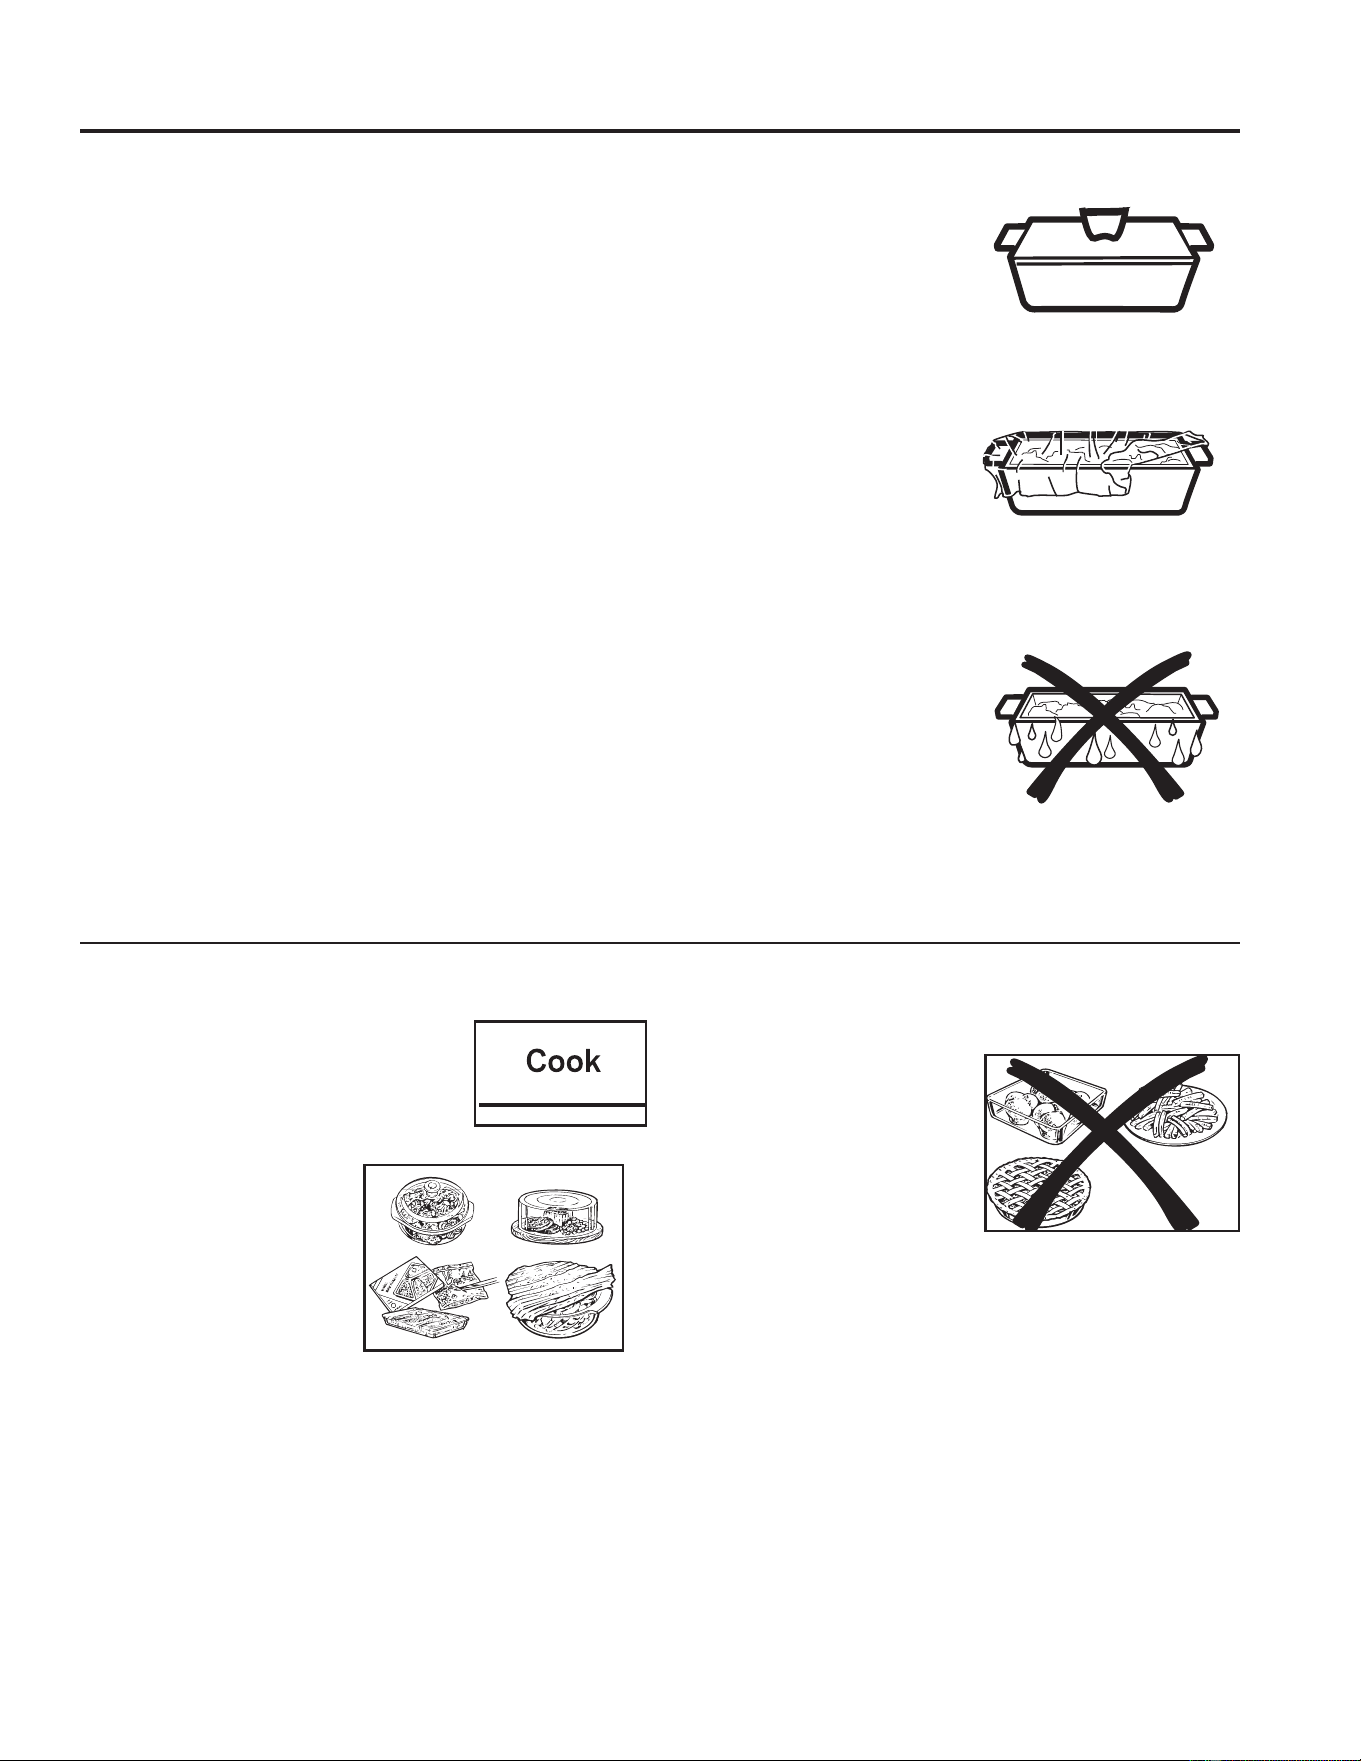
49-7000090 Rev. 1 13
USO DEL HORNO: Características de microondas por sensor
Características de microondas por sensor
Sensor de humedad
Qué sucede cuando usa las funciones de sensores:
Las funciones de Sensor detectan la mayor humedad
liberada durante la cocción.
El horno ajusta automáticamente el tiempo de cocción a
los diferentes tipos y cantidades de comida.
No utilice las funciones de Sensor dos veces
consecutivas en la misma porción de comida. Puede
resultar en que los alimentos se cocinen en exceso o se
quemen. Si la comida no se ha cocinado por completo
después de la cuenta regresiva, use la función Cook
Time para tiempo de cocción adicional.
NOTA: las funciones de sensor no estarán disponibles
cuando el horno está caliente. Si se pulsa uno de los
botones de cocinar por sensor cuando la temperatura
dentro del horno es superior a los 200ºF, aparecerá el
PHQVDMH³29(1722+27)256(1625&22.,1*
86,1*$/7(51$7(0(7+2'´+RUQRGHPDVLDGR
caliente para cocinar por sensor. Se está utilizando
RWURPpWRGR(OKRUQRFDPELDUiDXWRPiWLFDPHQWHD
ODIXQFLyQ³FRRNE\WLPH´FRFLQDUSRUWLHPSRVLJDODV
LQGLFDFLRQHVGHODSDQWDOODRXQDYH]TXHHOKRUQR
esté lo suficientemente frío, las funciones del sensor se
ejecutarán de forma normal.
Ŷ(VHVHQFLDOXVDUORV
recipientes y las tapas
apropiados para cocinar por
sensor de forma óptima.
Ŷ8VHVLHPSUHUHFLSLHQWHV
aptos para microondas y
cúbralos con tapas o film de
plástico agujereado. No use
nunca recipientes cerrados
por completo—pueden
hacer que el vapor no salga
y causar que la comida se cocine
demasiado.
Ŷ$VHJ~UHVHTXHWDQWRHO
exterior de los recipientes
como el interior del
horno microondas estén
secos antes de poner la
comida en el horno. Las
acumulaciones de humedad
que se convierten en vapor
pueden engañar al sensor.
Seque los platos para que no
engañen al sensor.
Cubierto
Agujereado
Cook (cocinar)
Dado que la mayoría de los
recipientes deben estar cubiertos
durante Cook, esta función trabaja
mejor con comidas que quiera hacer
al vapor o en las que quiera mantener
la humedad.
Comidas recomendadas
Con esta función se
pueden cocinar una gran
variedad de comidas
incluyendo carnes,
pescado y vegetales.
Comidas no recomendadas
No deberían cocinarse
usando esta función aquellas
comidas que deban cocinarse
descubiertas, aquellas que
requieran atención constante,
aquellas que requieran añadir
ingredientes durante su
cocción y comidas que deban
tener apariencia seca o con una superficie crujiente.
Es mejor cocinar todas estas usando Cook Time.
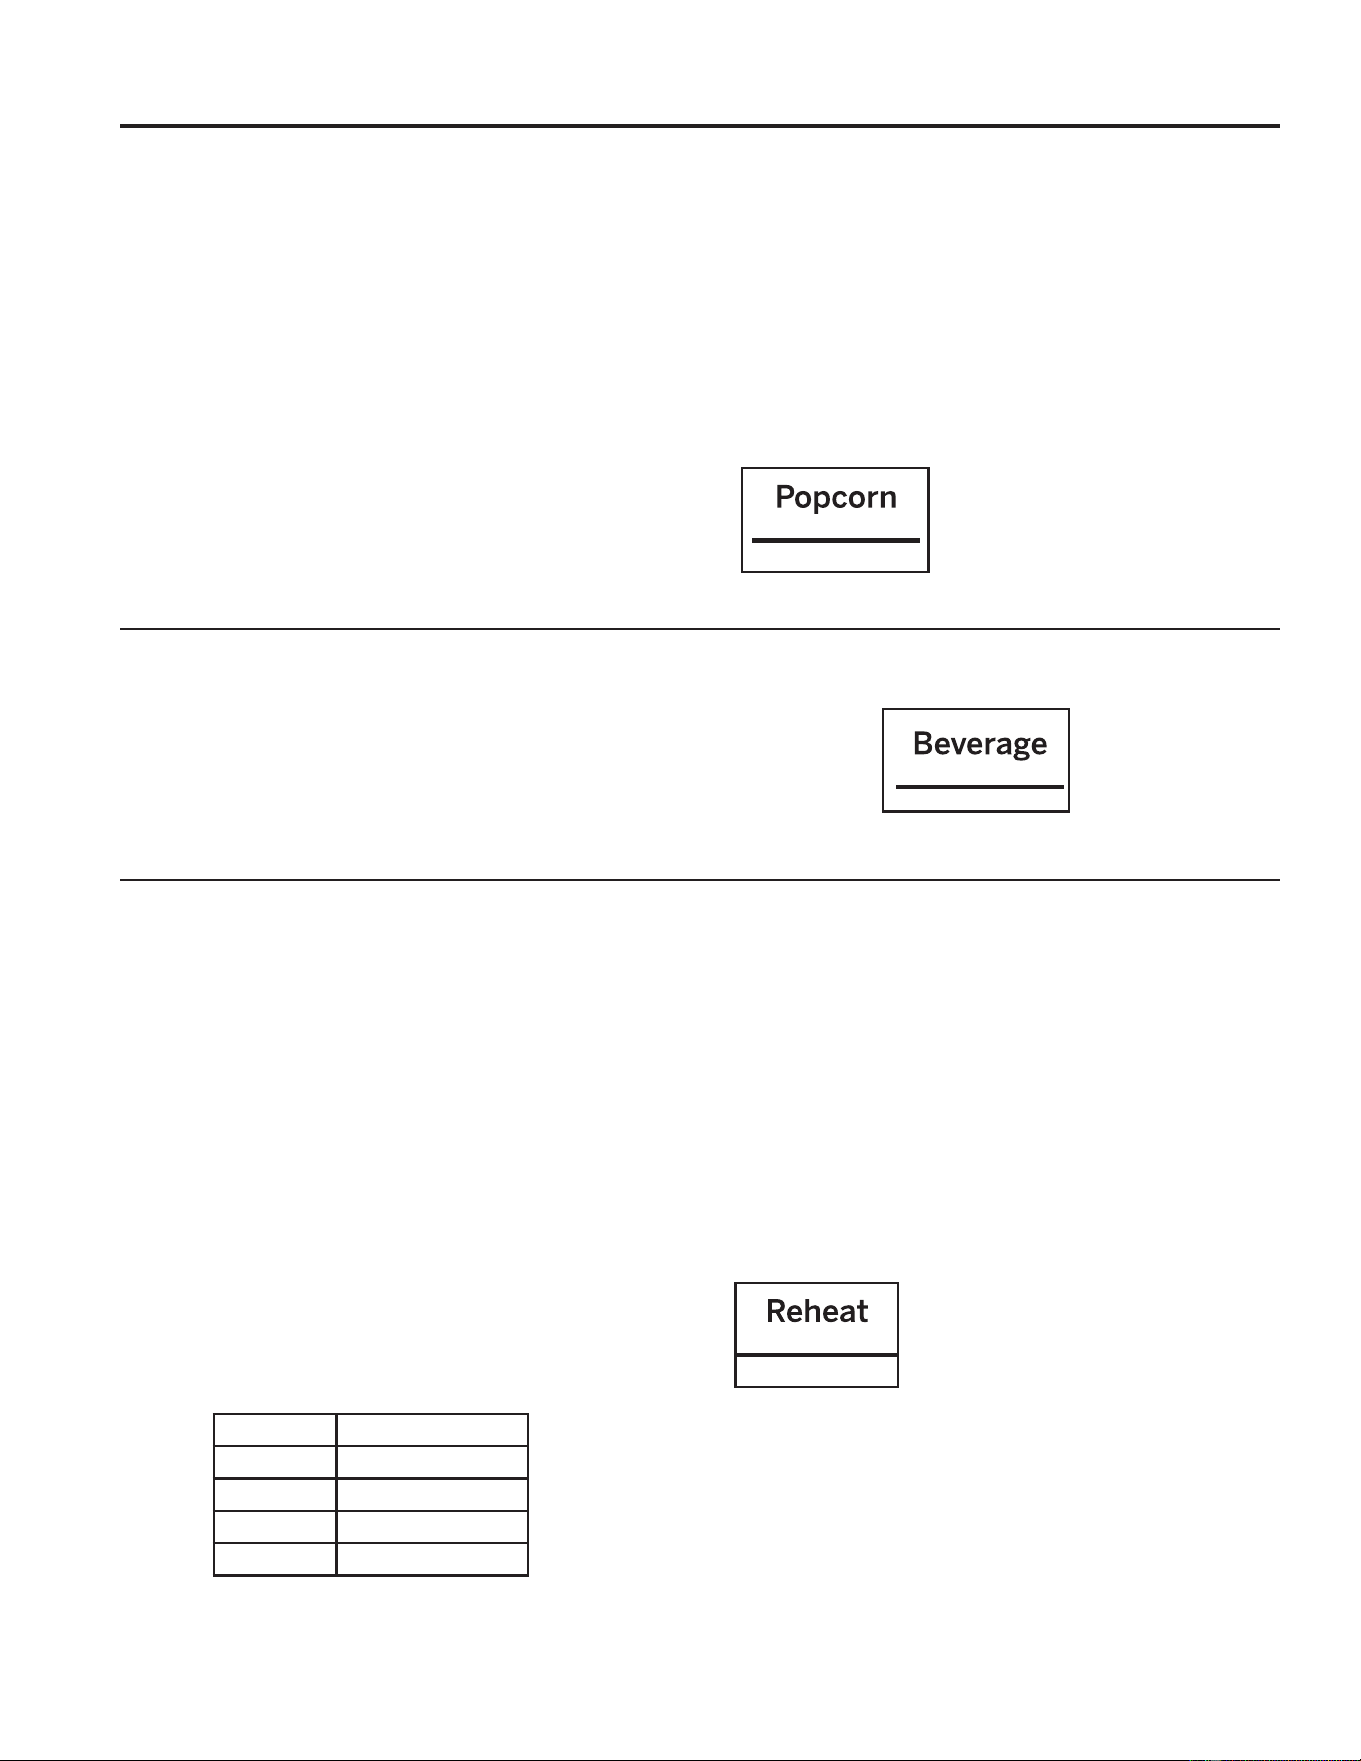
14 49-7000090 Rev. 1
USO DEL HORNO: Características de microondas por sensor
Características de microondas por sensor
Popcorn (rosetas o palomitas de maíz)
Para usar la función Popcorn:
1. Siga las indicaciones del paquete, use Cook Time si el
paquete pesa menos de 2,0 onzas o es mayor de 3,5 onzas.
Sitúe el paquete de rosetas en el centro del plato giratorio.
2. Presione el botón Popcorn. El horno empieza a funcionar
inmediatamente.
Si abre la puerta mientras aparece en pantalla POPCORN
6(1625VHQVRUGHSDORPLWDVDSDUHFHUiXQPHQVDMHGH
error. Cierre la puerta, pulse Cancel/Off FDQFHODUGHVDFWLYDU\
comience de nuevo.
Si la comida no se ha cocinado por completo después de la
cuenta regresiva, use la función Cook Time para tiempo de
cocción adicional.
Cómo ajustar la configuración automática para
palomitas de maíz para un mayor o menor tiempo de
cocción
Si se da cuenta de que en la bolsa de la marca de palomitas
que usa queda mucho maíz sin reventar o lo cuece demasiado,
puede añadir o substraer 20–30 segundos al tiempo automático
de cocción.
Para restar o sumar tiempo a la cocción con sensor, gire el dial
cuando el tiempo aparezca.
Use sólo con palomitas o rosetas
preempaquetadas para microondas
que pesen de 2,0 a 3,5 onzas.
NOTA: No utilice esta función dos
veces consecutivas en la misma
porción de comida. Puede resultar
en que los alimentos se cocinen en
exceso o se quemen.
Reheat (recalentar)
La función de recalentar (Reheat) vuelve a calentar raciones
de comidas previamente cocinadas o un plato de sobras.
1. Coloque la taza de líquido o comida cubierta en el horno.
3UHVLRQH5HKHDW5HFDOHQWDU\HOLMDHOWLSRGHFRPLGD
2. El horno da una señal cuando advierte que hay vapor y
empieza a mostrarse hacia atrás el tiempo que queda.
No abra la puerta del horno hasta que el tiempo en el horno
aparezca en cuenta atrás. Si se abre la puerta, ciérrela y
presione Start/Pause inmediatamente.
Una vez que haya retirado la comida del horno, remuévala,
si es posible, para igualar la temperatura. Las comidas
recalentadas pueden tener grandes diferencias de
temperatura. Algunas áreas pueden estar extremadamente
calientes.
Si la comida no está suficientemente caliente después de
la cuenta regresiva, use Cook Time tiempo adicional para
recalentar.
No está recomendado el uso de reheat para algunas
comidas
Es mejor usar Cook Time en estos casos:
Ŷ Productos de pan.
Ŷ Comidas que deben recalentarse sin cubrir.
Ŷ Alimentos que necesiten removerse o rotarse.
Ŷ Comidas que necesiten tener un aspecto seco o una
superficie crujiente tras ser recalentados.
Para restar o sumar tiempo a la cocción con sensor, gire
el dial cuando el tiempo aparezca.
Beverage (bebida)
/DIXQFLyQ%HYHUDJH%HELGDFDOLHQWDEHELGDVGHDRQ]DV
3UHVLRQHHOERWyQ%HYHUDJH%HELGD(OKRUQRVHLQLFLDGH
inmediato.
Las bebidas calentadas con la función Beverage pueden estar
muy calientes. Saque el recipiente con cuidado.
NOTA: No utilice esta función dos veces
consecutivas en la misma porción de
comida. Puede resultar en que los alimentos
se cocinen en exceso o se quemen.
Selection Food to Reheat
1 Plate
2 Soup
3 Veggies
4Pasta
49-7000090 Rev. 1 15
Características de microondas por sensor
USO DEL HORNO: Características de microondas por sensor
Cook (cocinar)3RQJDODFRPLGDFXELHUWDHQHOKRUQR\FLHUUHODSXHUWD3XOVHHOERWyQ&RRNFRFFLyQ$SDUHFHHQ
pantalla ENTER FOOD TYPELQWURGX]FDHOWLSRGHFRPLGD
2. Gire el dial al tipo de comida deseado. Presione para
seleccionar
Ver la Tabla de Tipos de Comidas con Sensor de más abajo
para tipos específicos de comidas e instrucciones.
El horno empieza a funcionar inmediatamente.
NOTA: Si la puerta se abre mientras se está seleccionando el
control, ciérrela y presione el botón Start/Pause para empezar
a cocinar.
Si la comida no se ha cocinado por completo después de la
cuenta regresiva, use la función Cook Time para tiempo de
cocción adicional.
No abra la puerta del horno antes de que
el tiempo de cuenta atrás aparezca en la pantalla—el vapor
que se escapa del horno puede afectar la cocción. Si se abre la
puerta, ciérrela y presione Start/Pause inmediatamente.
6LVHOHFFLRQDFDUQHSLFDGDJURXQGPHDWHOKRUQRSXHGH
que le indique que le extraiga el líquido y la remueva. Abra la
puerta, seque la carne y cierre la puerta. Presione el botón
Start/Pause, si fuera necesario, para seguir con la cocción.
Consejos de cocción
Ŷ&XDQGRHOKRUQRKDFHXQDVHxDO\DSDUHFHHOWLHPSRKDFLD
atrás, la puerta puede abrirse para remover, girar o dar la
vuelta a la comida. Cierre la puerta y presione Start/Pause
para seguir cocinando.
Ŷ$MXVWHODFDQWLGDGGHFRPLGDDOWDPDxRGHOUHFLSLHQWH/OHQH
los recipientes por lo menos hasta la mitad.
Ŷ$VHJ~UHVHGHTXHODSDUWHH[WHULRUGHOUHFLSLHQWH\HOLQWHULRU
del horno estén secos.
Ŷ8QDYH]FRPSOHWDGRHOFLFORGH&RFFLyQVLODFRPLGD
necesita cocerse más, vuélvala a poner en el horno y use
Cook Time para acabar de cocinarla.
Para restar o sumar tiempo a la cocción con sensor, gire el dial
cuando el tiempo aparezca.
NOTA: No utilice esta función
dos veces consecutivas en la
misma porción de comida. Puede
resultar en que los alimentos se
cocinen en exceso o se quemen.
Tabla de tipos de comidas con sensor
Tipo de comida Raciones Tamaños de
las raciones
Comentarios
Piezas de pollo Con Huesos
Deshuesado
2 a 8 piezas Use un plato ovalado, cuadrado o redondo. Cubra con envoltura
plástica ventilada.
Pescado — 4 a 16 oz. Use un plato ovalado, cuadrado o redondo. Cúbralo con un film plástico
agujereado.
Carne picada
7HUQHUD3XHUFR
3DYR
— 8 a 32 oz. Use plato de guisos redondo. Reparta la carne en el plato. Cúbralo con
un papel de cera o un film plástico agujereado.
Papas — 8 a 32 oz. Rompa la piel con un tenedor. Arréglelas en un patrón en forma de
estrella al centro del plato giratorio.
Vegetales frescos Frescos 4 a 16 oz. Use cazuela de guisos para microondas, tazón o bol. Añada dos
cucharadas de agua por cada ración. Cúbralo con una tapa o un film
plástico agujereado.
Vegetales congelados Congelados 4 a 16 oz. Use cazuela de guisos para microondas, tazón o bol. Siga las
instrucciones del paquete en cuanto al agua a añadir. Cúbralo con una
tapa o un film plástico agujereado.
Vegetales enlatados Enlatados 4 a 16 oz. Use cazuela de guisos para microondas, tazón o bol. Cúbralo con una
tapa o un film plástico agujereado.
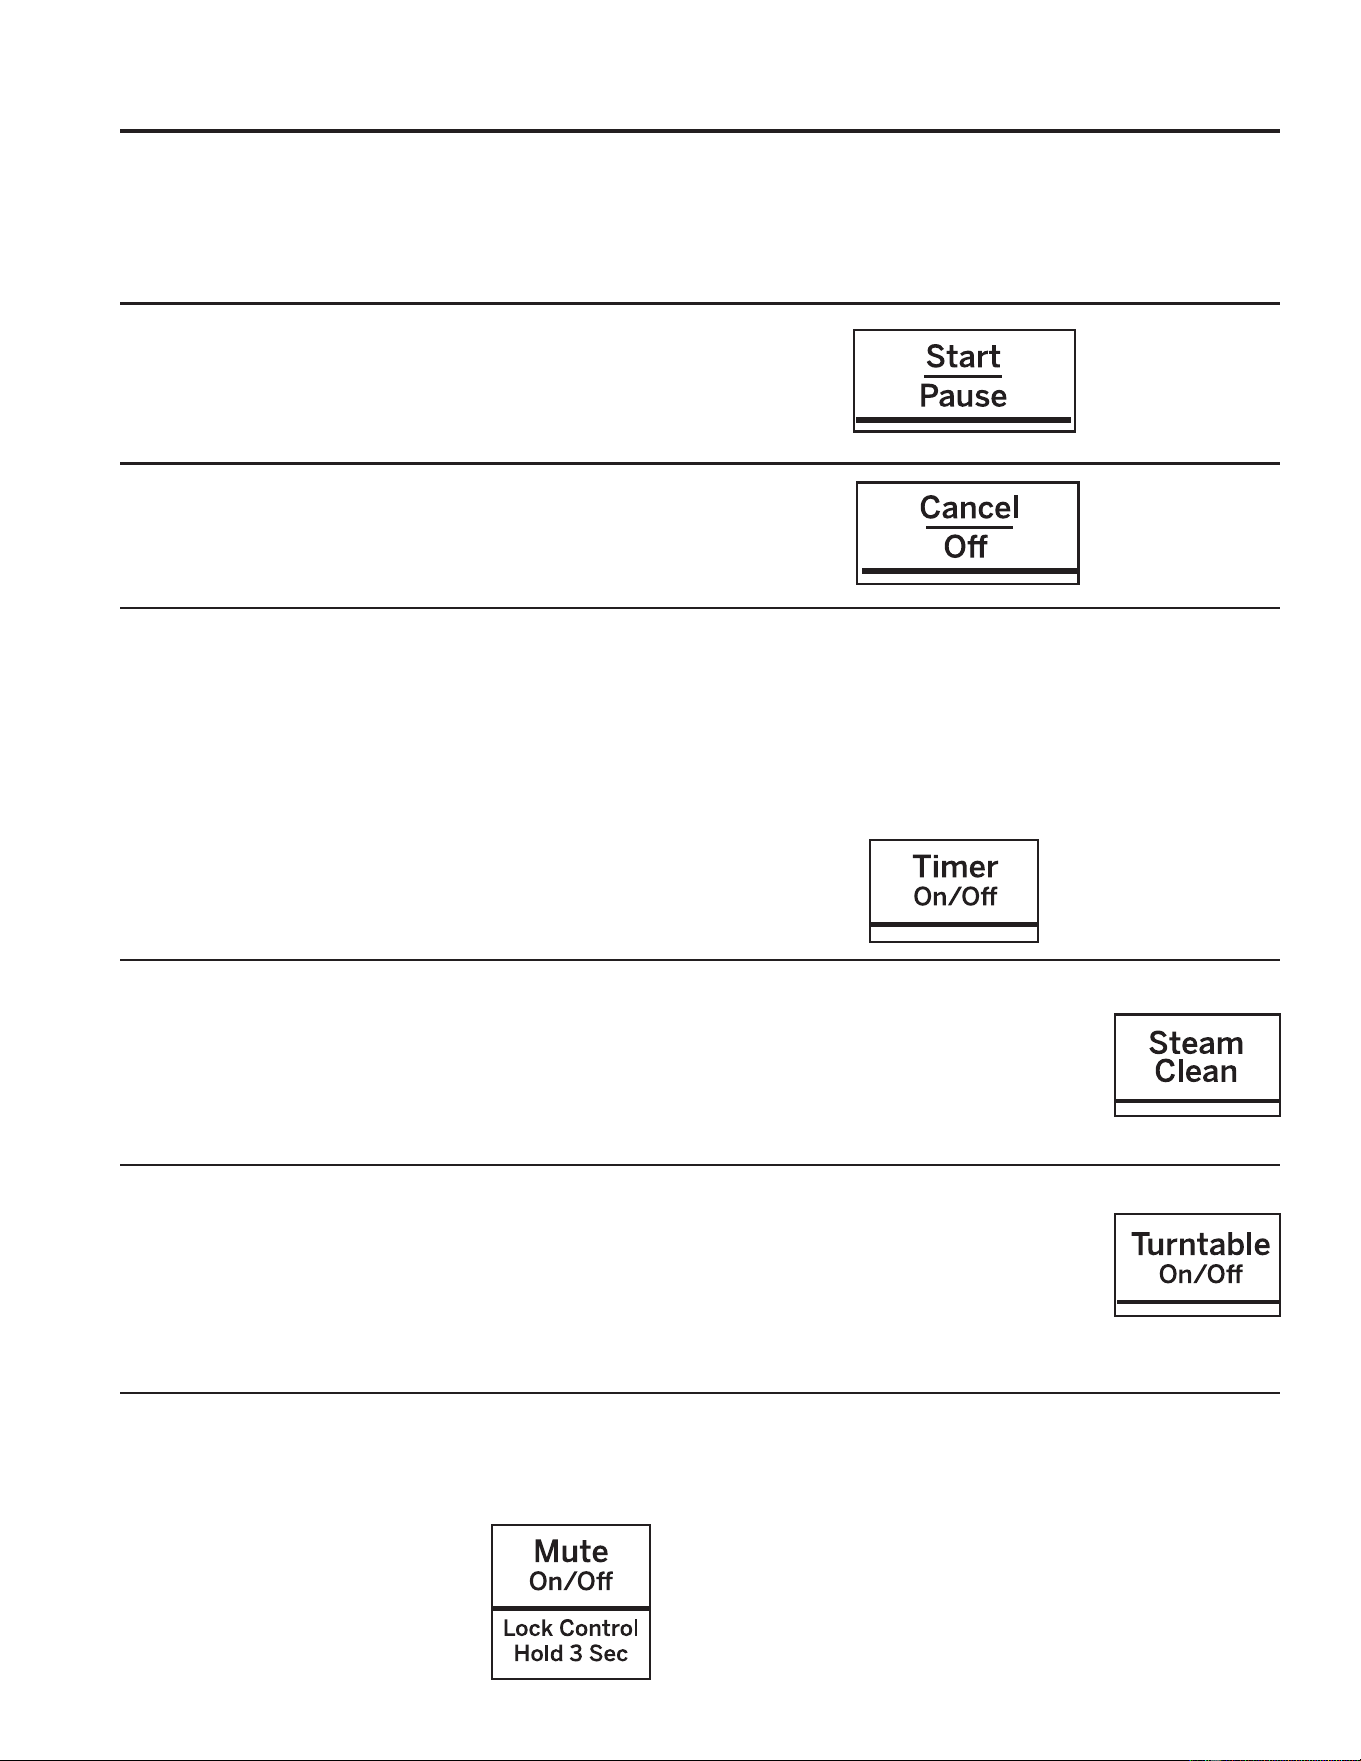
16 49-7000090 Rev. 1
USO DEL HORNO: Otras funciones
Otras funciones
Señal de final de cocción
Para recordarle que tiene comida en el horno, aparecerá el
PHQVDMH)22',65($'<6XFRPLGDHVWiOLVWD\VRQDUi
un pitido cada minuto hasta que abra la puerta del horno o
presione el botón Cancel/Off.
Start/Pause (inicio / pausa)
Además de poner en marcha muchas funciones, Start/Pause
le permite parar la cocción sin tener que abrir la puerta o borrar
lo que haya en pantalla.
Cancel/Off (borrar/apagado)
Presione el botón Cancel/Off para parar y cancelar la
cocción en cualquier momento.
Temporizador Encendido/ Apagado
El temporizador funciona por minutos y puede ser usado
en cualquier momento, incluso cuando el temporizador está
funcionando.
1. Presione el botón TIMER7HPSRUL]DGRU
2. Gire el dial para seleccionar los minutos. Presione el dial
para ingresar.
3. Gire el dial para seleccionar los segundos. Presione el dial
para ingresar.
4. Presione el dial o Timer7HPSRUL]DGRUSDUDFRPHQ]DU
Para cancelar, presione el botón Timer7HPSRUL]DGRU
Cuando el tiempo concluya, el temporizador emitirá una
señal.Para apagar la señal del temporizador, presione Timer
7HPSRUL]DGRU
NOTA: El indicador del Temporizador se iluminará mientras el
temporizador esté funcionando.
Dispositivo giratorio
Para obtener mejores resultados de cocción, deje el dispositivo
giratorio activado. Puede desactivarse si va a cocinar platos
grandes.
3UHVLRQHHOERWyQ7XUQWDEOH2Q2II3ODWR*LUDWRULR
(QFHQGLGR$SDJDGRSDUDGHWHQHURLQLFLDUODURWDFLyQGHO
plato giratorio.
En determinadas ocasiones el dispositivo
giratorio puede calentarse demasiado como
para tocarlo.
Tenga cuidado al tocarlo durante la cocción
o posteriormente a ella.
Steam Clean (Limpieza al Vapor)
1. Presione el botón Steam Clean /LPSLH]DDO9DSRU
2. Coloque el recipiente de vapor con 1/4 de taza de agua.
3. Presione el dial o Start/Pause,QLFLDU3DXVDUSDUD
comenzar.
Una vez finalizado el ciclo, limpie la cavidad
del horno con una toalla de papel o de tela.
Mute On/Off (Mudo Encendido/
Apagado)
Puede controlar el sonido usando el botón Mute On/Off0XGR
(QFHQGLGR$SDJDGR
Bloqueo del control
Puede bloquear el panel de control para evitar que enciendan
el horno accidentalmente durante la limpieza o paraque no lo
utilicen los niños.
Para bloquear y desbloquear los controles, apriete y mantenga
durante un período de tres segundos. Con el panel de control
bloqueado aparecerá brevemente el mensaje CONTROL
LOCKED cada vez que se apriete un botón o el dial.

49-7000090 Rev. 1 17
Otras funciones
USO DEL HORNO: Otras funciones
Chef Connect
Use la función Chef Connect para
conectar su horno microondas a una
Cocina de Café Appliances, a fin de
sincronizar el ventilador, las luces de
la superficie de cocción y el reloj a
través de la tecnología de Bluetooth.
1. Debe contar con una cocina habilitada para Chef
Connect. A fin de emparejar su horno por primera vez,
inicie el proceso de Chef Connect en la cocina Café
Appliances. Para acceder a instrucciones, consulte el
Manual del Propietario de la cocina .
2. En el horno microondas, mantenga presionado el botón
Chef Connect durante 3 segundos. El ícono de Bluetooth
en la pantalla comenzará a titilar a medida que el horno
microondas comience a buscar y a emparejarse con su
Cocina Café Appliances. El ícono permanecerá en ON
(QFHQGLGROXHJRGHXQHPSDUHMDPLHQWRH[LWRVR
Si no es encontrada una Cocina Café Appliances dentro
de los 2 minutos durante el modo de búsqueda, el horno
microondas dejará de buscar y el ícono de Bluetooth
TXHGDUiHQ2))$SDJDGR
Durante la configuración inicial, el protocolo de
configuración será iniciado.
Si la función Chef Connect es activada, las
configuraciones por omisión serán las siguientes:
- Sincronización del reloj en pantalla: ENCENDIDO
- Luz automática de la superficie de cocción: ENCENDIDA
FRQILJXUDFLyQ$/7$
- Ventilador extractor automático: APAGADO
- Apagado Automático: 15 minutos
3. Gire el dial para seleccionar Surface Light Sync ON/
OFF Luz de superficial syncronize encendido /
apagado de la luz de la superficie. Presione el dial para
confirmar. Si está activada, esto permite que las luces
de la superficie del microondas se enciendan en el nivel
+,*+$OWRGHIRUPDDXWRPiWLFDFXDQGRHOTXHPDGRU
de la superficie de cocción de la cocina emparejada se
enciende. Si está desactivada, las luces de la superficie
del microondas no se encenderán automáticamente
cuando un quemador de la superficie de cocción se
encienda.
4. Gire el dial para seleccionar Vent Fan Sync ON/OFF
6LQFURQL]DFLyQGHO9HQWLODGRU([WUDFWRU(QFHQGLGD
$SDJDGD3UHVLRQHHOGLDOSDUDFRQILUPDU6LHVWi
activada, esto permite que el ventilador extractor del
PLFURRQGDVVHHQFLHQGDHQODYHORFLGDG/2:%DMDGH
forma automática cuando el quemador de la superficie
de cocción de la cocina emparejada se enciende.
Si
VHHQFXHQWUDHQ2))$SDJDGRHOH[WUDFWRUQRVH
encenderá automáticamente cuando el quemador de la
superficie de cocción sea encendido.
El emparejamiento está ahora completo; la función Chef
Connect está ahora activada.
NOTA: Si no hay ninguna selección de la opción
sincronizar durante la configuración, 5 minutos luego de
encendido el ícono, las unidades regresarán al modo de
suspensión y usarán las configuraciones por omisión.
Luego de completar la configuración siguiendo los pasos
anteriores, el ventilador extractor de su horno microondas
y la luz de la superficie de cocción quedarán configurados
para encenderse de forma automática cuando el
quemador de la superficie de cocción sea encendido. La
superficie de cocción y la pantalla del reloj de la cocina
serán sincronizadas para mostrar el mismo tiempo. El
ventilador extractor y la luz de la superficie de cocción
estarán configurados para apagarse de forma automática
15 minutos después de que el quemador de la superficie
de cocción sea apagado.
Si lo desea, la luz, el ventilador y las configuraciones
de apagado automática pueden ahora ser modificadas
XVDQGRODRSFLyQHQ6HWWLQJV&RQILJXUDFLRQHV
Presione Chef Connect una vez para apagar de forma
temporaria la comunicación entre el horno microondas y
la cocina. Presione nuevamente si desea volver a activar
la comunicación. El ícono se iluminará cuando esté
encendido.
En el caso de una desconexión no intencional donde el
horno microondas o la cocina no reciban corriente, la
conexión permanecerá una vez restablecida la corriente.
En caso de interrupciones de corriente por cortes breves,
es posible que sea necesario reiniciar la corriente de
modo que se vuelva a establecer la conexión.
NOTA: Para desparejar el horno microondas de la cocina,
mantenga presionado el botón Chef Connect en el horno
microondas durante 3 segundos. El ícono de Bluetooth
comenzará a titilar. Presione cancelar o espere 2 minutos
hasta que la luz deje de titilar. Es posible que necesite
desparejarlas cuando se deba reemplazar o realizar el
servicio técnico sobre la cocina.
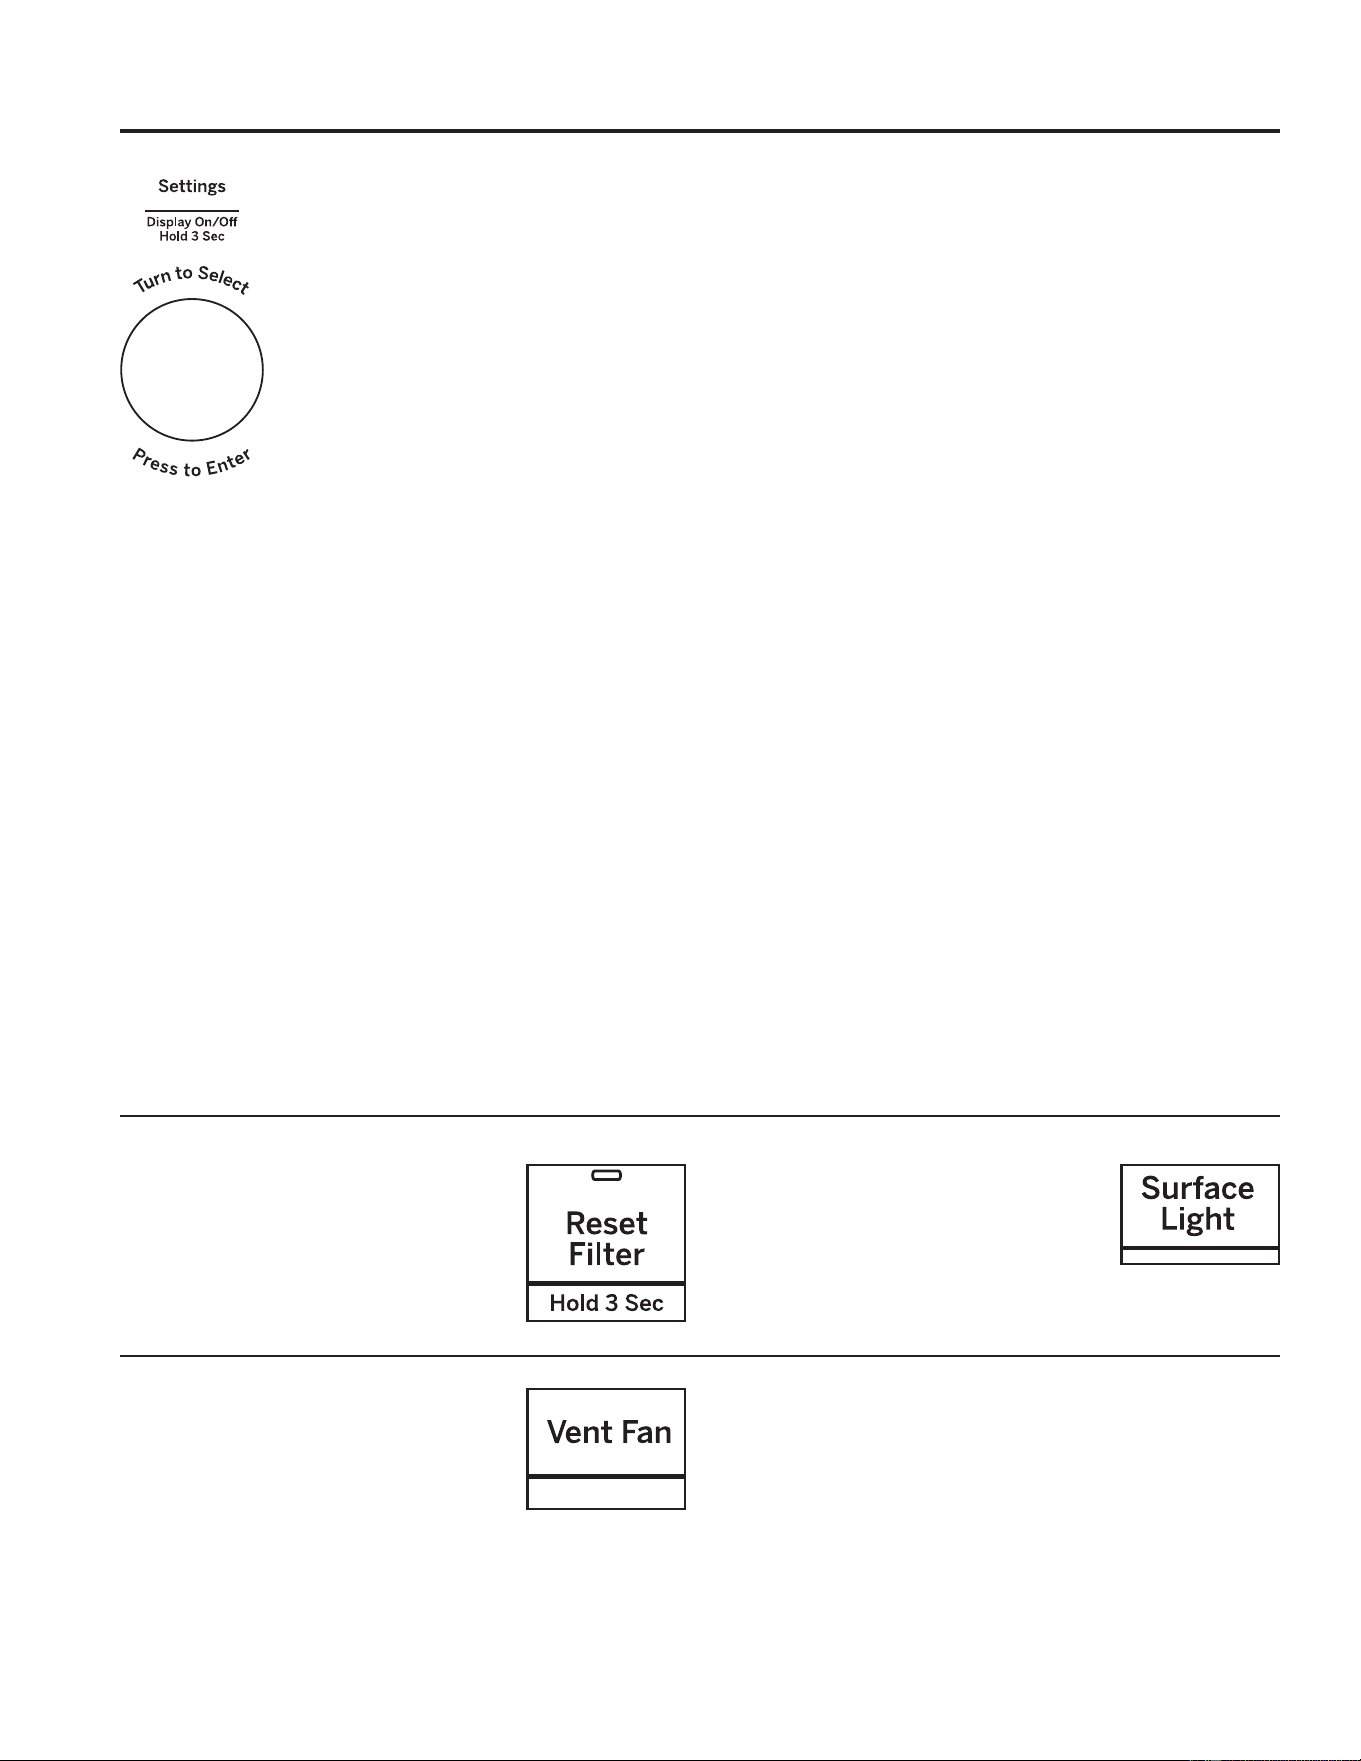
18 49-7000090 Rev. 1
Ajustar el reloj
1. Presione el botón Settings
&RQILJXUDFLRQHVSDUDJLUDUHOGLDODILQ
GHVHOHFFLRQDU&ORFN6HW&RQILJXUDFLyQ
GHO5HORM3UHVLRQHHOGLDOSDUD
seleccionar.
2. Gire el dial para configurar las horas.
Presione el dial para seleccionar.
3. Gire el dial para configurar los minutos.
Presione el dial para seleccionar.
4.
Gire el dial para seleccionar AM/PM.
Presione el dial para ingresar.
Modo de Reloj
Clock Mode (Modo de Reloj) puede ser configurado en 12
horas y en 24 horas
NOTA: el valor predeterminado es 12 horas
1. Presione el botón Settings&RQILJXUDFLRQHV\JLUHHOGLDODILQGH
seleccionar Clock Mode0RGRGH5HORM3UHVLRQHHOGLDOSDUD
seleccionar.
2. Gire el dial para configurar el Modo de Reloj en 12 horas o en 24
horas. Presione el dial para seleccionar.
Velocidad de pantalla
Display Speed (Velocidad de la Pantalla) puede ser ajustado
HQ6ORZ/HQWR1RUPDO1RUPDOR)DVW5iSLGR
NOTA: el valor predeterminado es normal
1. Presione el botón Settings y gire el dial para seleccionar Display
Speed. Presione el dial para seleccionar.
2. Gire el dial para configurar la Velocidad de la Pantalla/HQWR
1RUPDO5iSLGR3UHVLRQHHOGLDOSDUDVHOHFFLRQDU
Nivel de Sonido
El nivel de sonido puede ser ajustado en Mute (Mudo),
Low (Bajo), Normal (Normal) o Loud (Alto).
NOTA: el valor predeterminado es normal
1. Presione el botón Settings&RQILJXUDFLRQHV\JLUHHOGLDODILQGH
seleccionar Sound Level (1LYHOGH6RQLGR3UHVLRQHHOGLDOSDUD
seleccionar.
2. Gire el dial para configurar el Nivel de Sonido 0XGR%DMR
1RUPDOR$OWR3UHVLRQHHOGLDOSDUDVHOHFFLRQDU
Sincronización de la Luz de la Superficie
1. Presione el botón Settings&RQILJXUDFLRQHVSDUDJLUDUHOGLDOD
fin de seleccionar Surface Light Sync6LQFURQL]DFLyQGHOD/X]
GHOD6XSHUILFLH3UHVLRQHHOGLDOSDUDLQJUHVDU
*LUHHOGLDOSDUDVHOHFFLRQDUHOPRGRGHVLQFURQL]DFLyQ$SDJDGR
%DMR$OWR
3. Presione el dial para activarlo.
Sincronización del Ventilador
1. Presione el botón Settings&RQILJXUDFLRQHV\JLUHHOGLDO
para seleccionar Vent Fan Sync6LQFURQL]DFLyQGHO9HQWLODGRU
([WUDFWRU3UHVLRQHHOGLDOSDUDLQJUHVDU
2. Gire el dial para seleccionar el modo de Sincronización del
Ventilador $SDJDGR%DMR0HGLRR$OWR
3. Presione el dial para activarlo.
Sincronización Automática Apagada
1. Presione el botón Settings&RQILJXUDFLRQHV\JLUHHOGLDOSDUD
seleccionar Sync Auto Off 6LQFURQL]DFLyQ$XWRPiWLFD$SDJDGD
Presione el dial para ingresar.
2. Gire el dial para seleccionar Sync Auto Off6LQFURQL]DFLyQ
$XWRPiWLFD$SDJDGDKDVWDPLQXWRV\PDQXDO3UHVLRQH
ingresar para activarlo.
Hornear por Convección Lateral
1. Presione el botón Settings&RQILJXUDFLRQHV\JLUHHOGLDODILQ
de seleccionar Convect Bake Offset +RUQHDUSRU&RQYHFFLyQ
/DWHUDO3UHVLRQHHOGLDOSDUDLQJUHVDU
2. Gire el dial para seleccionar Convect Bake Offset On/Off
+RUQHDUSRU&RQYHFFLyQ/DWHUDO(QFHQGLGR$SDJDGR3UHVLRQH
ingresar para activarlo.
Ajuste de temp. de cocción
1. Presione el botón Settings y gire el dial para seleccionar BAKE
TEMP ADJUST Pulse el dial para introducir la selección.
2. Gire el dial para seleccionar el rango de Bake Temp Adjust
$MXVWHGH7LHPSRGH+RUQHDGRGHVGHJUDGRVKDVWD
grados.Pulse el dial para introducir la selección.
Mi Ciclo
El botón Add 30 Sec (Agregar 30 Segundos) puede ser ajustado a la
función My Cycle (Mi Ciclo).
1. Presione el botón Settings (Configuraciones) y gire el dial a My
Cycle (Mi Ciclo). Presione el dial para ingresar.
*LUHHOGLDOSDUDVHOHFFLRQDUHOWLHPSRGHVGHVHJXQGRVKDVWD
VHJXQGRV\SUHVLRQHHOGLDOSDUDFRPSOHWDUODFRQILJXUDFLyQ
USO DEL HORNO: Otras funciones
Otras funciones
Recordatorio de Reemplazo del Filtro
Cuando la luz de Filter Replace
5HHPSOD]RGHO)LOWURVHHQFLHQGD
reemplace el filtro y mantenga presionado
Reset Filter
5HLQLFLRGHO),OWURGXUDQWH
segundos para realizar el reinicio.
Un filtro sólo es necesario para los
modelos que no cuentan con ventilación
hacia el exterior.
Luz de superficie
Presione Surface Light una vez para una
iluminación fuerte, dos veces para la luz
nocturna o una tercera vez para apagarla.
La luz de superficie se encenderá
automáticamente cuando se encienda el quemador de la estufa
con Chef Connection.
Ventilador extractor
El ventilador de ventilación elimina el vapor
y otros vapores de la superficie de cocción.
Presione Vent Fan una vez para aumentar
la velocidad del ventilador, dos veces para
obtener una velocidad de ventilador alta,
tres veces para un ventilador medio spped,
adelante para una velocidad baja del ventilador, o quinto para
apagar el ventilador.
NOTA: El indicador FAN se encenderá mientras el ventilador
esté funcionando.
El extractor se iniciará de forma automática cuando el
quemador de la superficie de cocción sea encendido con la
función Chef Connect.
Extractor automático
El extractor automático protege al horno microondas del calor
excesivo que surge de la estufa debajo de éste. Se enciende
de forma automática si percibe demasiado calor.
Si ha encendido el extractor, es posible que sienta que no
lo puede apagar. El extractor se apagará automáticamente
cuando las partes internas se hayan enfriado. Puede
permanecer encendido hasta por 30 minutos o más después
de que los controles de la estufa y del microondas se hayan
apagado.
49-7000090 Rev. 1 19
Terminología de microondas
Término Definición
Arco eléctrico El arco eléctrico es lo que, en la terminología de los microondas, describe las chispas en el horno. El arco
eléctrico se produce cuando:
ŶHOHVWDQWHGHPHWDOVHKDLQVWDODGRGHIRUPDLQFRUUHFWD\HVWiWRFDQGRODVSDUHGHVGHOPLFURRQGDV
Ŷhay un metal o papel de aluminio tocando el lateral del horno.
ŶKD\SDSHOGHDOXPLQLRQRHVWiHQYROYLHQGRELHQODFRPLGDKD\ERUGHVGREODGRVKDFLDDUULEDTXHDFW~DQFRPR
DQWHQDV
Ŷhay algún metal, como cintas de cierre con metal, pinchos de pollo, o platos con decoración de oro.
Ŷhay papel toalla reciclado que contiene pequeñas piezas de metal.
ŶHOVRSRUWHGHODURGHOSODWRJLUDWRULRHVWiLQVWDODGRLQFRUUHFWDPHQWH
Cubierto Las cubiertas mantienen la humedad dentro, permitiendo un calentamiento más parejo y reduciendo el tiempo de
cocción. Cuando se agujerea el envoltorio de plástico o se cubre con papel de cera se permite la salida del vapor.
Resguardar En un horno convencional, se tapan o resguardan las pechugas de pollo o las comidas horneadas para que no
se doren demasiado. Al usar el microondas, use pequeñas cintas de papel de aluminio para cubrir partes finas,
como las puntas de las alas en las aves, que podrían cocinarse antes que las partes mayores.
Tiempo de reposo Cuando cocina en hornos regulares, las comidas como los asados o pasteles se dejan reposar para que acaben
de cocinarse o se asienten. El tiempo de reposo es especialmente importante al cocinar con microondas. Tenga
en cuenta que un pastel cocido en horno microondas no se coloca en un estante de enfriamiento.
Abrir respiraderos Una vez que haya cubierto un plato con film plástico, deberá abrir un orificio desplegando una esquina para que
pueda escapar el vapor.
USO DEL HORNO:Terminología de microondas
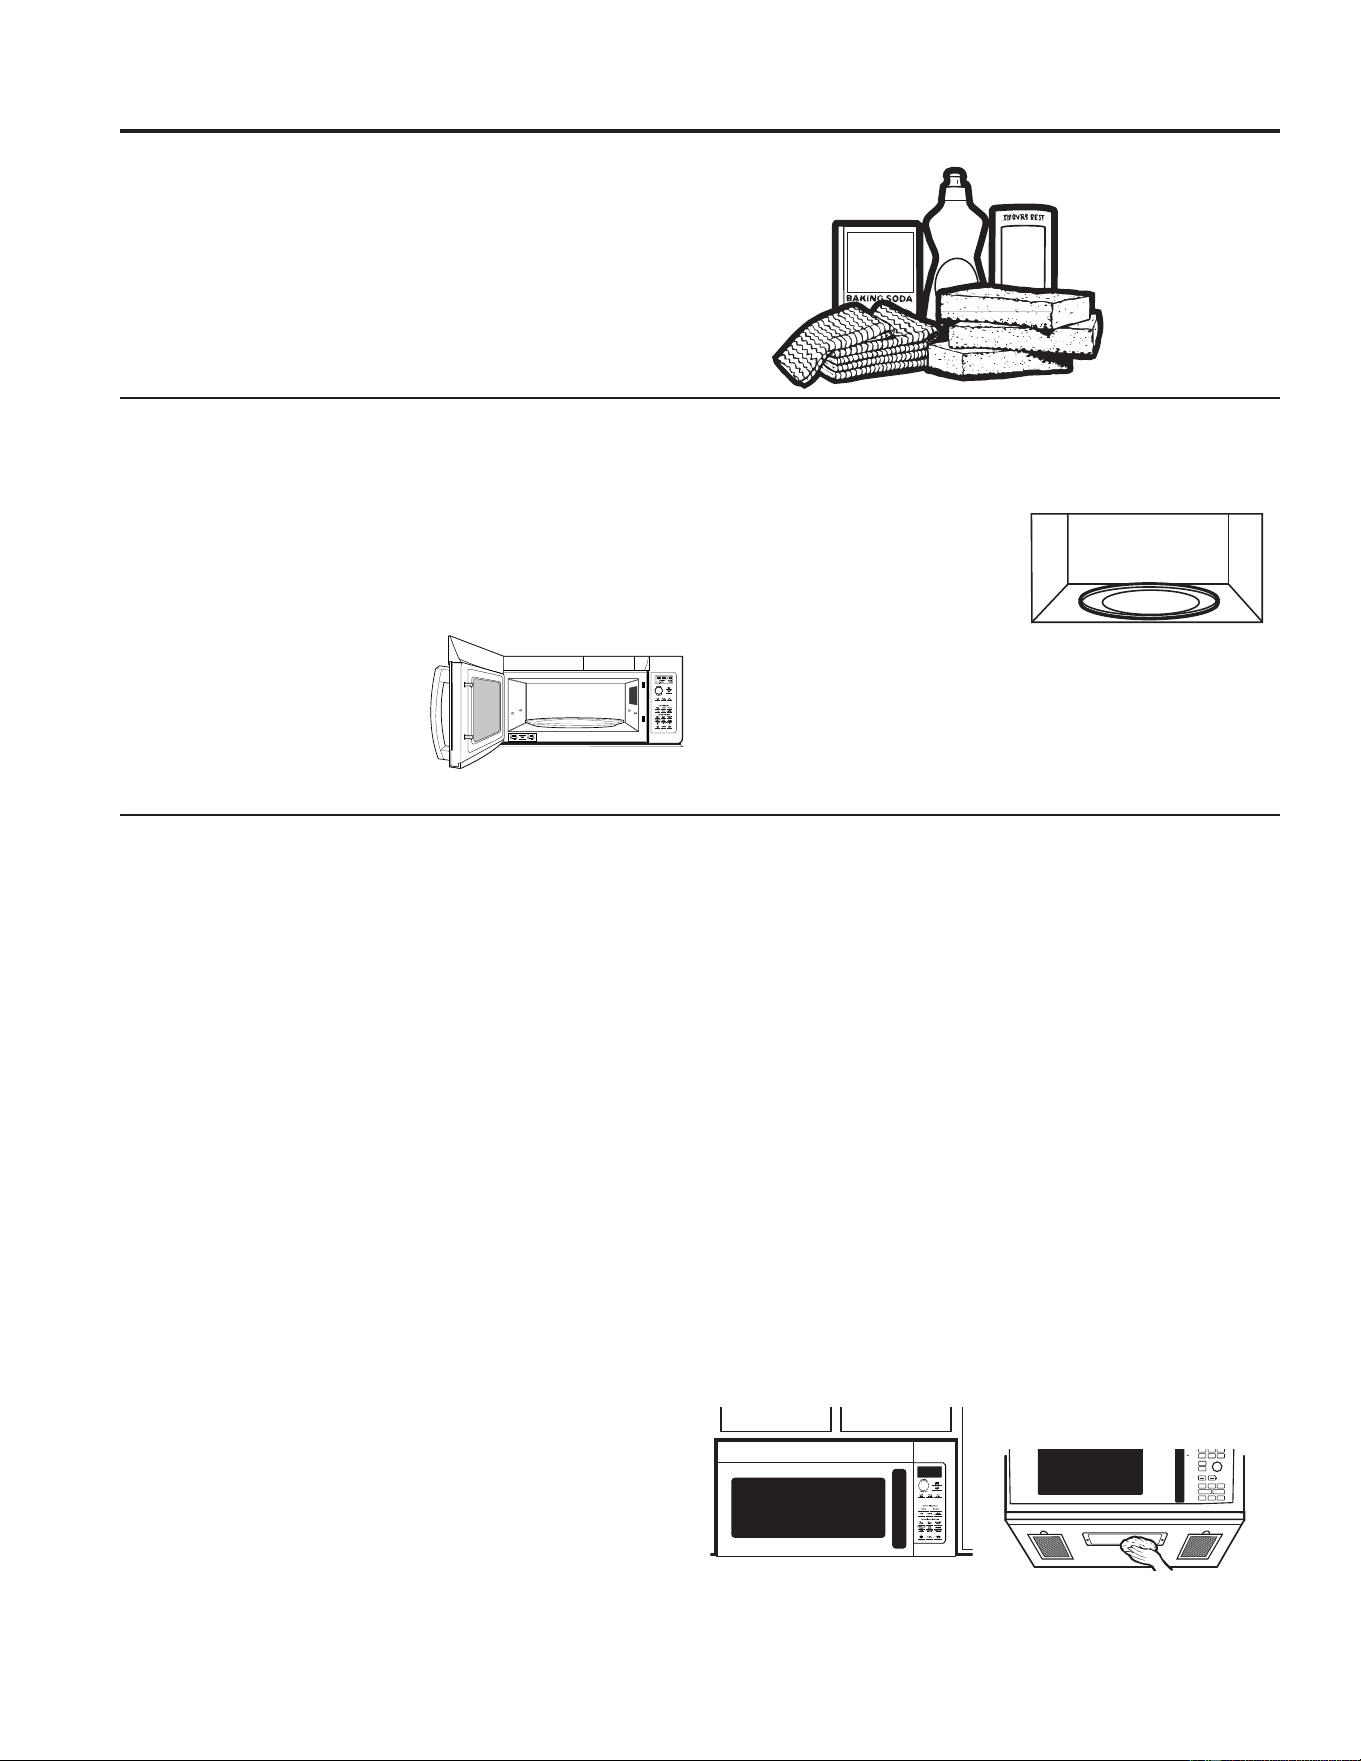
20 49-7000090 Rev. 1
Mantenimiento y limpieza
Consejos útiles
Una limpieza minuciosa ocasional con un trapo empapado de
bicarbonato sódico y agua mantendrá el interior fresco.
Asegúrese que se encuentre apagado el control del horno
antes de limpiar cualquier pieza del horno.
Cómo limpiar el interior
Paredes, suelo, ventana interior y piezas de plástico de la
puerta
Algunas salpicaduras pueden limpiarse con un papel
WRDOODRWUDVSXHGHQQHFHVLWDUXQSDxRK~PHGR4XLWHODV
salpicaduras con un paño enjabonado y aclare con un paño
húmedo. No use limpiadores abrasivos ni utensilios afilados en
las paredes del horno.
Nunca use un limpiador
comercial de horno en ninguna
parte del microondas.
Base giratoria extraíble y soporte de base giratoria
Para que no se rompa, no ponga
el plato giratorio en agua justo
después de cocinar. Límpielo con
cuidado en agua tibia con jabón o
en el lavavajillas. El plato giratorio
y el soporte pueden romperse
si se caen. Recuerde no hacer
funcionar el horno en el modo microondas sin el dispositivo
giratorio y el soporte colocados en su lugar.
Cómo limpiar el exterior
No recomendamos el uso de limpiadores con amoniaco
o alcohol, ya que pueden dañar el aspecto del horno
microondas. Si opta por usar un limpiador casero, primero
aplique el limpiador directamente en un paño limpio, luego
limpie el área sucia.
La caja
Limpie la parte externa del horno de microondas con un paño
humedecido con agua jabonosa. Enjuáguela y luego séquela.
Pásele un paño humedecido limpio a la ventana para limpiarla.
El panel de control
Pásele un paño humedecido para limpiar. Seque
completamente. No use esprays limpiadores, grandes
cantidades de detergente y agua, abrasivos u objetos filosos
sobre el panel, ya que lo podría dañar. Algunas toallas de
papel podrían también dañar el panel de control.
Panel de puerta
Antes de limpiar el panel de puerta frontal, asegúrese de que
sabe qué tipo de panel tiene. Consulte el octavo dígito del
Q~PHURGHPRGHOR³6´HVDFHURLQR[LGDEOH³/´HV&OHDQ6WHHO\
³%´³:´R³&´VRQFRORUHVSOiVWLFRV
Acero inoxidable (en algunos modelos)
El panel de acero inoxidable puede limpiarse con Stainless
Steel Magic o un producto similar, utilizando un paño suave y
limpio. Aplique el limpiador de superficies de acero inoxidable
cuidadosamente para evitar tocar las piezas de plástico que
rodean al acero. No utilice cera, pulimento, lejía ni productos
que contengan clorina en acabados en acero inoxidable.
Paneles plásticos de color
Utilice un paño suave, limpio y ligeramente humedecido y, a
continuación, seque bien toda la zona.
Los sellos de la puerta
Es importante mantener el área donde la puerta se sella con
el horno de microondas limpia. Solamente use detergentes no
abrasivos suaves aplicados con una esponja limpia o con un
paño suave. Enjuague bien.
El fondo
Limpie la grasa y elimine el polvo del fondo a menudo. Use
una solución de agua cálida y detergente.
MANTENIMIENTO Y LIMPIEZA
T
u
r
n
t
o
S
e
l
e
c
t
P
r
e
s
s
t
o
E
n
t
e
r
Reheat
Timer
On/Off
Defrost
Weight/Time
Start
Pause
Cancel
Off
Lock Controls
Hold 3 Sec
Cook
Time
Set
Clock
Options Help
Surface
Light
Vent Fan
Warm
Power
Level
Auto
Cook
Combination
Fast Bake
Convection
Roast
Turntable
Convection
Bake

49-7000090 Rev. 1 21
Reemplazo de la lámpara LED
MANTENIMIENTO Y LIMPIEZA:v Reemplazo de la lámpara
Luz de encimera/luz nocturna
Reemplazo de la lámpara LED. Vea la contraportada para
ordenar en línea en geappliances.com.
1
Para cambiar la luz de encimera/luz nocturna, primero
desconecte la corriente del fusible principal o del panel de
diferencial o estire del enchufe.
2
4XLWHHOWRUQLOORGHOODWHUDOGHODFXELHUWDGHOFRPSDUWLPLHQWR
de la bombilla y baje la cubierta hasta que pare.
3
Asegúrese que la lámpara LED está fría antes de retirarla.
Retire un tornillo y el conector de la lámpara LED.
4
Conecte la lámpara LED y asegure la misma usando el
tornillo. Levante la tapa de la luz y reemplace el tornillo.
Conecte el horno a la corriente eléctrica.
4XLWHHOWRUQLOOR
22 49-7000090 Rev. 1
La función de extractor
LA FUNCIÓN DE EXTRACTOR
Filtros de extractor reutilizables
Los filtros metálicos atrapan la grasa liberada por la comida en
la cocina encimera. También evitan que las llamas de la cocina
encimera puedan dañar en interior del horno.
Por esta razón, los filtros deben estar siempre en su lugar
cuando se esté usando la campana. Los filtros del extractor
deben limpiarse una vez al mes o según sea necesario.
Cómo quitar y limpiar los filtros
Para quitarlos, usando las lengüetas, deslícelos hacia atrás.
Estire hacia abajo y afuera.
Para limpiar los filtros del extractor, empápelos y páselos de
un lado a otro en agua con detergente. No use amoniaco ni
productos que lo contengan ya que oscurecerían el metal.
Se pueden cepillar ligeramente para quitar suciedad pegada.
Aclárelos, sacúdalos y déjelos secar antes de volverlos a
poner.
Para volver a colocarlos, deslice los filtros en los marcos por
la parte trasera de cada apertura. Presione hacia arriba y hacia
la parte frontal para ajustarlos en su lugar.
Ventilador extractor
El ventilador extractor tiene dos filtros de metal reutilizables.
Los modelos que hacen recircular el aire de nuevo a la
habitación usan un filtro de carbón vegetal
T
u
r
n
t
o
S
e
l
e
c
t
P
r
e
s
s
t
o
E
n
t
e
r
Reheat
Timer
On/Off
Defrost
Weight/Time
Start
Pause
Cancel
Off
Lock Controls
Hold 3 Sec
Cook
Time
Set
Clock
Options Help
Surface
Light
Vent Fan
Popcorn
Beverage
Microwave
Express
Warm
Power
Level
Auto
Cook
Combination
Fast Bake
Convection
Roast
Turntable
Convection
Bake
Filtros de extractor reutilizables
HQWRGRVORVPRGHORV
Filtro de carbón vegetal
T
u
r
n
t
o
S
e
l
e
c
t
P
r
e
s
s
t
o
E
n
t
e
r
Reheat
Timer
On/Off
Defrost
Weight/Time
Start
Pause
Cancel
Off
Lock Controls
Hold 3 Sec
Cook
Time
Set
Clock
Options Help
Surface
Light
Vent Fan
Popcorn
B
everage
Microwave
Express
Warm
Power
Level
Auto
Cook
Combination
Fast Bake
Convection
Roast
Turntable
Convection
Bake
Filtros de carbón vegeta
El filtro de carbón vegetal no puede limpiarse. Debe cambiarse
por otro. Vea la contraportada para ordenar en línea en
cafeappliances.com.
Si el modelo no realiza la extracción al exterior, el aire
recirculará a través de un filtro de carbón vegetal no
reutilizable que ayuda a quitar olores y humos.
El filtro de carbón vegetal debería cambiarse cuando está
YLVLEOHPHQWHVXFLRRGHVFRORULGRQRUPDOPHQWHWUiVR
PHVHVVHJ~QHOXVR&RQVXOWHKits opcionales en la página
25 para obtener más información.
REEMPLAZO DEL FILTRO DE CARBÓN
1. Desenchufe el horno microondas
2. Retire los tornillos de montaje de la rejilla de ventilación.
3. Incline la parrilla hacia adelante, y luego levante la misma
para su retiro.
4. Retire el filtro de carbón.
5. Deslice el nuevo filtro de carbón hasta su posición.
6. Deslice la parte inferior de la rejilla de la ventana hasta su
posición. Empuje la parte superior hasta que calce en su
posición. Reemplace los tornillos de montaje
7. Enchufe el horno microondas.
49-7000090 Rev. 1 23
Problema Causas posibles Qué hacer/Explicación
El horno no se inicia Es posible que un fusible de su hogar se
haya quemado o que el disyuntor se haya
desconectado.
Replace fuse or reset circuit breaker
Pico de tensión. Desenchufe el horno microondas; luego vuelva a
enchufarlo.
El enchufe no está totalmente insertado en el
tomacorriente.
Asegúrese de que el cable de 3 patas del horno
esté completamente insertado en el tomacorriente.
La puerta no está cerrada de forma segura. Abra la puerta y cierre la misma de forma segura.
El piso del horno está caliente, incluso
cuando el horno no fue usado.
El calor de la luz de la placa de cocción podrá
hacer que el piso del horno se caliente.
Esto es normal.
³&21752//2&.,621´(O%ORTXHR
GHO&RQWURO(VWi$FWLYDGRDSDUHFHHQ
la Pantalla
El control fue bloqueado. 0DQWHQJDSUHVLRQDGR087(212))0XGR
(QFHQGLGR$SDJDGRSRUXQRVVHJXQGRVSDUD
desbloquear el control.
Escucha un atípico pitido en tono bajo
Intentó iniciar el Recordatorio sin una hora del
día válida.
Comience nuevamente e ingrese una hora del día
válida.
Intentó cambiar el nivel de potencia cuando no
es permitido.
Muchas de las funciones del horno están
preconfiguradas y no se pueden modificar.
³6(1625(5525´(UURUGHO6HQVRU
aparece en la pantalla.
Al usar una función de Sensor, la puerta fue
abierta antes de que se pudiera detectar el
vapor.
No abra la puerta hasta que se sienta el vapor y el
tiempo se muestre en cuenta regresiva en la pantalla.
No se detectó vapor en una cantidad de tiempo
máxima.
8VH&22.7,0(&RFFLyQSRU7LHPSRSDUD
calentar durante más tiempo.
Cantidad de comida demasiado
grande para el Sensor
Sensor Reheat (Recalentar con Sensor) es
para porciones individuales de comidas
recomendadas.
8VH&22.7,0(&RFFLyQSRU7LHPSRSDUD
grandes cantidades de comida.
Consejos para la Solución de Problemas... Antes de solicitar el servicio
técnico
¡Ahorre tiempo y dinero! Primero revise los cuadros que aparecen en las siguientes páginas y es posible que no
necesite solicitar reparaciones.
CONSEJOS PARA LA SOLUCIÓN DE PROBLEMAS
Cosas que son Normales de su Horno Microondas
Cosas que son Normales de su Horno Microondas
Ŷ Cosas que son Normales de su Horno Microondas
Ŷ Reflejo de luz alrededor de la puerta o la cubierta exterior.
Ŷ Luz del horno tenue y cambio del sonido del pitido en niveles de
potencia que no son altos.
Ŷ
Ruido de golpes secos mientras el horno está en funcionamiento.
DECLARACIÓN DE INTERFERENCIA POR RADIOFRECUENCIA DE LA FEDERAL
COMMUNICATIONS COMMISSION (COMISIÓN FEDERAL DE COMUNICACIONES)
(EE.UU. ÚNICAMENTE)
Este equipo genera y utiliza energía de frecuencia ISM y si no
es instalado y usado de forma adecuada, estando en estricto
cumplimiento con las instrucciones del fabricante, podrá generar
interferencia en la recepción de radio y televisión. Fue evaluado
de forma específica y se comprobó que cumple con los límites de
Equipamientos ISM, de acuerdo con la parte 18 de las Normativas
de la FCC, que fueron diseñadas para brindar una instalación
residencial.
Sin embargo, no se garantiza que no se presenten interferencias
en una instalación en particular. Si este equipamiento genera
interferencias en la recepción de radio o televisión, lo que se puede
comprobar encendiendo y apagando el equipo, se aconseja al usuario
que intente corregir la interferencia a través de una de las siguientes
medidas:
Ŷ5HRULHQWHODDQWHQDUHFHSWRUDGHODUDGLRRHOWHOHYLVRU
Ŷ5HXELTXHHO+RUQR0LFURRQGDVHQUHODFLyQDOUHFHSWRU
Ŷ$OHMHHOKRUQRPLFURRQGDVGHOUHFHSWRU
Ŷ(QFKXIHHOKRUQRPLFURRQGDVHQXQWRPDFRUULHQWHGLIHUHQWHGH
modo que el horno microondas y el receptor estén en diferentes
recepciones de códigos.
El fabricante no es responsable por ninguna interferencia de radio
o TV generada por modificaciones no autorizadas sobre este
horno microondas. Es responsabilidad del usuario corregir tales
interferencias.
Este equipo ha sido probado y cumple con los límites establecidos
para un dispositivo digital de Clase B, de acuerdo con la parte 15
de las Normativas de la FCC. Estos límites han sido diseñados para
ofrecer una protección razonable contra interferencias perjudiciales
en la instalación residencial. Este equipo genera, usa y puede emitir
energía de radiofrecuencia y, si no se instala y utiliza de acuerdo
con las instrucciones, podrá ocasionar interferencias perjudiciales
para las comunicaciones de radio. Sin embargo, no se garantiza que
no se presenten interferencias en una instalación en particular. Si
el equipo provoca interferencias perjudiciales para la recepción de
radio o televisión, lo que puede comprobar encendiendo y apagando
el equipo, se aconseja al usuario intentar corregir la interferencia a
través de una de las siguientes medidas:
Ŷ5HRULHQWHRUHXELTXHODDQWHQDUHFHSWRUD
Ŷ$XPHQWHODVHSDUDFLyQHQWUHHOHTXLSR\HOUHFHSWRU
Ŷ&RQHFWHHOHTXLSRDXQWRPDFRUULHQWHGHXQFLUFXLWRGLIHUHQWHDOTXH
se encuentra conectado el receptor.
Ŷ3DUDVROLFLWDUD\XGDFRQVXOWHDOSURYHHGRUPLQRULVWDRDXQWpFQLFR
experimentado de radio/ TV.
A fin de satisfacer los requisitos de exposición a RF de la FCC, se
deberá mantener una distancia de separación de 20 cm o más entre
la antena de este dispositivo y las personas durante el funcionamiento
del mismo.
Para asegurar el cumplimiento, no se recomienda el funcionamiento
en una cercanía mayor.
ADVERTENCIA
Las modificaciones sobre esta unidad
no aprobadas expresamente por la parte responsable del
cumplimiento adecuado podrán anular la autoridad del usuario a
utilizar el equipo.

24 49-7000090 Rev. 1
Abroche su recibo aquí. Para acceder al servicio técnico de acuerdo con
la garantía deberá contar con la prueba de la fecha original de compra.
GEAppliances.com
Todo el servicio de garantía es provisto por nuestros Centros de Servicio de Fabricación, o un técnico autorizado de Servicio. Para
programar una visita del servicio técnico a través de Internet, visítenos en cafeappliances.com/service.
Lo que Café no cubrirá:
Ŷ 9LDMHVGHOWpFQLFRGHOVHUYLFLRDVXKRJDUSDUDHQVHxDUOH
sobre cómo usar el producto.
Ŷ ,QVWDODFLyQHQWUHJDRPDQWHQLPLHQWRLQDGHFXDGRV6L
tiene un problema con la instalación, comuníquese con su
vendedor o instalador. Usted es responsable de brindar
instalaciones adecuadas de conexión eléctrica, escape u
otras instalaciones de conexión.
Ŷ )DOODGHOSURGXFWRRGDxRVREUHHOSURGXFWRVLVHSURGXFH
XQDEXVRXVRLQDGHFXDGRSRUHMHPSORDUFRHOpFWULFRHQ
XQDFDYLGDGGHODUHMLOODRPHWDOSDSHOGHDOXPLQLRRXVR
diferente para el cual fue diseñado o uso comercial.
Ŷ 5HHPSOD]RGHIXVLEOHVGHODFDVDRUHLQLFLRGHGLV\XQWRUHV
Ŷ 'DxRVRFDVLRQDGRVVREUHHOSURGXFWRSRUDFFLGHQWH
incendio, inundaciones o catástrofes naturales.
Ŷ 'DxRVFRQVHFXHQWHVRLQFLGHQWDOHVFDXVDGRVSRUSRVLEOHV
defectos sobre este producto.
Ŷ 'DxRFDXVDGRGHVSXpVGHODHQWUHJD
Ŷ 3URGXFWRQRDFFHVLEOHSDUDEULQGDUHOVHUYLFLRUHTXHULGR
Ŷ 6ROLFLWHHOVHUYLFLRWpFQLFRSDUDUHSDUDURUHHPSOD]DUODV
lámparas, excepto las lámparas LED.
Ŷ 'DxRVVREUHHODFDEDGRWDOHVFRPRy[LGRVREUHOD
superficie, deslustres o manchas pequeñas no informadas
dentro de las 48 horas luego de la entrega.
GARANTÍA LIMITADA
Garantía Limitada de Horno Microondas Café
EXCLUSIÓN DE GARANTÍAS IMPLÍCITAS
Su única y exclusiva alternativa es la reparación del producto, como se indica en la Garantía Limitada. Las garantías
implícitas, incluyendo garantías implícitas de comerciabilidad o conveniencia sobre un propósito particular, se limitan a un
año o al período más corto permitido por la ley.
Esta garantía limitada se extiende al comprador original y a cualquier dueño subsiguiente de productos comprados para uso hogareño
dentro de EE.UU. Si el producto está en un área donde no se encuentra disponible un Proveedor Autorizado del Servicio Técnico de
Café, usted será responsable por el costo de un viaje o se podrá requerir que traiga el producto a una ubicación del Servicio Técnico
de Café autorizado para recibir el servicio. En Alaska, la garantía limitada excluye el costo de envío o llamadas del servicio a su hogar.
Algunos estados no permiten la exclusión o limitación de daños fortuitos o consecuentes. Esta garantía limitada le da derechos legales
específicos y es posible que tenga otros derechos legales que varían entre un estado y otro. Para conocer cuáles son sus derechos
legales, consulte a la oficina de asuntos del consumidor local o estatal o al Fiscal de su estado.
Garante: GE Appliances, a Haier Company
/RXLVYLOOH.<
Por el período de Café Reemplazará:
Un año
Desde la fecha de
compra original
Cualquier parte del horno que falle debido a un defecto en los materiales o mano de obra.
Durante esta garantía limitada de un año, Café también proveerá, sin costo, todo el trabajo
y los costos del servicio relacionado con el reemplazo de la parte que presente defectos.

49-7000090 Rev. 1 25
ACCESORIOS OPCIONALES
Accesorios Opcionales
Kit del Panel de Relleno
JX36BSS - Acero Inoxidable
Al reemplazar una campana de estufa de 36”, los kits del panel
de relleno completan el ancho adicional a fin de brindar un
aspecto de construcción a medida.
Sólo para instalación entre gabinetes; no apto para la
instalación al final del gabinete. Cada kit cuenta con dos
paneles de relleno de 3” de ancho.
Kit del Filtro de Carbón con Recirculación
Los kits del filtro se utilizan cuando el horno microondas no
puede ser ventilado hacia el exterior.
Kit de Instalación del Gabinete de 15”
Para uso al instalar con gabinetes de 15” de profundidad.
Disponible por un costo adicional a través de su proveedor de
Café Appliances, o vea la contraportada para ordenar en línea
en geappliances.com
Disponibles en su distribuidor Café Appliances por un costo adicional.
.LWVGHSDQHOGHUHOOHQR

26 49-7000090 Rev. 1
Impreso en Malaysia
Soporte para el Consumidor
SOPORTE PARA EL CONSUMIDOR
Sitio Web de Café
¿Desea realizar una consulta o necesita ayuda con su electrodoméstico? ¡Intente a través del Sitio Web de Café las 24 horas
del día, cualquier día del año! Usted también puede comprar más electrodomésticos maravillosos de Café y aprovechar todos
nuestros servicios de soporte a través de Internet, diseñados para su conveniencia.
En EE.UU.: cafeappliances.com
Registre su Electrodoméstico
¡Registre su electrodoméstico nuevo a través de Internet, según su conveniencia! Un registro puntual de su producto permitirá
una mejor comunicación y un servicio más puntual de acuerdo con los términos de su garantía, en caso de surgir la necesidad.
También puede enviar una carta en la tarjeta de inscripción preimpresa que se incluye con el material embalado.
En EE.UU.: cafeappliances.com/register
Servicio Programado
El servicio de reparación de expertos de Café está a sólo un paso de su puerta. Conéctese a través de Internet y programe su
servicio a su conveniencia cualquier día del año. En EE.UU.: cafeappliances.com/service o comuníquese al 800.432.2737 durante
el horario de atención comercial.
Garantías Extendidas
Adquiera una garantía extendida de Café y conozca los descuentos especiales que están disponibles mientras su garantía aún
está vigente. La puede adquirir en cualquier momento a través de Internet. Los servicios de Café aún estarán allí cuando su
garantía caduque. En EE.UU.: cafeappliances.com/extended-warranty o comuníquese al 800.626.2224 durante el horario de
atención comercial.
Conectividad Remota
3DUDVROLFLWDUDVLVWHQFLDSDUDODFRQHFWLYLGDGGHUHGLQDOiPEULFDSDUDPRGHORVFRQDFFHVRUHPRWR
YLVLWHQXHVWURVLWLRZHEHQcafeappliances.com/connect o comuníquese al 800.220.6899 en EE.UU.
Piezas y Accesorios
Aquellos individuos calificados para realizar el servicio técnico de sus propios electrodomésticos podrán solicitar el envío de
SLH]DVRDFFHVRULRVGLUHFWDPHQWHDVXVKRJDUHVVHDFHSWDQODVWDUMHWDV9,6$0DVWHU&DUG\'LVFRYHU2UGHQHKR\DWUDYpVGH
Internet durante las 24 horas, todos los días. En EE.UU.: cafeappliances.com/parts
Las instrucciones que figuran en este manual cubren los procedimientos que serán realizados por cualquier usuario.
Otros servicios técnicos generalmente deben ser derivados a personal calificado del servicio. Se deberá tener cuidado,
ya que una reparación indebida podrá hacer que el funcionamiento no sea seguro.
Contáctenos
Si no se encuentra satisfecho con el servicio que recibió de Café, comuníquese con nosotros a través de nuestro sitio Web,
cafeappliances.com/contact o escriba a: En EE.UU.: General Manager,