Loading ...
Loading ...
Loading ...
14
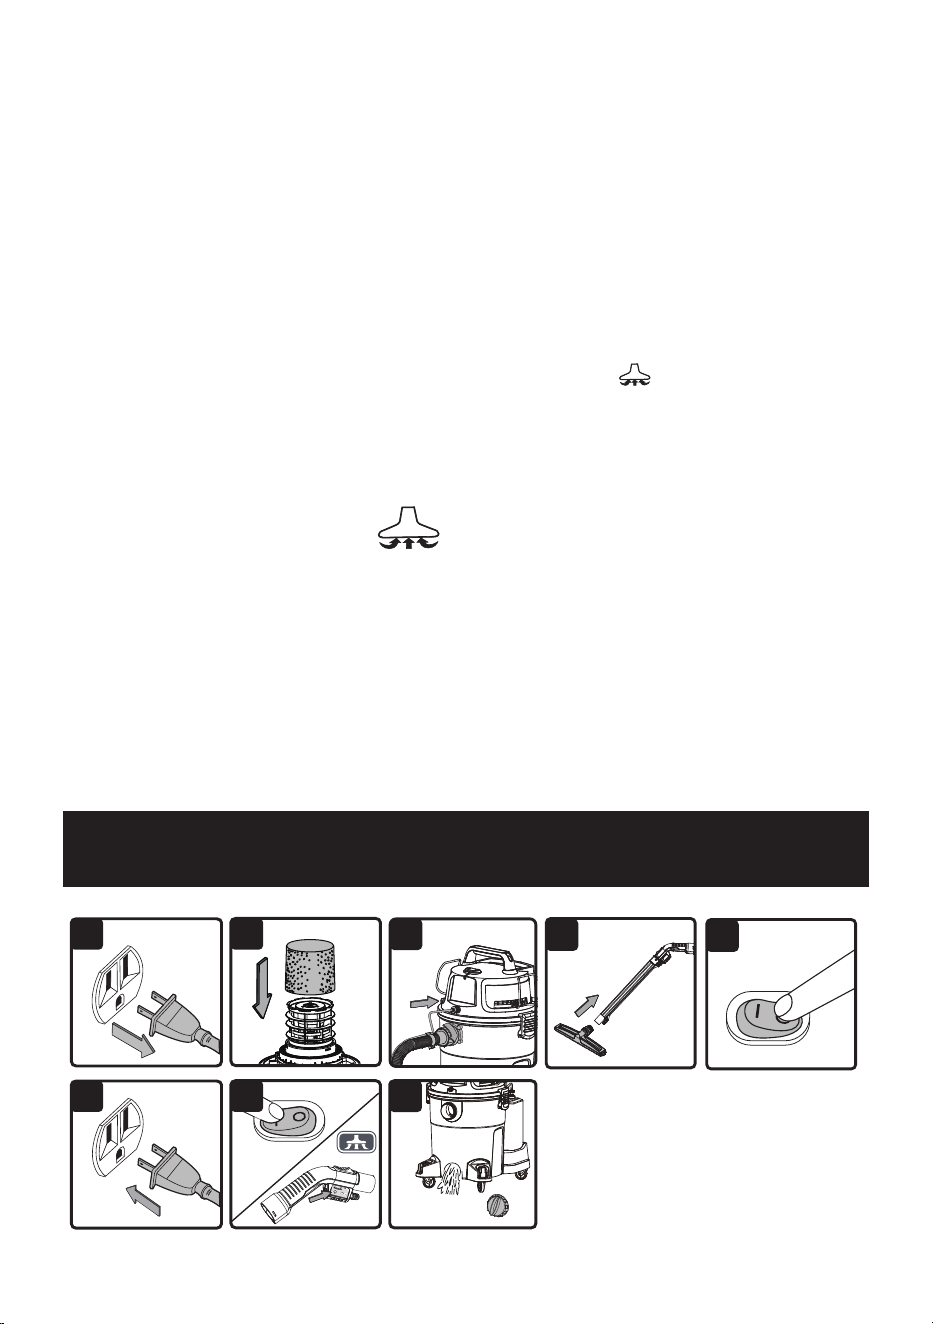
4. Optional: For improved dust ltration, t the dust collection bag ange onto the inlet port, taking
care not to damage the bag (Fig. 5).
5. Place the powerhead back on the collection tank and secure it in place using the latches (Fig. 6).
OPERATING INSTRUCTIONS: DRY VACUUMING
6. Insert the locking end of the hose into the vacuum port on the collection tank and turn clockwise to
lock into place (Fig. 7).
7. Choose the desired accessory and connect onto the remote-control handle or the extension wand
(Fig. 8). The air ow regulation on the remote-control handle allows you to manually change the
amount of vacuum suction.
8. Verify that the switch is in the ‘O’ OFF position before plugging the power cord into the power
outlet. Plug the power cord into the outlet (Fig. 9 & 10).
9. Turn the motor on by ipping the switch to the ‘I’ ON position and the machine is ready for use.
Press the vacuum mode button, indicated by the following symbol , on either the remote-
control handle or the powerhead and operate the vacuum (Fig. 11).
10. Once you have completed vacuuming, switch off the vacuum by pressing the vacuum mode
button on either the remote-control handle or the powerhead. Switch to the “O” OFF position and
unplug the power cord from the power outlet.
O = OFF I = ON = VACUUM MODE
DO NOT USE THE CARTRIDGE FILTER FOR LIQUID VACUUMING.
DO NOT USE THE DUST BAG FOR LIQUID VACUUMING.
LI QUI D VACUUM OPERATI ON
4
1
5
6
7
8
3
2
Loading ...
Loading ...
Loading ...