Loading ...
Loading ...
Loading ...
assembly
MOUNTING BAND SAW ON LEG SET
This leg set is includedwith Model No. 113.244420
only.
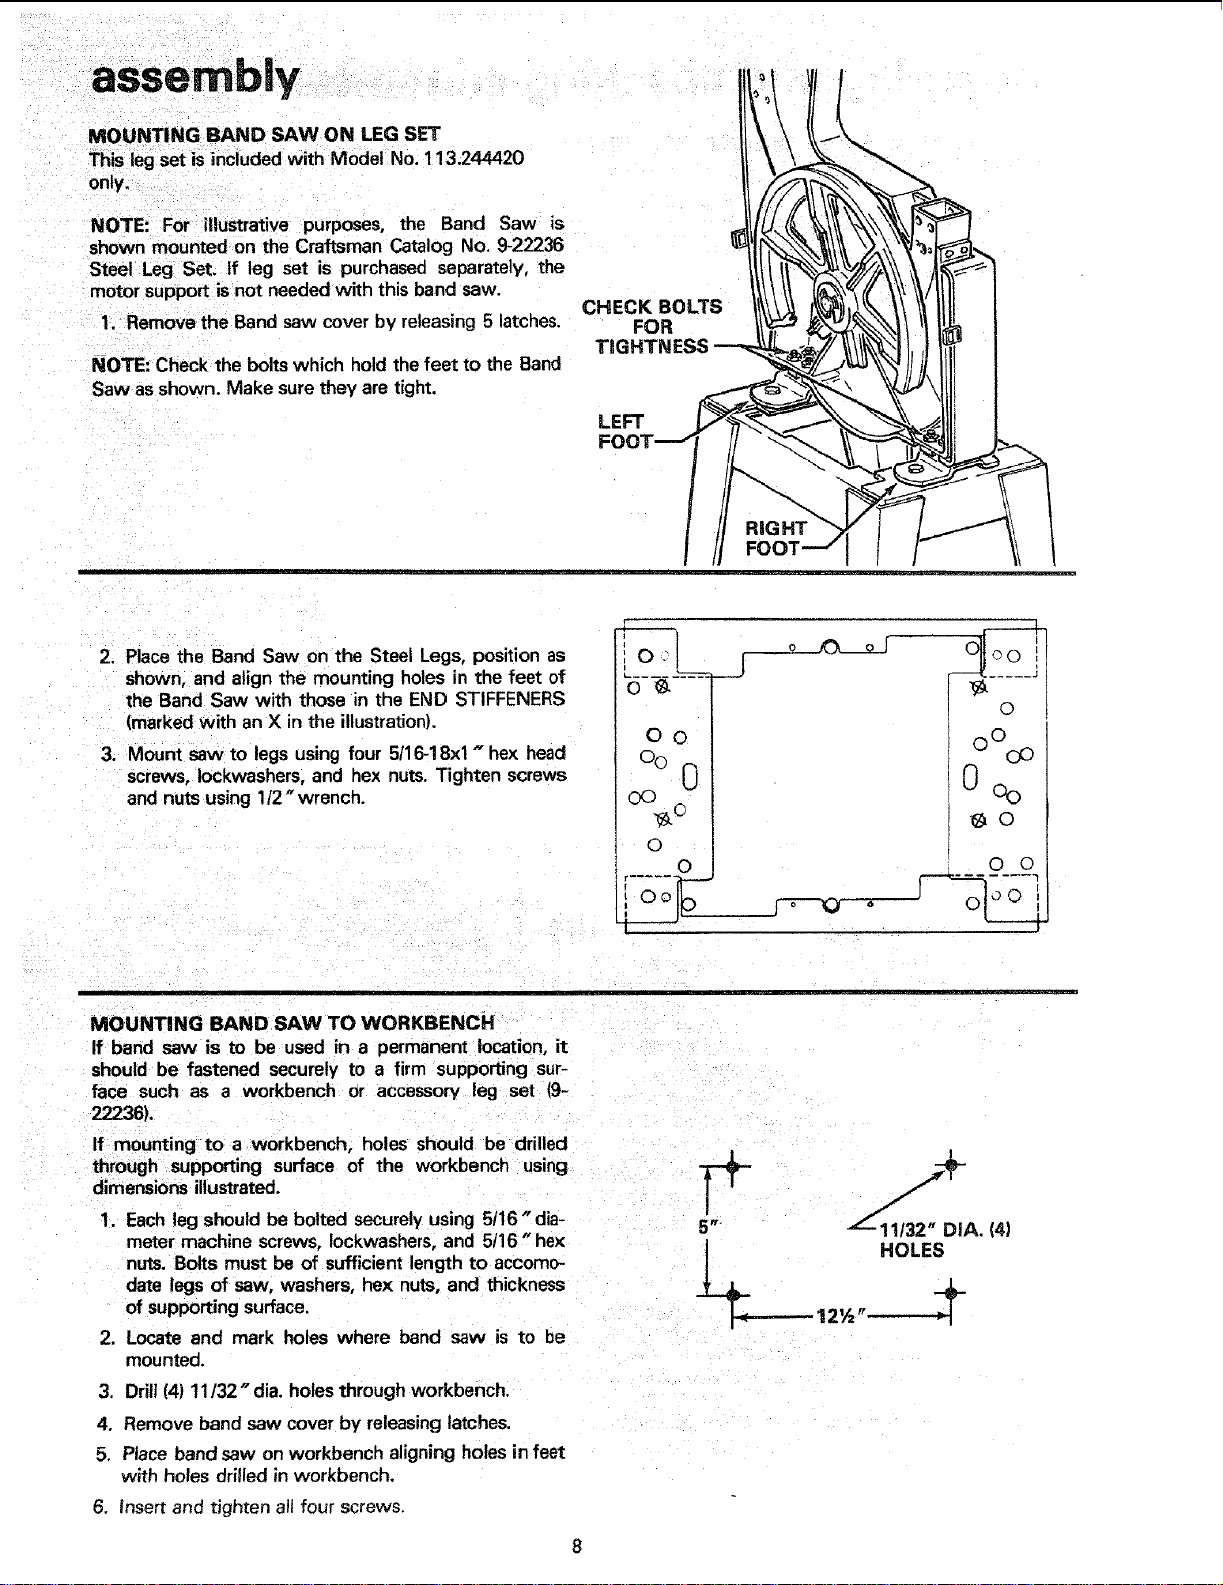
NOTE: For illustrative purposes, the Band Saw is
shown mounted on the Craftsman Catalog No. 9-22236
Steel Leg Set. If leg set is purchased separately, the
motor support is not needed with this band saw.
1. Remove the Band saw cover by releasing 5 latches.
NOTE: Check the bolts which hold the feet to the Band
Saw as shown. Make sure they are tight.
CHECK BOLTS
FOR
TIGHTr
LEFT
2. Place the Band Saw on the Steel Legs, position as
shown, and align the mounting holes in the feet of
the Band Saw with those in the END STIFFENERS
(marked with an X in the illustration).
3. Mount saw to legs using four 5/16-18xl u hex head
screws, Iockwashers, and hex nuts. Tighten screws
and nuts using 1/2 " wrench.
O
OO
©
O
©
© Ooo
_O
O ©
MOUNTING BAND SAW TO WORKBENCH
If band saw is to be used in a permanent location, it
should be fastened securely to a firm supporting sur-
face such as a workbench or accessory leg set (9-
22236).
If mounting to a workbench, holes should be drilled
through supporting surface of the workbench using
dimensionsillustrated.
1. Eachleg should be bolted securelyusing 5/16" dia-
meter machine screws, Iockwashers,and 5/16" hex
nuts.Bolts must be of sufficientlength to accomo-
date legs of saw, washers, hex nuts,and thickness
of supportingsurface.
2. Locate and mark holes where band saw is to be
mounted.
3. Drill(4) 11t32"dia. holesthrough workbench,
4. Remove band saw cover by releasinglatches.
5, Place bandsaw on workbench aligningholes in feet
with holes drilled in workbench.
6. Insert and tighten all four screws.
5" DIA, (4)
__ , HOLES
12½ _
Loading ...
Loading ...
Loading ...