Loading ...
Loading ...
Loading ...
assembUy
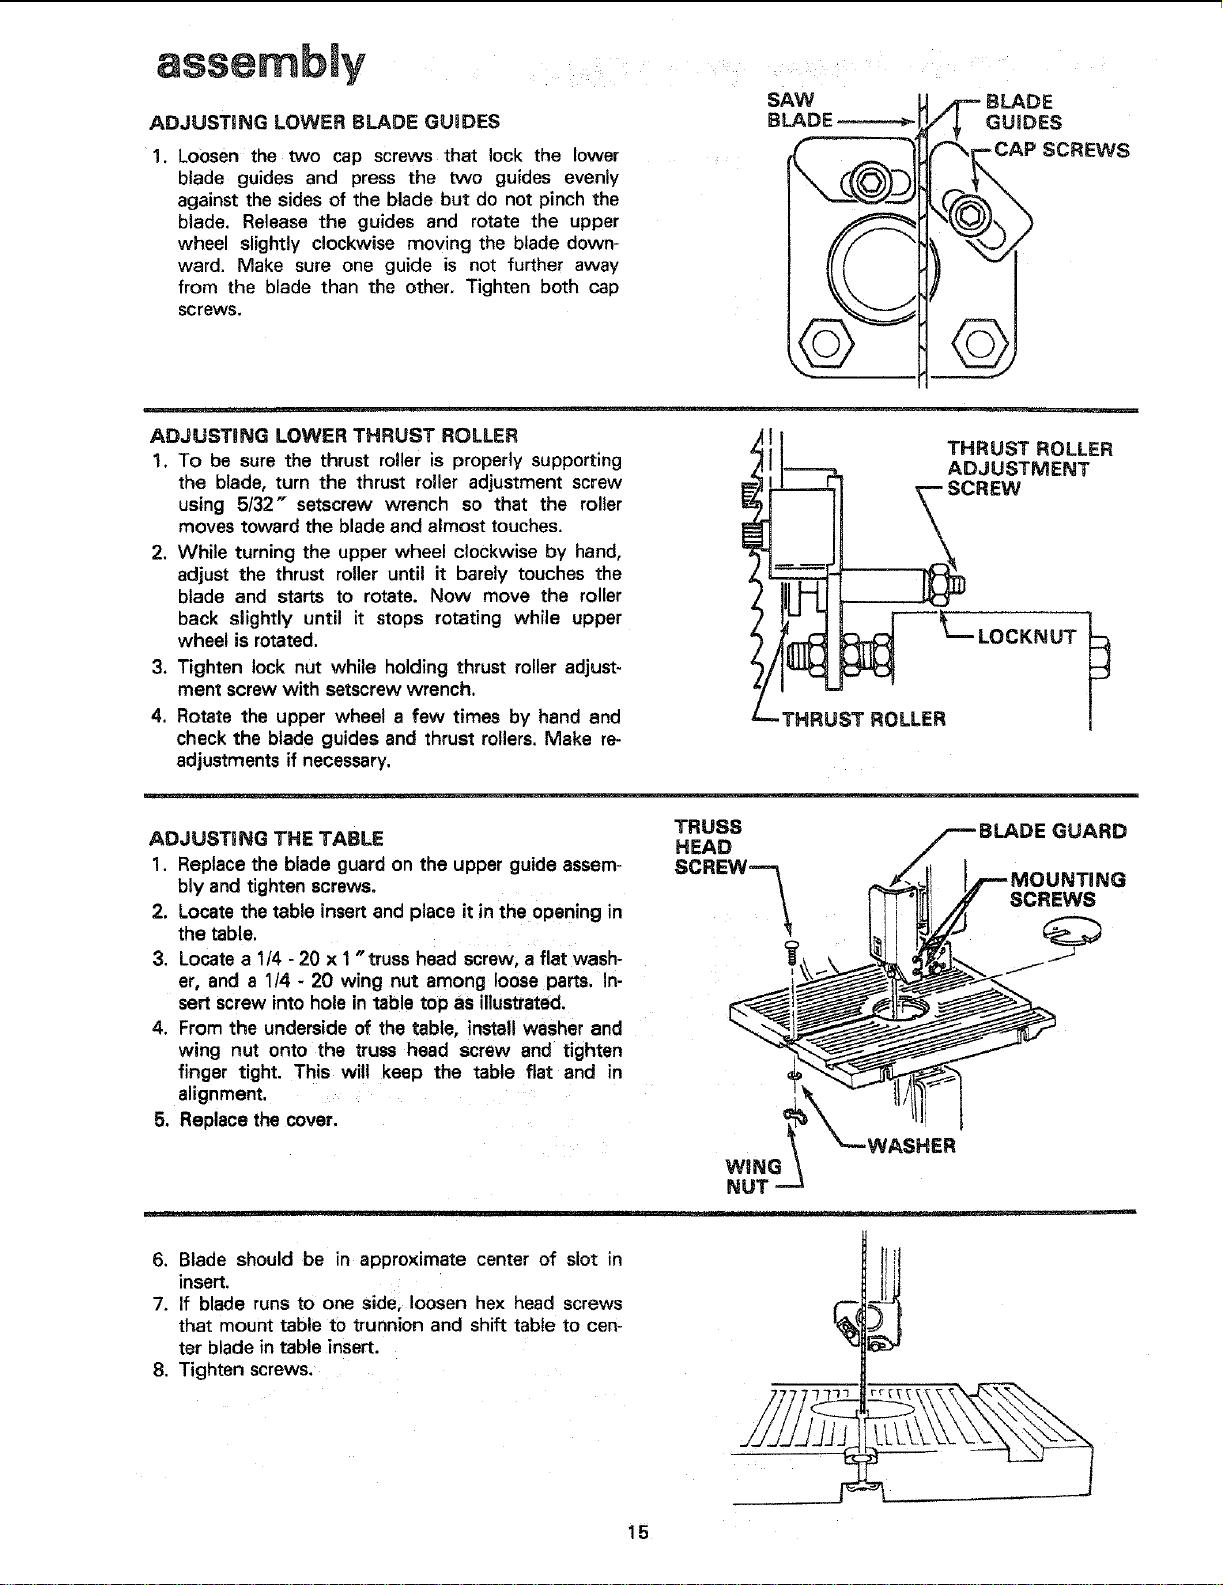
ADJUSTING LOWER BLADE GUIDES
1. Loosen the two cap screws that lock the lower ....
blade guides and press the two guides evenly
against the sides of the blade but do not pinch the
blade. Release the guides and rotate the upper
wheel slightly clockwise moving the blade down-
ward. Make sure one guide is not further away
from the blade than the other. Tighten both cap
screws.
SAW
BLADE
BLADE
GUIDES
SCREWS
ADJUSTING LOWER THRUST ROLLER
1. To be sure the thrust roller is properly supporting
the blade, turn the thrust roller adjustment screw
using 5/32" setscrew wrench so that the roller
moves toward the bladeand almost touches.
2. While turning the upper wheel clockwise by hand,
adjust the thrust roller until it barely touches the
blade and starts to rotate. Now move the roller
back slightly until it stops rotating while upper
wheel is rotated.
3. Tighten lock nut while holding thrust roller adjust-
ment screw with setscrew wrench.
4. Rotate the upper wheel a few times by hand and
check the blade guides and thrust rollers. Make re-
adjustments if necessary.
THRUST ROLLER
ADJUSTMENT
__SCREW
-THRUST ROLLER
ADJUSTING THE TABLE
1. Replacethe blade guard on the upper guide assem-
bly and tighten screws.
2. Locate the table insertand place it in the opening in
the table.
3. Locate a 114- 20 x 1"truss head screw, a flat wash-
er, and a 1/4 - 20 wing nut among loose parts. In-
sert screw into holein table top as illustrated.
4. From the underside of the table, install washer and
wing nut onto the truss head screw and tighten
finger tight. This will keep the table flat and in
alignment.
5, Replacethe cover.
TRUSS GUARD
HEAD
SCREW=-_ 3
SCREWS
6. Blade should be in approximate center of slot in
insert.
7. If blade runs to one side, loosen hex head screws
that mount table to trunnion and shift table to cen-
ter bladein table insert.
8. Tighten screws.
7777
JJJJJ
15
Loading ...
Loading ...
Loading ...