Loading ...
Loading ...
Loading ...
After Sales Support
(AU) 1300 886 649 (NZ) 0800 836 761 | tempo.org/support
29
Other Useful Information (Cont.)
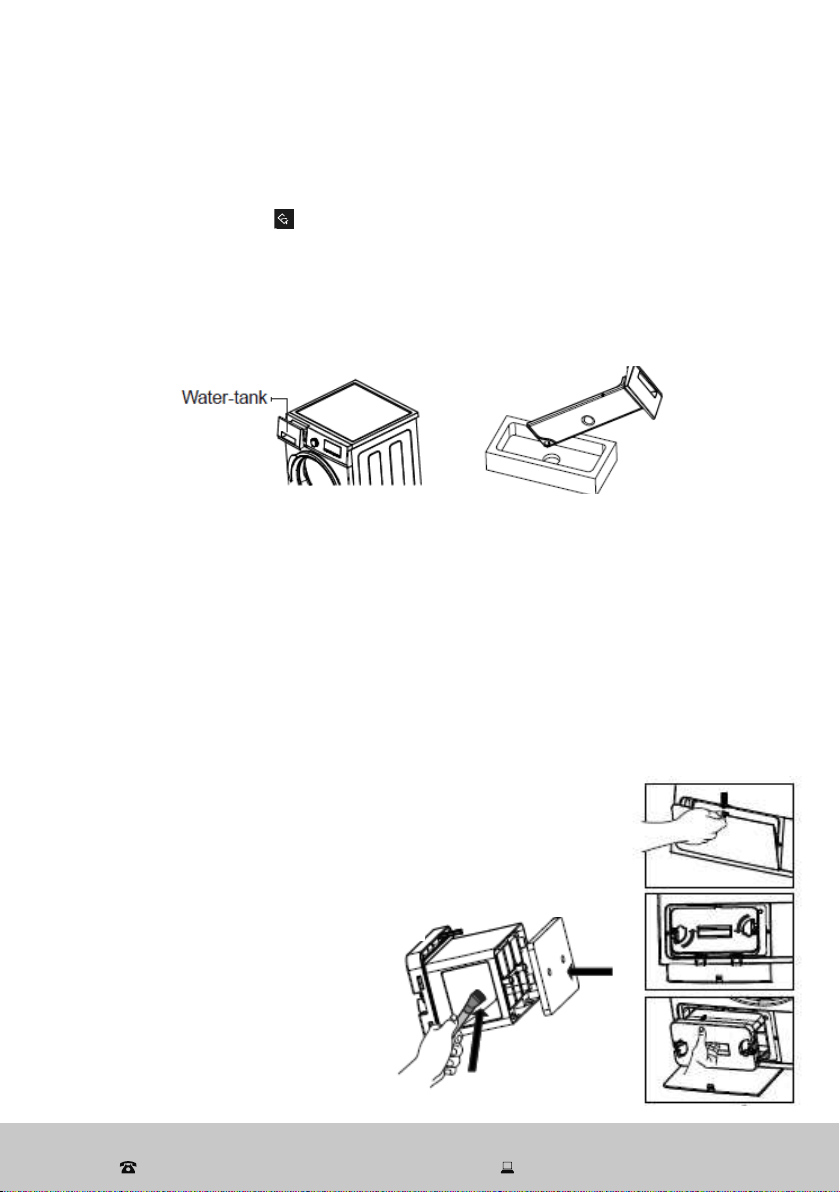
Emptying the water container
The water container collects all the water from the condenser (unless you have
the drain hose connected). The water container needs to be emptied after every
drying cycle, the tank full
SY-DH80S5UW-001
SY-DH80S5UW-001
indicator will remind you to do so. This indicator will
also illuminate if the water container is full while the dryer is in operation. Should
that happen, the program will stop and a buzzer will sound. In order to continue the
program, you must empty the water container first.
Holding the water container with two hands, pull it out of the dryer housing, tilt it over a
sink and pour out the condensate water (Fig. 13).
Fig. 13
Insert the empty water container back into its space in the dryer housing.
To restart the program, press the Start/Pause button.
WARNING: Do not drink the condensate water. Do not use the dryer without the water
container.
Cleaning the filter drawer
Lint and fibres that could not be captured by the lint filter are blocked in the filter drawer,
which should be cleaned after each drying process. It is located behind the maintenance
cover and contains a two-level filter: a filter drawer sponge and a filter cloth.
Push down the locking latch to the maintenance cover. Unlock the fixer. Pull out the filter
drawer (Fig. 14).
Remove any lint, fibres and textile threads from the filter cloth by
hand or with a soft brush or cloth (Fig. 15).
When you notice a layer that may lead to clogging of the filter cloth,
clean off the layer by washing the filter in warm water. Let the filter
cloth dry thoroughly before installing it back in the filter drawer.
Wash the filter drawer sponge by hand to remove any fibres and
lint from the surface. After washing
the sponge, squeeze it by hand
and remove the excess water.
Thoroughly dry the sponge before
reinstalling it.
Fig. 14
Fig. 15
Loading ...
Loading ...
Loading ...