Loading ...
Loading ...
Loading ...
Shure Incorporated
29/61
6.
7.
1.
2.
3.
4.
1.
2.
3.
4.
5.
Press enter to deploy the frequencies or press menu to cancel the deployment.
The front panel LEDs on each receiver will blink when a deployed frequency has been assigned.
Note: Full frequency deployment may not occur if the number of receivers in the network exceeds the number of available frequencies in the selected group.
Try another group or rescan after turning off unused receivers.
Step 2: IR Sync for Automatic Transmitter Set Up
Performing an IR Sync automatically tunes the transmitter to match the receiver frequency, forming a wireless audio channel.
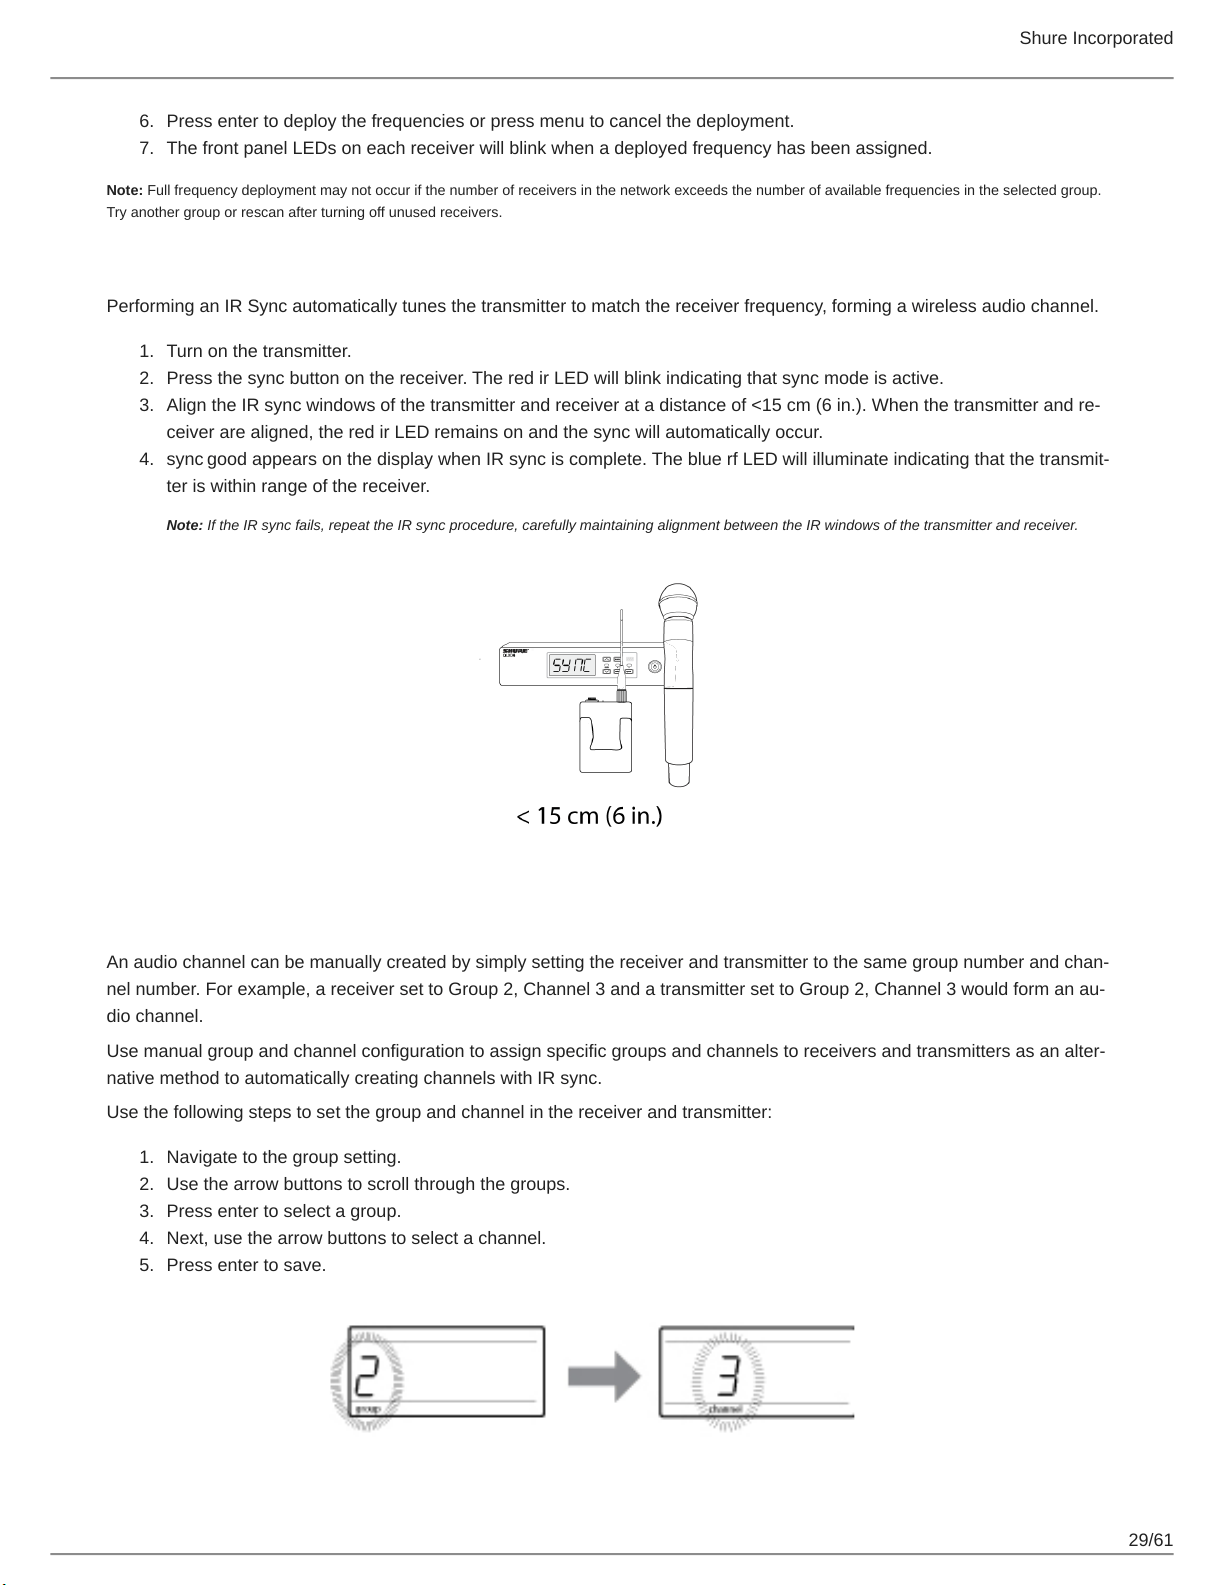
Turn on the transmitter.
Press the sync button on the receiver. The red ir LED will blink indicating that sync mode is active.
Align the IR sync windows of the transmitter and receiver at a distance of <15 cm (6 in.). When the transmitter and re
ceiver are aligned, the red ir LED remains on and the sync will automatically occur.
sync good appears on the display when IR sync is complete. The blue rf LED will illuminate indicating that the transmit
ter is within range of the receiver.
Note: If the IR sync fails, repeat the IR sync procedure, carefully maintaining alignment between the IR windows of the transmitter and receiver.
Manual Group and Channel Assignment
An audio channel can be manually created by simply setting the receiver and transmitter to the same group number and chan
nel number. For example, a receiver set to Group 2, Channel 3 and a transmitter set to Group 2, Channel 3 would form an au
dio channel.
Use manual group and channel configuration to assign specific groups and channels to receivers and transmitters as an alter
native method to automatically creating channels with IR sync.
Use the following steps to set the group and channel in the receiver and transmitter:
Navigate to the group setting.
Use the arrow buttons to scroll through the groups.
Press enter to select a group.
Next, use the arrow buttons to select a channel.
Press enter to save.
Loading ...
Loading ...
Loading ...