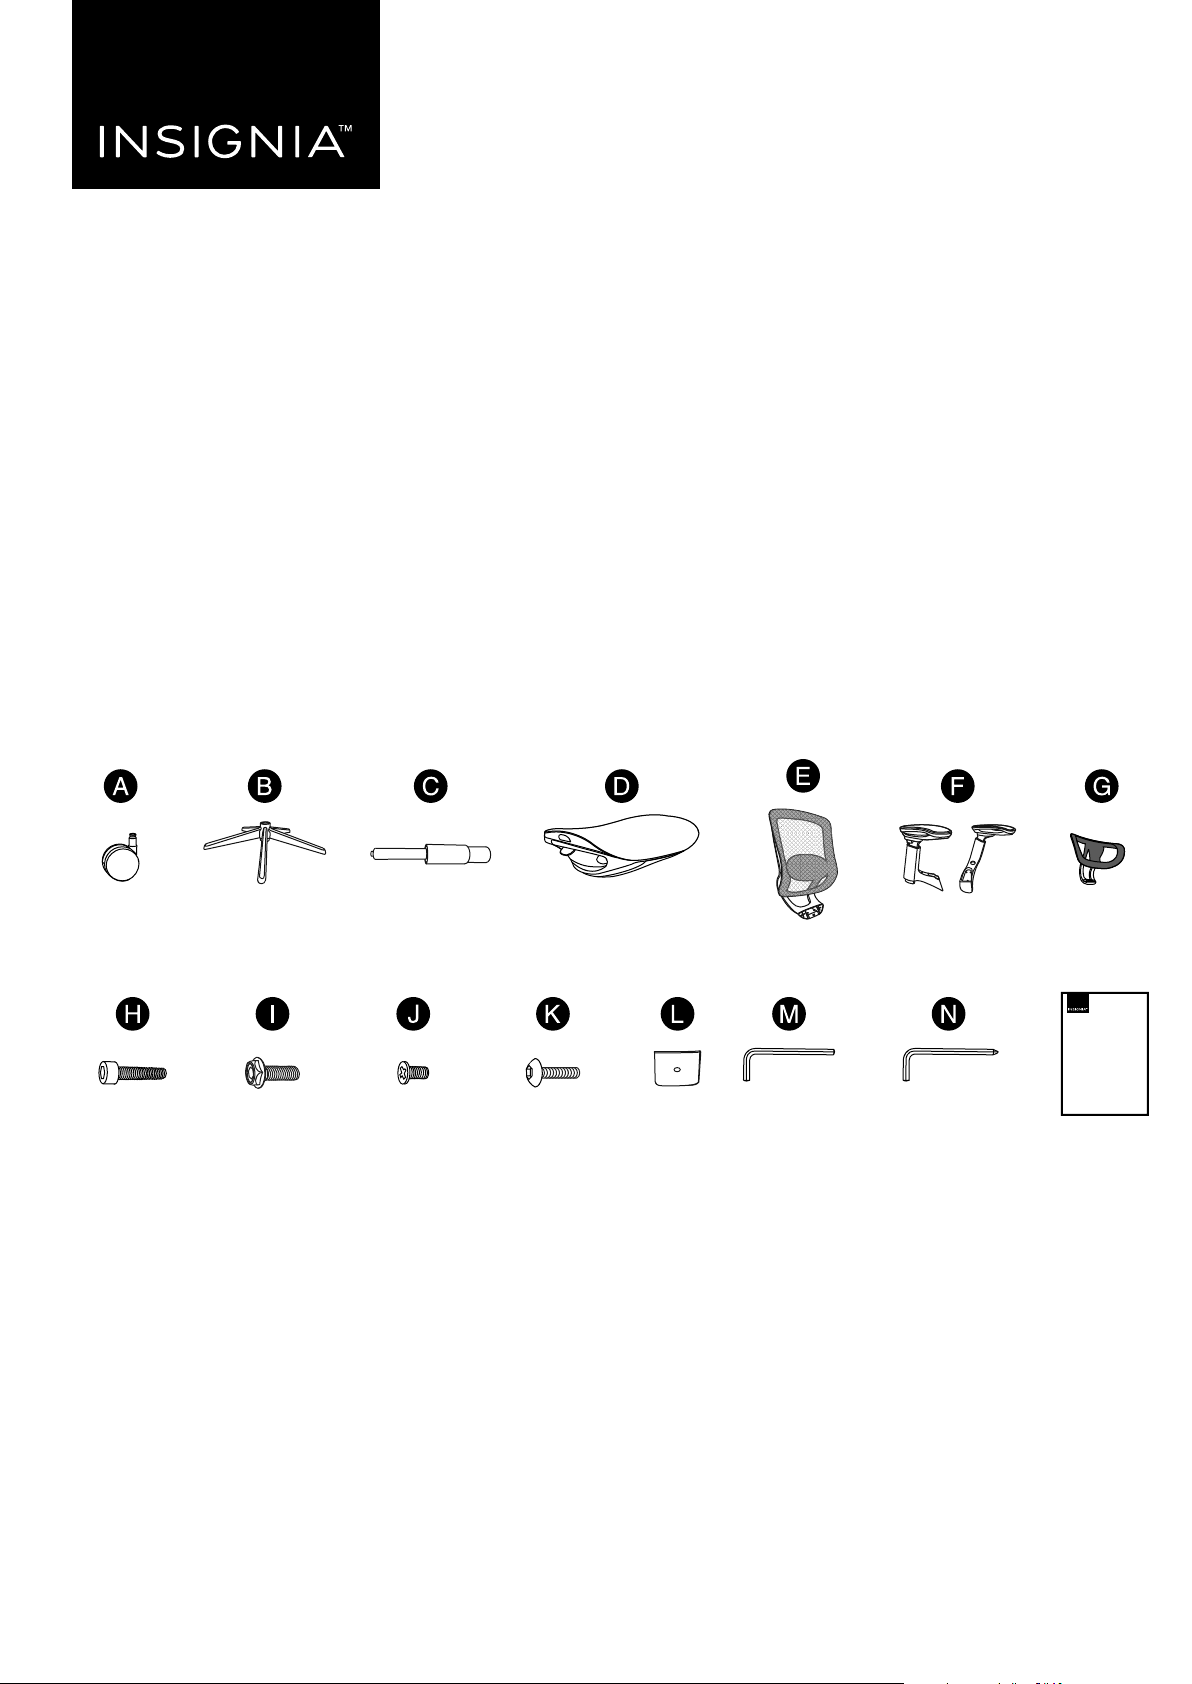
PACKAGE CONTENTS
ASSEMBLING YOUR CHAIR
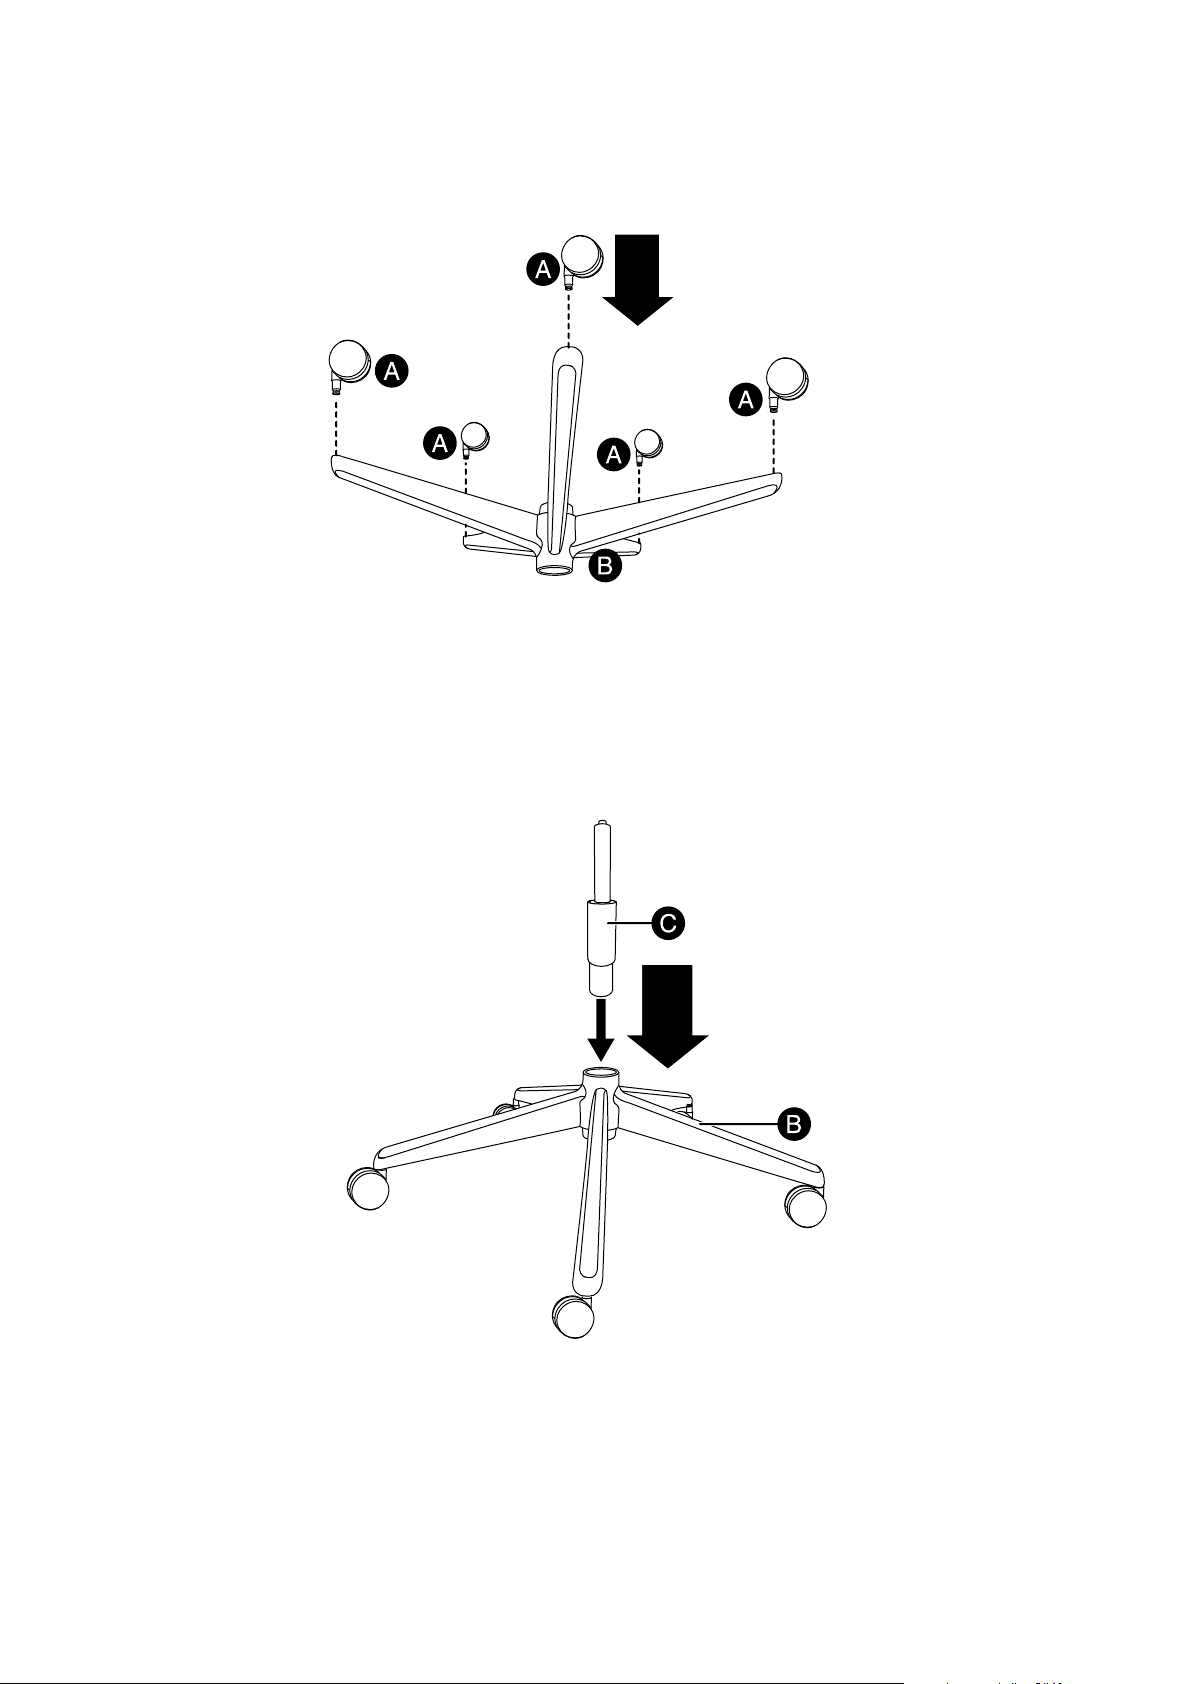
1 Turn the base (B) upside down on carpet or a soft towel.
2 Insert the wheel (A) posts into the holes at the ends of the base arms until they click into place.
3 Turn the base right side up, then insert the bottom of the center support post (C) into the hole in the center
of the base.
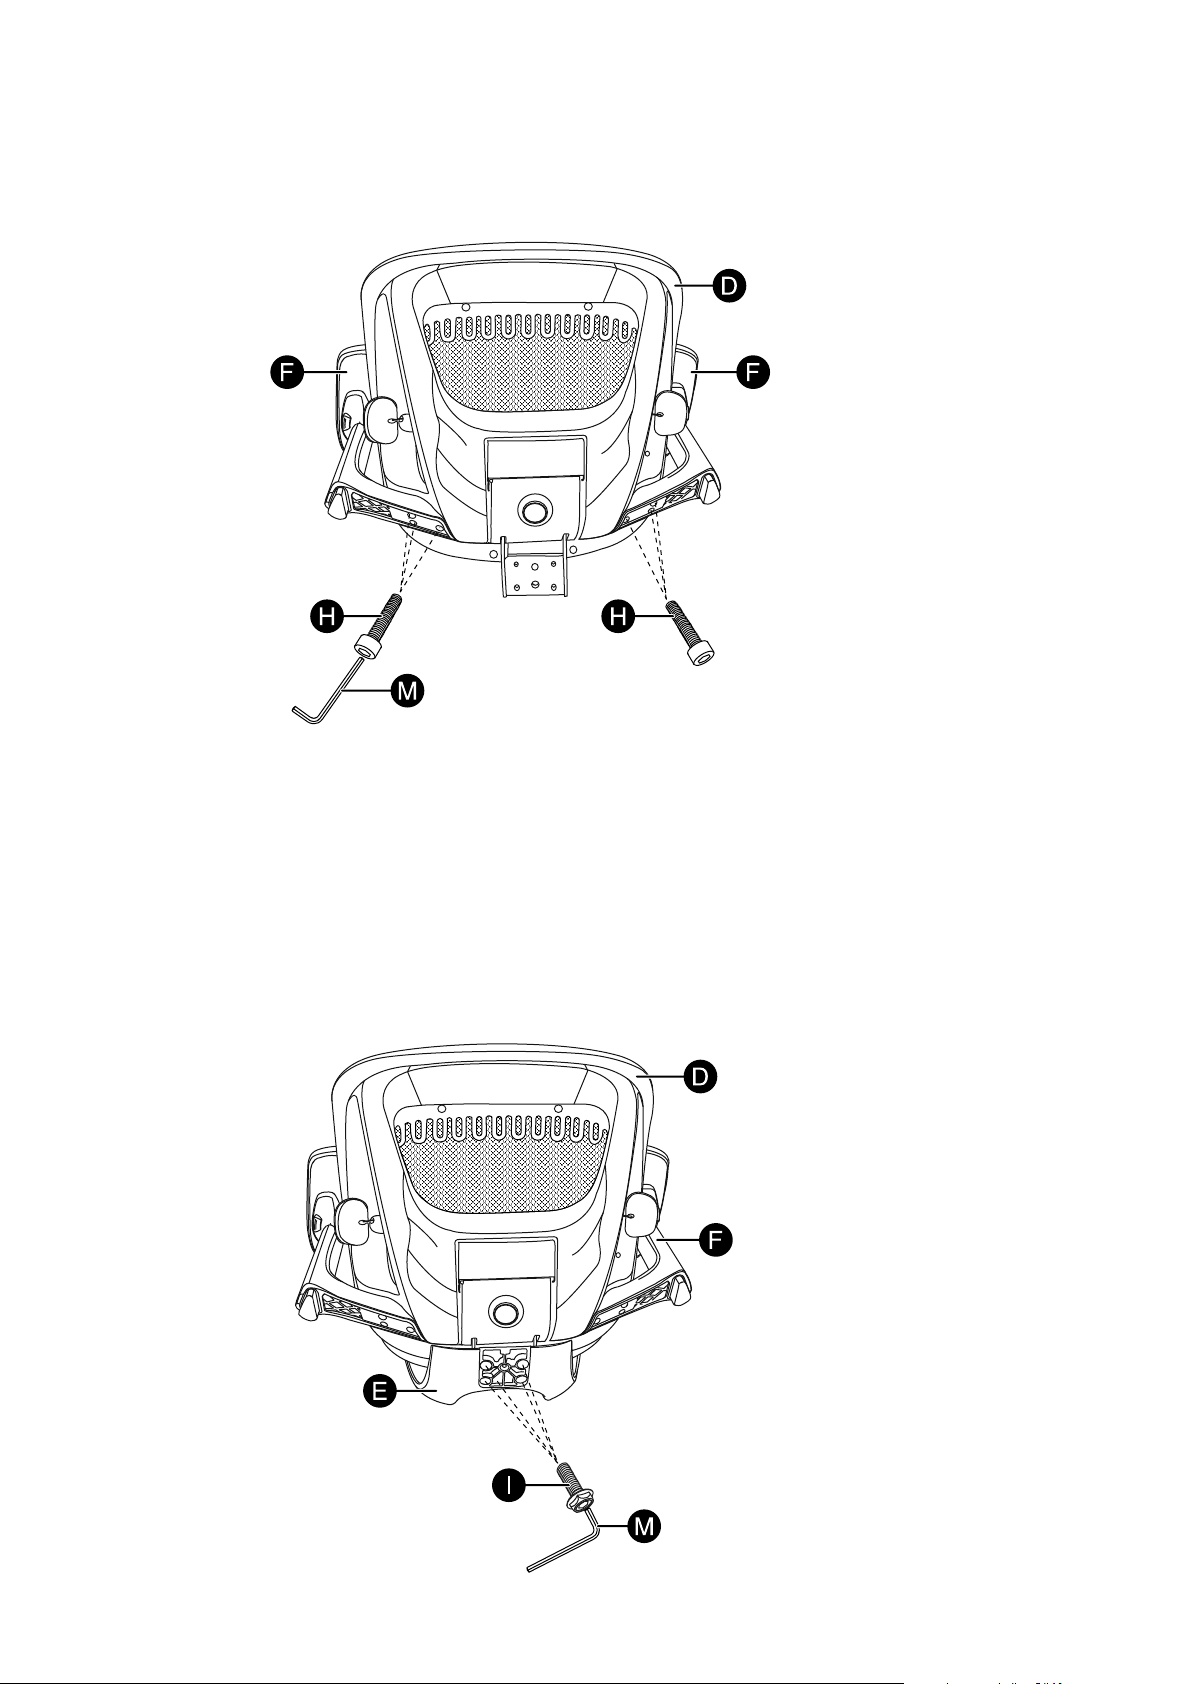
4 Align the screw holes in the left arm (F) with the holes in the left rear of the seat bottom (D) and attach it
with three M6 × 25 mm screws (H). Tighten with the Allen wrench (M). Do the same for the right arm (F).
5 With the seat supported, align the holes in the bottom of the seat bottom (D) with the bracket on the
chair back (E). Make sure that the arms (F) are toward the front of the chair seat. Attach the seat bottom
(D) with four M8 × 20 mm screws (I). Tighten with the Allen wrench (M).
FEATURES
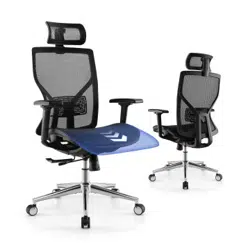
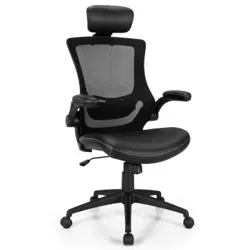
• Adjustable seat, armrests, and headrest t your body’s specic needs
• Swivel and tilt mechanism lets you customize the chair to your ideal position
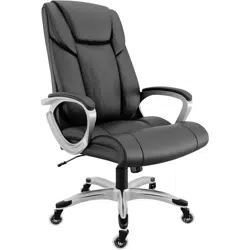
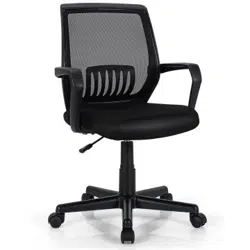
• Breathable mesh design grants a modern, stylish look
• Reinforced lumbar support provides maximum comfort
• Sturdy 5-pointed base with wheels makes it easy to move around your workspace
QUICK SETUP GUIDE
Ergonomic
Mesh Office Chair
NS-OCP3
Before using your new product, please read these instructions to prevent any damage.
Quick Setup
Guide
Allen
wrench (1)
Wheels (5) Base (1)
M6 × 25 mm
screw (6)
Center support
post (1)
Seat bottom (1)
Chair back (1)
Head
support (1)
Arms (2)
M8 × 20 mm
screw (4)
M5 × 10 mm
screw (1)
M6 × 20 mm
screw (1)
Cover
plate (1)
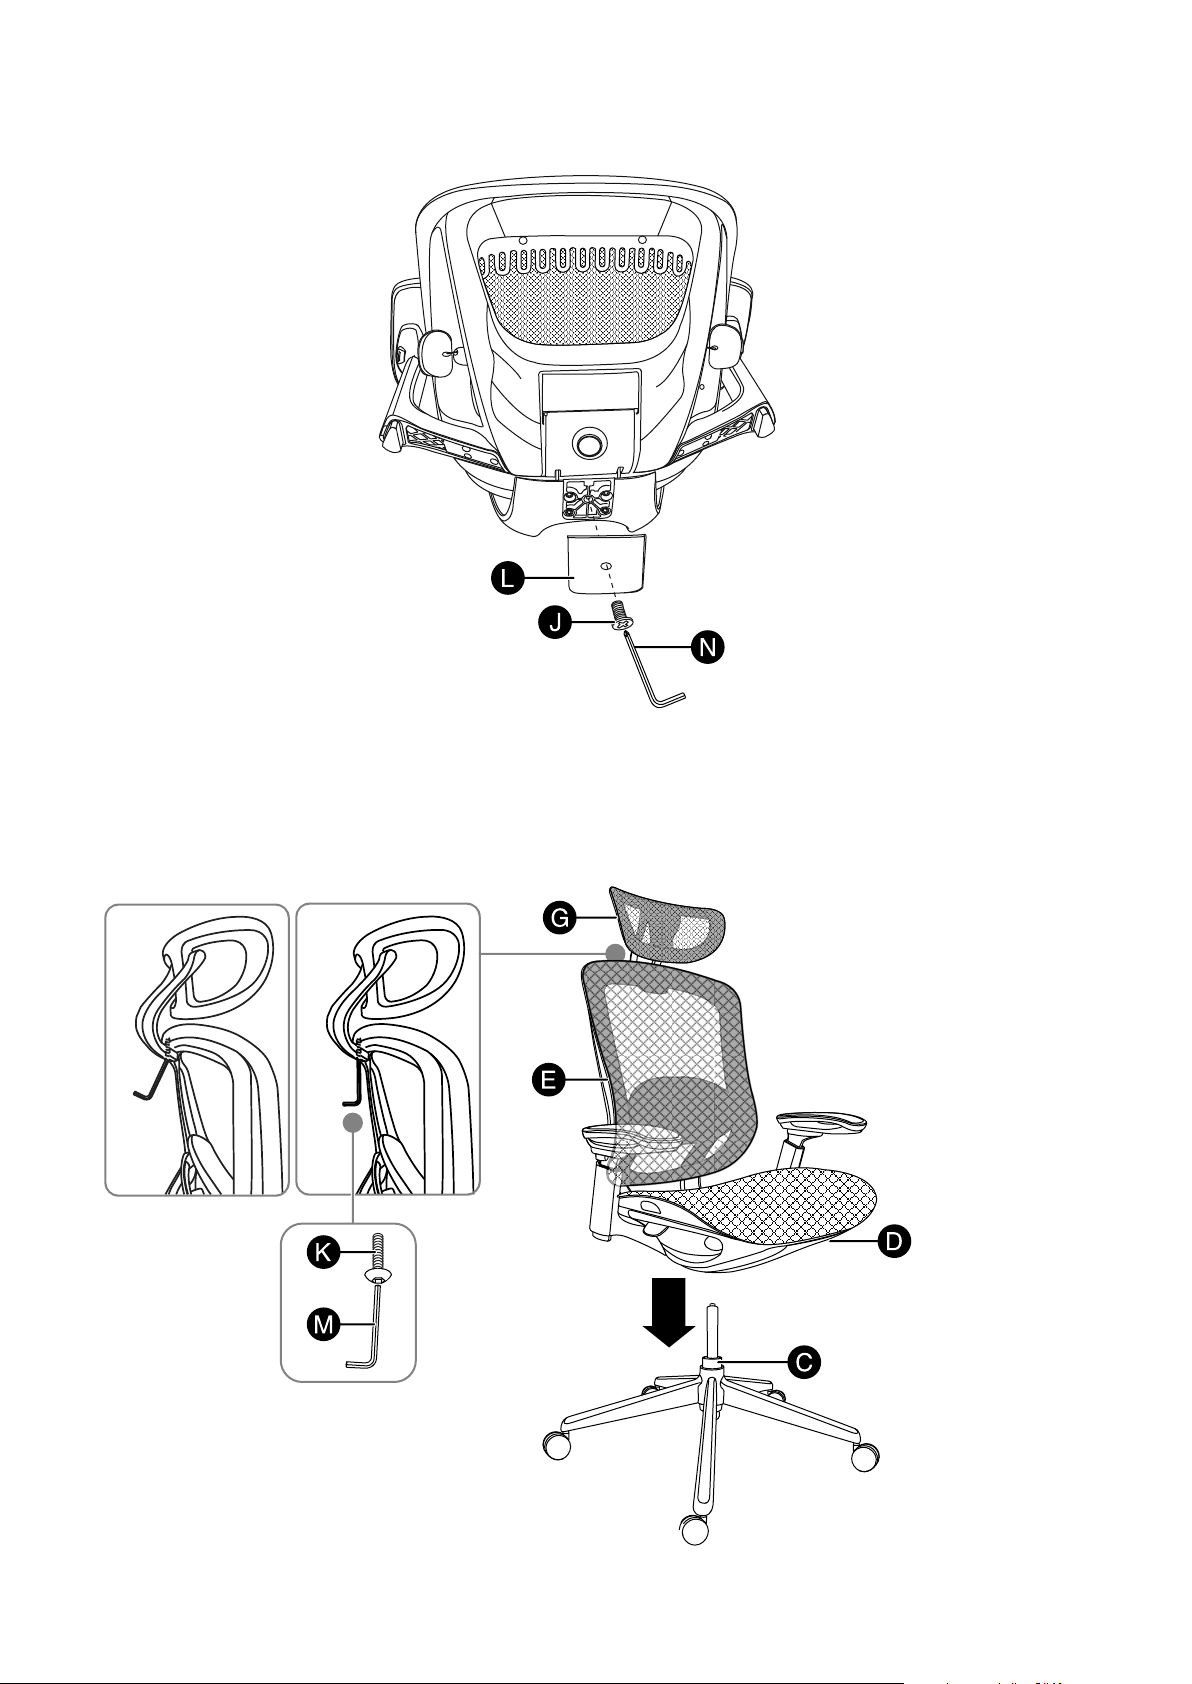
6 Attach the cover plate (L) to the seat bottom with one M5 × 10 mm screw (J). Tighten with the Allen
wrench (N).
7 Turn the chair back/seat assembly right side up and attach it to the chair base by guiding the top of the
center support post (C) into the hole in the bottom of the seat bottom (D). Attach the head support (G)
to the chair back (E) with an M6 × 20 mm screw (K). Tighten with an Allen wrench (M).
CAUTION: Make sure that the chair back/seat assembly and chair base are securely connected and that all bolts
are tightened before sitting in the chair.
Correct
Incorrect
Allen wrench for
M5 × 10 mm (J)
screw (1)
PACKAGE CONTENTS
ASSEMBLING YOUR CHAIR
1 Turn the base (B) upside down on carpet or a soft towel.
2 Insert the wheel (A) posts into the holes at the ends of the base arms until they click into place.
3 Turn the base right side up, then insert the bottom of the center support post (C) into the hole in the center
of the base.
4 Align the screw holes in the left arm (F) with the holes in the left rear of the seat bottom (D) and attach it
with three M6 × 25 mm screws (H). Tighten with the Allen wrench (M). Do the same for the right arm (F).
5 With the seat supported, align the holes in the bottom of the seat bottom (D) with the bracket on the
chair back (E). Make sure that the arms (F) are toward the front of the chair seat. Attach the seat bottom
(D) with four M8 × 20 mm screws (I). Tighten with the Allen wrench (M).
FEATURES
• Adjustable seat, armrests, and headrest t your body’s specic needs
• Swivel and tilt mechanism lets you customize the chair to your ideal position
• Breathable mesh design grants a modern, stylish look
• Reinforced lumbar support provides maximum comfort
• Sturdy 5-pointed base with wheels makes it easy to move around your workspace
QUICK SETUP GUIDE
Ergonomic
Mesh Office Chair
NS-OCP3
Before using your new product, please read these instructions to prevent any damage.
Quick Setup
Guide
Allen
wrench (1)
Wheels (5) Base (1)
M6 × 25 mm
screw (6)
Center support
post (1)
Seat bottom (1)
Chair back (1)
Head
support (1)
Arms (2)
M8 × 20 mm
screw (4)
M5 × 10 mm
screw (1)
M6 × 20 mm
screw (1)
Cover
plate (1)
6 Attach the cover plate (L) to the seat bottom with one M5 × 10 mm screw (J). Tighten with the Allen
wrench (N).
7 Turn the chair back/seat assembly right side up and attach it to the chair base by guiding the top of the
center support post (C) into the hole in the bottom of the seat bottom (D). Attach the head support (G)
to the chair back (E) with an M6 × 20 mm screw (K). Tighten with an Allen wrench (M).
CAUTION: Make sure that the chair back/seat assembly and chair base are securely connected and that all bolts
are tightened before sitting in the chair.
Correct
Incorrect
Allen wrench for
M5 × 10 mm (J)
screw (1)
V2 ENGLISH 23-0353
IMPORTANT SAFETY INFORMATION
Warnings:
• Fall hazard - Do not stand on the chair or attempt to use the chair as a ladder.
• Choking hazard - Be sure to properly dispose of all plastic packing bags.
• Fall hazard - Be careful not to lean the chair back so far that is causes the chair to fall backward or slip out from under you, or put all of your weight on
the front of the chair, causing it to fall forward.
Caution:
• Make sure that casters/wheels are fully inserted into the base of the chair.
• Always keep the base of the chair completely on the oor.
• Periodically make sure that the bolts holding the base and back of the chair in place are securely tightened.
Safety information
• Maximum weight capacity: 275 lbs. (125 kg).
• Read the Quick Setup Guide completely before assembly.
• Remove all parts from the carton and make sure that all parts are included prior to assembly.
• Assemble the chair on carpet or a soft towel to prevent scratching the chair.
• This chair is designed for sitting on the seat only and nothing else.
• Do not stand on or use as a step ladder.
• Do not sit on the armrests.
• This chair is designed for seating one person at a time.
• Tighten all screws, knobs, bolts, and parts rmly, otherwise do not use.
• If any parts are missing, damaged, or worn, stop using immediately.
• Do not use power tools.
USING YOUR CHAIR
Seat back reclining angle adjustment
1 Pull the tilt adjustment handle on the left side of the seat up to release the seat back. Lean back in the
chair until it’s in the position you want, then release the handle.
2 Push down on the tilt adjustment handle to lock the seat in place.
Seat height adjustment
1 Pull up the seat height adjustment handle on the right side of the seat to raise the seat cushion to the
highest position.
2 After sitting down, pull up the seat adjustment handle to adjust the seat to a suitable height, then release
the handle.
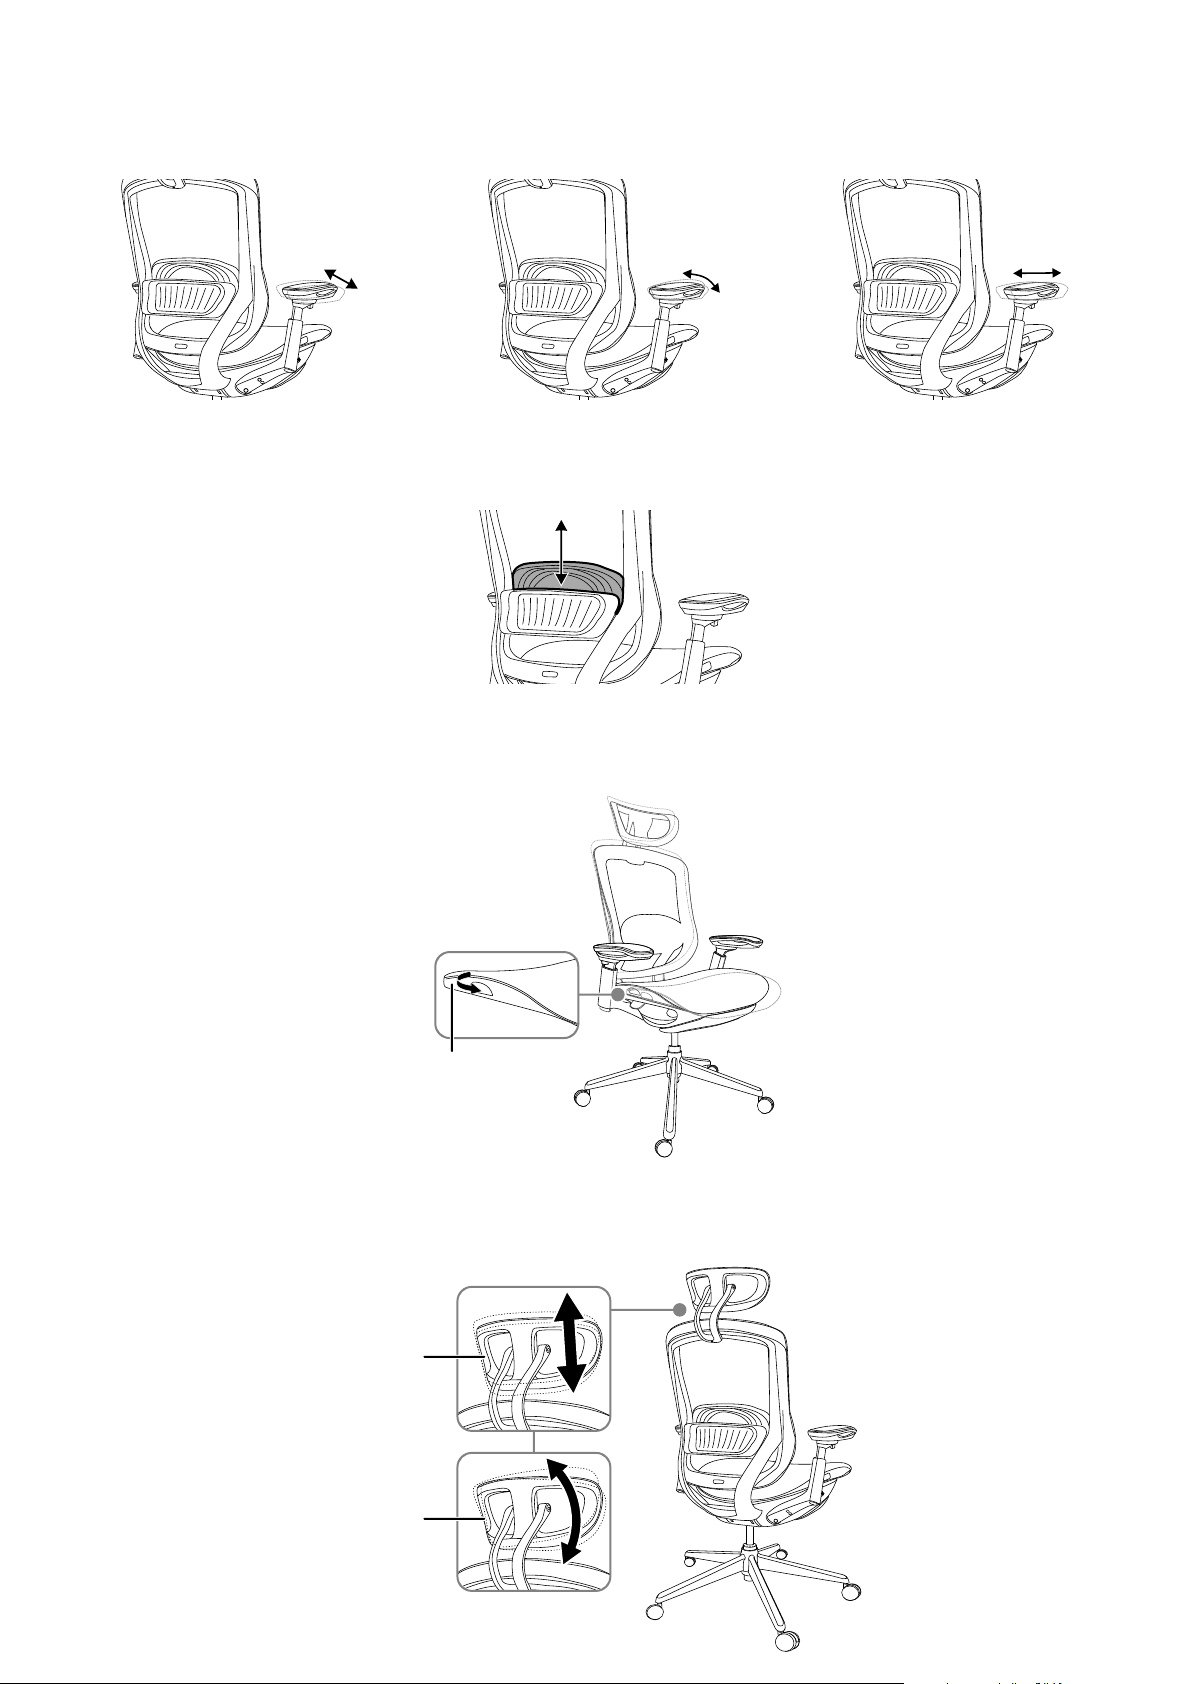
Arm rest height adjustment
• Press and hold the armrest height adjustment button on the underside of the armrest, adjust the height to
the position you want, then release the button.
Armrest adjustments
• Grip the armrest tightly, adjust it to your desired position, then release it. You can move the armrests forward,
backward, left, and right, or rotate them outward.
Lumbar adjustment
• Grip the lumbar support and adjust it up or down to a suitable position.
Seat depth adjustment
1 Sit in the chair and grip the seat depth adjustment handles on both sides of the seat with your hands.
2 While holding the chair steady with your feet, move your hips forward or backward to position the seat where
you want it, then release the handles.
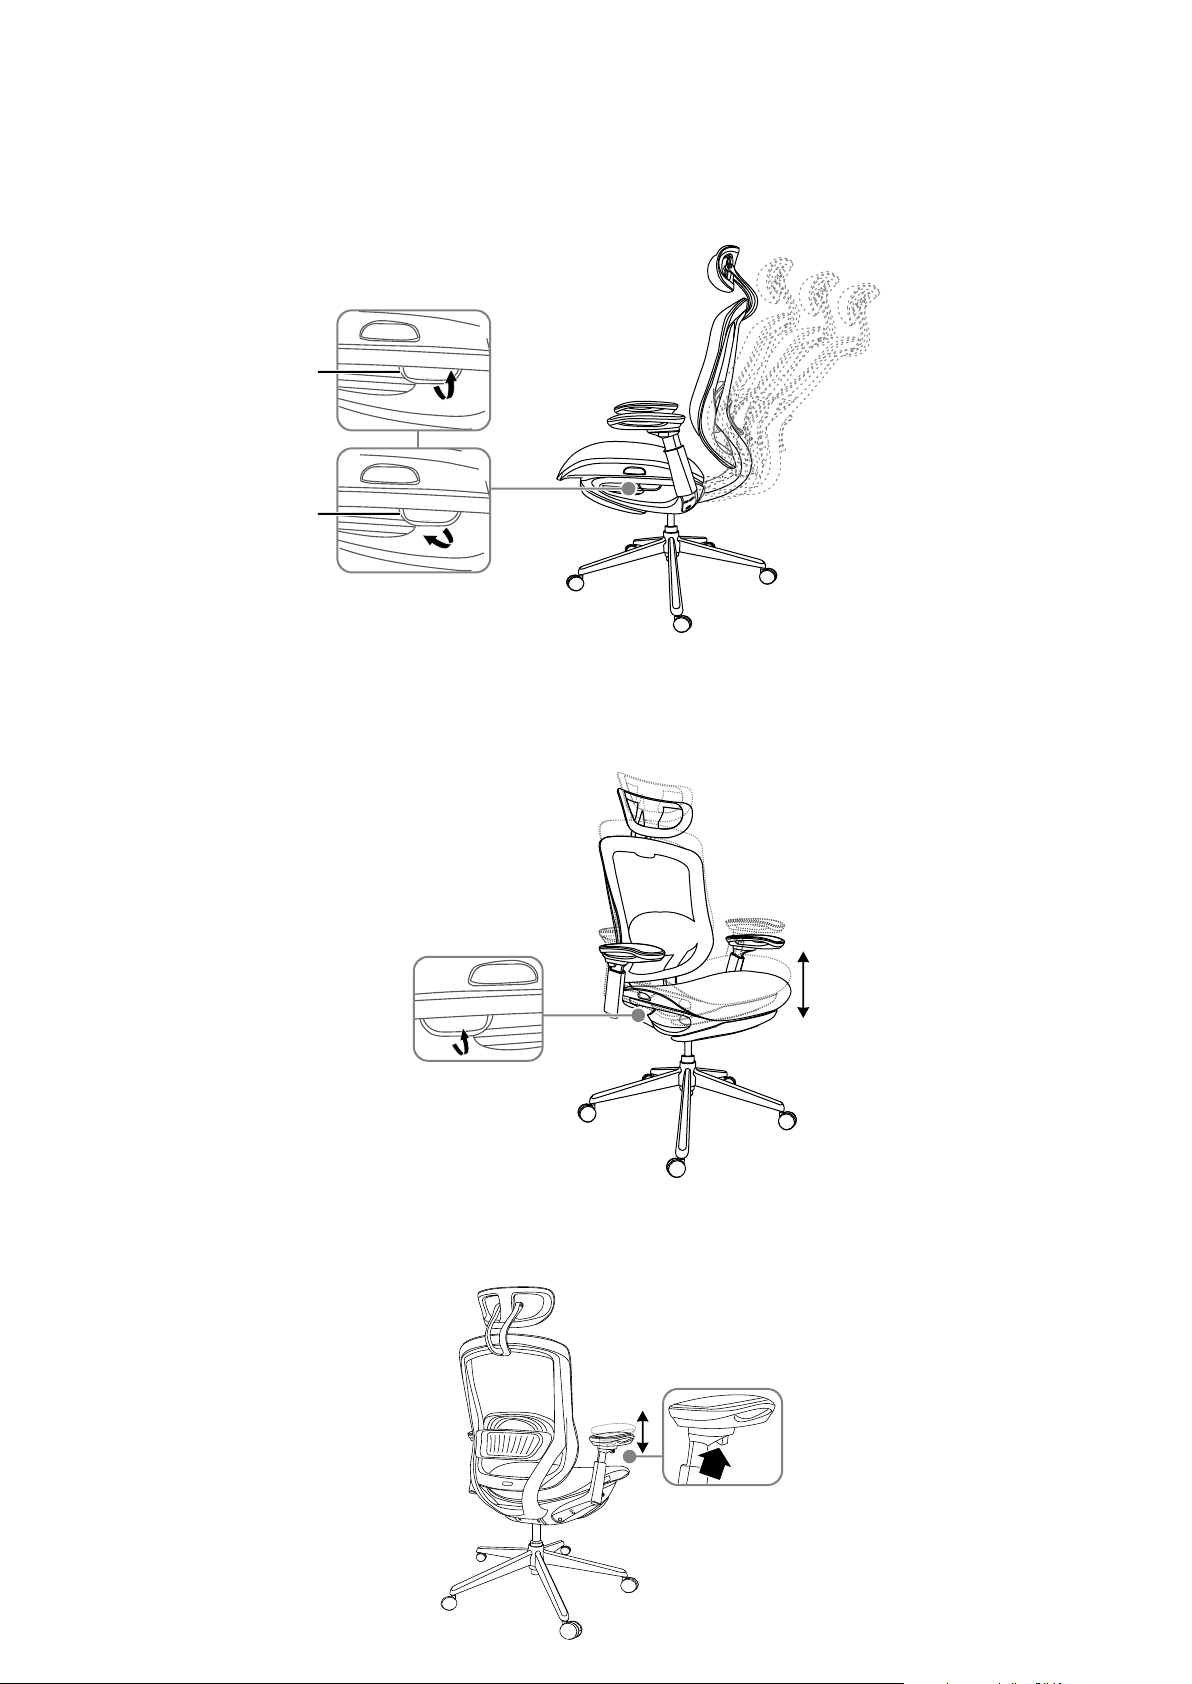
Headrest adjustment
1 Grip the headrest and move it upwards or downwards to a suitable position, then release it.
2 Grip the headrest and adjust it to the angle you want, then release it.
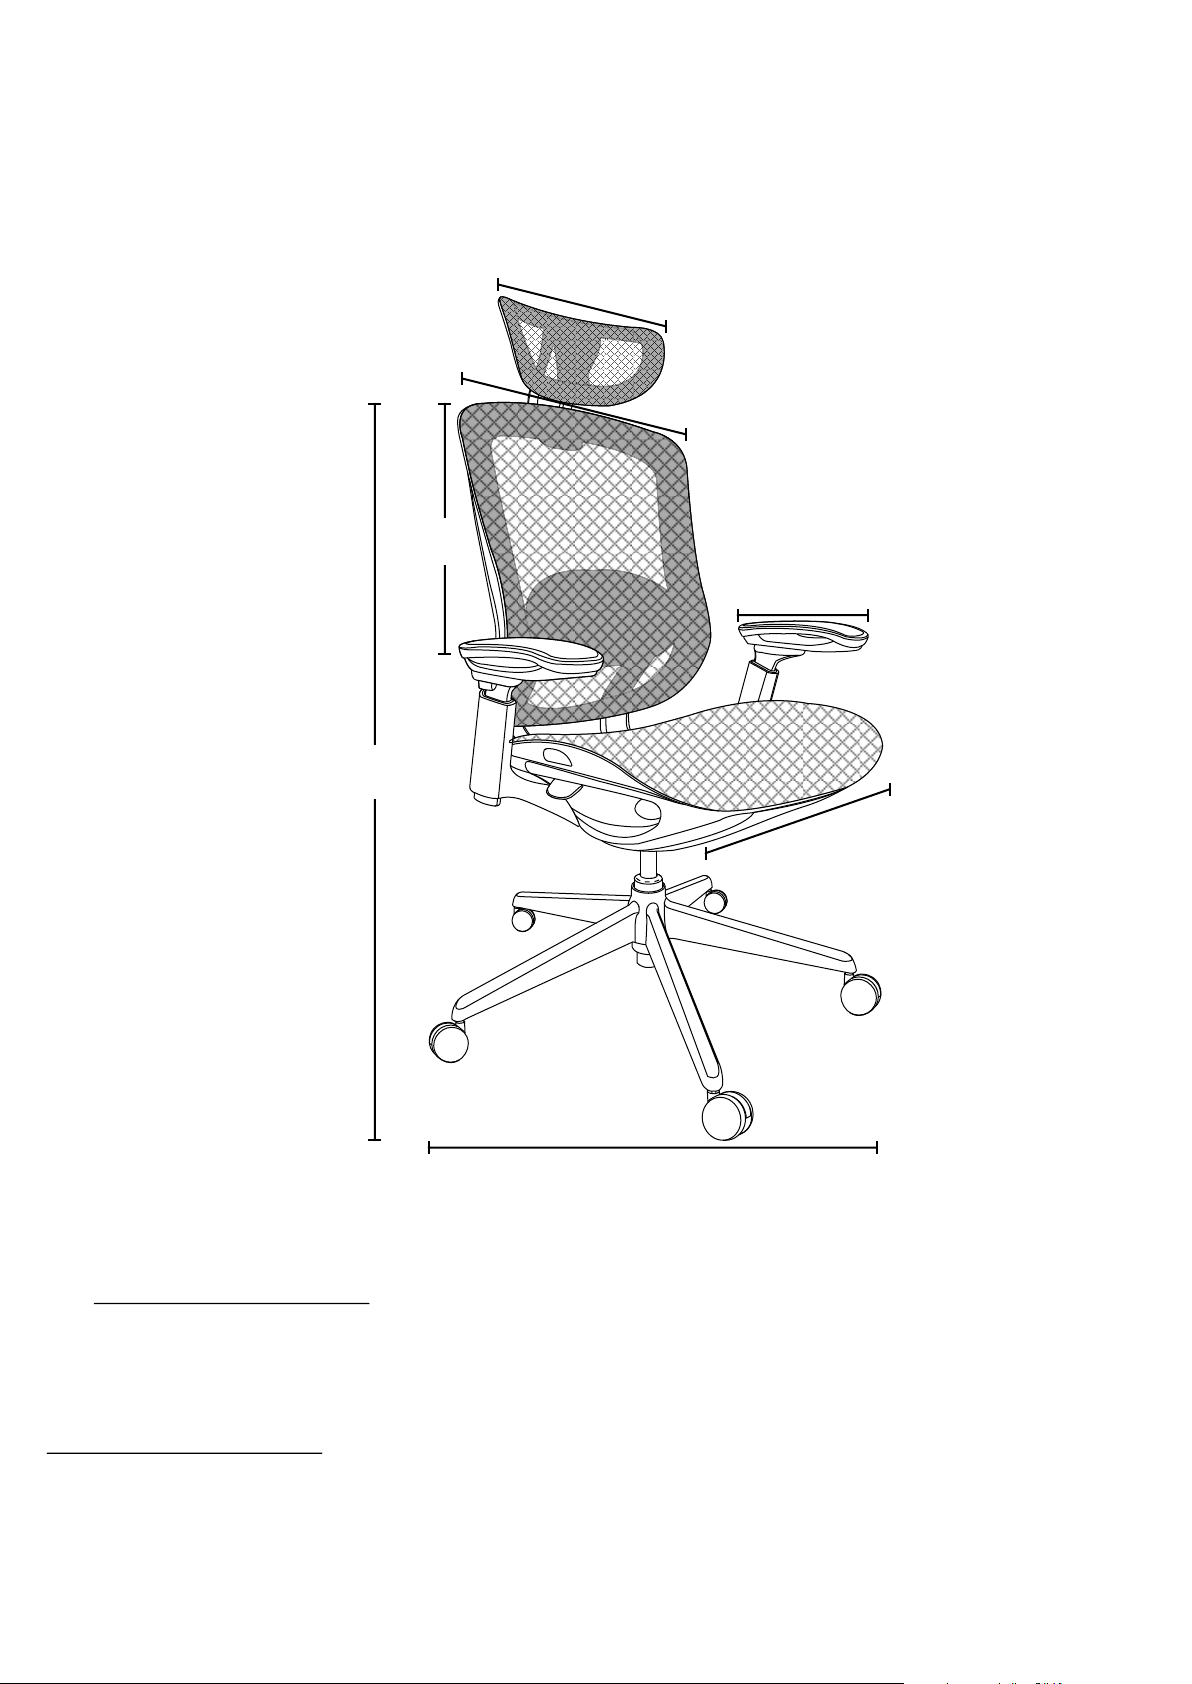
11.8 in. (30 cm)
13.4 in. (34 cm)
29.5 in. (75 cm)
20.2 in. (51.5 cm)
19.5 in. (49.5 cm)
21.5 in.
(54.5 cm)
46.6-50.4 in.
(118.5-128 cm)
SPECIFICATIONS
• Dimensions (H×W×D): 50.3 × 29.9 × 29.5 in. (128 × 76 × 75 cm)
• Net weight: 61.2 lbs. (27.7 kg)
• Maximum weight allowed: 275 lbs. (125 kg)
• Adjustable height range: 3.74 in. (9.5 cm)
ONE-YEAR LIMITED WARRANTY
Visit www.insigniaproducts.com for details.
CONTACT INSIGNIA:
For customer service, call 1-877-467-4289 (U.S. and Canada)
www.insigniaproducts.com
INSIGNIA is a trademark of Best Buy and its aliated companies.
Distributed by Best Buy Purchasing, LLC
7601 Penn Ave South, Richeld, MN 55423 U.S.A.
©2023 Best Buy. All rights reserved.
Tilt adjustment handle
Tilt adjustment handle
Height adjustable
Angle adjustable
Headrest
Headrest
Seat depth
adjustment handle
Left and right
rotation adjustment
Front and rear
adjustment
Adjustment
left and right
V2 ENGLISH 23-0353
IMPORTANT SAFETY INFORMATION
Warnings:
• Fall hazard - Do not stand on the chair or attempt to use the chair as a ladder.
• Choking hazard - Be sure to properly dispose of all plastic packing bags.
• Fall hazard - Be careful not to lean the chair back so far that is causes the chair to fall backward or slip out from under you, or put all of your weight on
the front of the chair, causing it to fall forward.
Caution:
• Make sure that casters/wheels are fully inserted into the base of the chair.
• Always keep the base of the chair completely on the oor.
• Periodically make sure that the bolts holding the base and back of the chair in place are securely tightened.
Safety information
• Maximum weight capacity: 275 lbs. (125 kg).
• Read the Quick Setup Guide completely before assembly.
• Remove all parts from the carton and make sure that all parts are included prior to assembly.
• Assemble the chair on carpet or a soft towel to prevent scratching the chair.
• This chair is designed for sitting on the seat only and nothing else.
• Do not stand on or use as a step ladder.
• Do not sit on the armrests.
• This chair is designed for seating one person at a time.
• Tighten all screws, knobs, bolts, and parts rmly, otherwise do not use.
• If any parts are missing, damaged, or worn, stop using immediately.
• Do not use power tools.
USING YOUR CHAIR
Seat back reclining angle adjustment
1 Pull the tilt adjustment handle on the left side of the seat up to release the seat back. Lean back in the
chair until it’s in the position you want, then release the handle.
2 Push down on the tilt adjustment handle to lock the seat in place.
Seat height adjustment
1 Pull up the seat height adjustment handle on the right side of the seat to raise the seat cushion to the
highest position.
2 After sitting down, pull up the seat adjustment handle to adjust the seat to a suitable height, then release
the handle.
Arm rest height adjustment
• Press and hold the armrest height adjustment button on the underside of the armrest, adjust the height to
the position you want, then release the button.
Armrest adjustments
• Grip the armrest tightly, adjust it to your desired position, then release it. You can move the armrests forward,
backward, left, and right, or rotate them outward.
Lumbar adjustment
• Grip the lumbar support and adjust it up or down to a suitable position.
Seat depth adjustment
1 Sit in the chair and grip the seat depth adjustment handles on both sides of the seat with your hands.
2 While holding the chair steady with your feet, move your hips forward or backward to position the seat where
you want it, then release the handles.
Headrest adjustment
1 Grip the headrest and move it upwards or downwards to a suitable position, then release it.
2 Grip the headrest and adjust it to the angle you want, then release it.
11.8 in. (30 cm)
13.4 in. (34 cm)
29.5 in. (75 cm)
20.2 in. (51.5 cm)
19.5 in. (49.5 cm)
21.5 in.
(54.5 cm)
46.6-50.4 in.
(118.5-128 cm)
SPECIFICATIONS
• Dimensions (H×W×D): 50.3 × 29.9 × 29.5 in. (128 × 76 × 75 cm)
• Net weight: 61.2 lbs. (27.7 kg)
• Maximum weight allowed: 275 lbs. (125 kg)
• Adjustable height range: 3.74 in. (9.5 cm)
ONE-YEAR LIMITED WARRANTY
Visit www.insigniaproducts.com for details.
CONTACT INSIGNIA:
For customer service, call 1-877-467-4289 (U.S. and Canada)
www.insigniaproducts.com
INSIGNIA is a trademark of Best Buy and its aliated companies.
Distributed by Best Buy Purchasing, LLC
7601 Penn Ave South, Richeld, MN 55423 U.S.A.
©2023 Best Buy. All rights reserved.
Tilt adjustment handle
Tilt adjustment handle
Height adjustable
Angle adjustable
Headrest
Headrest
Seat depth
adjustment handle
Left and right
rotation adjustment
Front and rear
adjustment
Adjustment
left and right