Loading ...
Loading ...
Loading ...

13
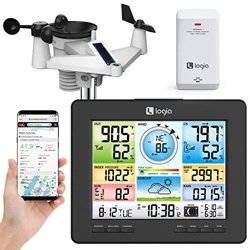
PAIRING THE WIRELESS 7-IN-1 SENSOR AND INDOOR SENSOR
RESET AND FACTORY HARD RESET
RE-PAIRING SENSORS
CHANGING BATTERIES AND MANUAL PAIRING OF SENSOR
PAIRING ADDITIONAL WIRELESS SENSORS
1. Plug the power adapter to the power jack located in back of the console.
2. Once the console is turned on, it will automatically enter pairing mode.
NOTE: If the LCD display does not turn on, use a pin or other small object to press the RESET
button on back of the console.
1. Once your display console powers on, it should automatically search for and connect to the wireless
weather sensors. If the console does not connect within the rst 15 minutes, refer to the following
section, Changing Batteries and Manual Pairing of Sensor, for instructions on manual pairing.
2. You will see the icon of an antenna blinking in the temperature and humidity (outdoor) section of the
display.
3. Once the pairing process completes, the antenna icon will appear solid (not blinking), and the
readings for outdoor temperature and humidity, wind speed, wind direction, UV, light intensity, and
rainfall will appear in their designated sections of the LCD display.
To reset the console and start again, press the RESET button once. To hard reset the console and
resume factory settings, press and hold the RESET button on the console for six (6) seconds.
If the connection fails or the console is reset, then press the WI-FI/SENSOR button once for the console
to enter pairing mode, and the console will re-register all the sensors that have already been registered to
it before, (i.e. the console will not lose the connection of the sensors that you’d paired up before.)
Whenever you change the batteries of the wireless indoor or 7-in-1 weather sensor, re-pairing must be
done manually.
1. Change all the batteries to new ones in the sensor.
2. Press the WI-FI/SENSOR button on the console to enter pairing mode.
3. Press the RESET button on the wireless indoor or 7-in-1 weather sensor.
1. Press the WI-FI/SENSOR button once on the console to enter pairing mode.
2. Press the RESET button on the new sensor, and wait for a few minutes for the new sensor to pair to
the console.
NOTE: Channel number of an indoor sensor must not be the same as another indoor sensor. Please
refer to Setting Up the Wireless Indoor Hygro-thermo Sensor section for details.
POWERING UP THE CONSOLE
RESET
To reset the console and start again, press the
console and resume factory settings, press and hold the
icon to conrm and exit.
Loading ...
Loading ...
Loading ...