
Loading ...
Loading ...
Loading ...
12
1. Remove the battery door on the back of the sensor.
2. Use the channel switch to set the channel number for the sensor.
3. Insert two (2) AA batteries into the battery compartment according to the +/- polarity labeled in
the compartment.
4. Place the battery door back on the sensor. The sensor will then be in pairing mode and can be
registered to the console within the next few minutes. The transmission status LED will begin to
ash every minute.
NOTE: To change the sensor to a new channel, slide the channel switch to a dierent channel.
Then, press the RESET button on back of the sensor.
Your console can pair up with one (1) wireless 7-in-1 outdoor sensor and up to seven (7) wireless
indoor sensors. (Only one (1) indoor sensor included.)
1. Insert a screw or hook into the wall.
2. Hang the sensor onto the screw or hook using the wall mounting holder. (Note that the sensor can
also be placed on a table.)
1. Remove the battery door on the rear of the console.
2. Insert a new button battery.
3. Replace the battery door.
NOTE: The backup battery can assist with backing up the time & date, MAX/MIN data, weather
records from the past 24 hours, alert settings, the oset value of weather data, and the
sensor(s) channel history. The built-in memory will backup router and weather server settings.
SETTING UP THE WIRELESS INDOOR HYGRO-THERMO SENSOR
SETTING UP THE WEATHER CONSOLE
INSTALLING THE BATTERIES
PLACING THE WIRELESS INDOOR HYGRO-THERMO SENSOR
INSTALLING THE BACKUP BATTERIES
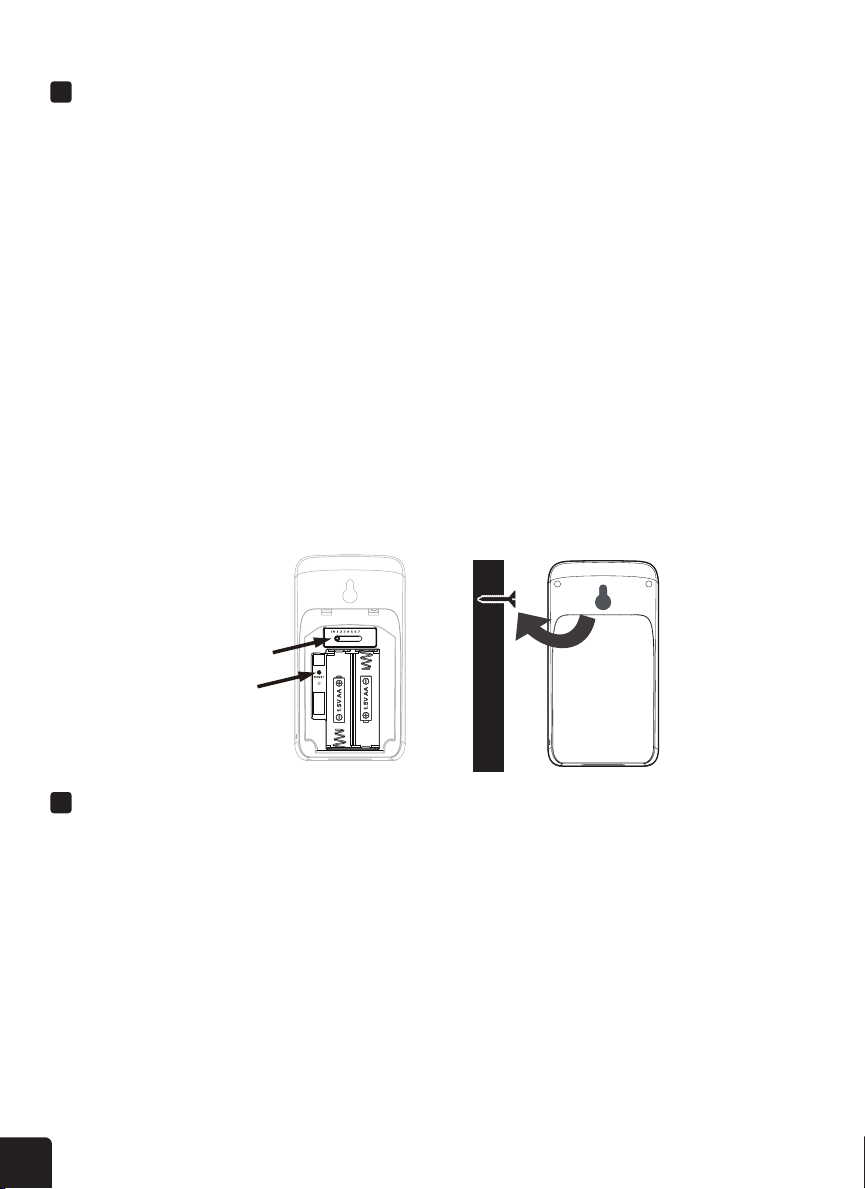
size batteries into the battery compartment and close
the battery door according to the polarity information marked on the
The sensor is in synchronization mode, and can be registered to the
The transmission status LED
will begin to ash every 1 minute.
the sensor/s rst, and then press
will begin to ash every 1 minute.
the sensor/s rst, and then press
Place a screw on the wall that you wish to hang the sensor on.
Loading ...
Loading ...
Loading ...