
Loading ...
Loading ...
Loading ...
11
The outdoor wireless weather sensor is calibrated to be pointed north for maximum accuracy. However,
for your convenience, if you are a user located in the Southern Hemisphere, you can use the sensor with
the wind vane pointing south.
1. Mount and install the wireless weather sensor with the wind meter end pointed South, instead of
North. (Please refer to Mounting Sensor on Pole for mounting instructions.)
2. Select “S’ in hemisphere section of the setup UI setup page. (Please refer to Setting Up Weather
Server Connection section for setup details)
3. Press the APPLY icon to conrm and exit.
NOTES: Changing the hemisphere setting will automatically switch the direction of the moon
phases on the display.
Pointing the wireless weather sensor toward the south will allow maximum sunlight on the solar
panel, especially during the winter season in the Southern Hemisphere.
POINTING THE WIRELESS 7-IN-1 OUTDOOR SENSOR TO SOUTH (OPTIONAL)
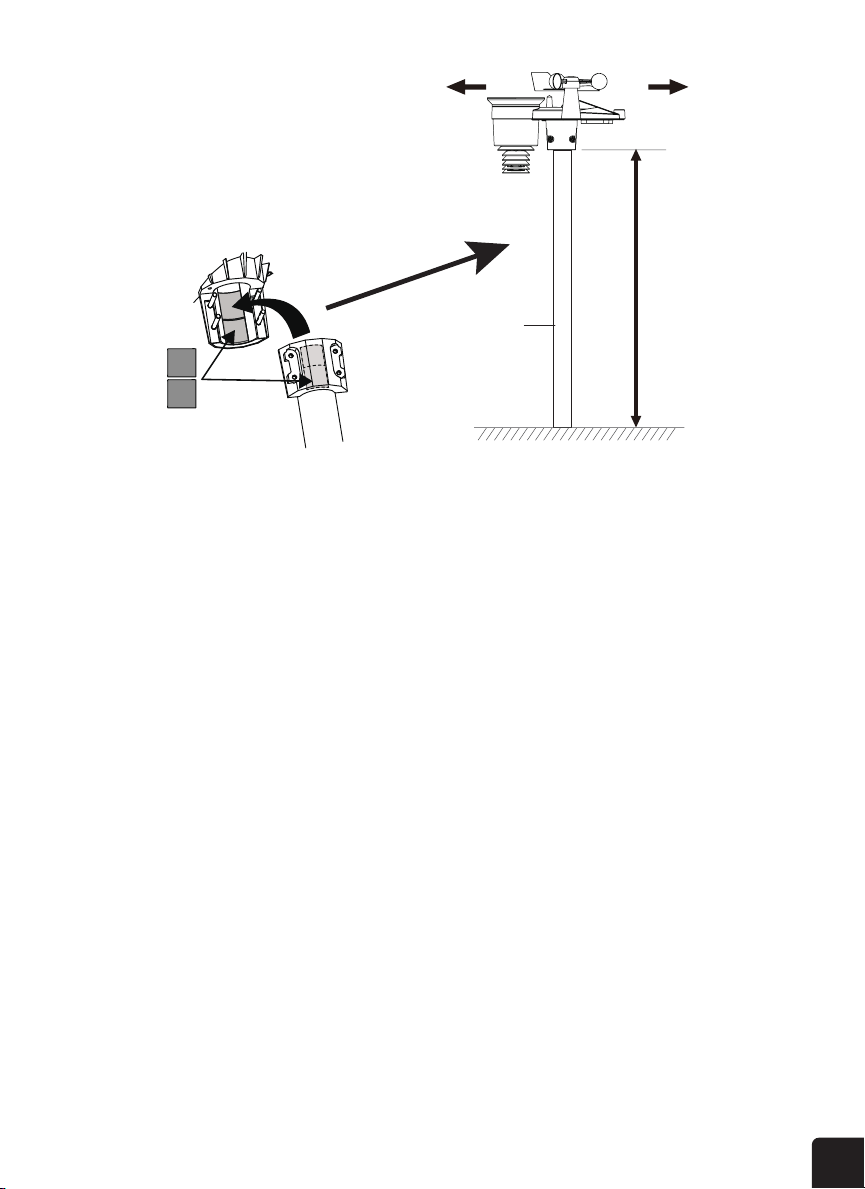
MOUNTING POLE AND DIRECTION ALIGNMENT
Install the wireless 7-IN-1 sensor in an open
location with no obstructions above and around the
sensor for accurate rain and wind measurement.
Install the sensor with the smaller end facing the
North to properly orient the wind direction vane.
Secure the mounting stand and bracket (included)
35 ~ 40mm diameter steel post or pole, and
allow minimum 2m off the ground.
Point to
SOUTH
Point to
NORTH
2 meters
off the
ground
mounting pole
and stand not
included
Add rubber
pad before
mounting on
pole or post
Loading ...
Loading ...
Loading ...