Loading ...
Loading ...
Loading ...
English 11English 11
Installation
Installation
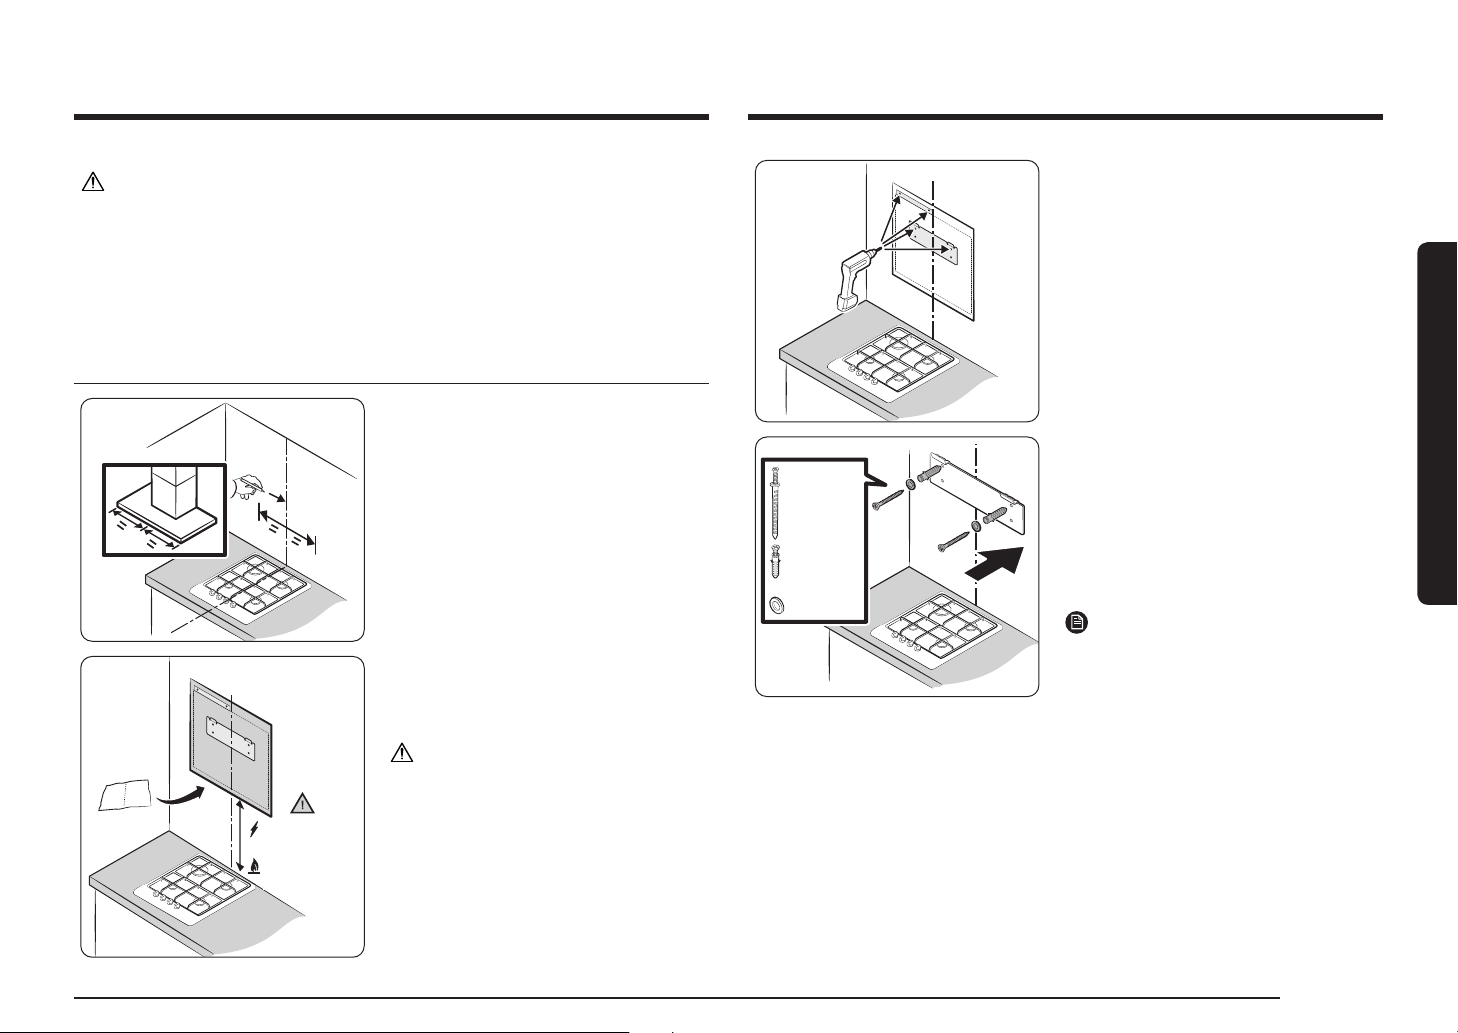
3. Check the position for fixing the hood
mounting bracket.
130 mm
Screw Anchors
(2 pcs.)
or 30 mm
Screw Anchors
(2 pcs.)
and Washers
(2 pcs.)
4. Fix the hood mounting bracket
horizontally on the wall where the
hood is to be installed using screw
anchors, hood mounting bracket
screws, and washers.
Be sure to install it on the wall using
the two 30 mm screw anchors.
NOTE
For a secure hold, use a 130 mm screw
anchor.
CAUTION
• This product must be installed by a professional hood installer.
• If the product is installed on a tiled wall or on drywall, there is a risk of the hood
falling, so be sure to fix the fixing screws to the concrete behind the wall.
• Do not attach the product as if it were a tile or fix it with cement, silicone, or
adhesive. Install it on a concrete wall using the provided screws.
Setting the Location
1. Be sure to check that the product you
have purchased is suitable for the
installation space you have chosen.
24" – 36"
(61.0 cm – 91.4 cm)
27" – 36"
(68.5 cm – 91.4 cm)
2. Fix the enclosed installation template
and then install it so that it does not
twist horizontally.
CAUTION
Please pay attention to the mounting
height. The mounting height is
measured from the top of the range
to the upper cabinets. The mounting
height for an electric cooking surface
is measured from its glass cooktop. For
a gas cooking surface, the mounting
height is measured from the top of the
burning grates.
Loading ...
Loading ...
Loading ...