Home
Search
Bookmarks
Write Review
ManualsFile
Keurig
Keurig User Manuals
Find
Tip search: Enter brand name + model number to search. For example:
Keurig VUE V600
How to find model number?
Newly added products
Keurig VUE V600
2025-06-04
1 docs
Keurig VUE V500
2025-06-04
1 docs
Keurig K-COMPACT K35
2025-06-04
1 docs
Keurig K10 MINI PLUS
2025-06-04
1 docs
Keurig B475
2025-06-04
1 docs
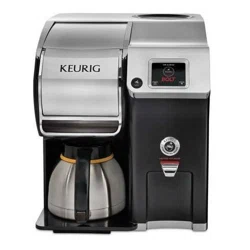
Keurig B155 OFFICEPRO PREMIER
2025-06-04
1 docs
Keurig B08Z8ND3HT Kselect Coffee Maker Single Serve Kcup Pod Coffee Brewer Bundle 2 Items
2025-06-04
1 docs
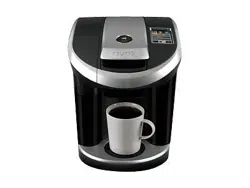
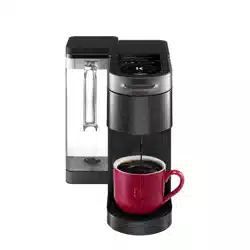
Keurig RIVO R500
2025-06-03
1 docs
Keurig K-SELECT K80
2025-06-03
1 docs
Keurig K50
2025-06-03
1 docs
Keurig K-2550 Medium Business Coffee Maker
2025-01-18
1 docs
Keurig 611247386385 K-Supreme Single Serve K-Cup Pod Coffee Maker
2025-01-14
1 docs
Keurig K-1550 Small Business Coffee Maker
2024-12-15
2 docs
Keurig K-4500 Café System
2024-12-15
2 docs
Keurig K900 K-Slim Single Serve K-Cup Pod Coffee Maker
2023-08-29
1 docs
Keurig K-EXPRESS Coffee Maker, Single Serve K-Cup Pod Coffee Brewe
2023-06-22
1 docs
Keurig K35 K-Compact Single Serve K-Cup Pod Coffee Maker
2023-03-06
1 docs
Keurig K-1500 Commercial Coffee Maker
2022-10-31
3 docs
Keurig K-SUITE Premium Hospitality Brewer
2022-10-31
2 docs
Keurig K-3500 Commercial Single-Cup Coffee Maker
2022-10-31
3 docs
Keurig K-Duo Special Edition Single Serve K-Cup Pod & Carafe Coffee Maker
2022-10-07
1 docs
Keurig VUE V1255
2021-10-05
1 docs
Keurig VUE V1200 Coffee maker
2021-10-05
1 docs
Keurig VUE V700 Single Serve Coffee Brewing System
2021-10-05
1 docs
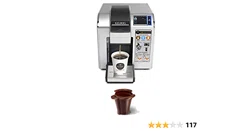
Keurig K3000SE Commercial Brewing System Combo Pack
2021-10-05
1 docs
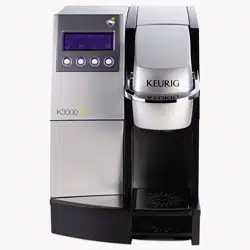
Keurig K3000
2021-10-05
1 docs
Keurig K560 Brewer and Crafe
2021-10-05
1 docs
Keurig K550 - Coffee Maker Single Serve 2.0 Brewing System
2021-10-05
1 docs
Keurig K545 PLUS
2021-10-05
1 docs
Keurig K525C Single Serve Coffee Maker, 12 K-Cup Pods and My K-Cup 2.0
2021-10-05
1 docs
Keurig K525 Single Serve K-Cup Coffee Maker
2021-10-05
1 docs
Keurig 20222 K500 2.0 Brewing System Coffee Maker Single Serve
2021-10-05
1 docs
Keurig K350 Coffee Makers
2021-10-05
1 docs
Keurig K300 2.0 Brewing System, 4 Cups
2021-10-05
1 docs
Keurig K225 Coffe Maker
2021-10-05
1 docs
Keurig K150P Coffee Makers
2021-10-05
1 docs
Keurig K145 OFFICEPRO Coffee Makers
2021-10-05
1 docs
Keurig K140 Commercial Brewer
2021-10-05
1 docs
Keurig K90 K-Elite Single-Serve K-Cup Pod Coffee Maker with Iced Coffee Setting
2021-10-05
1 docs
Keurig K77 SELECT ULTRA
2021-10-05
1 docs
Popular products
Keurig K25 K-Express Essentials Single Serve K-Cup Pod Coffee Maker
2021-09-29
2 docs
Keurig K910 K-Supreme Single Serve Coffee Maker
2021-10-05
1 docs
Keurig K900 K-Slim Single Serve K-Cup Pod Coffee Maker
2023-08-29
1 docs
Keurig K920 K-Supreme Plus Single Serve Coffee Maker
2021-10-05
1 docs
Keurig KEURIG-K921 K-Supreme Plus® Single Serve Coffee Maker
2021-10-05
1 docs
Keurig K-DUO Single Serve & Carafe Coffee Maker
2021-09-29
1 docs
Keurig K90 K-Elite Single-Serve K-Cup Pod Coffee Maker with Iced Coffee Setting
2021-10-05
1 docs
Keurig K-1550 Small Business Coffee Maker
2024-12-15
2 docs
Keurig K-2500 Commercial Coffee Maker
2021-10-05
1 docs
Keurig K-4500 Café System
2024-12-15
2 docs
Keurig K-2550 Medium Business Coffee Maker
2025-01-18
1 docs
Keurig K155 Office Pro Single Cup Commercial K-Cup Pod Coffee Maker
2021-04-14
4 docs
Keurig K-Cafe Special Edition Coffee Makers
2020-09-04
1 docs
Keurig K-50 K-Classic Coffee Maker K-Cup Pod, Single Serve, Programmable, 6 to 10 oz. Brew Sizes
2021-08-17
4 docs
Keurig K-DUO ESSENTIALS Kduo Essentials Single Serve & Carafe Coffee Maker
2021-09-29
1 docs
Keurig K250 2.0 K200 Plus Series Single Serve K-Cup Brewer, Programmable
2020-07-22
1 docs
Keurig Z6000 Bolt Carafe Brewing System
2021-10-05
1 docs
Keurig K-EXPRESS Coffee Maker, Single Serve K-Cup Pod Coffee Brewe
2023-06-22
1 docs
Keurig K-SUPREME PLUS SMART Coffee Maker
2021-09-29
1 docs
Keurig K-SELECT K80
2025-06-03
1 docs
Keurig K-Mini Coffee Maker Single Serve K-Cup Pod Coffee Brewer
2021-04-13
1 docs
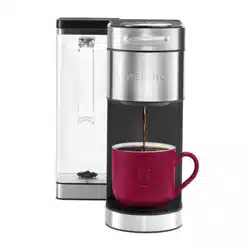
Keurig RIVO R500
2025-06-03
1 docs
Keurig K-DUO PLUS Kduo Plus Single Serve & Carafe Coffee Maker
2021-09-29
1 docs
Keurig 20222 K500 2.0 Brewing System Coffee Maker Single Serve
2021-10-05
1 docs
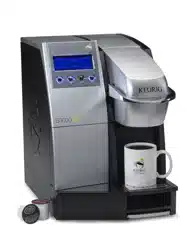
Keurig K3000SE Commercial Brewing System Combo Pack
2021-10-05
1 docs
Keurig K300 2.0 Brewing System, 4 Cups
2021-10-05
1 docs
Keurig K525 Single Serve K-Cup Coffee Maker
2021-10-05
1 docs
Keurig K21P K-Mini Plus Single Serve K-Cup Pod Coffee Maker, Cool Aqua
2021-10-05
1 docs
Keurig K-Slim Single-Serve Coffee Maker
2020-07-10
2 docs
Keurig B3000SE
2021-10-05
1 docs
Keurig K150 Commercial Coffee Maker
2020-08-23
2 docs
Keurig K-1500 Commercial Coffee Maker
2022-10-31
3 docs
Keurig B68 SPECIAL EDITION & SIGNATURE
2021-10-05
1 docs
Keurig K560 Brewer and Crafe
2021-10-05
1 docs
Keurig K-Elite Single-Serve K-Cup Pod Coffee Maker, Brushed Slate, 12 oz. Brew Size
2021-04-19
1 docs
Keurig K525C Single Serve Coffee Maker, 12 K-Cup Pods and My K-Cup 2.0
2021-10-05
1 docs
Keurig B60 Special Edition Brewing System
2021-10-05
3 docs
Keurig K15 Coffee Maker, Single Serve K-Cup Pod Coffee Brewer, 6 to 10 oz. Brew Sizes, Greenery
2020-07-29
1 docs
Keurig B66 ULTIMATE Coffee Maker
2021-10-05
1 docs
Keurig K-3500 Commercial Single-Cup Coffee Maker
2022-10-31
3 docs