Loading ...
Loading ...

ENGLISH | 3
CPWI Telescope Control Software for PC
You can control your telescope and StarSense Autoguider with our
free Celestron CPWI software. To download the latest version, visit:
celestron.com/pages/celestronpwi-telescope-control-software
You’ll need CPWI version 2.5.0 or greater. Install the software and open
CPWI. Select “Start” if the opening window appears. Then, click on the
“Connection” icon in the upper left corner of the screen. If you are using a
wired connection to your Celestron mount (i.e., through the hand control or
the mount itself), select “USB.” If you are using the SkyPortal WiFi Module,
select “WiFi.” CPWI should fi nd and connect to the autoguider. Once
connected, the SSAG icon will appear in the selection menu on the left side
of the screen. Select the icon to display the StarSense Autoguider menu
(Fig. 11).
Fig. 11: When you connect your Celestron mount to your PC and launch CPWI,
you should see the StarSense AG menu among the icons on the left side
of the screen.
SkyPortal App for iOS and Android
If you use the Celestron SkyPortal WiFi Module or have a Celestron
mount with built-in WiFi (e.g., NexStar Evolution), you can use the
SkyPortal app to control your SSAG. Please refer to the Support &
Downloads section on the StarSense Autoguider page at celestron.com
for more information.
4. Using SSAG with the NexStar+
Hand Control
The NexStar+ hand control is perhaps the simplest way to control your
SSAG, as it doesn’t require an external computer. You can use the hand
control as you normally would but with SSAG’s enhanced functionality.
Auto Align
One of SSAG’s most convenient features is its ability to align your
Celestron mount to the night sky automatically. No more manually
centering stars to provide alignment references; it’s all handled
automatically.
To perform an automatic alignment using the
NexStar+ hand control:
1. Power on the mount.
2. Press ENTER.
3 a. If you have an EQ mount with home position switches, such
as the CGX or CGX-L, the hand control will prompt you to move the
mount to its home position. Press ENTER.
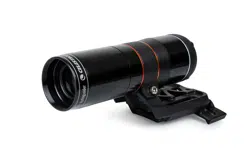
Fig. 9: Reinstall the front housing onto SSAG. Don’t forget the orange cosmetic ring!
6. To install SSAG into your telescope’s standard fi nderscope dovetail
base, simply insert the small bracket into the base and tighten the
thumbscrew on the base to secure it in place.
Now that you have installed SSAG, you’ll need to connect its AUX port
to one of the AUX ports on your telescope mount. Use the supplied AUX
cable (Fig. 10). If you do not have an available AUX port on your mount,
consider purchasing an optional Celestron AUX Port Splitter.
AUX port (on SSAG)
AUX port (on mount)
AUX cable
Fig. 10: Use the supplied AUX cable to connect SSAG’s AUX port to the mount’s
AUX port.
3. Controlling Your StarSense Autoguider
There are several ways to control your StarSense Autoguider:
NexStar+ Hand Control
To use SSAG with the NexStar+ hand control that came with your
Celestron mount, you will likely need to update the hand control’s
fi rmware. You’ll need fi rmware version 5.35.XXXX or greater. To
check your fi rmware version number, press the MENU button. Use
the SCROLL and ENTER buttons to navigate to Hand Control>Get
Version Info. Use the Celestron Firmware Manager (CFM) software to
update the fi rmware if needed. You’ll fi nd the latest version of CFM here:
celestron.com/pages/drivers-and-software
You’ll need a USB cable (Type-A to Mini-B) to connect the hand control to
your PC. Refer to section 9 of this manual (page 10) for more information.
Loading ...
Loading ...
Loading ...