Loading ...
2 | ENGLISH
If you are using the small bracket, you’ll need to remove SSAG from
the large bracket fi rst. To mount SSAG with the small bracket:
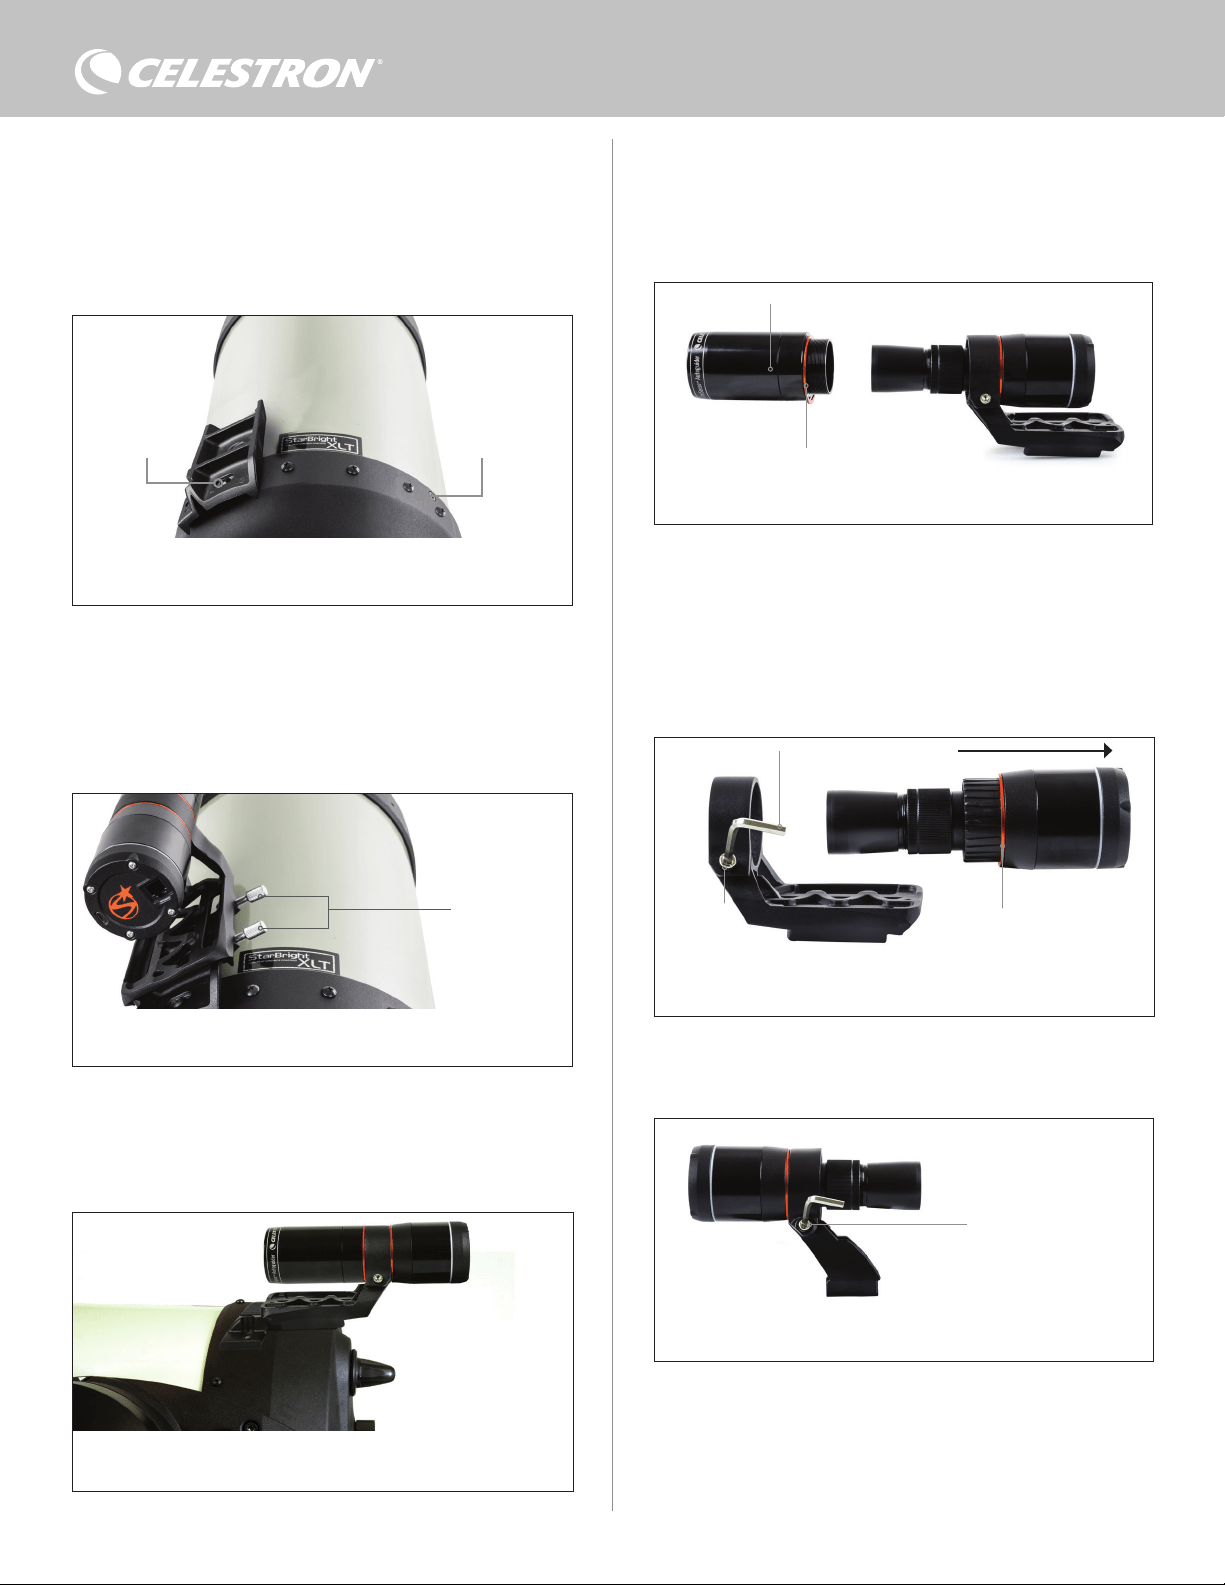
1. Unthread SSAG’s front housing completely and remove it. Doing this
will expose SSAG’s optical tube (Fig. 6). Also, remove the orange front
cosmetic ring.
Front of SSAG housing
Orange
cosmetic ring
Fig. 6: To switch brackets, completely unthread and remove the entire front of the
SSAG housing, including the orange ring.
NOTE: When removing the front housing to install the small bracket,
you could accidentally affect SSAG’s factory focus. Keep this in
mind when you are using SSAG later. If the device is not working
correctly and you are receiving “No Stars!” error messages, you
may need to refocus. To do so, refer to the section on Focusing
later in this manual.
2. Use the hex key to loosen the socket head cap screw, which provides
the bracket’s clamping force. Then pull SSAG out of the bracket
(Fig. 7). Doing this will also remove the orange rear cosmetic ring.
Socket head
cap screw
Rear orange
cosmetic ring
Hex key
Fig. 7: Loosen the socket head cap screw. Remove SSAG from the large bracket,
including the rear orange ring.
3. Loosen the socket head cap screw on the small bracket’s clamp and
install SSAG and the orange ring into the small bracket. Orient it as
shown (Fig. 8).
Socket head cap screw
Fig. 8: Install SSAG into the small bracket as shown, then retighten the socket head
cap screw on the bracket.
4. Retighten the socket head cap screw on the small bracket’s clamp.
5. Reinstall SSAG’s front housing and the orange front ring (Fig. 9).
If you are using the pre-installed large bracket to mount SSAG to
your telescope tube:
1. Connect the large bracket base to the telescope. (Note: Some
telescopes may already have this base installed; it is the same one
used for the 8x50 fi nderscope included with several telescopes.) If
you need to install the base, use the Phillips-head accessory screws,
which are pre-installed in the rear cell of the telescope. There are
usually two locations on the rear cell to mount the base (Fig. 4).
Bracket
mounting
location 1
Bracket
mounting
location 2
Fig. 4: The large bracket can be connected to the OTA in two locations on most
Celestron telescopes.
2. Remove the screws, orient the base as shown, and line up the holes in
the base with the holes in the rear cell.
3. Reinstall the screws so the base is secure. If needed, use the two
supplied Phillips head screws.
4. Loosely thread the two thumbscrews into the large bracket (Fig. 5).
Thumbscrews
Fig. 5: Install the thumbscrews into the large bracket base. These secure the large
bracket.
5. Slide the bracket onto the base until it is fully seated.
6. Tighten the thumbscrews to secure the bracket to the base.
The optional 8” CGE Dovetail Bar for mounting accessories will obstruct
SSAG’s large bracket. The CPC 800 fork arm also obstructs SSAG. For
these confi gurations, attach the base and large bracket backwards as
shown in Fig. 5a.
Fig. 5a: You’ll need to install the base and large bracket backwards on a CPC 800
telescope.
Loading ...
Loading ...
Loading ...