Loading ...
Loading ...
Loading ...
Item Description
FTP Upload Uploads a clip to the FTP server.
0
This Clip:
Uploads the clip pointed by
the cursor.
0
Selected Clips:
Uploads the clips selected
(appended with check
mark).
0
All Clips:
Uploads all clips.
Delete Clips Deletes clip. However, clips with
OK mark cannot be deleted.
0
This Clip:
Deletes the clip pointed by
the cursor.
0
Selected Clips:
Deletes the clips selected
(appended with check
mark).
0
All Clips:
Deletes all clips.
Trim This Clip Trims the clip pointed by the
cursor.
Memo :
0
The object of action is the clip of the current slot
being displayed.
0
[Selected Clips] cannot be performed if there are
no selected (appended with check mark) clips.
0
[This Clip] cannot be performed if there are more
than one selected (appended with check mark)
clips.
0
If the write-protect switch of an SD card is set,
OK mark cannot be appended or deleted, and
the clips cannot be deleted.
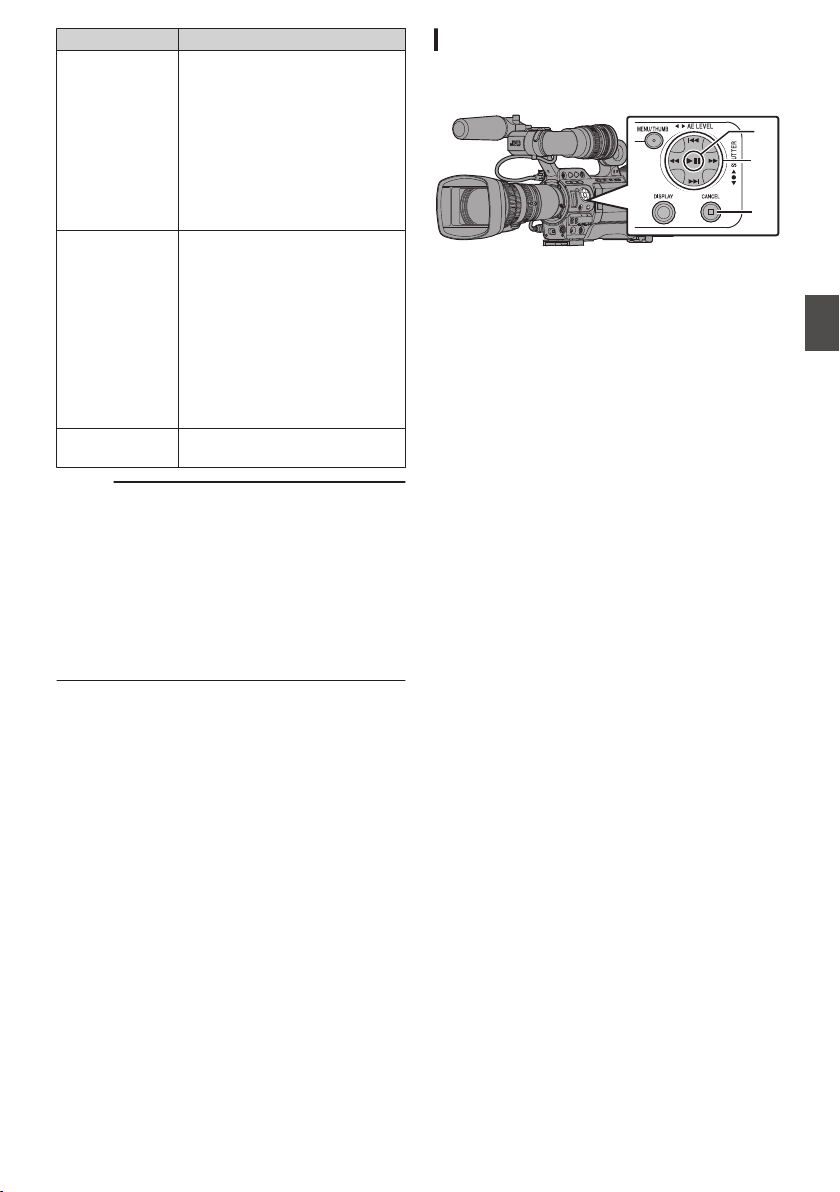
Playing back
Use the operation buttons on the side control panel
of the camera recorder to play back.
.
B
C
A
A
IW Button
0
Plays back/pauses the clip pointed by the
cursor.
0
You can press the cross-shaped button (HI)
to perform frame-by-frame forward playback
during pause mode.
B
S/T Button
Skips in the reverse or forward direction.
O/N Button
During Playback:
Fast forwards in the reverse or forward
direction.
While paused:
Frame-by-frame playback in the reverse or
forward direction.
C
o Button
Stops playback.
1
In the thumbnail screen, move the cursor to
the clip to be played back.
Move the cursor to the clip to be played back
using the cross-shaped button (JKH I).
2
Press the playback/pause button.
Playback of the selected clip starts.
Audio Output during Playback
0
You can check the playback sound from the
monitor speaker or the earphone connected to
the [PHONES] terminal. When a earphone is
connected to the [PHONES] terminal, sound
cannot be output from the monitor speaker.
(A P163 [Connecting a Earphone] )
0
Adjust the volume of the monitor speaker and
earphone using the [MONITOR +/-] volume
adjustment button on the LCD monitor of the
camera recorder.
Playing Recorded Clips
97
Playback
Loading ...
Loading ...
Loading ...