Loading ...
Loading ...
Loading ...
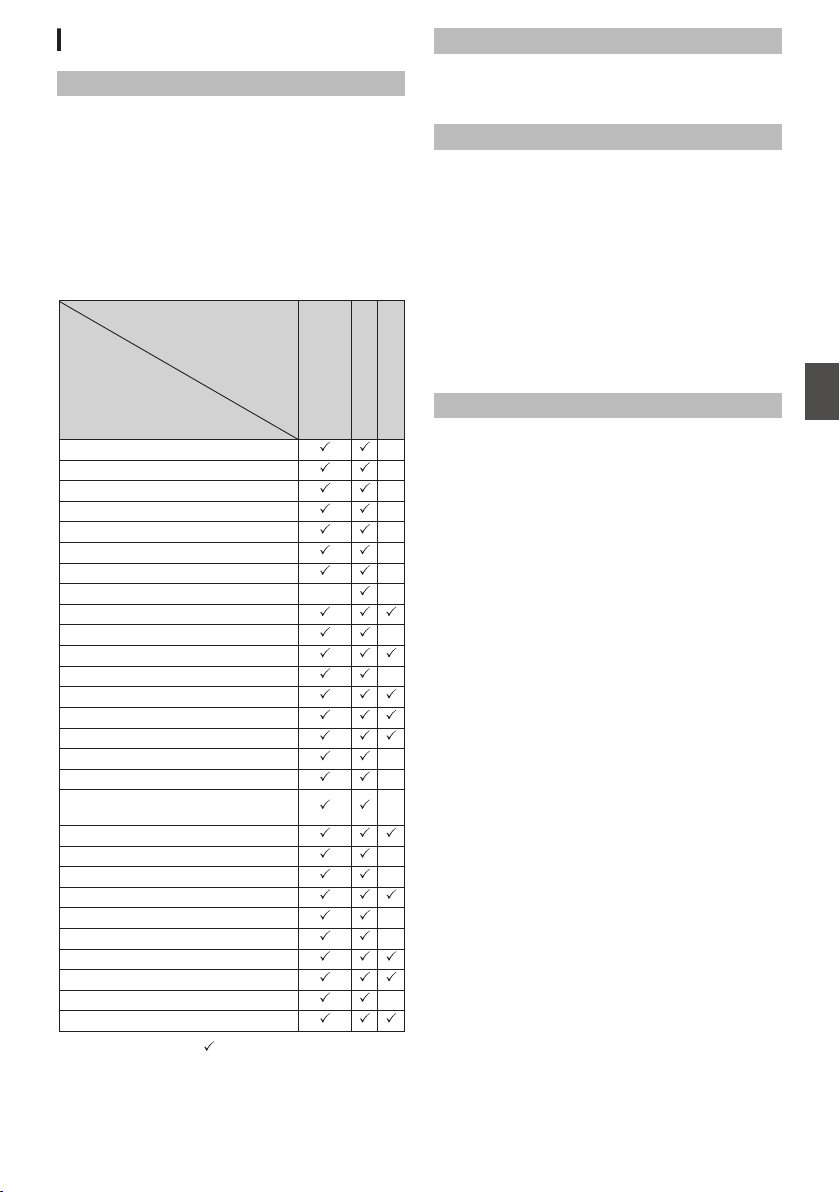
User Switch Set Item
USER1 to USER11, Lens RET
By assigning one of the menu functions below to
the [OIS/1], [MARKER/2], [LOAD FILE/3],
[F.ASSIST/4], [J/5], [K/6], [7/H/ZEBRA], [8/I/
SPOT METER], [AWB/9], [REC/10], [AUTO
FOCUS/11] buttons and the [RET] button on the
lens, you can operate the preset function (on/off,
startup, switching).
Set according to the shooting conditions. Usable
only in the Camera mode.
The settable values for each item are as follows.
.
−
−
−
−
−
−
−
−
−
−
−
−
−
−
−
−
−
−
−
: −:
Settable
Setting Value
Item
Live Streaming
Load Picture File
Return VideoAB
Clip Review
OK Mark
Clip Cutter Trig
Backup Trig
Rec
LCD Backlight
Expanded Focus
Histogram
Spot Meter
Focus Assist
Marker
Zebra
AWB
White Balance
Preset Zoom1 to Preset Zoom3
Auto FocusF
One Push FocusF
One Push IrisF
OISF
Face DetectF
AE Lock
Lolux
Flash Band
Bars
None
Not settable
USER11
USER9, USER10
USER1 to USER8,
Lens RET
Lolux
To increase the sensitivity when in dim
surroundings, set a value in the Lolux mode.
[Setting Values: 36dB, R30dB]
Clip Review
For setting the operation of clip review.
* Clip review functions by operating the user button
assigned with the “Clip Review” function.
0
Last 5sec:
Views about 5 seconds of the clip from the
ending.
0
Top 5sec:
Views about 5 seconds of the clip from the
beginning.
0
Clip:
Views the entire clip.
[Setting Values: RLast 5sec, Top 5sec, Clip]
Spot Meter
For setting the operation of the spot meter.
* Spot meter functions by operating the user button
assigned with the “Spot Meter” function.
(A P80 [Setting Spot Meter] )
0
Max & Min:
Displays the brightest and darkest areas of the
image.
0
Max:
Displays the brightest area of the image.
0
Min:
Displays the darkest area of the image.
0
Manual:
Displays the image brightness at a specified
position.
[Setting Values: RMax & Min, Max, Min, Manual]
Camera Function Menu
111
Menu Display and Detailed Settings
Loading ...
Loading ...
Loading ...