Loading ...
Loading ...
Loading ...
Wireless Controller - Instruction Manual
9
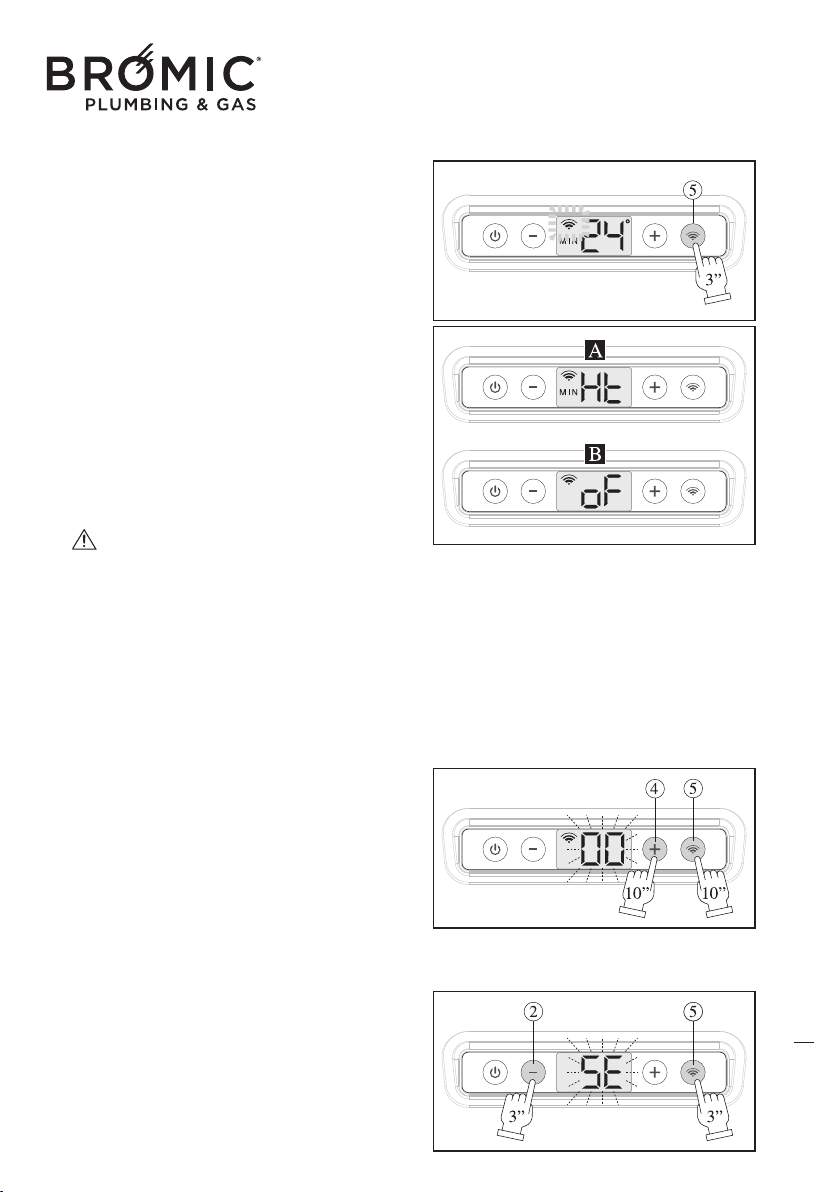
• WIRELESS COMMAND ENABLING
- Switch on the device.
- Activate the Wireless command inserting the batteries.
- Press the Wireless key (5) for MIN 3”, the wire-
less icon flashes.
- The device searches the nearest Wireless com-
mand, as soon as it finds it, it is automatically recog-
nised and the wireless icon remains on and fixed.
From now on, the device is managed by the wire-
less command and there will
be two types of
screens:
--- A (device on), HT (Heating) and MIN or MAX
(power).
--- B (device in stand-by), OF (Off), the device is
not off but in standby for the wireless command to
re-activate it to reach the desired temperature.
If communication between the device and the
remote chronothermostat is interrupted for more
than 5 seconds (e.g. battery discharge), the
device goes in standby while waiting fo
r a new
wireless signal. The device never disconnects
from the remote chronothermostat until the user
decides to do so.
• ASSIGN WIRELESS ADDRESS
- Switch on the device.
- At the same time press the 4 + 5 keys for 10 sec-
onds, the digits “00” flashes.
- Press the “+” and “-”keys to set the same value
already assigned to the remote chronothermostat.
- Press the 4 + 5 keys for 10 seconds to confirm
and return
to the main menu.
• KEYPAD LOCK
- Switch on the device.
- Simultaneously press the 2 + 5 keys for 3 sec-
onds, the letters “SE” (security) flash, whatever key
is pressed “SE” appears.
- At the same time, press the 2 + 5 keys for 3 sec-
onds to release the keys.
10
Loading ...
Loading ...
Loading ...