Loading ...
Loading ...
Loading ...
28 GETTING TO KNOW YOUR VEHICLE
(Continued)
1. Insert the check arm screw into the check arm
bracket. Ensure the screw is in the correct
orientation.
2. Slowly pull on the screw to draw the check arm out
until you encounter increased resistance. Do not
attempt to pull the check arm all the way out.
3. While sitting inside the vehicle, hold the door partially
closed and insert the screw into the hole on the body.
4. Using your fingers, turn the screw clockwise at least
two full turns. Gently pull on the screw to ensure it is
secure.
5. Using the door handle, slowly push the door open.
The check arm will be pulled out of the door.
You may hear the check arm pop against the screw.
6. Fully tighten the screw as instructed.
Replacing The Wiring Connector Into The Wiring Harness
To reinstall the wiring connector on the vehicle’s door into
the harness just inside the vehicle, proceed as follows:
NOTE:
Make sure there is plenty of slack on the wiring connector
during installation. Close the door slightly to provide more
slack if needed.
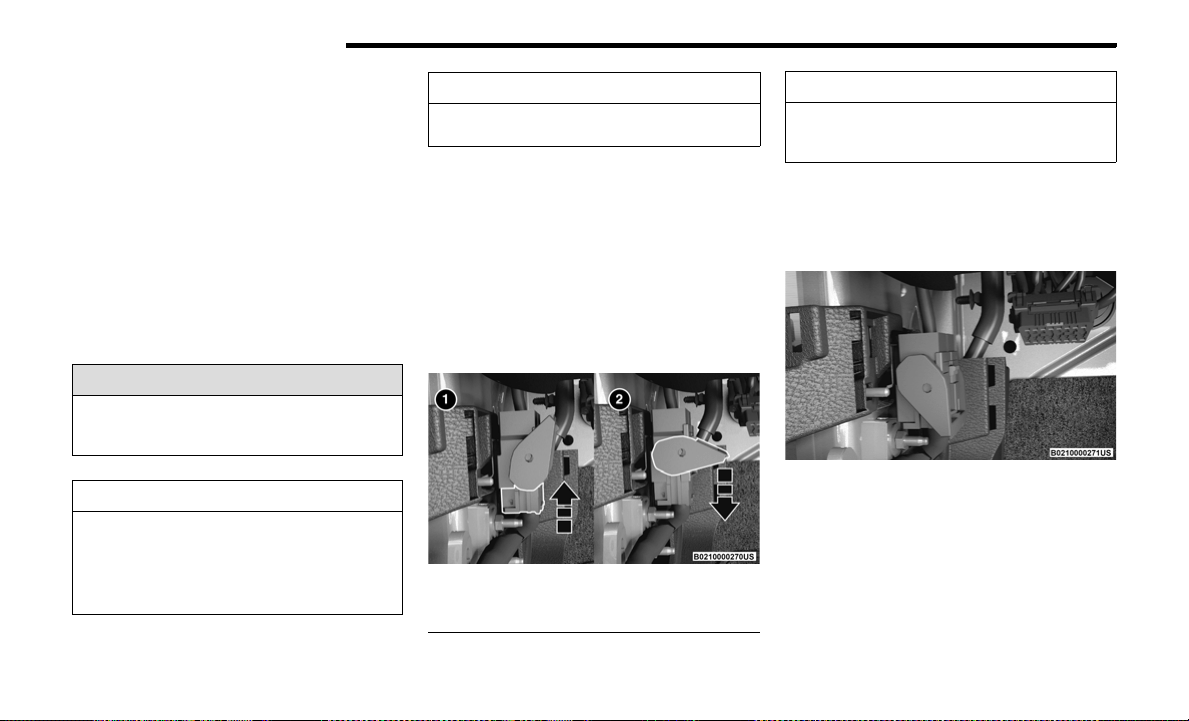
1. With light finger pressure, seat the wiring connector
straight
into the wiring harness until the wiring
harness lever starts to lower with the latching pin.
Connecting The Wiring Harness
2. After the harness lever has started to move with the
pressure of seating the wiring connector, continue by
lowering the wiring harness lever to the fully closed
position.
Fully Closed Position
3. Push the red locking tab downward to lock into place.
4. Attach the cloth strap of the door onto the metal hook
just inside the vehicle.
WARNING!
To avoid personal injury be sure to keep your arms,
hands, fingers and all objects clear of the check arm
area during the removal and installation procedures.
CAUTION!
Do not close the door before reattaching the
door check to the body. Damage may occur to
the door check.
Do not overtighten Torx fasteners, damage to the
vehicle’s parts will occur.
Hinge pins can break if overtightened during door
install (Max Torque: 6.0 ft· lb/8.1 N·m).
1 — Seat Connector Straight Into Harness
2 — Wiring Harness Lever Starts To Lower
CAUTION!
CAUTION!
Failure to correctly reconnect the wiring connector into
the harness will result in damage that is not covered by
the New Vehicle Warranty.
23_JT_OM_EN_USC_t.book Page 28
Loading ...
Loading ...
Loading ...