Loading ...
Loading ...
Loading ...
NCE
MUFFLER
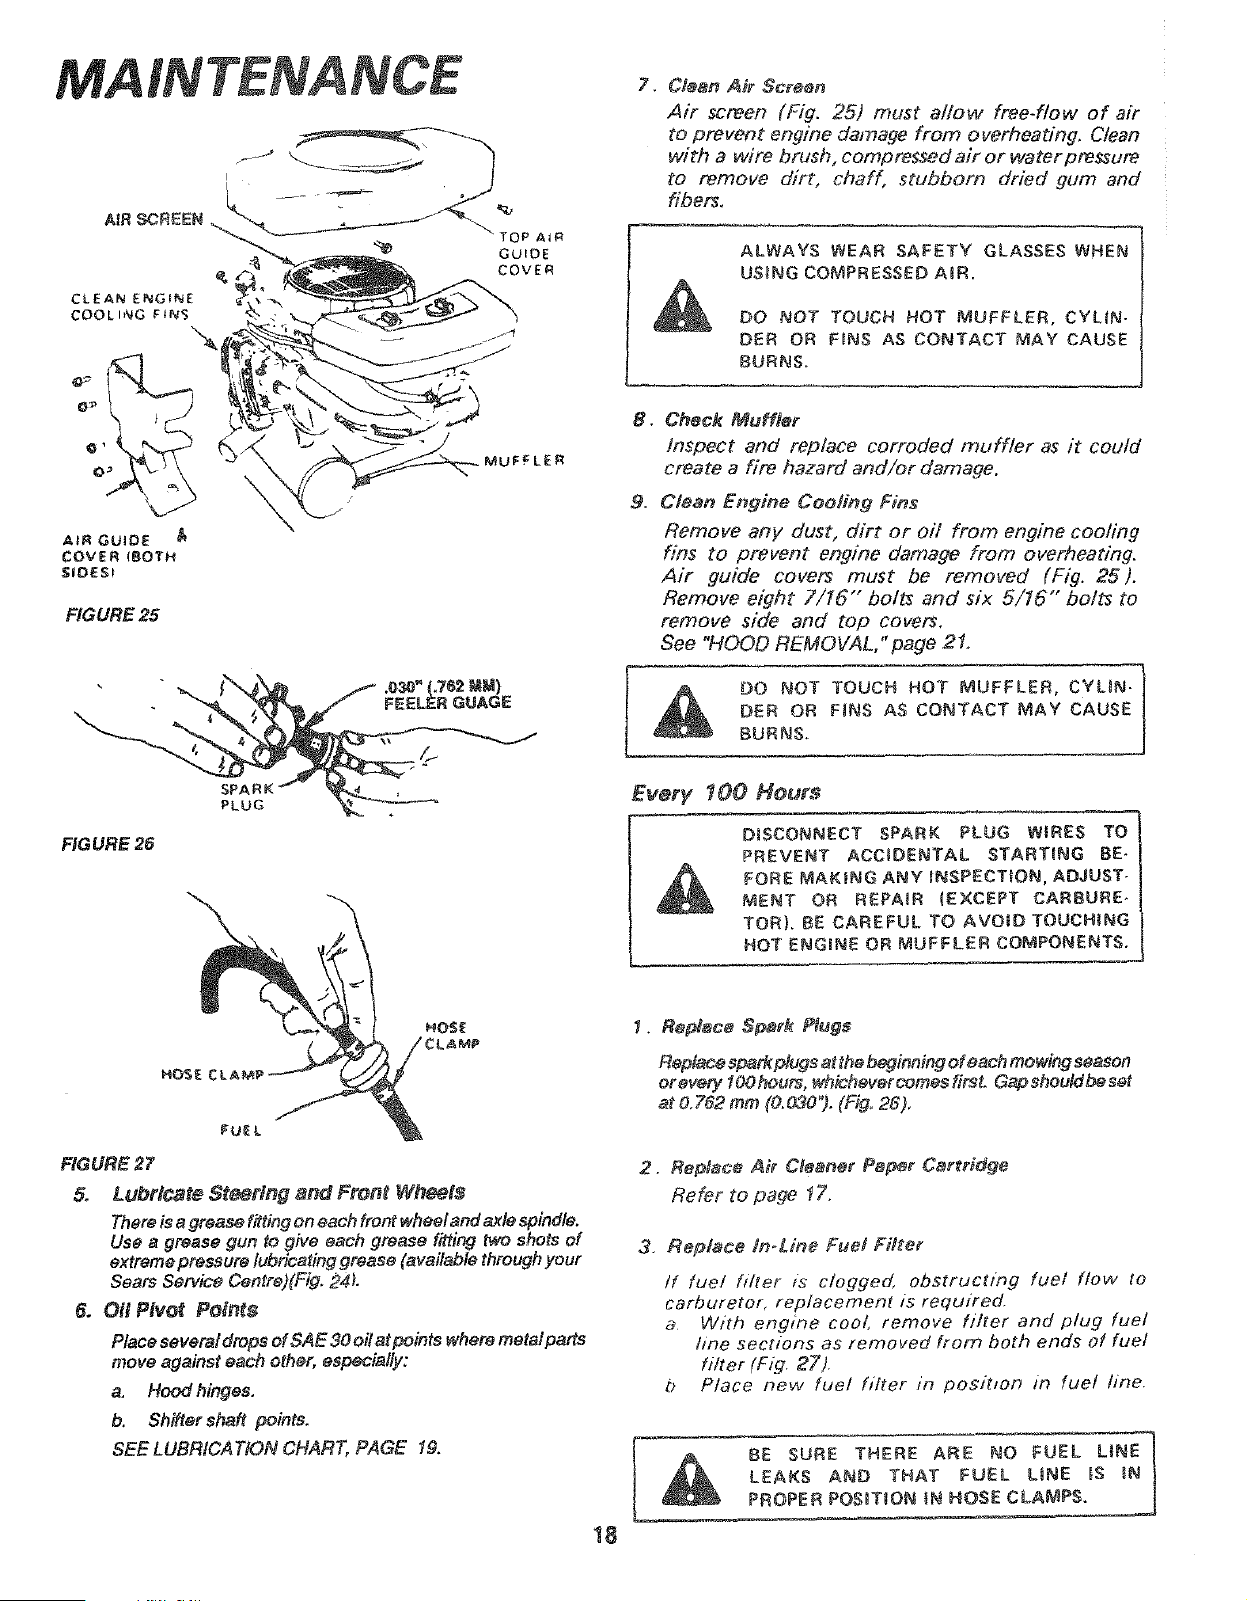
FIGURE 25
FIG URE 26
SPA I
PLUG
\
7. CJean Air Screen
Air screen (Fig. 25) must allow free-flow of air
to prevent engine damage from overheating, Clean
with a wire brush, compressed air or water pressure
to remove dirt, chaff, stubborn dried gum and
fibers,
ALWAYS WEAR SAFETY GLASSES WHEN
USING COMPRESSED AiR.
DO NOT TOUCH HOT MUFFLER, CYLIN-
DER OR FINS AS CONTACT MAY CAUSE
8URNS.
, Chock MuHler
Inspect and replace corroded muffler as it could
create a fire hazard and/or damage.
9. Clean Engine Cooling Fins
Remove any dust, dirt or oH from engine cooling
fins to prevent engine damage from over, heating.
Air guide covers must be removed (Fig. 25).
Remove eight 7/I6"" bolts and six 5/16" bolts to
remove side and top covers.
See "HOOD REMOVAL," page 2t.
DER OR F_NS AS CONTACT MAY CAUSE
BURNS.
EvefF 100 Hours
DISCONNECT SPARK PLUG W{RES TO
PREVENT ACCIDENTAL STARTING BE-
FORE MAKING ANY INSPECTION, ADJUST-
MENT OR REPAIR {EXCEPT CARBURE*
TOR}. BE CAREFUL TO AVOID TOUCHING
HOT ENGmNE OR MUFFLER COMPONENTS.
FU_L
RGURE 27
5_ Lubricate St_rtng and Fron_ Wheels
There is a grease fitting on each front wheel and _le spindle.
Use a grease gun to give each grease fitting _o shots of
extreme pressure lubricating grease (available through your
Sears Service Centre)(Fig. 24L
6. Oit Pivof Poin_s
Place several drops ef SAE 30 oilat points where metai parts
move against each other, especially:
a, Hood hinges,
b. Shifter shaft points.
SEE LUBRICATION CHART, PAGE !&
18
1. Ro_ac_ £8:_r_ Piuge
Ropl_co sp_rk plugs at the beginning of each mowing season
er every l OOheurs, whichever comes first. Gap shoutd be set
at 0,762 mm (&&_O*). (Fig. 26),
.
Replaco Air CJeaner Pa_r Cartridge
Refer to page ! Zo
3. Replace/n_Line Fuel Fill'or
tf fuet h/zer is clogged, obstructing fuel flow to
carburetor, replacement is required.
a With engine cool, remove filter and plug fuel
hne sections as removed from both ends of fuel
biter (Fig_ 2_').
b P/ace new fuel filter _n posit_on m fuel fine.
_ BE SURE THERE ARE NO FUEL LiNE
LEAKS AND THAT FUEL L_NE _S _N
PROPER POS_T_ON _N HOSE CLAMPS.
Loading ...
Loading ...
Loading ...