Loading ...
Loading ...
Loading ...
9
ASSEMBLY
LEVER ADJUST
NOTE: The seat is shipped with the seat switch and seat
pan attached.
1. Cut any straps securing the seat assembly to the tractor.
Remove any packing material.
NOTE: Be careful not to cut the wiring harness connecting the
seat and the seat switch.
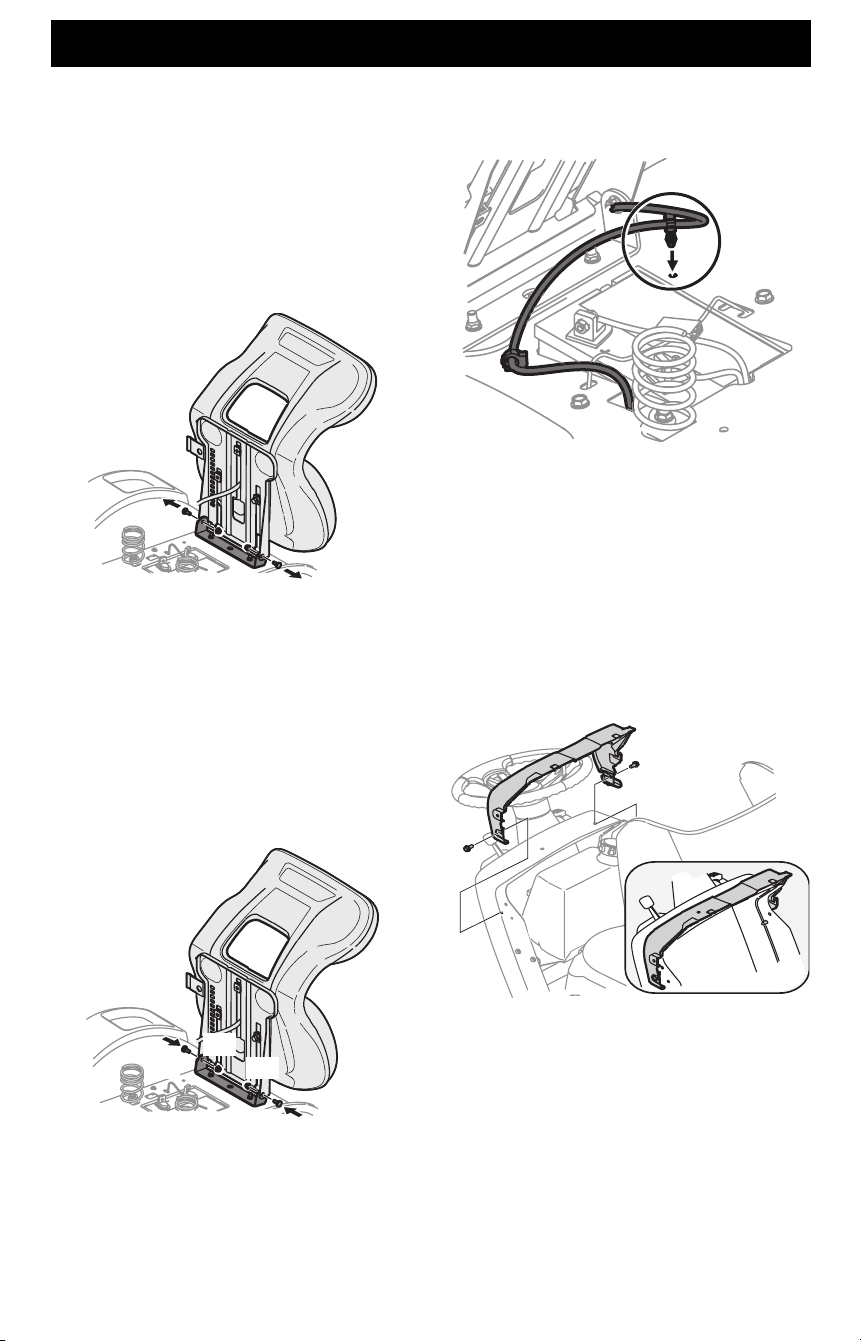
2. Remove the two shoulder bolts (a) and flange lock nuts (b) in
the seat pan as shown in Figure 5.
(a)
(a)
(b)
(b)
(b)
(b)
Figure 5
3. Rotate the seat into position and slide a Phillips screwdriver
through one of the seat-securing holes and seat bracket
for alignment.
4. With the previously removed shoulder bolts (a) and flange
lock nuts (b) secure one side of the seat and seat bracket.
While supporting the seat, remove the Phillips screwdriver
and secure the other side of the seat. Be careful not to crimp
or damage the wire harness while installing the seat. See
Figure 6. Torque to 84-103 in-lbs (10-12 N-m).
(a)
(b)
(a)
(b)
Figure 6
5. Using the harness clip attached to the harness, secure the
excess wire to the fender by snapping the harness clip in place
as shown in Figure 7.
Figure 7
Dash Shroud (If equipped)
1. If the dash shroud (a) was shipped loose, the hardware for
attaching the dash shroud (a) is shipped attached to the dash
shroud (a). Remove the two bolts (b) from the dash shroud
(a). See Figure 8.
2. Mount the dash shroud (a) and align the mounting holes
between the top of the dash and the dash shroud. See Figure 8.
3. Secure the dash shroud (a) to the dash (c) with the bolts (b)
removed in Step 1. See Figure 8.
(b)
(a)
(c)
(a)
(b)
Figure 8
Attaching the Hood Topper (If necessary/
If equipped)
NOTE: Be careful not to damage the headlight harness when
installing the hood topper.
1. Cut the cable ties securing the hood topper to the tractor.
2. Remove the four screws pre-installed in the hood topper and
retain for Step 4.
Loading ...
Loading ...
Loading ...