Loading ...
Loading ...
Loading ...
ENGLISH
6
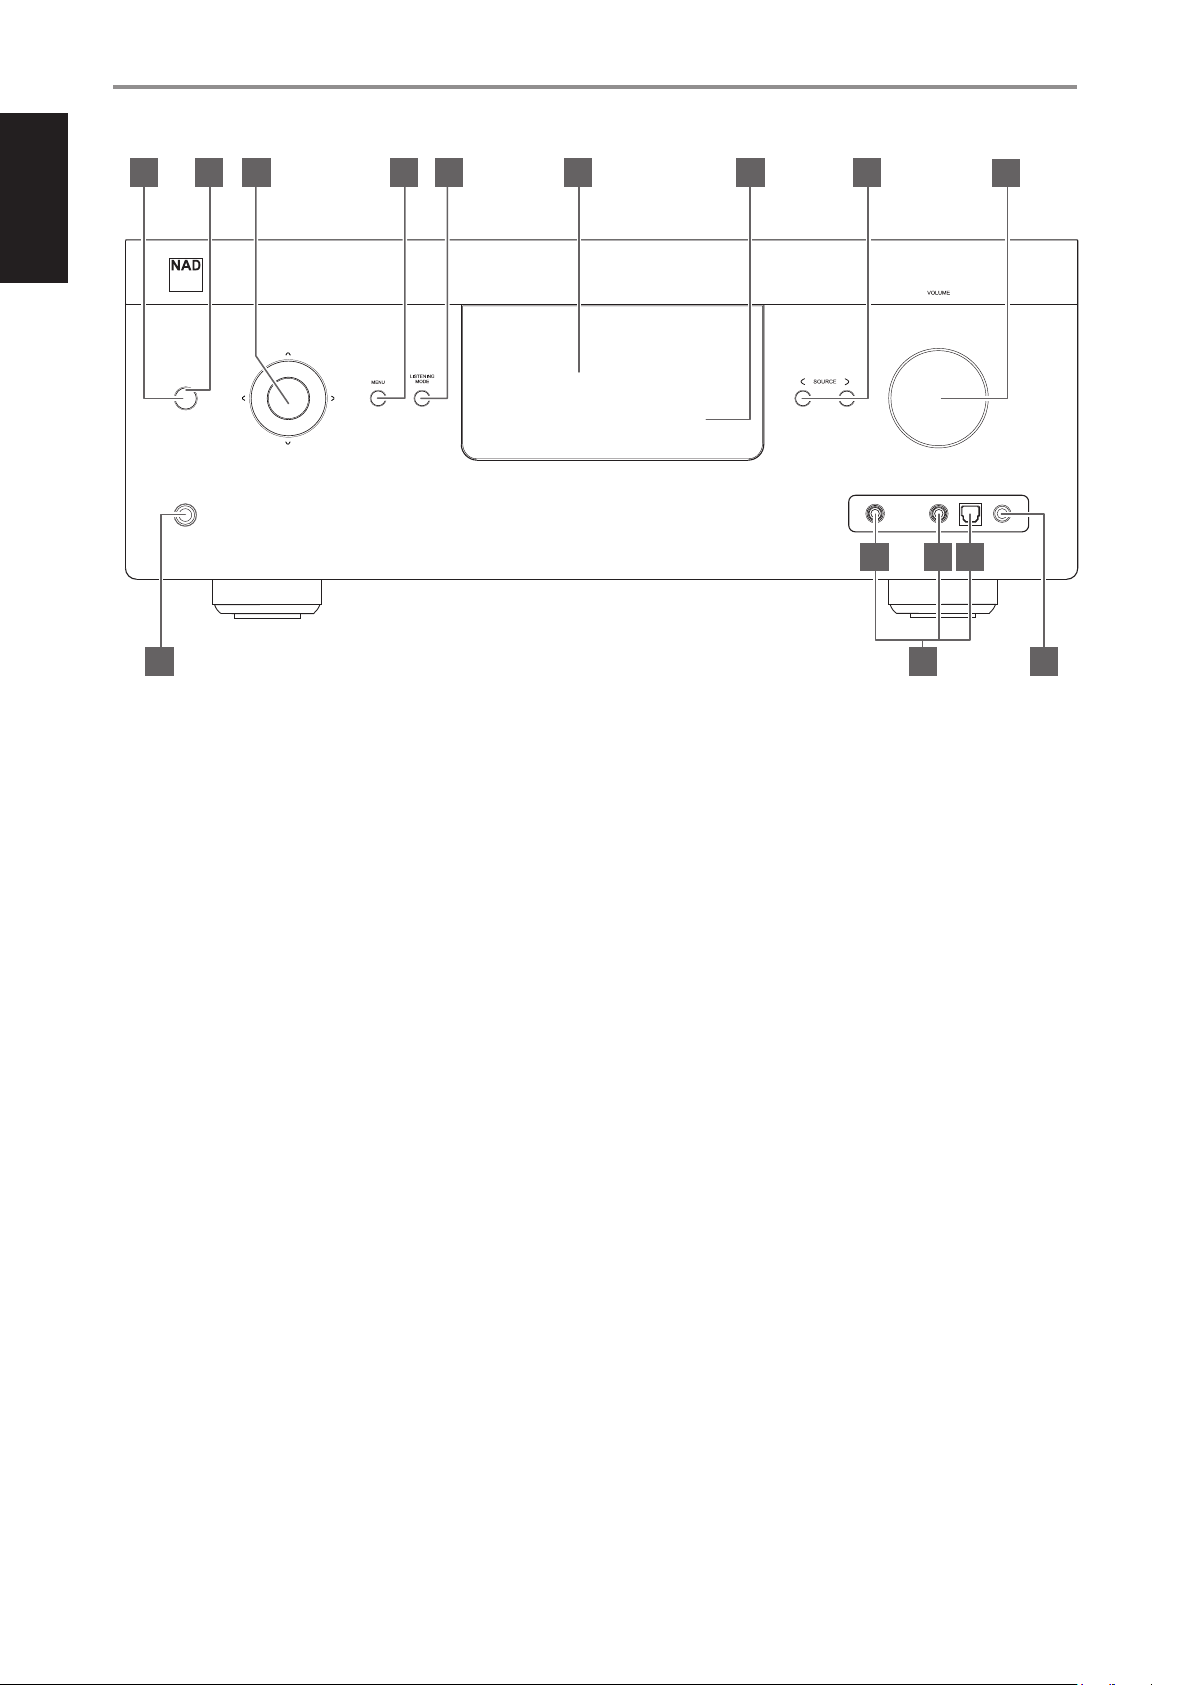
IDENTIFICATION OF CONTROLS
FRONT PANEL
1 STANDBY BUTTON
• Press this button to switch ON the T 758 from standby mode. The
Standby LED indicator will turn from amber to blue and illuminate
the VFD. Pressing the STANDBY button again turns the unit back to
standby mode.
• The T 758 can also be switched ON from standby mode by pressing
any of the front panel buttons.
2 STANDBY LED
• This indicator will light up amber when the T 758 is at standby
mode.
• When the T 758 is powered up from standby mode, this indicator
will illuminate blue.
• If Zone 2 is still ON and STANDBY button is pressed to switch the
T 758 to standby mode, the VFD will be extinguished but the
STANDBY LED remains illuminated blue. This indicates that Zone 2
is still active. In order to completely shut down the T 758 together
with Zone 2, press and hold STANDBY button until the STANDBY
LED turns amber.
3 NAVIGATION and ENTER BUTTONS
The navigation [ a/s/d/f ] and [ENTER] buttons have various
applications specic to given modes. The middle round button
designated as [ENTER] button; this is normally pressed to complete a
selection, procedure, sequence or other applicable functions.
4 MENU
• Press to activate or deactivate OSD menu.
5 LISTENING MODE
• Toggle to select through the various Listening mode options.
• Depending on the format of the currently selected input (digital
or analog, stereo or multichannel), various listening modes are
available.
• Refer also to the item about LISTENING MODE under the USING THE
T 758 - MAIN MENU segment of the OPERATION section.
6 VACUUM FLUORESCENT DISPLAY (VFD)
• Displays visual information about the current settings like the
active Source, volume level, listening mode, audio format and other
related indicators.
• Refer also to the item about FRONT PANEL DISPLAY SETUP under the
USING THE T 758 - SETUP MENU segment of the OPERATION section.
7 REMOTE SENSOR
• Point the AVR 4 remote control at the remote sensor and press the
buttons.
• Do not expose the remote sensor of the T 758 to a strong light
source such as direct sunlight or illumination. If you do so, you may
not be able to operate the T 758 with the remote control.
Distance: About 23ft (7m) from the front of the remote sensor.
Angle: About 30° in each direction of the front of the remote sensor.
8 a SOURCE s
• Toggle through the input selections - Source 1, Source 2, Source 3,
Source 7, Front Input and Media Player. More Sources can be directly
recalled upon enabling them at the Setup Menu.
• Refer also to the item about SOURCE SETUP under the USING THE
T 758 - SETUP MENU segment of the OPERATION section.
9 VOLUME
• The VOLUME control adjusts the overall loudness of the signal being
fed to the loudspeakers or headphones.
• Turn clockwise to increase the volume level; counter clockwise to
lower it.
© NAD T 758
AUDIO FRONT
MIC/MP
L R
(MONO)
AV Surround Sound Receiver T 758
3 4 5 6 7 8
10
CB
1 2
A
1211
9
Loading ...
Loading ...
Loading ...