Loading ...
Loading ...
Loading ...
W415-1407 / 11.20.14
46
EN
A. Remove optional front, see “AFK82/RFK82
FACING KIT INSTALLATION” section.
B. Tilt the control panel forward and remove
allowing access to the electrode box which is
screwed to the base of the fi rebox.
C. Pull back on the battery compartment door
latch and remove.
D. Install battery.
E. Reinstall battery compartment and control
doors.
A. Remove safety screen, refer to “SAFETY SCREEN
REMOVAL / INSTALLATION” section.
B. Optional Front Removal.
Pull on the top of the optional front away from
the appliance until the male portion of the latch
disengages. Tilt forward slightly and lift from the 4
shoulder screws (if installed).
C. Control Panel Removal
Tilt control panel away from the door and lift from
slots.
D. Turn Power and Gas off to the appliance.
E. Door Removal. See “DOOR REMOVAL” section.
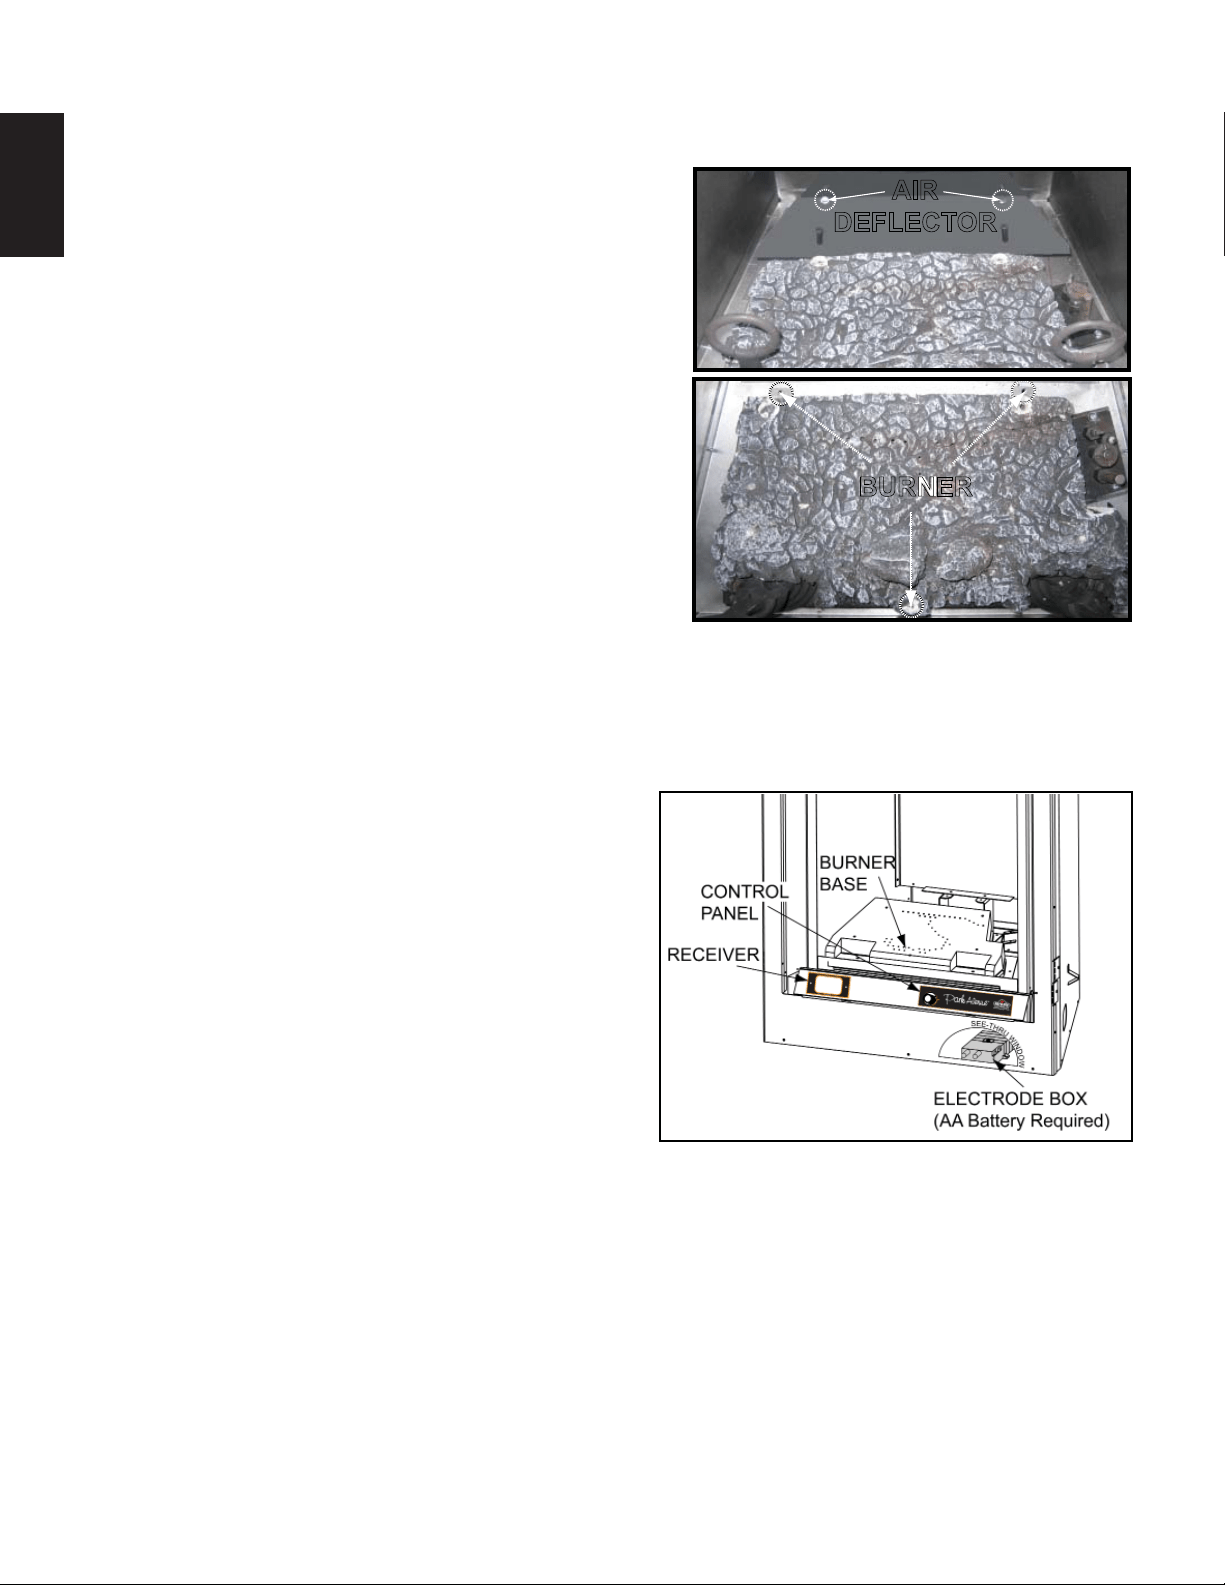
F. Burner Removal
Start by removing the logs being careful since
the logs may still be warm. Remove the 2 screws
holding the air defl ector then remove the 3 screws
holding the burner. Lift burner from fi rebox.
G. Remove the 5 screws securing the burner base. Once the gas has been disconnected, the valve train
assembly will lift out. Service components as required.
AIR
DEFLECTOR
BURNER
11.1 BURNER AND VALVE REPLACEMENT
11.2 SPARK MODULE BATTERY INSTALLATION
Loading ...
Loading ...
Loading ...