Loading ...
Loading ...
Loading ...
EN
37
Cleaning and maintenance
www.bora.com
8 Cleaning and
maintenance
Observe all safety and warning information
(see the Safety section).
INFO Clean the stainless steel surfaces in the polishing
direction only.
Regular cleaning and maintenance ensures the
longevity of the product and optimal function.
Adhere to the following cleaning and maintenance cycles:
Component Cleaning cycle
Cooktop extractor interior and
surface
After cooking very greasy dishes;
at least once a week
Cover flap, grease filter and
filter tray
After cooking very greasy dishes;
at least once a week
Maintenance tray as required (when the activated
charcoal filter is replaced at the
latest for recirculation mode)
Activated charcoal filter
(with recirculation only)
Replace if odours have built up or
the service life has expired
(see Filter service display)
Knob ring/Knob housing Immediately after every soiling
Tab. 8.1 Cleaning cycles
8.1 Cleaning agents
INFO Due to the use of aggressive cleaning agents and
abrasion caused by the pot bases the surface will
become damaged and dark stains will occur.
Never use steam cleaners, abrasive sponges, scouring
pads or chemically aggressive cleaning agents
(e.g. oven cleaner spray).
Make sure that the cleaning agent does not contain
any sand, soda, acids, lyes or chloride.
8.2 Cleaning the cooktop extractor
Grease particles and limescale residues from cooking
vapours can settle on the surface and in the extraction
system.
Clean the components of the cooktop extractor in
accordance with the cleaning intervals.
Remove the cover flap, grease filter and filter tray prior
to cleaning.
Clean the surfaces using a soft, damp cloth, detergent
or a mild window cleaning agent.
Soften dried on dirt using a damp cloth
(do not scrape it off!).
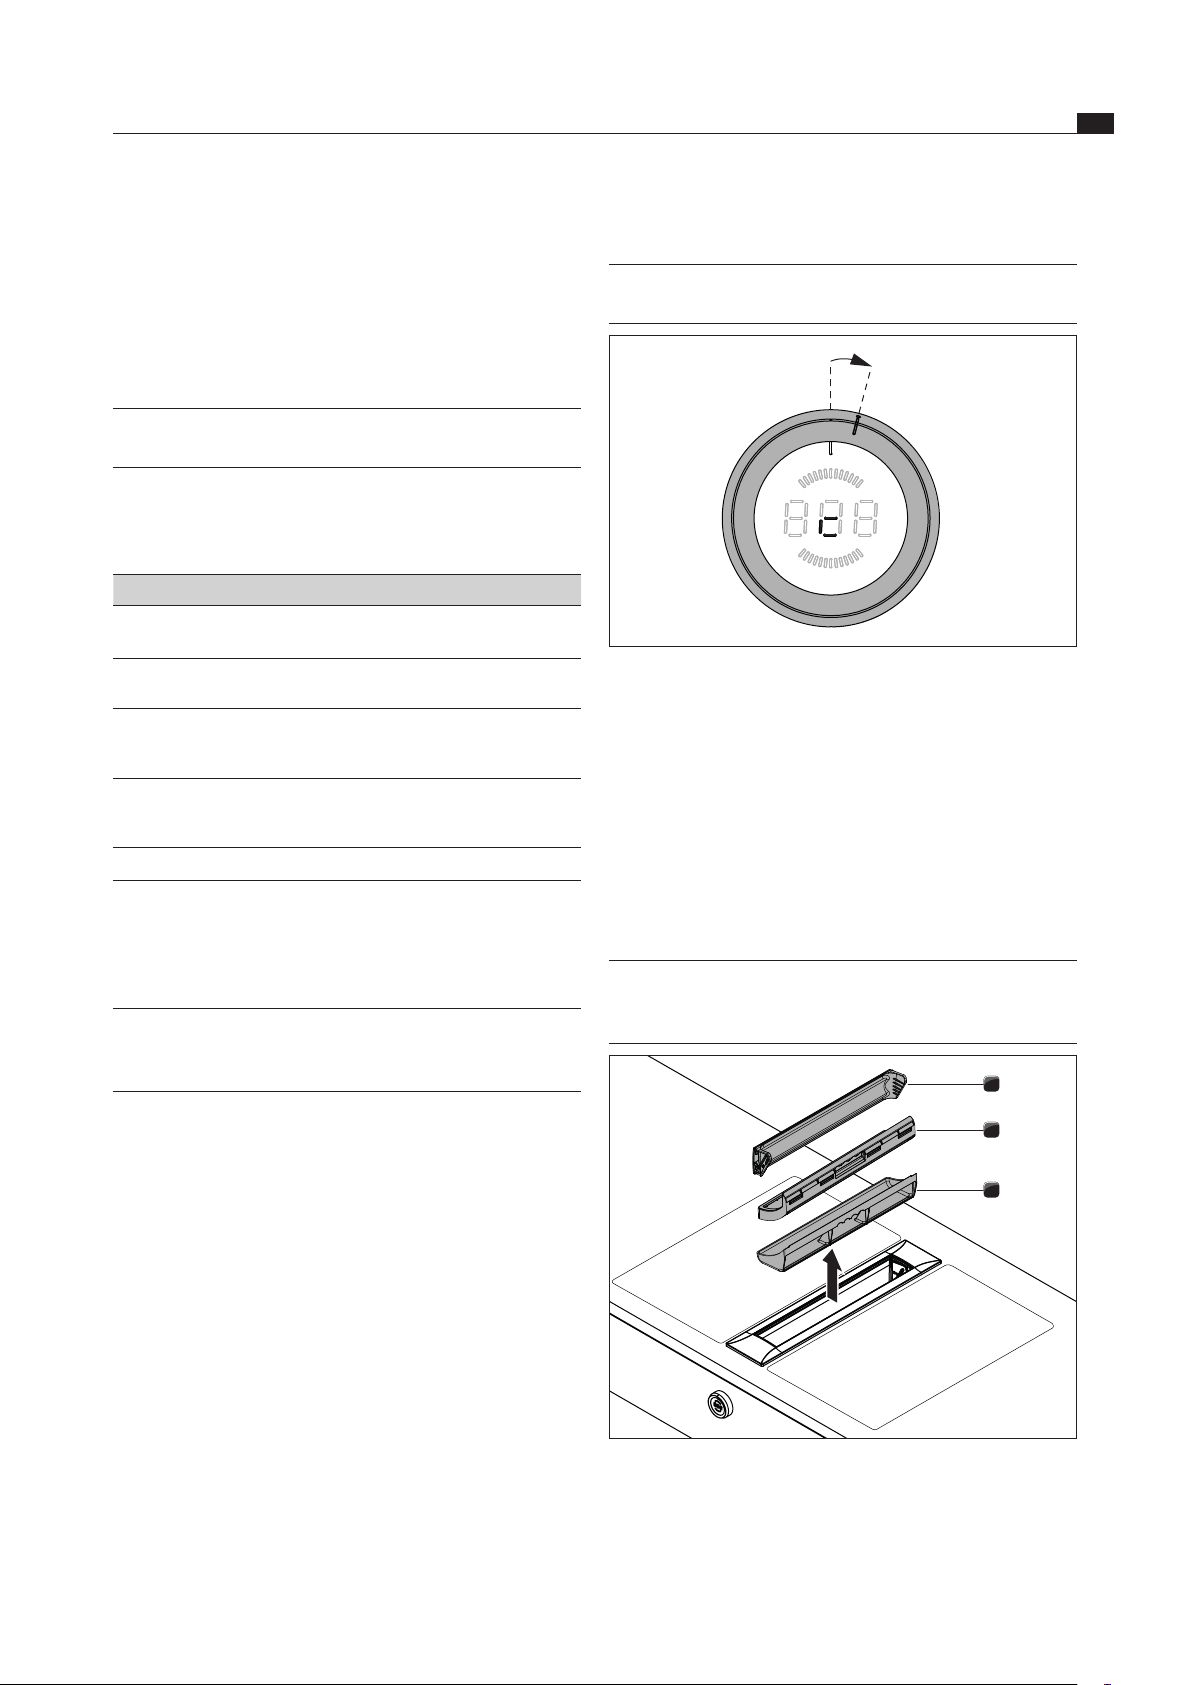
8.2.1 Cleaning position for cover flap
INFO The cleaning position is between the 12 o’clock
position and the 1 o’clock position.
15°
Fig. 8.1 Cleaning position
Make sure that the cooktop extractor is switched off
(see the Operation section).
Turn the selector ring approximately 15° clockwise
from the 12 o’clock position until it lightly engages.
The display shows c and the cover flap opens.
The fan motor does not run or switches itself off if it
was running.
8.2.2 Removing the cover flap, the grease
filter and the filter tray
INFO The grease filter components can only be
removed if the cover flap is in the cleaning
position.
3
2
1
Fig. 8.2 Removing the grease lter components
[1] Cover flap
[2] Grease filter
[3] Filter tray
Loading ...
Loading ...
Loading ...