Loading ...
Loading ...
Loading ...
EN
24
Installation
www.bora.com
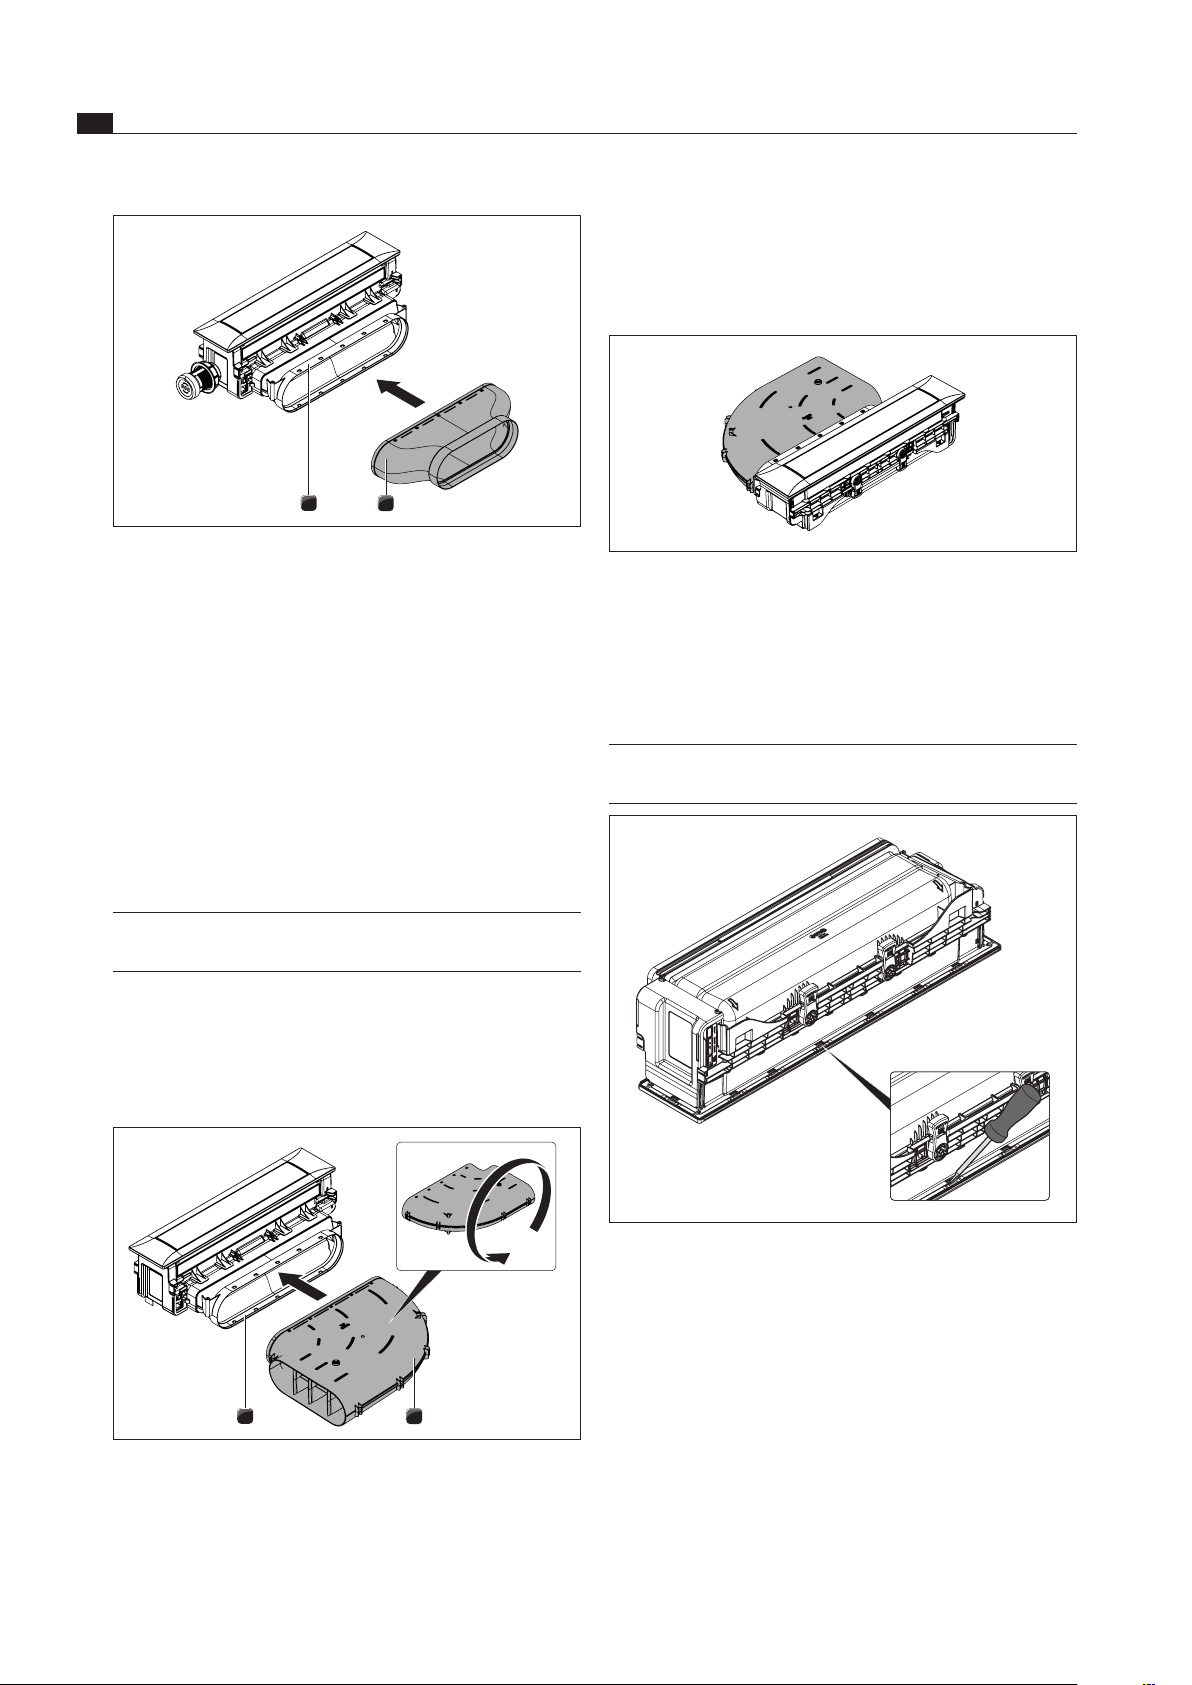
Turn the angled ducting piece [1].
Push the rotated angled ducting piece [1] back onto
the ducting piece adapter [2] until the fastening lugs
click into place.
Fig. 6.29 Airow to the left with angled ducting piece
Make sure that no air gap has formed between the
components.
Secure the holding plate.
Rotate the cover frame about 180°.
INFO In order to correct the direction of the cover
frame, it may need to be rotated around 180°.
Fig. 6.30 Dismounting the cover frame
Rotate the cooktop extractor and place it down
carefully with the visible surface on a soft surface
(e.g. a blanket).
Carefully undo the holding clamps (18x) with a
screwdriver.
2
1
Fig. 6.27 Mounting the straight ducting piece
[1] Straight ducting piece
[2] Ducting piece adapter
Push the straight ducting piece [1] onto the ducting
piece adapter [2] until the fastening lugs click into
place.
Make sure that no air gap has formed between the
components.
Secure the holding plate to the ducting piece adapter
[2] with just 2 screws.
6.7.2 Airflow to left
(installation rotated around 180°)
INFO The PKA cooktop extractor can be fitted rotated
around 180° so that the airflow is to the left.
Airflow to the left with angled ducting piece
Dismount the holding plate and the angled ducting
piece (see Airflow straight to the side).
Rotate the cover frame around 180°
(see Rotating the cover frame around 180°).
2
1
Fig. 6.28 Turn angled ducting piece
[1] Angled ducting piece
[2] Ducting piece adapter
Loading ...
Loading ...
Loading ...