Loading ...
Loading ...
Loading ...
OPERATION
DEPTH OF CUT
As previously mentioned, the depth of cut is important be-
cause it affects the rate of feed which, in fLu'n,affects the
quality of a cut (and, also, the possibility of damage to your
bit). A deep cut requires a slower feed than a shallow one, and
a too deep cut will cause you to slow the feed so much that
the bit is no longer cutting, it is scraping, instead.
Making a deep cut is never advisable. The smaller bits --
especially those only 1/16 in. in diameter-- are easily broken
off when subjected to too much side thrust. A large enough bit
may not be broken off, but if the cut is too deep a rough cut
will result -- and it may be very difficult to guide and control
the bit as desired. For these rea_sona,we recommend that
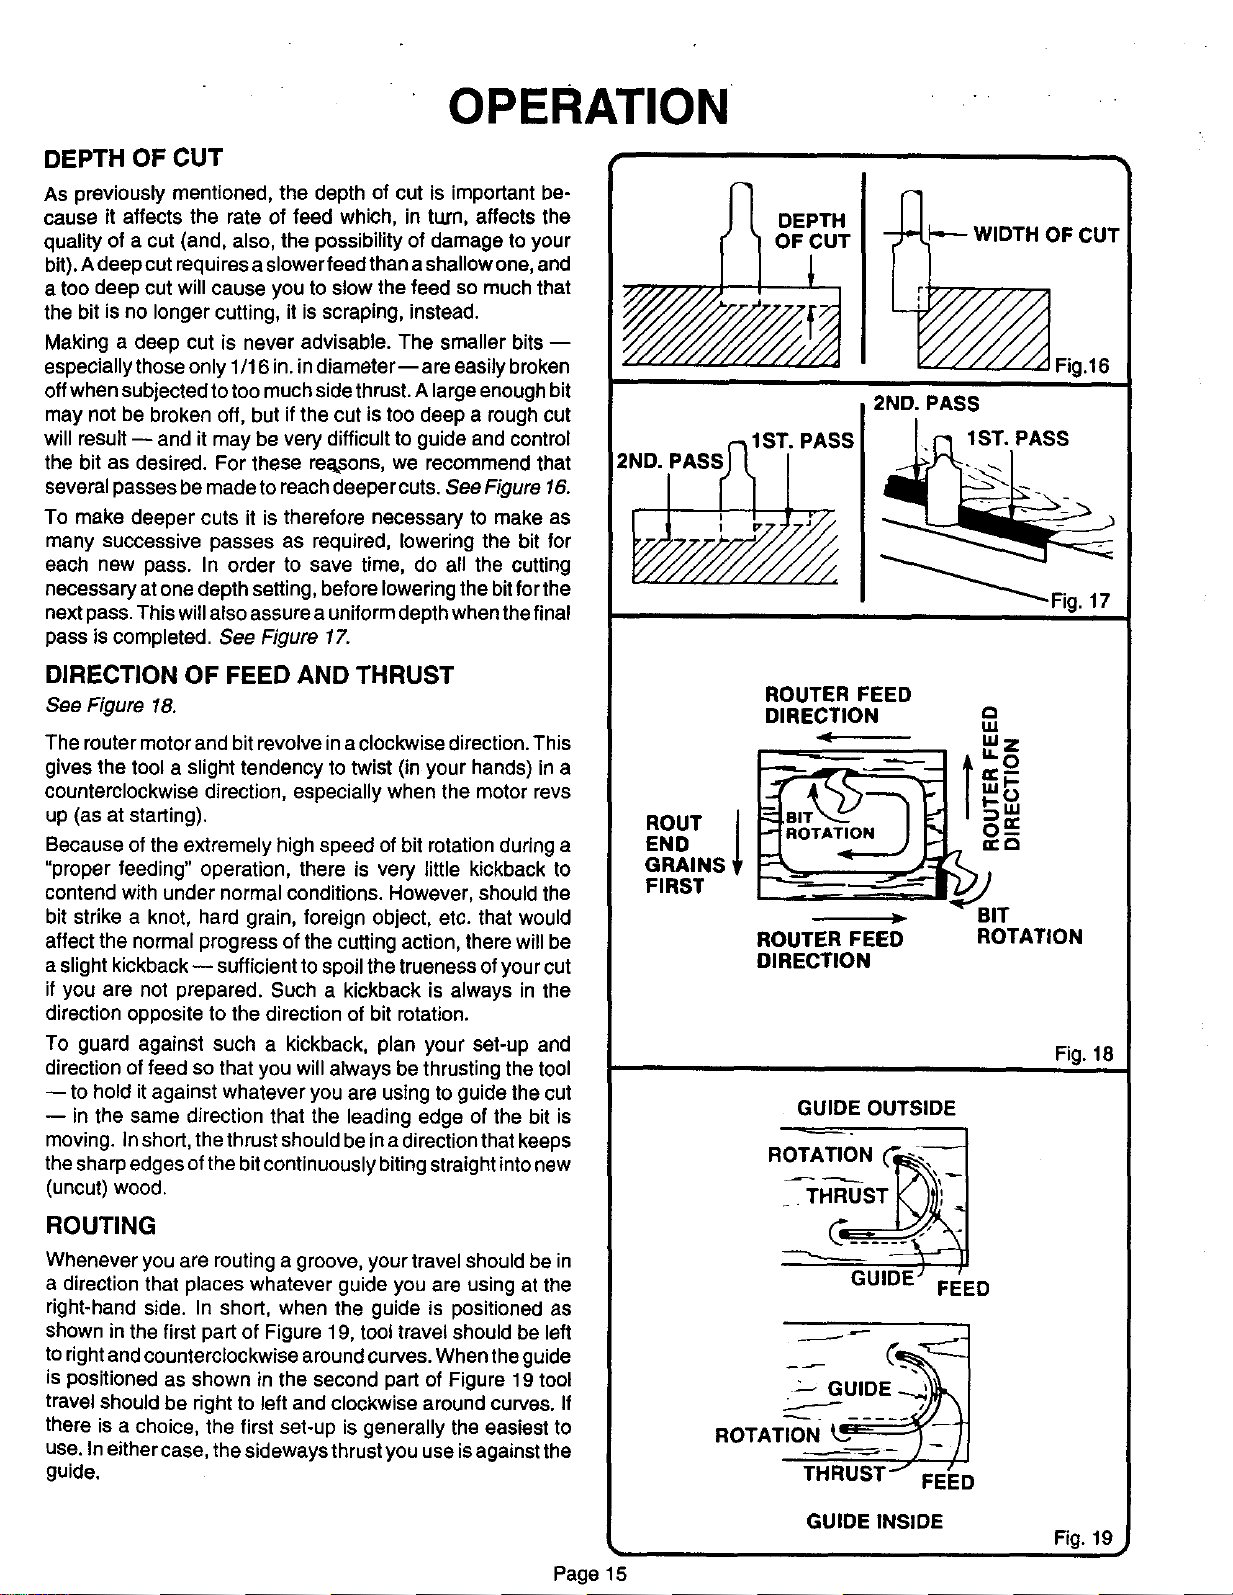
several passes be made to reach deeper cuts. See Figure 16.
To make deeper cuts it is therefore necessary to make as
many successive passes as required, lowering the bit for
each new pass. In order to save time, do all the cutting
necessary at one depth setting, before lowering the bit for the
next pass. This will also assure a uniform depth when the final
pass is completed. See Figure 17.
DIRECTION OF FEED AND THRUST
See Figure 18.
The router motor and bit revolve in a clockwise direction. This
gives the tool a slight tendency to twist (in your hands) in a
counterclockwise direction, especially when the motor revs
up (as at starting).
Because of the extremely high speed of bit rotation during a
"proper feeding" operation, there is very little kickback to
contend with under normal conditions. However, should the
bit strike a knot, hard grain, foreign object, etc. that would
affect the normal progress of the cutting action, there will be
a slight kickback-- sufficient to spoil the trueness of your cut
if you are not prepared. Such a kickback is always in the
direction opposite to the direction of bit rotation.
To guard against such a kickback, plan your set-up and
direction of feed so that you will always be thrusting the tool
-- to hold it against whatever you are using to guide the cut
-- in the same direction that the leading edge of the bit is
moving. Inshort, the thrust should be in a direction that keeps
the sharp edges of the bit continuously biting straight intonew
(uncut) wood.
ROUTING
Whenever you are routing a groove, your travel should be in
a direction that places whatever guide you are using at the
right-hand side. In short, when the guide is positioned as
shown in the first part of Figure 19, tool travel should be left
to rightand counterclockwise aroundcurves. When the guide
is positioned as shown in the second part of Figure 19 tool
travel should be right to left and clockwise around curves. If
there is a choice, the first set-up is generally the easiest to
use. In either case, the sideways thrustyou use isagainst the
guide,
k
Page 15
DEPTH
OF _UT
I 2ND. PASS
_ 1ST. PASS I I_.rl 1ST. PASS
2ND.PASSl I / , I
ROUT 1
END
GRAINS
FIRST
ROUTER FEED
D'REC2'O"
BIT
ROUTER FEED ROTATION
DIRECTION
Fig. 18
GUIDE OUTSIDE
'O
GUIDE INSIDE
Fig. 19
Loading ...
Loading ...
Loading ...