Loading ...
Loading ...
Loading ...
ADJUSTMENTS
DEPTH OF CUT ADJUSTMENTS
See Figures 6, 7 and 8.
When routinga groove thatistoodeep tosafelycutinone pass,
itisbesttomake thecutinseveral passes. We recommend that
several passes be made to reach deeper cuts.
Properdepthofcutdepends on severalfactors: powerofrouter
motor,typeofcutterbeing used,andtype ofwoodbeing routed.
A lightweight,low power router isdesigned for makingshallow
cuts. A router with high power rating can safely cut deeper.
Small bits,suchas 1/4 in.shank veiningbitswith1/16 in.cutting
diameters, are designed to remove only small amounts of
wood. Large bits, such as 1/2 in. shank straight-flutebits, are
made to remove larger amounts ofwood ina single pass. Cuts
can be made deeper in softwoods, such as white pine, than in
tough hardwoods,like oak or maple. Based upontheseconsid-
erations, choose a depth of cut that will not place excessive
strain on router motor. Ifyou find that extra force is needed or
thatthe motorspeed slows down considerably, turnoff router
and raise the bit.Then, make the cut in two or more passes.
TO SET DEPTH OF CUT
1. UNPLUG YOUR ROUTER.
WARNING: 1
Failure to unplug your router could result in accidental
starting causing serious_injury.
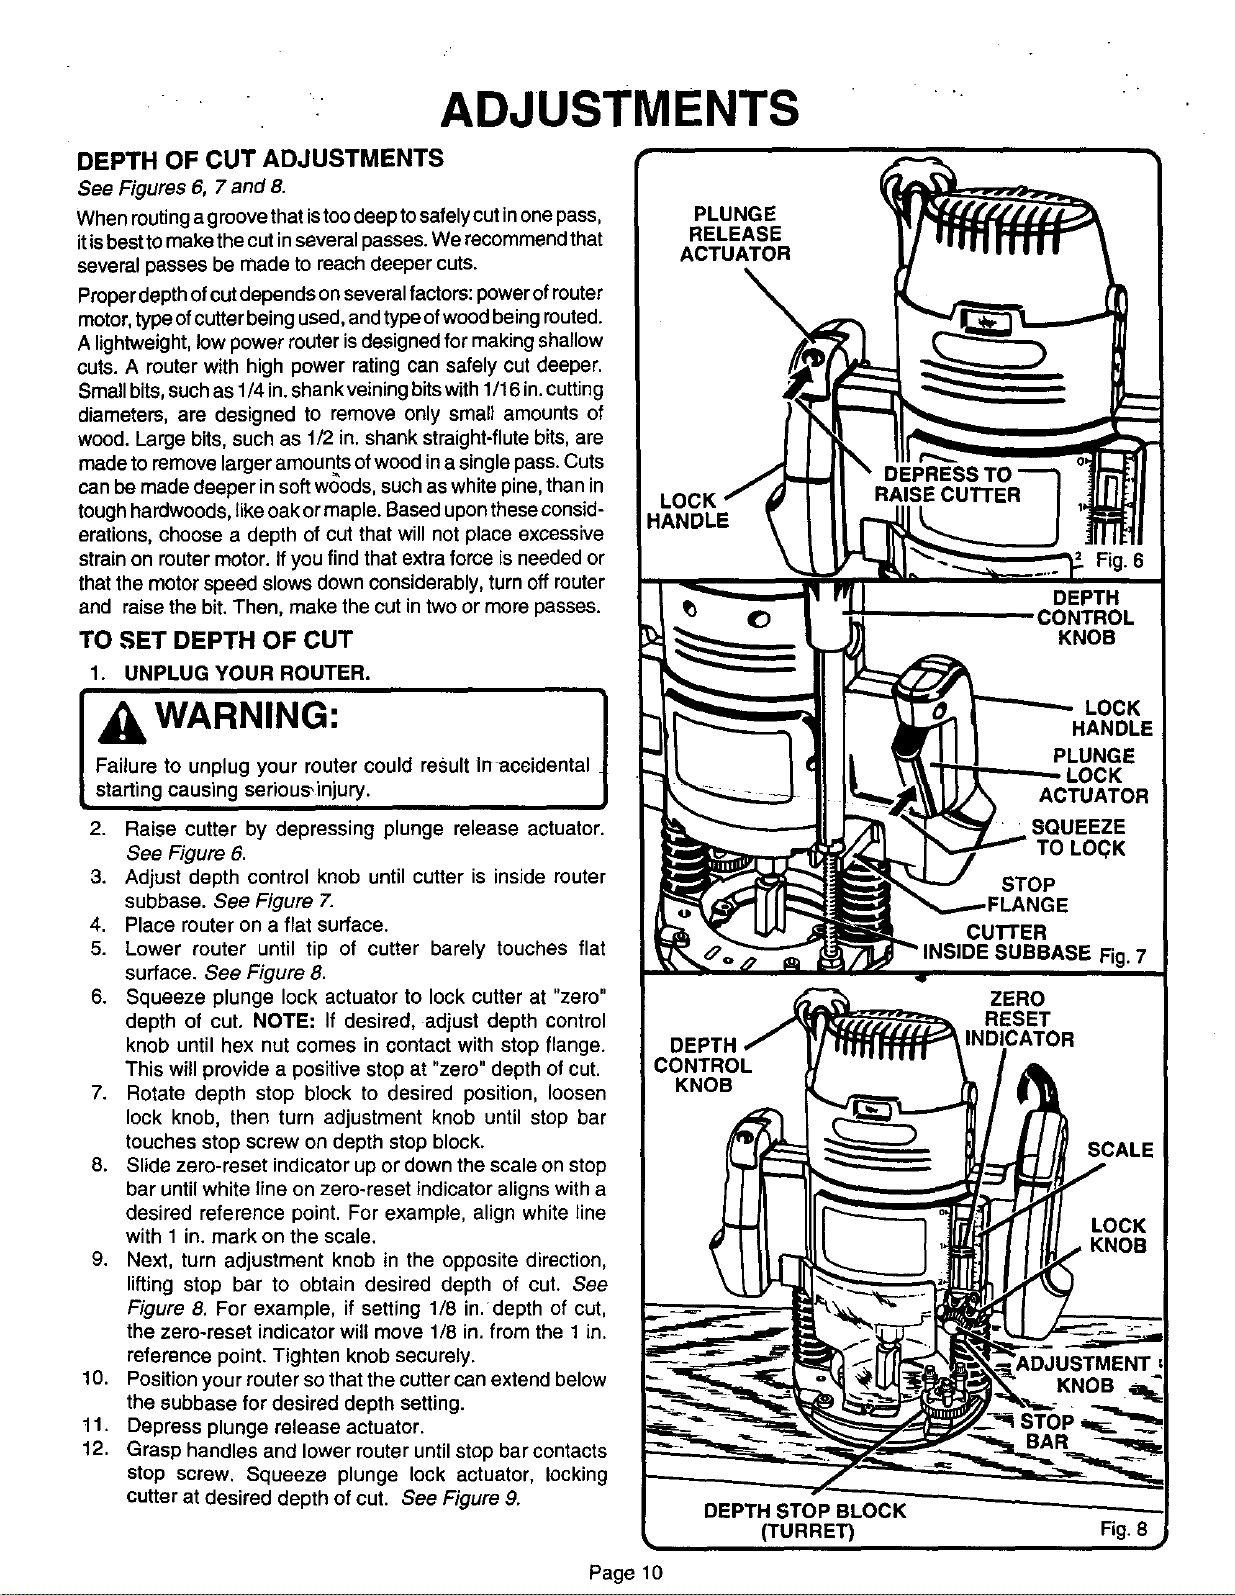
2. Raise cutter by depressing plunge release actuator.
See Figure 6.
3, Adjust depth control knob until cutter is inside router
subbase. See Figure 7.
4. Place router on a flat surface.
5. Lower router until tip of cutter barely touches flat
surface. See Figure 8.
6. Squeeze plunge lock actuator to lock cutter at "zero"
depth of cut, NOTE: If desired, adjust depth control
knob until hex nut comes in contact with stop flange.
This will provide a positive stop at "zero" depth of cut.
7. Rotate depth stop block to desired position, loosen
lock knob, then turn adjustment knob until stop bar
touches stop screw on depth stop block.
8. Slide zero-reset indicator up or down the scale on stop
bar until white line on zero-reset indicator aligns with a
desired reference point. For example, align white line
with 1 in. mark on the scale.
9. Next, turn adjustment knob in the opposite direction,
lifting stop bar to obtain desired depth of cut. See
Figure 8. For example, if setting 1/8 in. depth of cut,
the zero-reset indicator will move 1/8 in. from the 1 in.
reference point. Tighten knob securely.
10. Position your router so that the cutter can extend below
the subbase for desired depth setting.
11. Depress plunge release actuator.
12. Grasp handles and lower router until stop bar contacts
stop screw, Squeeze plunge lock actuator, locking
cutter at desired depth of cut. See Figure 9.
"IANDLE
DEPRESS T(
RAISE CUTTER
Fig. 6
D_.-I.'THSTOP BLOCK
• (TURRET) Fig. 8
Page 10
Loading ...
Loading ...
Loading ...