Loading ...
Loading ...
Loading ...
adiustrnents
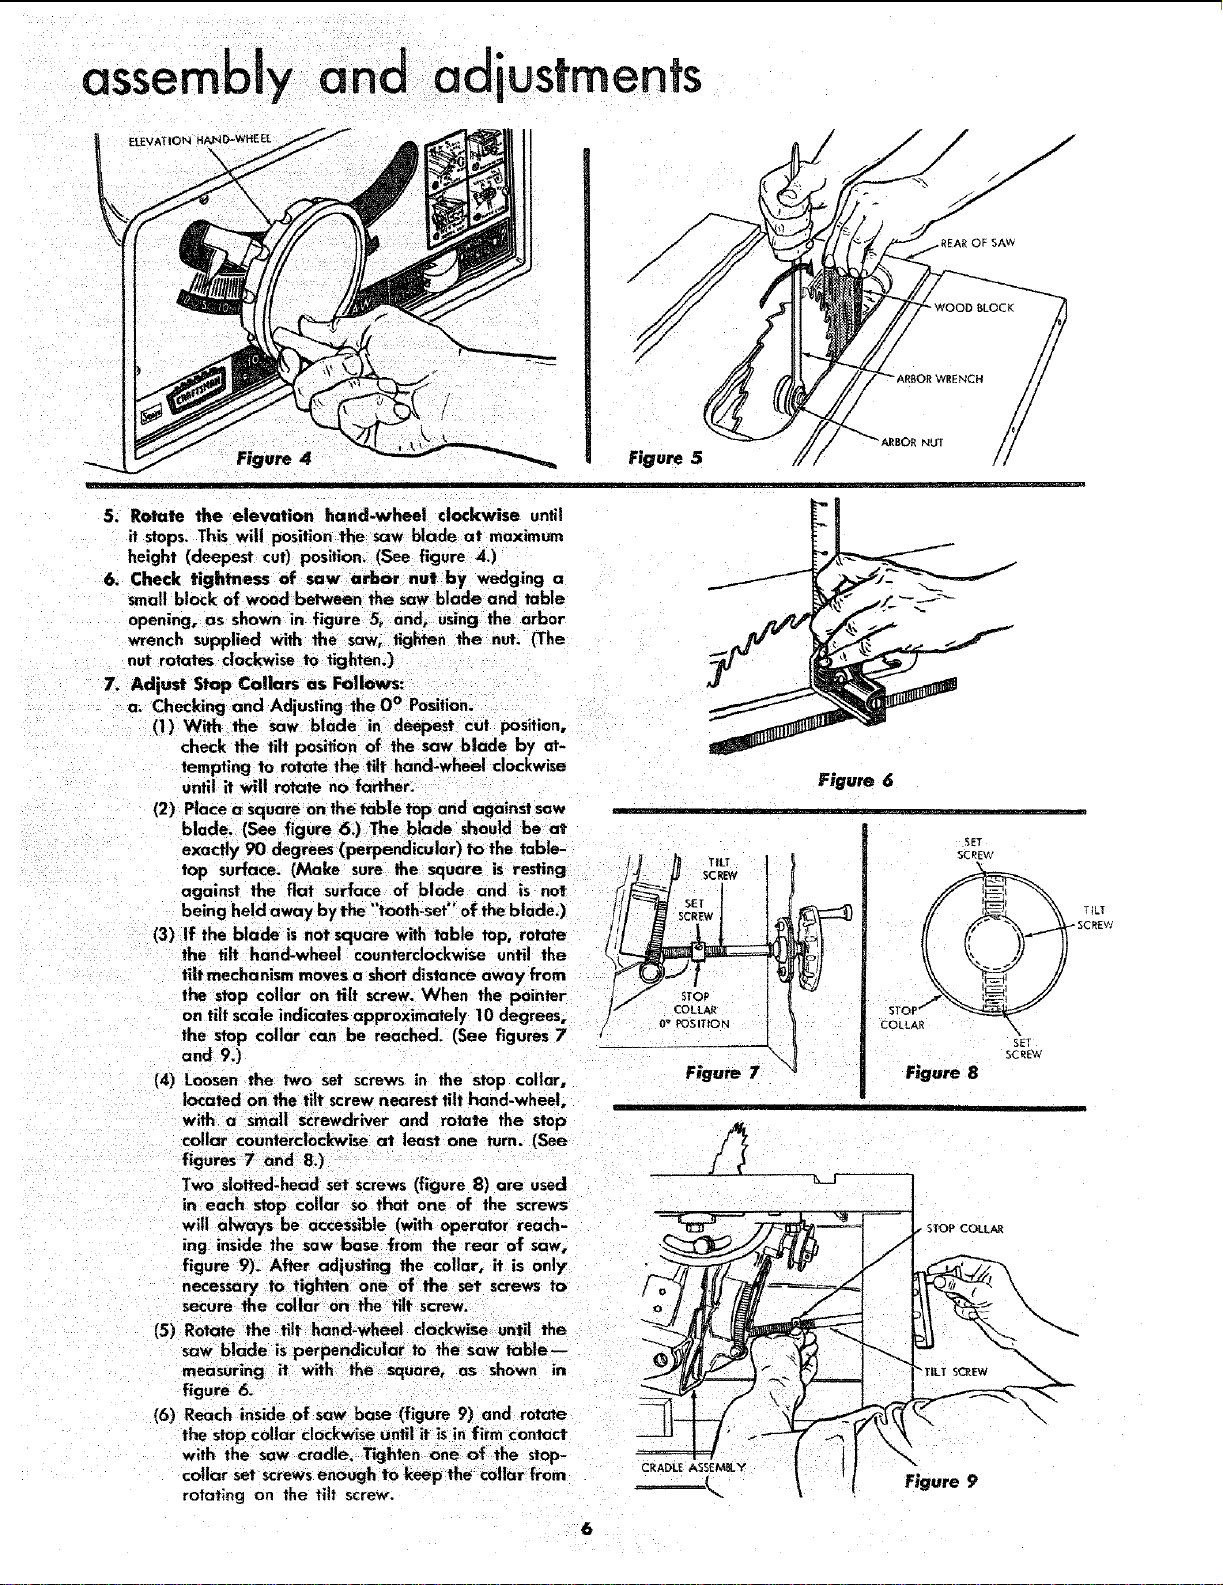
EL_VAT iON fl_D-WHE EL
F_u_ 4
ii
{ NUT
5. Rotate the elevation hand-wheel clockwise until
it stops. This will position the saw blade at maximum
height (deepest cut) position. (See figure 4.)
6. Check tightness of saw arbor nut by wedging a
small block of wood between the saw blade and table
opening, as shown in figure 5, and, using the arbor
wrench supplied with the saw, tighten the nut. (The
nut rotates clockwise to tighten.)
7. Adjust Stop Collars as Follows:
a. Checking and Adjusting the O° Position....
(1) With the saw blade in deepest cut position,
check the tilt position of the saw b|ade by at-
tempting to rotate the tilt hand-wheel clockwise
until it will rotate no farther.
(2) Place a square on the table top and against saw
blade. (See figure 6.) The blade should be at
exactly 90 degrees (perpendicular) to the table-
top surface. (Make sure the square is resting
against the flat surface of blade and is not
being held away by the "tooth-set" of the blade.)
(3) if the blade is not square with table top, rotate
the tilt hand-wheel counterclockwise until the
tilt mechanism movesa shortdistance away from
the stop collar on tilt screw. When the pointer
on tilt scale indicates approximately 10 degrees,
the stop collar can be reached. (See figures 7
and 9.)
(4) Loosen the two set screws in the stop collar,
located on the tilt screw nearest tilt hand-wheel,
with a small screwdriver and rotate the stop
collar counterclockwise at least one turn. (See
Figure 6
_H /_ T,LT I
0_ POSITION
Figure
/
.REAR OF SAW
SET
SCREW
_ T_LT
- SCREW
STOP " ____
COLLAR
SET
SCREW
Figure 8
(5)
(6)
Two slotted-head set screws (figure 8) are used
in each stop collar so that one of the screws
will always be accessible (with operator reach-
ing inside the saw base from the rear of saw,
figure 9)_ After adjusting the collar, it is only
necessary to tighten one of the set screws to
secure the Collar on the tilt screw.
Rotate the tilt hand-wheel clockwise until the
saw blade is perpendicular to the saw table--
Reach inside of saw base (figure 9) and rotate
the stop collar clockwise until it is in firm contact
with the saw cradle. Tighten one of the stop-
collar set screwsenough to keep the collar from
rotating on the tlit screw.
I
Loading ...
Loading ...
Loading ...