Loading ...
Loading ...
Loading ...
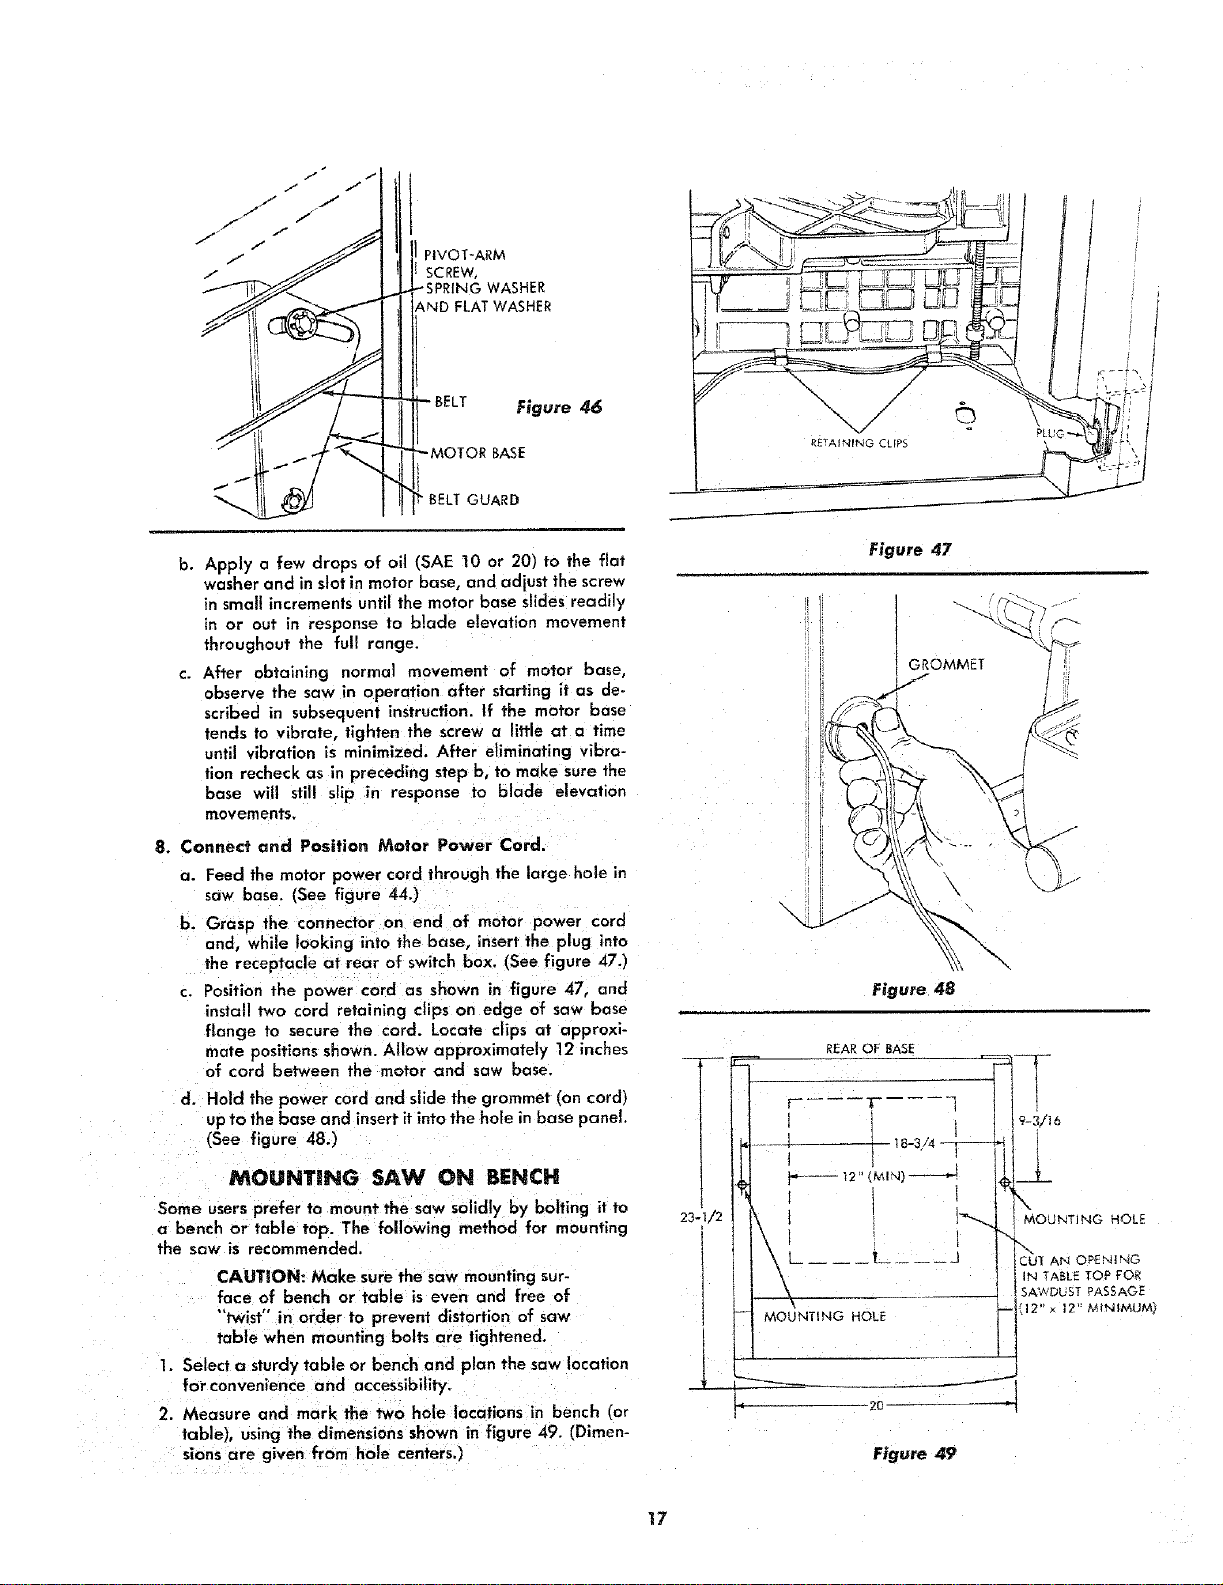
PIVOT-ARM
SCREW,
_iER
AND FLAT WASHER
Figure 46
-MOTOR BASE
BELT GUARD
Figure 47
b. Apply a few drops of oil (SAE 10 or 20] to the flat
washer and in slot in motor base, and adjust the screw
in small increments until the motor base slides readily
in or out in response to blade elevation movement
throughout the full range.
c. After obtaining normal movement of motor bose,
observe the saw in operation after starting it as de-
scribed in subsequent instruction. If the motor base
tends to vibrate, tighten the screw a little at a time
until vibration is minimized. After eliminating vibra-
tion recheck as in preceding step b, to make sure the
base will still slip in response to blade elevatian
movements.
8. Connect and Position Motor Power Cord.
a. Feed the motor power curd through the large hole in
saw base. (See figure 44.)
b. Grasp the connector on end of motor power cord
and, while looking into the base, insert the plug into
the receptacle at rear of switch box. (See figure 47.)
c. Position the power cord as shown in figure 47, and
install two cord retaining clips on edge of saw bose
flange to secure the cord. Locate clips at approxi-
mate positions shown. Allow approximately 12 inches
of cord between the motor and saw base,
d. Hold the power cord and slide the grommet (on cord)
upto the base and insert it into the hole in base panel.
(See figure 48.)
MOUNTmNG SAW ON BENCH
Some usersprefer to mount the saw solidly by bolting it to
a bench or table top. The following method for mounting
the sow is recommended.
CAUTION: Make sure the saw mounting sur-
face of bench or table is even and free of
"'twist" in order to prevent distortion of saw
table when mounting bolts are lightened.
1. Select a sturdy table or bench and plan the saw location
for convenience and accessibility.
2. Measure and mark the two hole locations in bench (or
table), using the dimensions shown in figure 49. [Dimen-
sions are given from hole centers.)
23-1/2
GROMMET i
\
\
Figure 48
REAR OF BASE
Figure 49
17
Loading ...
Loading ...
Loading ...