Loading ...
Loading ...
Loading ...
7 ŶEnglish
Indoor Unit Installation
2. /CMGVJGEGKNKPIQRGPKPIPGGFGFHQTKPUVCNNCVKQPYJGTGCRRNKECDNG
(For existing ceilings)
r Refer to the
'
template for ceiling opening dimensions.
r Create the ceiling opening required for installation. From the side of the opening to the casing outlet, implement the
refrigerant and drain piping and wiring for remote controller (unnecessary for wireless type) and wiring between units.
Refer to each Drain piping work or Wiring section.
r After making an opening in the ceiling, it may be necessary to reinforce ceiling beams to keep the ceiling level and to
prevent it from vibrating. Consult the builder for details.
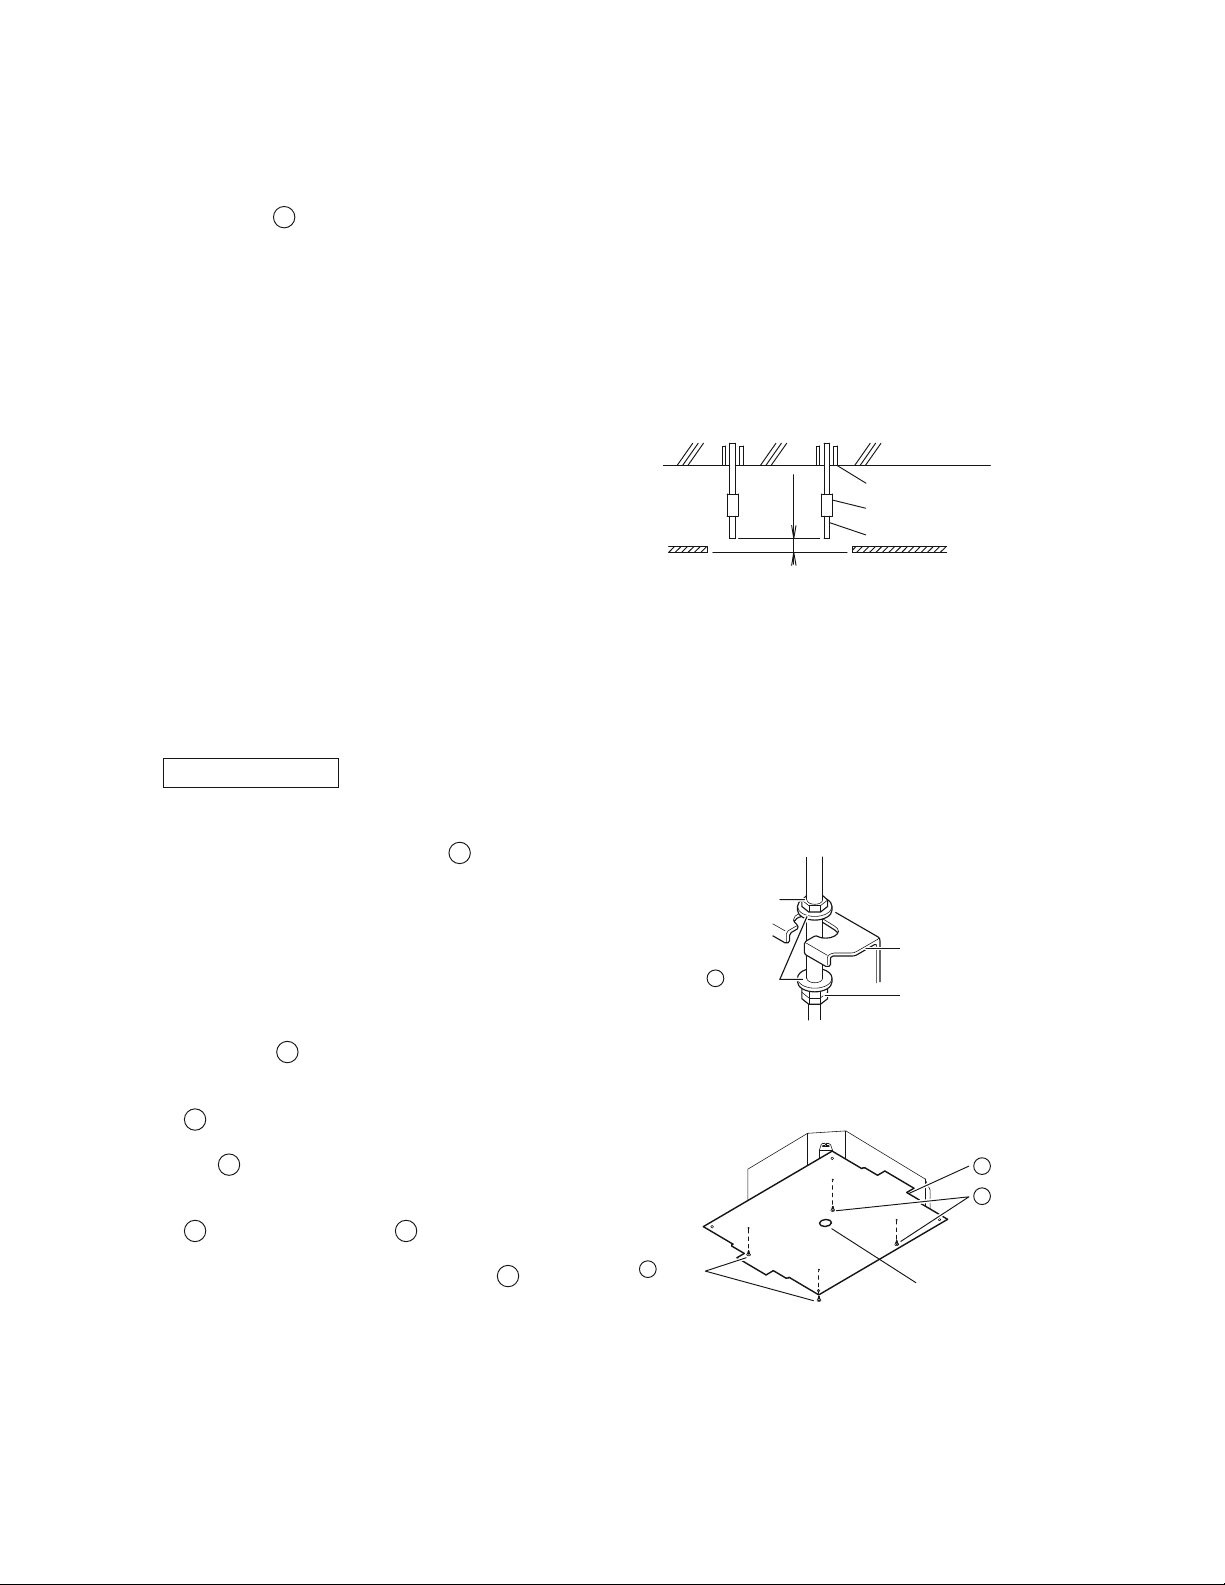
3. +PUVCNNKPIVJGUWURGPUKQPDQNVU
(Use either a M8-M10 size bolt or the equivalent)
Use a hole-in anchor for existing ceilings, and a sunken
KPUGTVUWPMGPCPEJQTQTQVJGTƂGNFUWRRNKGFRCTVUHQTPGY
ceilings to reinforce the ceiling to bear the weight of the unit.
Adjust clearance (2-4 inch (50-100mm)) from the ceiling
before proceeding further.
r #NNVJGCDQXGRCTVUCTGƂGNFUWRRNKGF
2-4
(50-100)
unit:inch (mm)
Anchor
Ceiling slab
Installation Example
Long nut or turn-buckle
Suspension bolt
False ceiling
4. Installing the indoor unit
9JGPKPUVCNNKPIQRVKQPCNCEEGUUQTKGUGZEGRVHQTVJGFGEQTCVKQPRCPGNTGCFCNUQVJGKPUVCNNCVKQPOCPWCNQHVJG
QRVKQPCNCEEGUUQTKGU&GRGPFKPIQPVJGƂGNFEQPFKVKQPUKVOC[DGGCUKGTVQKPUVCNNQRVKQPCNCEEGUUQTKGUDGHQTGVJG
KPFQQTWPKVKUKPUVCNNGF*QYGXGTHQTGZKUVKPIEGKNKPIUCNYC[UKPUVCNNHTGUJCKTKPVCMGMKVDGHQTGKPUVCNNKPIVJGWPKV
#UHQTVJGRCTVUVQDGWUGFHQTKPUVCNNCVKQPYQTMDGUWTGVQWUGVJGRTQXKFGFCEEGUUQTKGUCPFURGEKƂGFRCTVUFGUKIPCVGFD[
Daikin.
(QTPGYEGKNKPIU
1) Install the indoor unit temporarily.
r Attach the hanger bracket to the suspension bolt. Be sure
VQƂZKVUGEWTGN[D[WUKPICPWVCPF
C
washer from the
upper and lower sides of the hanger bracket.
Hanger bracket
Double nut
ƂGNFUWRRN[VKIJVGP
Nut
ƂGNFUWRRN[
9CUJGT
C
Securing the hanger bracket
2) Refer to the
'
template for ceiling opening dimension.
Consult the builder or carpenter for details.
r The center of the ceiling opening is indicated on the
'
template. This indication also indicates the center of the
unit.
r The
'
template can be rotated by 90° to be able to
indicate the correct dimensions on all 4 sides.
r After cutting the template from the packaging, attach the
'
template to the unit with
F
screws (×4) as shown in
ƂIWTG
r Ceiling height is shown on the side of the
'
template.
Adjust the height of the unit according to this indication.
Installation of template
Template
E
Screws
F
ScrewsF
Center of the ceiling opening
%GKNKPIYQTM
3) Adjust the unit to the right position for installation.
(Refer to 4GNCVKQPQHEGKNKPIQRGPKPIVQWPKVCPFUWURGPUKQPDQNVRQUKVKQP.)
Loading ...
Loading ...
Loading ...