
Loading ...
Loading ...
Loading ...
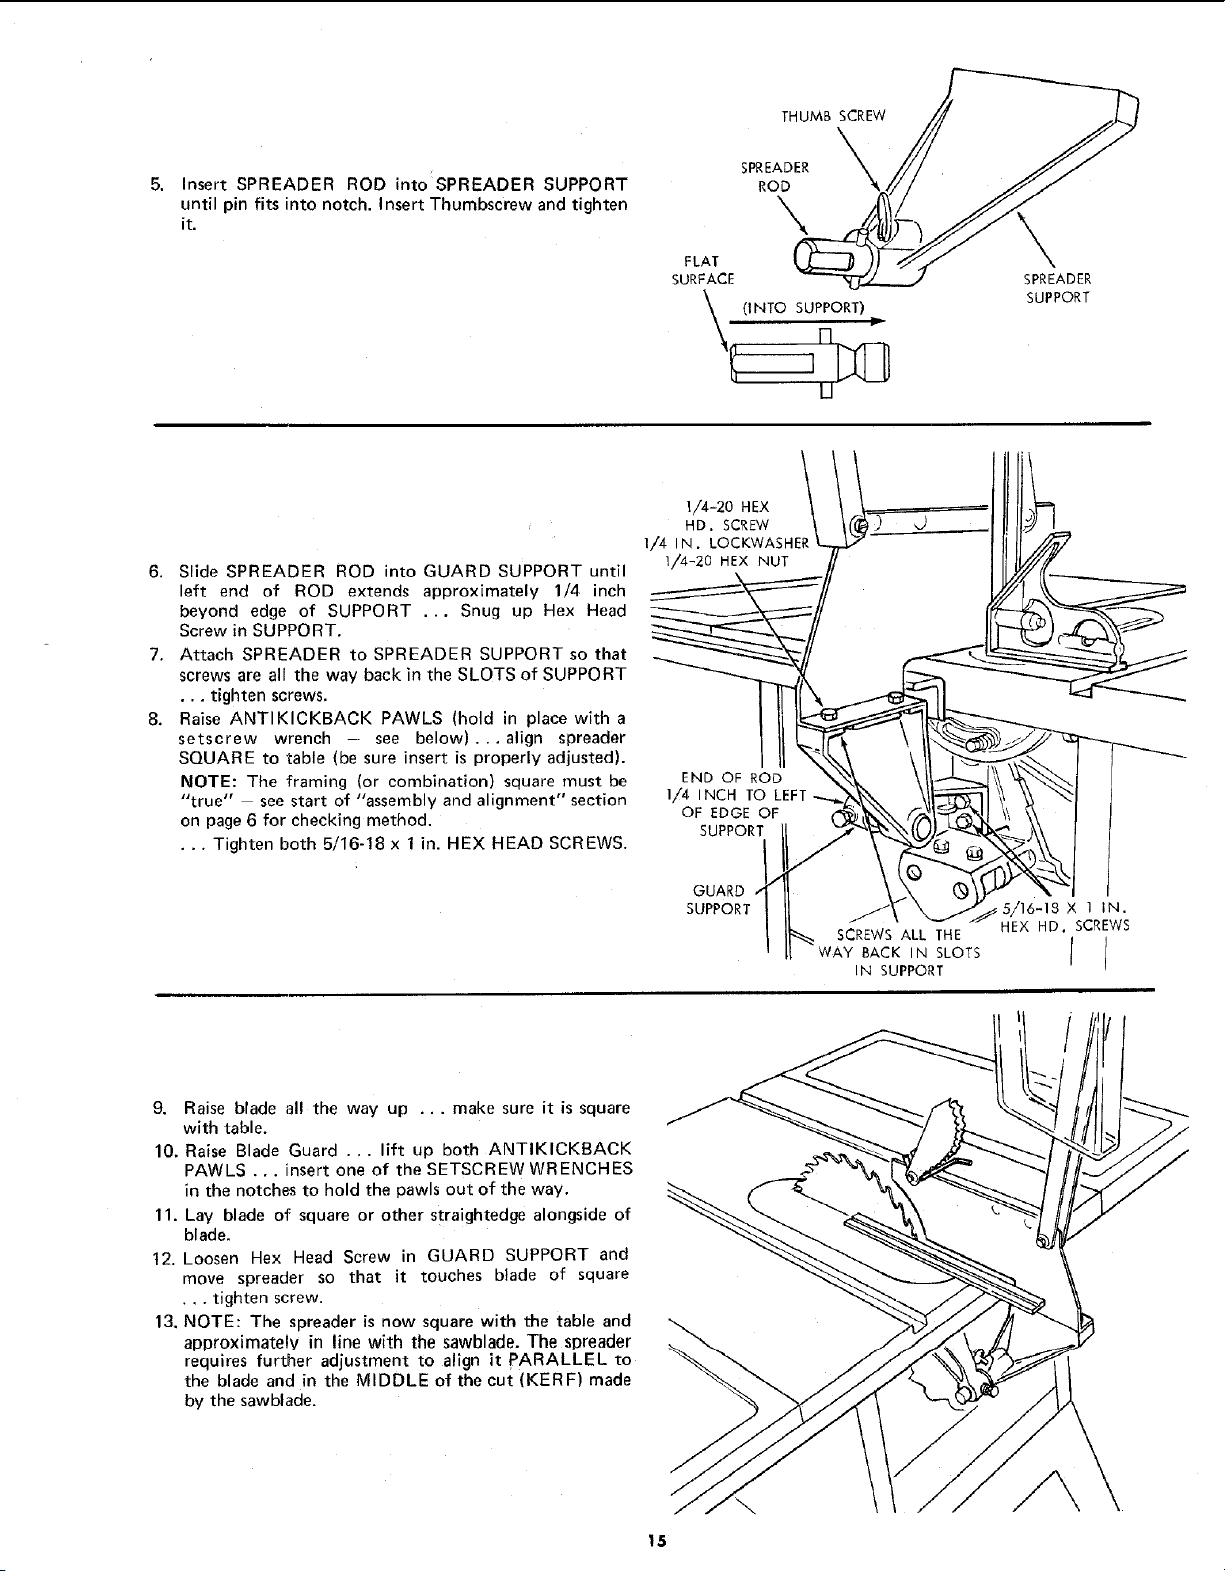
5o Insert SPREADER ROD int0SPREADER SUPPORT
until pin fits into notch. Insert Thumbscrew and tighten
it.
THUMB SCREW
SPREADER X
ROD
\
FLAT
SURFACE
_, (INTO _,
SUPPORT)
U
SPREADER
SUPPORT
6. Slide SPREADER ROD into GUARD SUPPORT until
left end of ROD extends approximately 1/4 inch
beyond edge of SUPPORT .., Snug up Hex Head
Screw in SUPPORT.
7. Attach SPREADER to SPREADER SUPPORT so that
screws are all the way back in the SLOTS of SUPPORT
•. • tighten screws.
8. Raise ANTIKICKBACK PAWLS (hold in place with a
setscrew wrench - see below).., align spreader
SQUARE to _able (be sure insert is properly adjusted).
NOTE: The framing (or combination) square must be
"true" see start of "assembly and alignment" section
on page 6 for checking method.
•.. Tighten both 5/16-18 x 1 in. HEX HEAD SCREWS.
1/4-20 HEX
HD. SCREW
1/4 IN. LOCKWASHER
1/4-20 HEX NUT
END OF ROD
1/4 INCH TO LEFT
OF EDGE OF
SUPPORT
GUARD
SUPPORT
XIlN.
SCREWS ALL THE HEX HD. SCREWS
WAY BACK IN SLOTS I I
IN SUPPORT
9. Raise blade all the way up ... make sure it is square
with table.
10. Raise Blade Guard ... lift up both ANTIKICKBACK
PAWLS ... insert one of the SETSCREW WRENCHES
in the notches to hold the pawls out of the way.
11. Lay blade of square or other straightedge alongside of
blade.
12. Loosen Hex Head Screw in GUARD SUPPORT and
move spreader so that it touches blade of square
• . . tighten screw.
13. NOTE: The spreader is now square with the table and
apDroximate!v in line with the sawblade. The spreader
requires further adjustment to align it PARALLEL to
the blade and in the MIDDLE of the cul: (KERF) made
by the sawblade.
15
Loading ...
Loading ...
Loading ...