Loading ...
Loading ...
Loading ...
17
3
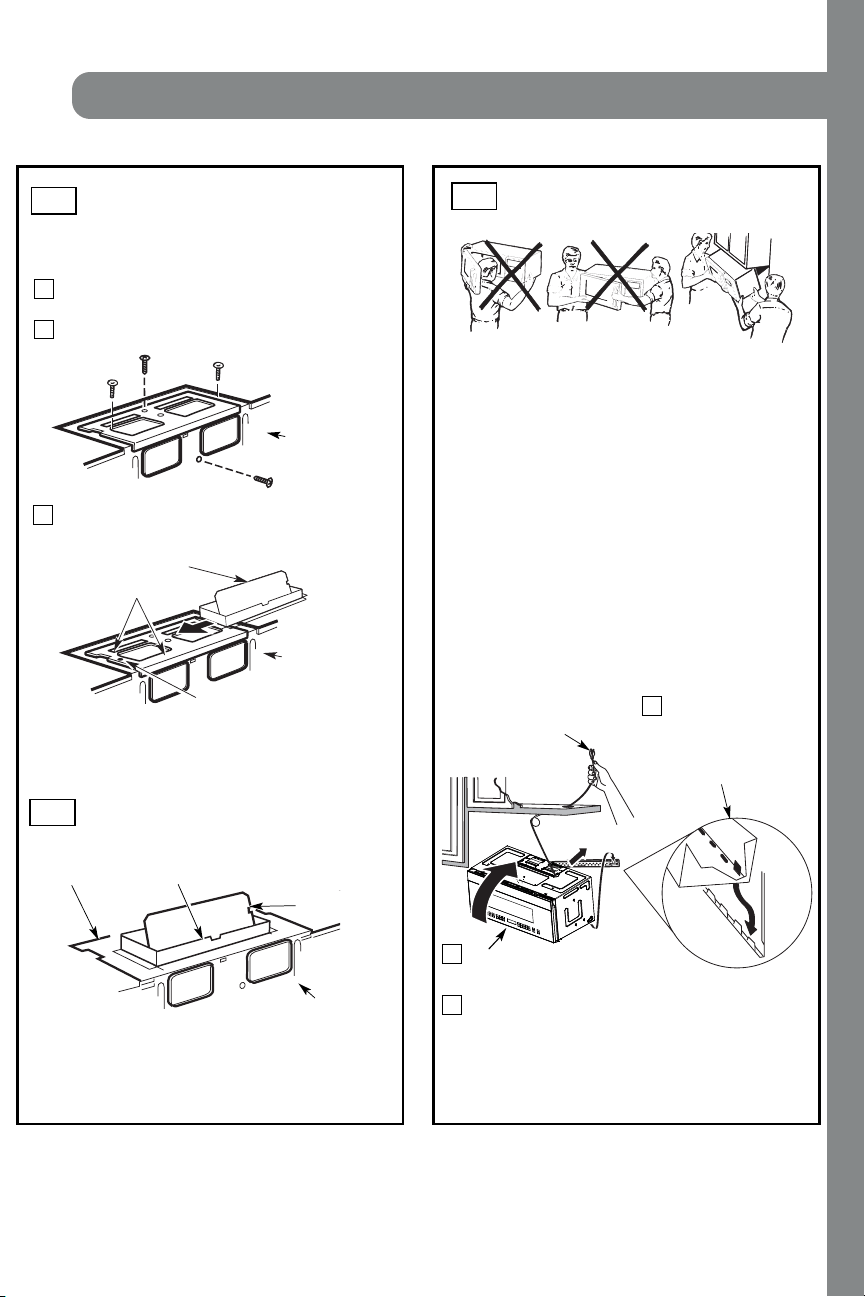
MOUNT THE MICROWAVE
OV EN
FOR EASIER INSTALLATION AND PERSONAL
SAFETY, WE RECOMMEND TH AT T WO PEO PLE
INSTALL THIS MICROWAVE OVEN.
NO TE: I f your cabinet i s metal, use t h e nylon
gr ommet aroun d th e power cor d h ole t o prevent
cutting of the cord.
NO TE: We recommend using filler blocks if the
cabinet front hangs below the cabinet bottom shelf.
IMPORTANT: If filler blocks are
not used, case damage may occur f rom
over t i ghteni ng screws.
Insert a self-aligning screw through top center
cabi n et hol e. Tempor ari ly secur e the oven by
turning the screw at least two f ull turns after the
thr eads have engaged. (It will be completely
ti ghten ed l ater.) Be sure to keep power cor d
tight. Be careful not to pinch the cord, especially
when mounting f lush to bottom of cabinet.
2
Rotate front of oven
up agai n st cabi n et
bottom.
NO TE: When mounting the
mi cr owave oven, th r ead
power cord through hole in
bottom of top cabinet. Keep
it tight throughout Steps
1–3. Do not pinch cord or
lift oven by pulling cord.
Lift microwave, tilt it
forward, and hook
slots at back bottom
edge onto four lower
tabs of mounting
pl at e.
1
CHECK FOR PROPER
DAM PER OPERATION
Exhaust Adaptor
Bl ower Pl at e
Damper
Back of
Microwave
• M ake sure t ape secur i ng damper is removed and
damper pivots easily bef ore mounting microwave.
• You will need to make adjustments to assure proper
alignment with your house exhaust duct after the
microwave is installed.
A3.
ADAPTING MICROWAVE
BLOWER FOR OUTSIDE
TOP EXHAUST
Secur e bl ower uni t t o mi cr owave wit h the scr ew
5
r emoved in Step 1. M ake sur e the scr ew is ti ght .
Repl ace bl ower plate with t he scr ew r emoved in
St ep 1. M ake sur e the scr ew is ti ght .
Back of
Microwave
6
7
Back of
Microwave
Gui de
Adaptor
Locki ng Tab
damper swin gs fr eely.
Attach the exhaust adaptor to the top of the
blower plate by sliding it into the guides
of the
bl ower pl ate.
Push in securely until it is in the locking
t ab s.
Take car e t o assur e th at t h e dam per h i nge
i s
installed so that the
A4.
A5.
Inst allation Instructions
IMPORTANT: Do not grip or use the handle
or heat shield during installation. Do not
r emove the cardboard spacer s between the
heat shield and door.
EN-14
INSTALLATION
Loading ...
Loading ...
Loading ...