Loading ...
Loading ...
Loading ...
36
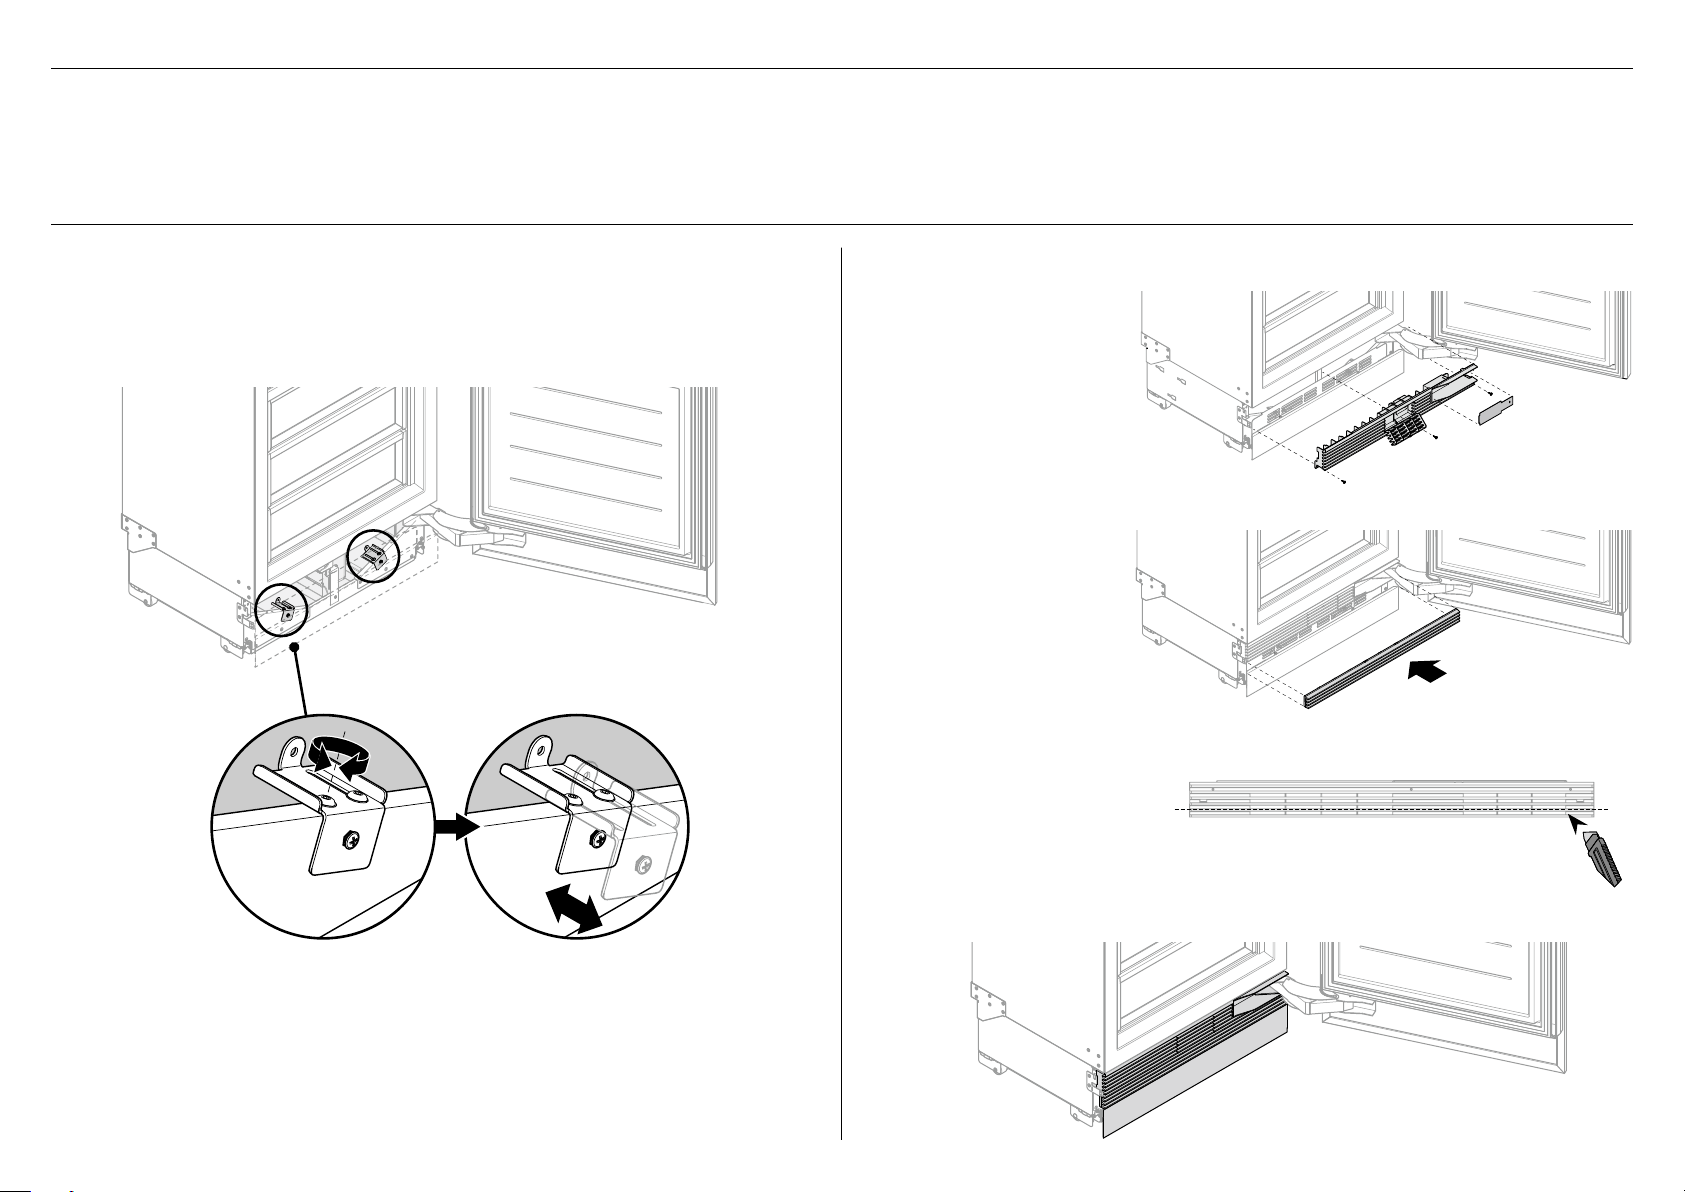
@2 INSTALL TOE KICK GRILLE
Adjusting the toe kick grille
1 Loosen the cap screws of the adjustment brackets from both sides of the plinth using a
hex key (A).
2 Adjust the toe kick to the desired depth by moving it forward/backward (B).
3 Re-tighten the cap screws of the adjustment brackets on both sides using the hex key.
Required components/tools:
Hex key (supplied)
1x Fixed (top) grille
1x Bottom (movable) grille
8x16mm Pan head screws
IMPORTANT!
For toe kick heights 41/2”–5” (114–127mm), shorten the lower grille by cutting along the
vertical ribs.
For 2” (51mm) toe kick height, an additional lower grille can be ordered.
For toe kick heights greater than 5” (127mm), lower grille is not required.
Refer to ‘Door and toe kick panel dimensions’ for more information.
5 Install the bottom
(movable) grille (E) with
8x16mm pan head screws.
BA
Toe kick and toe kick grille
complete installation
For toe kick heights 41/2”–5”
(114–127mm), shorten the
bottom grille by cutting along
the vertical ribs (F).
F
Attach the top and bottom grilles
4 Install the top (fixed) grille
(C) with 8x16mm pan head
screws and reinstall bottom
hinge pocket cover (D).
C
D
E
Loading ...
Loading ...
Loading ...