Loading ...
Loading ...
Loading ...
21
C
!5 SINGLE INSTALLATION
IMPORTANT!
Ensure that the hose is not run over when moving the appliance/s to prevent
damage and possible water leaks.
Use low speed, low torque setting when using powered drill.
Ensure power cord is not damaged during installation.
Positioning the appliance inside the cabinetry
1 Coil the water hose flat behind the appliance.
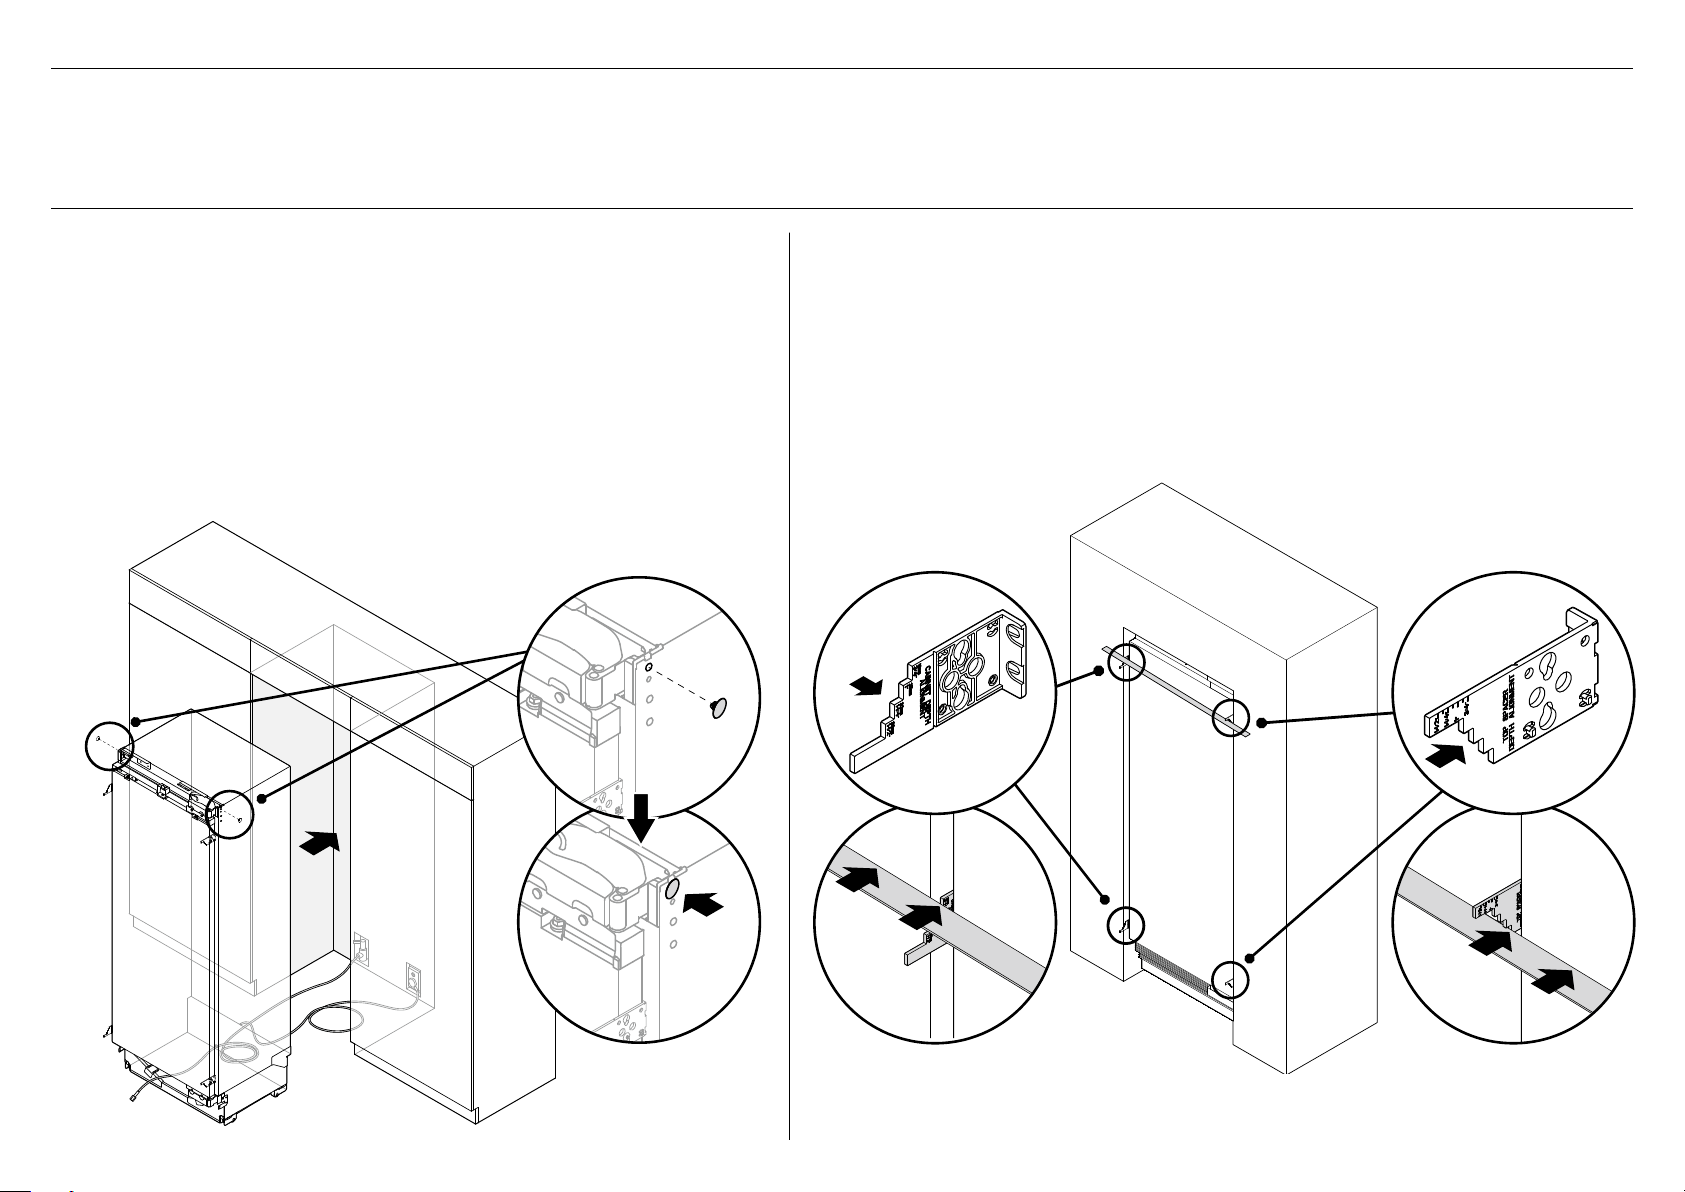
2 Before rolling the appliance, insert a barbed plug into a large hole on each side of the
appliance to protect the inside of the cabinetry from being damaged by screws on
the sides of the appliance (A).
3 Roll the appliance slowly into the cabinetry. Ensure that the water hose is not run
over to prevent damage that can cause water leak.
4 Continue rolling the appliance into the cabinetry until the anti-tip bracket overlaps
[minimum 7 1/16” (180mm)] the back top surface of the appliance. Refer to ‘Attach
the anti-tip bracket’.
5 Check the clearance between the floor and the feet. Ensure the rollers of the
appliance can roll freely on the floor.
Aligning the appliance inside the cabinetry
6 Mark the step on each alignment gauge based on the thickness of the door panel to be
installed to the door (B).
7 Align the front surface of the appliance flush with the front edge of the cabinetry side walls.
– Place a ruler on the steps of the alignment gauges to check if they are in line (C)
relative to the thickness of the door panel.
8 Check if the gaps between appliance and cabinetry side walls are even on both sides.
Mark the step on each
alignment gauge
based on the thickness
of the door panel to be
installed to the door.
B
Required components/tools:
Cross-head screwdriver or power driver (PH2 bit) at minimum torque setting
Ruler
2x Barbed plugs
C
B
A
Loading ...
Loading ...
Loading ...