Loading ...
Loading ...
Loading ...
17
!2 UNPACKING AND MOVING YOUR PRODUCT
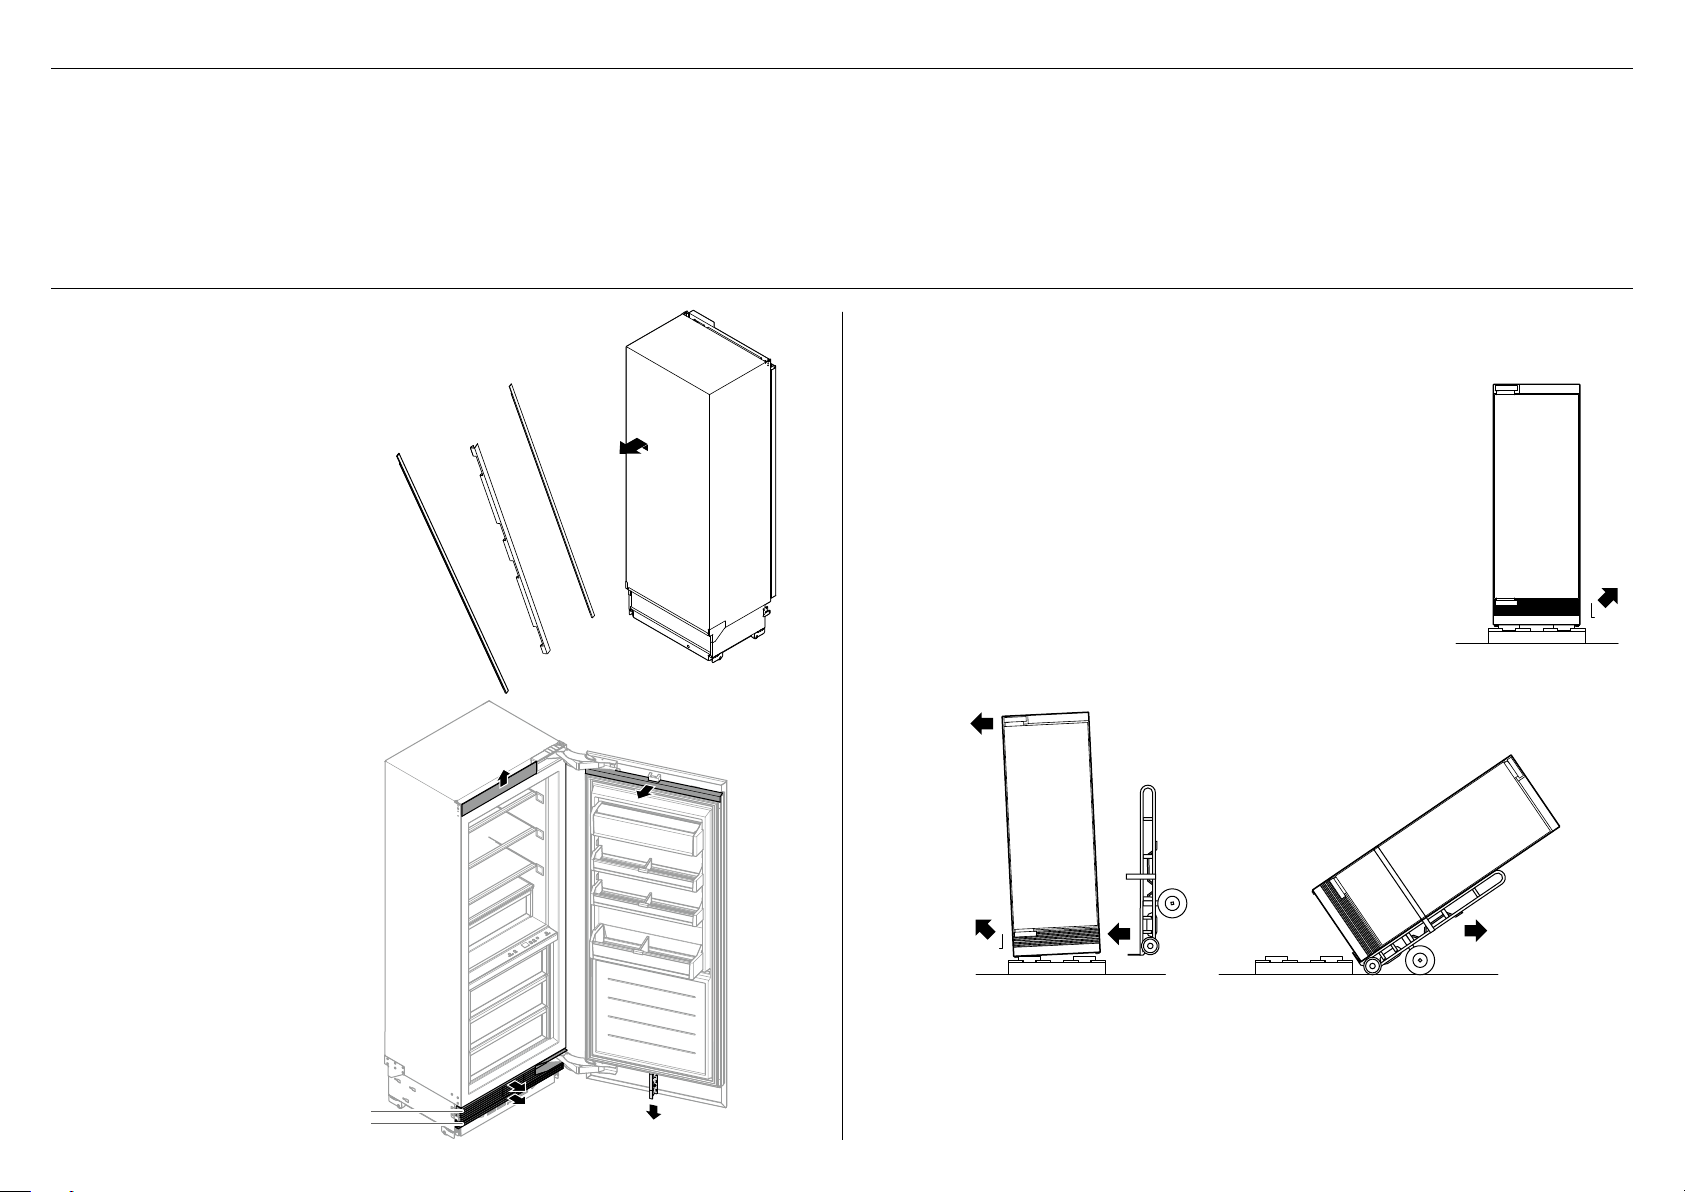
1 Remove the top of the packaging
carton. Cut along the cut lines
and remove the carton and EPS
(Expanded Polystyrene) foam.
2 Remove pre-packed install parts
(door panel side extrusion and side
trim assembly, center trim assembly,
dual install joiner kit) taped to the
back panel of the appliance.
3 Remove the pre-installed parts.
– Top (fixed) grille
– Bottom grille
– Top trim
– Top door panel extrusion
– Bottom flow door divider
Note: Set aside the screws to use
later when reinstalling the removed
parts.
IMPORTANT!
Be careful when unpacking to prevent damage to the surface of your appliance.
Ensure that the appliance is stable to prevent from tipping over when unpacking.
Do not open the doors to prevent the appliance from tipping over.
The appliance is heavy and requires a minimum of 2persons to unpack and install.
Ensure that the feet of the appliance are retracted.
If the appliance is damaged, contact your Fisher & Paykel dealer.
Take note of your model and registration numbers located at the lower right side of the
appliance. You will need these to request for servicing or repair of your appliance.
1 Remove the angled brackets (A) from one side of the appliance
(preferably, non-hinge side).
2 Tape the door shut and then tilt (B) the appliance slightly forward
to slide a two-wheeled cart (C) between the appliance andEPS.
– Do not insert the cart from the back or front side!
– Taping the door shut prevents the possible opening of the
doors when tilting.
3 Remove the top screws of the remaining angled brackets (D). Do
not remove the screws fixed to the pallet.
4 Restrain the appliance to the cart with straps, and then tilt the
appliance backward (E) onto the cart.
5 Set aside the pallet and push the cart to the installation location.
– Make sure the door stays closed until the appliance is
positioned inside the cabinet.
B
E
D
C
A
WARNING!
Follow these instructions to avoid risks that can cause serious injury or death.
Keep doors closed until the appliance has been moved to its installation location.
Required components/tools:
Cross-head screwdriver
Cutter or scissors
Two-wheeled cart with restraining straps
Unpacking your product Moving your product
Side trim
assembly
Door panel
side extrusion
Top trim
Top door panel extrusion
Top (fixed) grille
Bottom grille
Center trim
assembly
Flow door divider
Loading ...
Loading ...
Loading ...