Loading ...
Loading ...
Loading ...
26
!6 DUAL INSTALLATION
IMPORTANT!
Ensure the doors are in line with the cabinetry front and the appliance is centered.
All four corners of the appliance must be supported firmly onto the floor to eliminate
any movement. Installing the appliance on a soft, uneven or unlevelled floor may cause
twisting and poor door sealing.
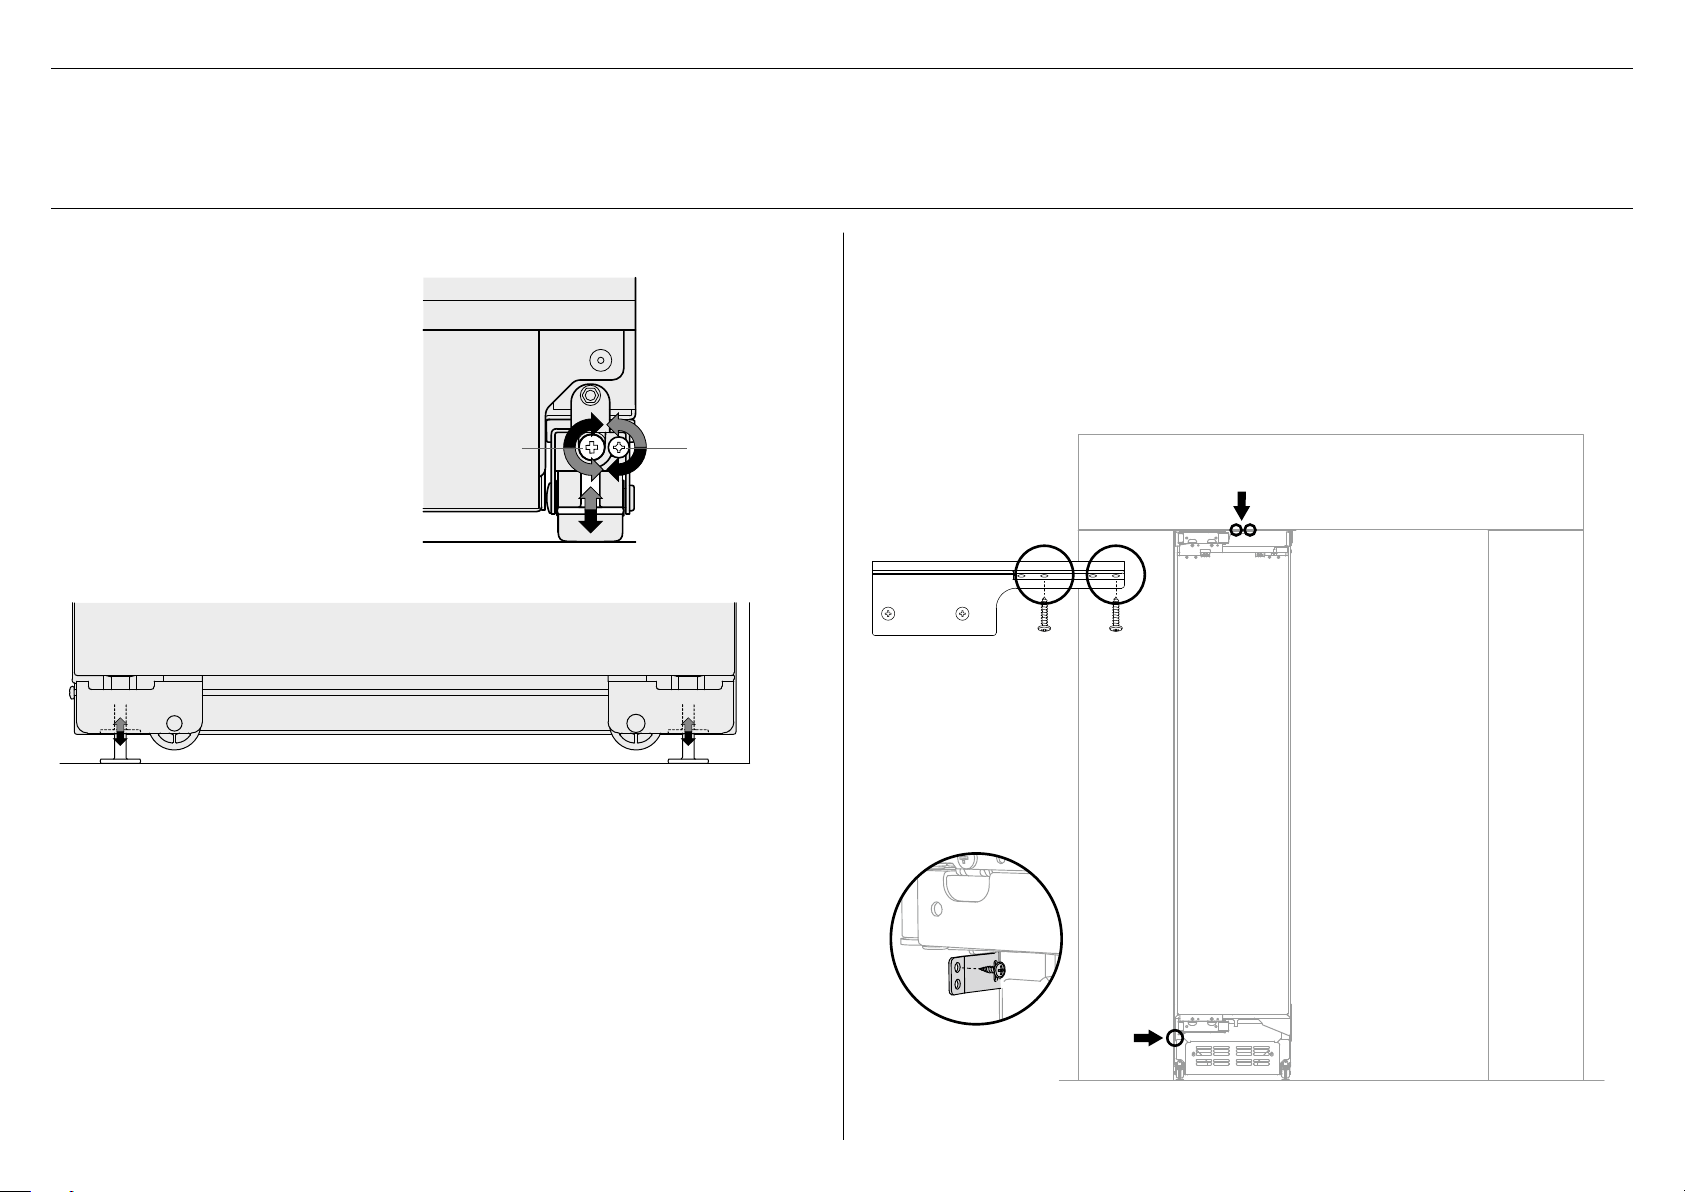
Fixing the first appliance inside the cabinetry
1 Fix each top bracket of first appliance to ceiling surface with two (2x) 8Gx16 countersunk
screws (B).
– 18” (457mm) column = 1 bracket
– 24” (610mm) column = 2 brackets
– 30” (762mm) column = 2 brackets
Note: Ensure the appliance does not move as you open the door when you install the screws.
2 Fix the alcove side bracket to alcove side surface with one 8Gx16 countersunk screw (C).
Note: Image shows first appliance (18” model) with 1 top bracket.
Required components/tools:
Cross-head screwdriver or power driver
5x 8Gx16 Countersunk screws
B
C
Alcove side bracket
C
B
2 Continue turning the adjusting screws alternately between front and rear feet until
you achieve the correct alignment.
3 Once you are satisfied with the alignment, raise the height of the appliance by
alternately adjusting the front and rear feet until the top surface contacts the
alcove ceiling.
Check the alignment gauges while adjusting the screws to make sure you
maintain the alignment of the appliance.
4 Ensure all feet are positively engaged with the floor.
Rear footFront foot
A
Front foot
adjustment
Rear foot
adjustment
1 Turn the front and rear adjustment
screws using a Cross-head screwdriver
(or powered driver) to extend the feet
until it engages the floor.
– One turn of height adjusting nuts
is equivalent to 1/32” (0.5mm) of
height adjustment. Clockwise turn
raises the height and counter-
clockwise turn lowers height (A).
Adjusting height of the appliance inside the cabinetry
Loading ...
Loading ...
Loading ...