Loading ...
Loading ...
Loading ...
32
!9 INSTALL BRACKETS TO DOOR PANEL (CUSTOM)
IMPORTANT!
Ensure the screw pilot holes do not penetrate the full depth of the panel.
Do not place the handle holes in marked areas to avoid clashing with panel
attachment brackets.
Minimum panel thickness where screw hole is drilled must be 5/8” (16mm).
Required components/tools:
Door panel attachment kit
– 6x Side panel brackets
– 6x Bracket slider
– 6x Panel bracket spacer
– 30x M5x12 Cross-head screws (for
Custom door panel only)
Drill with 3/32” (2.55mm) bit
Powered driver (Cross-head)
M4 Hex key (supplied)
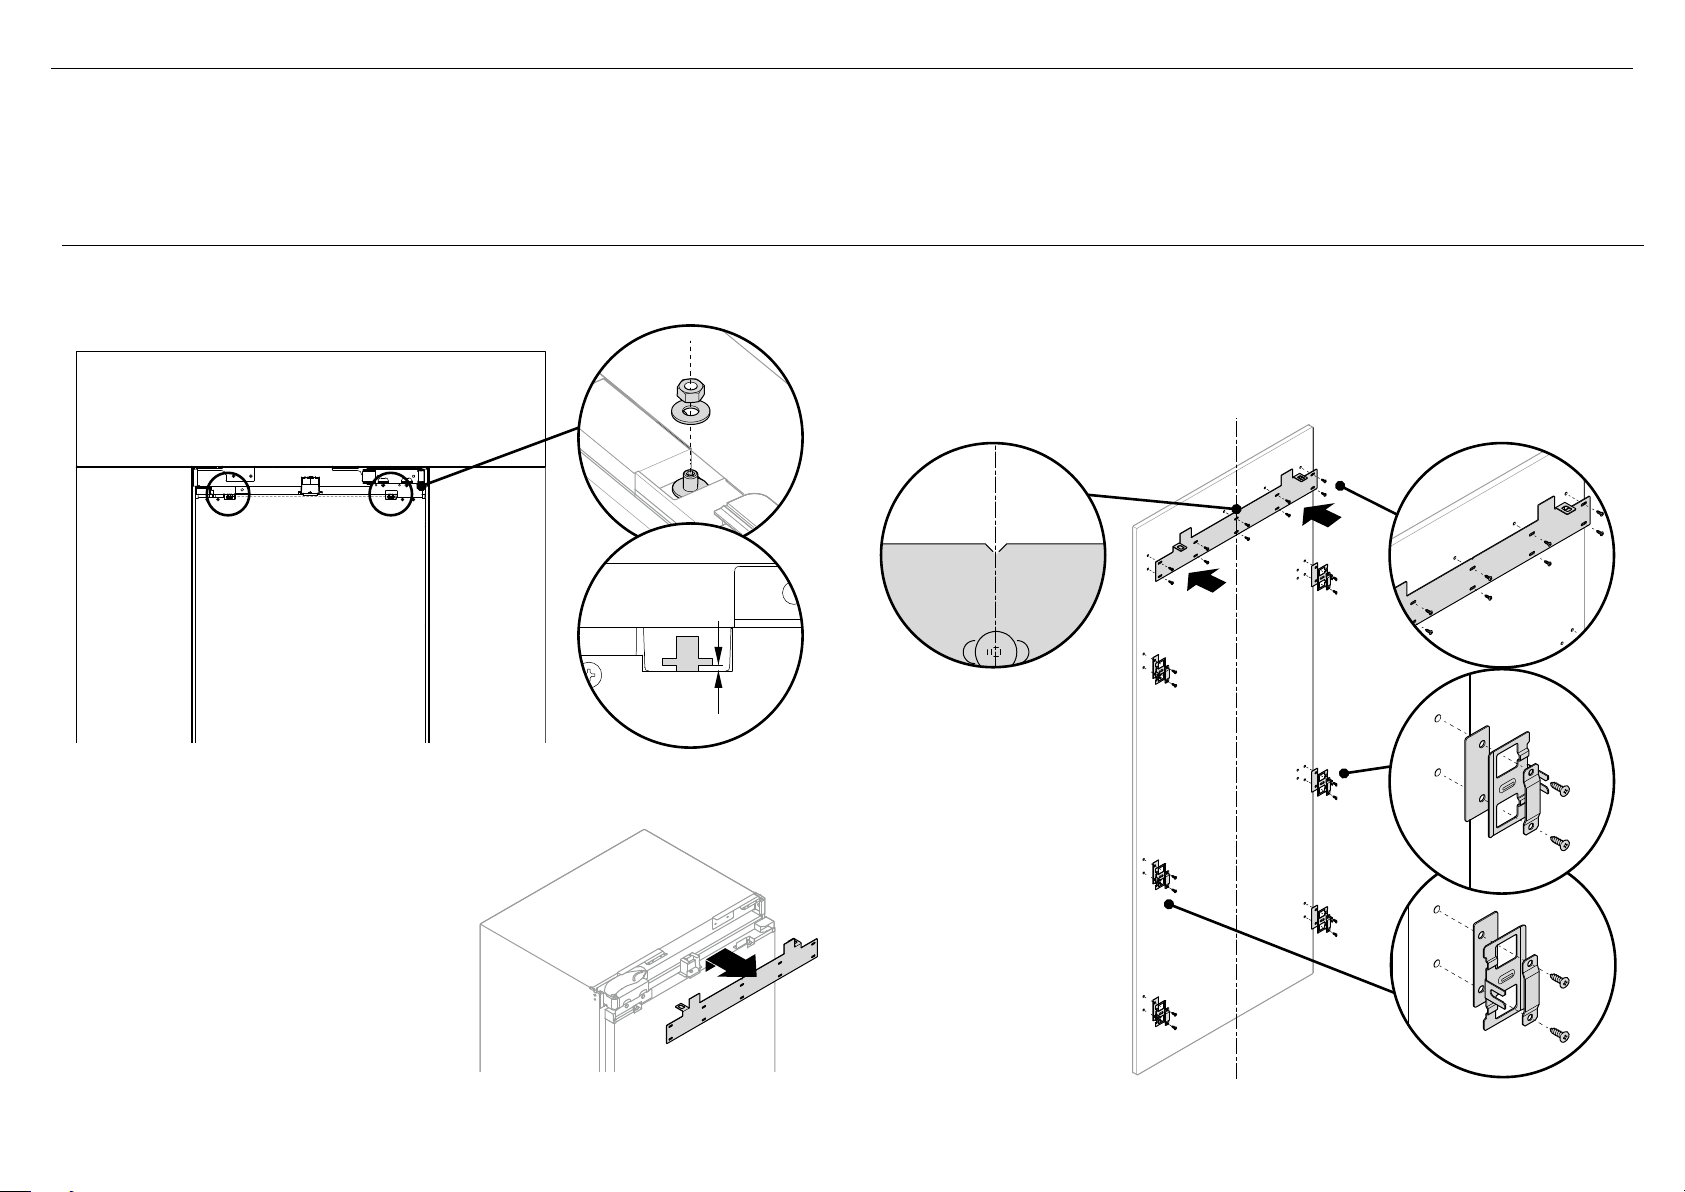
5 Mark the centerline from the top of the Custom panel and align with the ‘V’ notch in the
bracket (D).
6 Align the screw holes of the bracket with the screw holes of the door panel and fix the
hanging bracket to the door panel with M5x12 Cross-head screws (E).
– 6 screws for 18” (457mm)
– 10 screws for 24” (610mm) and 30” (762mm)
Attach the top and side hanging brackets to (Custom) door panel
B
2 Remove the top hanging bracket from the top
of the door and set aside (A).
3 Unscrew the adjustment screws by 1/8”
(3mm) to move close to the middle of
adjustment range (C).
4 Mark the location of the screw holes and drill
pilot holes to the marked location. Refer to
the custom panel template in the ‘Custom
door panel dimensions’ section.
7 Align the side panel bracket assembly (bracket, slider and spacer) to the screw holes on the
side of the door panel and fix with M5x12 Cross-head screws (F).
E
F
F
D
A
1/8”
(3mm)
C
1 Remove the M8 washer and M8 nut fromthe M8 screws at the top the door (B).
Loading ...
Loading ...
Loading ...