Loading ...
Loading ...
Loading ...
23
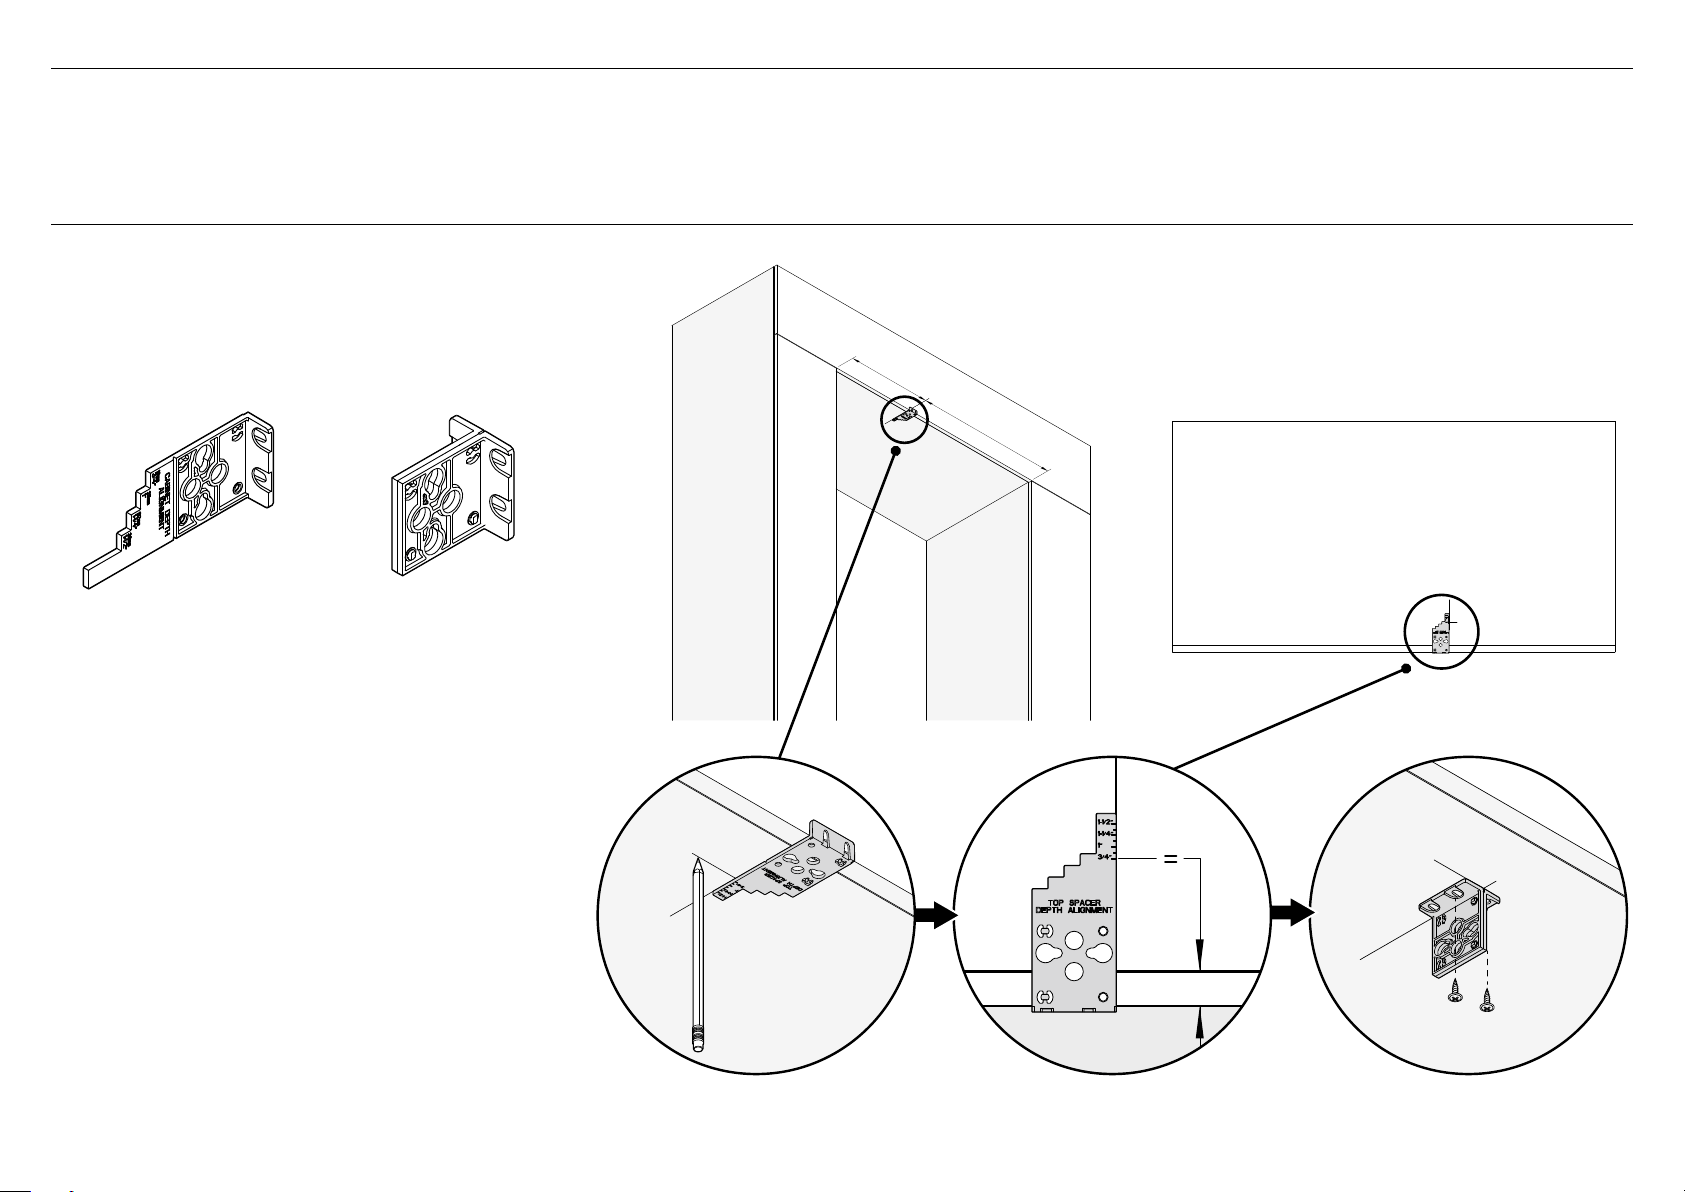
Attach central spacer to cabinetry
Note: The spacer must be attached between the first
and second appliances. The attachment location of the
spacer to the alcove ceiling depends on the model of
eachappliance.
Central spacerDepth alignment gauge
1 Measure from the alcove side towards the center.
Note: The alcove width for each side depends on the size
of the appliance to be installed. For example,
left side alcove width (A) = 18” model
right side alcove width (B) = 30” model
Refer to ‘Cavity dimensions’ section for dual install options.
2 Using one depth alignment gauge, mark the location and
depth position of the central spacer on the alcove ceiling
depending on the door panel thickness (C).
– Make sure to follow the marked depth of the
alignment gauge relative to the door panel (D).
3 Fix the central spacer to the alcove ceiling with two 8Gx16
countersunk screws. Tighten the screws with a screwdriver
or powered drill) (E).
!6 DUAL INSTALLATION
Required components/tools:
1x Depth alignment gauge
Cross-head screwdriver (powered drill)
Top joiner bracket
– 2x 8Gx16 Mush washer screw
– 1x Central spacer
IMPORTANT!
We recommend to place the appliance (Freezer) with water
connection first into the cabinetry to allow you to check the
connection before placing the second appliance.
Follow the instructions carefully for the correct installation
of first and second appliances inside the cabinetry.
Dual installation includes two appliances installed side by
side. Refer to ‘Cavity dimensions’ section for cabinetry
overall width for dual install. A joiner kit is required for
dual installation and is available through an authorized
Fisher&Paykel dealer. Please visit fisherpaykel.com for
more information.
A
B
E
D
C
Loading ...
Loading ...
Loading ...